Install OpenStack swift client only

To manage files in the OpenStack cloud you need the swift client. This is not so tiny python tool (a lot of dependencies), which offers by means of files (as files are objects for the OpenStack):

  • delete – Delete files, directories and sub-directories. Be careful with a simple command you can delete all your files at once. “Delete a container or objects within a container.”
  • download – Download files to your local storage. “Download objects from containers.”
  • list – List all files in the main directory (i.e. the container), cannot be listed files in sub-directories. The output will be a file with path per line or you can enable extended output to show file size, time modified, the type of the file and the full file path. “Lists the containers for the account or the objects for a container.”
  • post – Creates containers and updates metadata, could create seurity keys for temporary urls – “Updates meta information for the account, container, or object; creates containers if not present.”
  • copy – Copy files to a new place within a container or to a different container. “Copies object, optionally adds meta”
  • stat – Display information for files, container and your account. No information is available per directory. Most typically you will read the file length, the type and modifcation date. “Displays information for the account, container, or object”
  • upload – uploads files and whole directories in a container – “Uploads files or directories to the given container.” You can read our article here – Upload files and directories with swift in OpenStack
  • capabilities – List the configuration options of your account like file size limits, file amount limits , limit requests per seconds and so on and which additional middleware your instance supports like bulk_delete, bulk_upload (the name are self-explainatory) – “List cluster capabilities.”
  • tempurl – Generate a temporary url for a file protected with time validity and a key – “Create a temporary URL.”
  • auth – Show your authentication token and storage url – “Display auth related environment variables.”

The text in the hyphens is from the swift help command. If you do not know what is a container with simple words these are the main sub-directories in your account if you use the list command without any argument (not adding a name after “list”):

myuser@myserver:~$ swift --os-username myusr --os-tenant-name myusr --os-password mypass --os-auth-url https://auth01.example.com:5000/v2.0 list
mycontainer1
anyname

The best way is to install the swift client from the package system of your Linux Distribution. The package system ensures the programs you install and upgrade are consistent within dependencies upgrades.

When you install this package “python-swiftclient” it depends on multiple python packages, which might be upgraded later, too, but the package system of a Linux distribution ensure the programs of python-swiftclient will work with them

. On the contrary, if you install it manually even with “pip” as it is offered in OpenStack site it is unsure what will happen and even your client program from “python-swiftclient” could stop working because of an upgraded dependancy library. Of course, the packages from the official package system could be a little bit older (but probably more stable) than the manual installs from the OpenStack official site. Still if you would like to install it with “pip” here you can check how you can do it: https://www.swiftstack.com/docs/integration/python-swiftclient.html
Keep on reading!

Install Fedora Workstation 30 (Gnome GUI)

This tutorial will show you the simple steps of installing a modern Linux Distribution like Fedora 30 Workstation with Gnome for the user graphical interface. First, we present the basic steps for installing the Operating system in addition to your present operating systems (here we also have Windows 10) and then you can see some screenshots of the installed system and the look and feel of it. We have other tutorials showing more screenshots of the installed and working Fedora 29 (Gnome and KDE plasma) – so you can decide which of them to try first – coming soon.

The Fedora 30 Workstation comes with

  • Xorg X server – 1.20.4 XWayland is used by default
  • GNOME (the GUI) – 3.32.1
  • linux kernel – 5.0.9

Check out our article about what software is included in comming soon.

The installation process is very similar to the old Fedora Workstation 27, Fedora Workstation 28 and Fedora Workstation 29, in fact the main difference is the creation of an user, which the setup is not responsible anymore, the creation of an user is done by the first boot after installation. Our system was pretty good – Asus X399 with AMD Ryzen Threadripper 1950X and NVIDIA 1080 Ti and the setup loaded successfully and there were no problems till the end.

We used the following ISO for the installation process:

https://download.fedoraproject.org/pub/fedora/linux/releases/30/Workstation/x86_64/iso/Fedora-Workstation-Live-x86_64-30-1.2.iso

It is a LIVE image so you can try it before installing. The easiest way is just to download the image and burn it to a DVD disk and then follow the installation below:

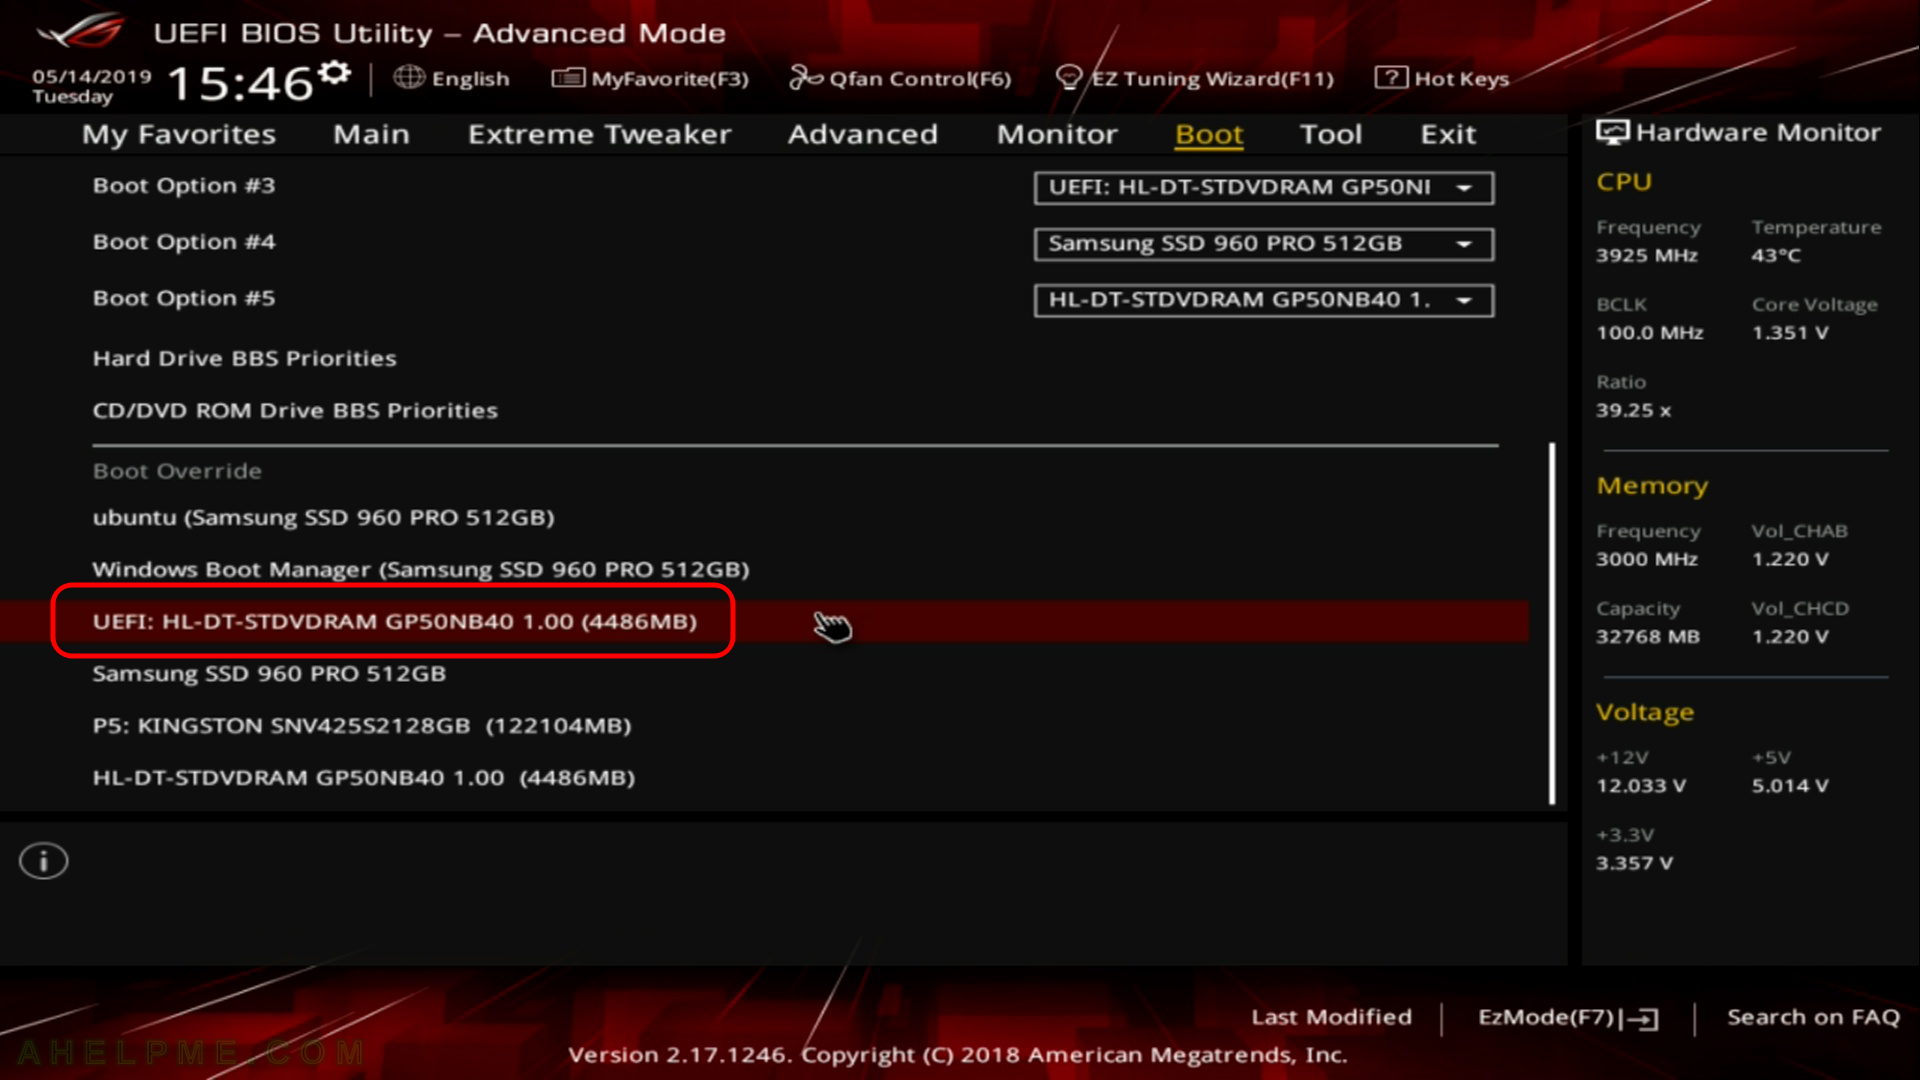
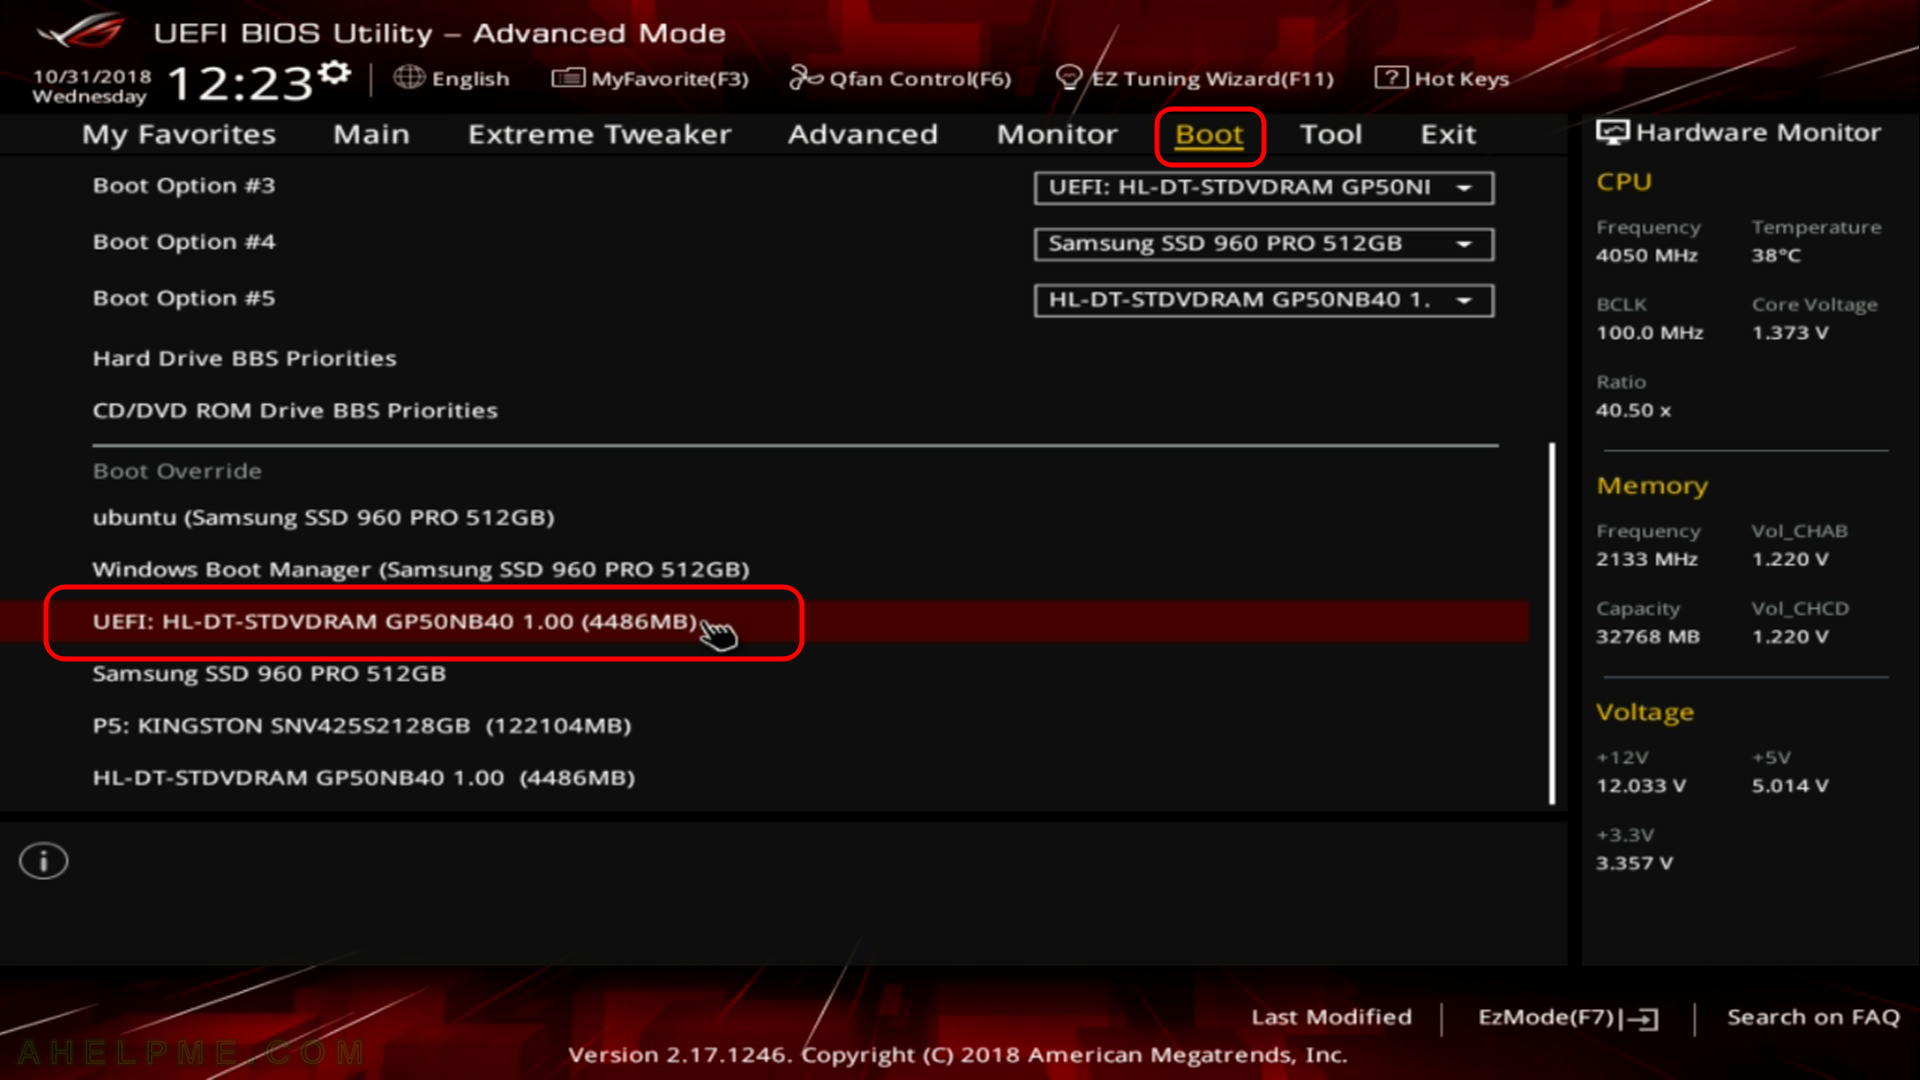
SCREENSHOT 1) Here is our “UEFI BIOS->Boot->Boot Override” and in most modern motherboard you can choose to override the default boot devices.

Choose the “UEFI: HL-DT-STDVDRAM…” to boot and install Fedora Workstation 30 with UEFI support. You should do this, because most of the new hardware like video cards would not work properly without being in UEFI mode.

main menu
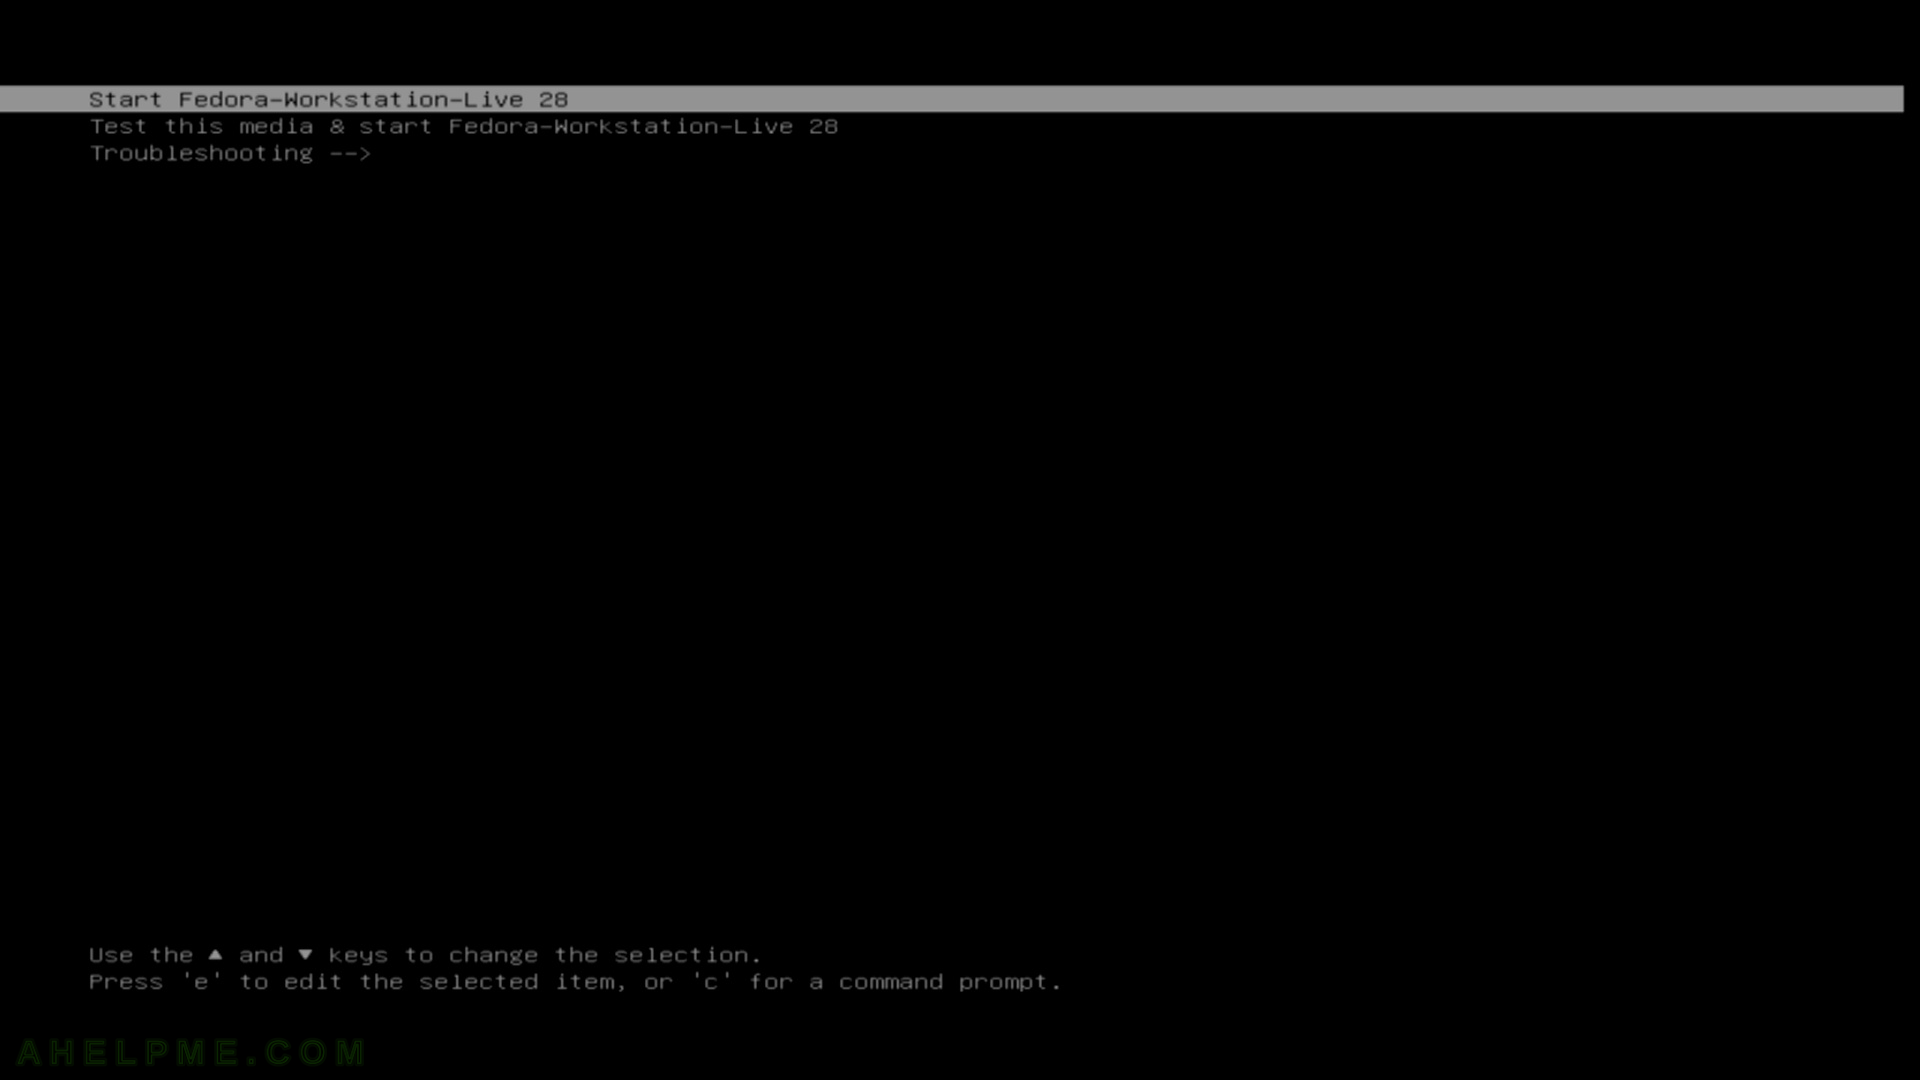
Boot from DVD/USB Installation

Keep on reading!

Review of freshly installed Fedora 29 KDE Plasma Desktop (KDE GUI)

After the tutorial of Install Fedora 29 KDE Plasma Desktop this tutorial is mainly to see what to expect from a freshly installed Fedora 29 KDE Plasma Desktop – the look and feel of the new KDE GUI (version 5.13.5 of KDE Plasma).
Here you can find how to Install Fedora 29 KDE Plasma Desktop. Here it worth mentioning the included versions of KDE software for Fedora 29:
The Fedora 29 KDE Plasma Desktop comes with

  • KDE Plasma version: 5.13.5
  • KDE Frameworks version: 5.50.0
  • QT version: 5.11.1

The idea of this tutorial is just to see what to expect from Fedora 29 KDE Plasma – the look and feel of the GUI, the default installed programs and their look and how to do some basic steps with them, it is included also screenshots of the KDE settings program. Here you’ll find more than 140 screenshots and not so many texts we do not want to turn this review of many texts and version information and 3 meaningless screenshots, which you cannot see anything for the user interface because these days is the primary goal of a Desktop system. You can expect more of this kind of reviews in the future…

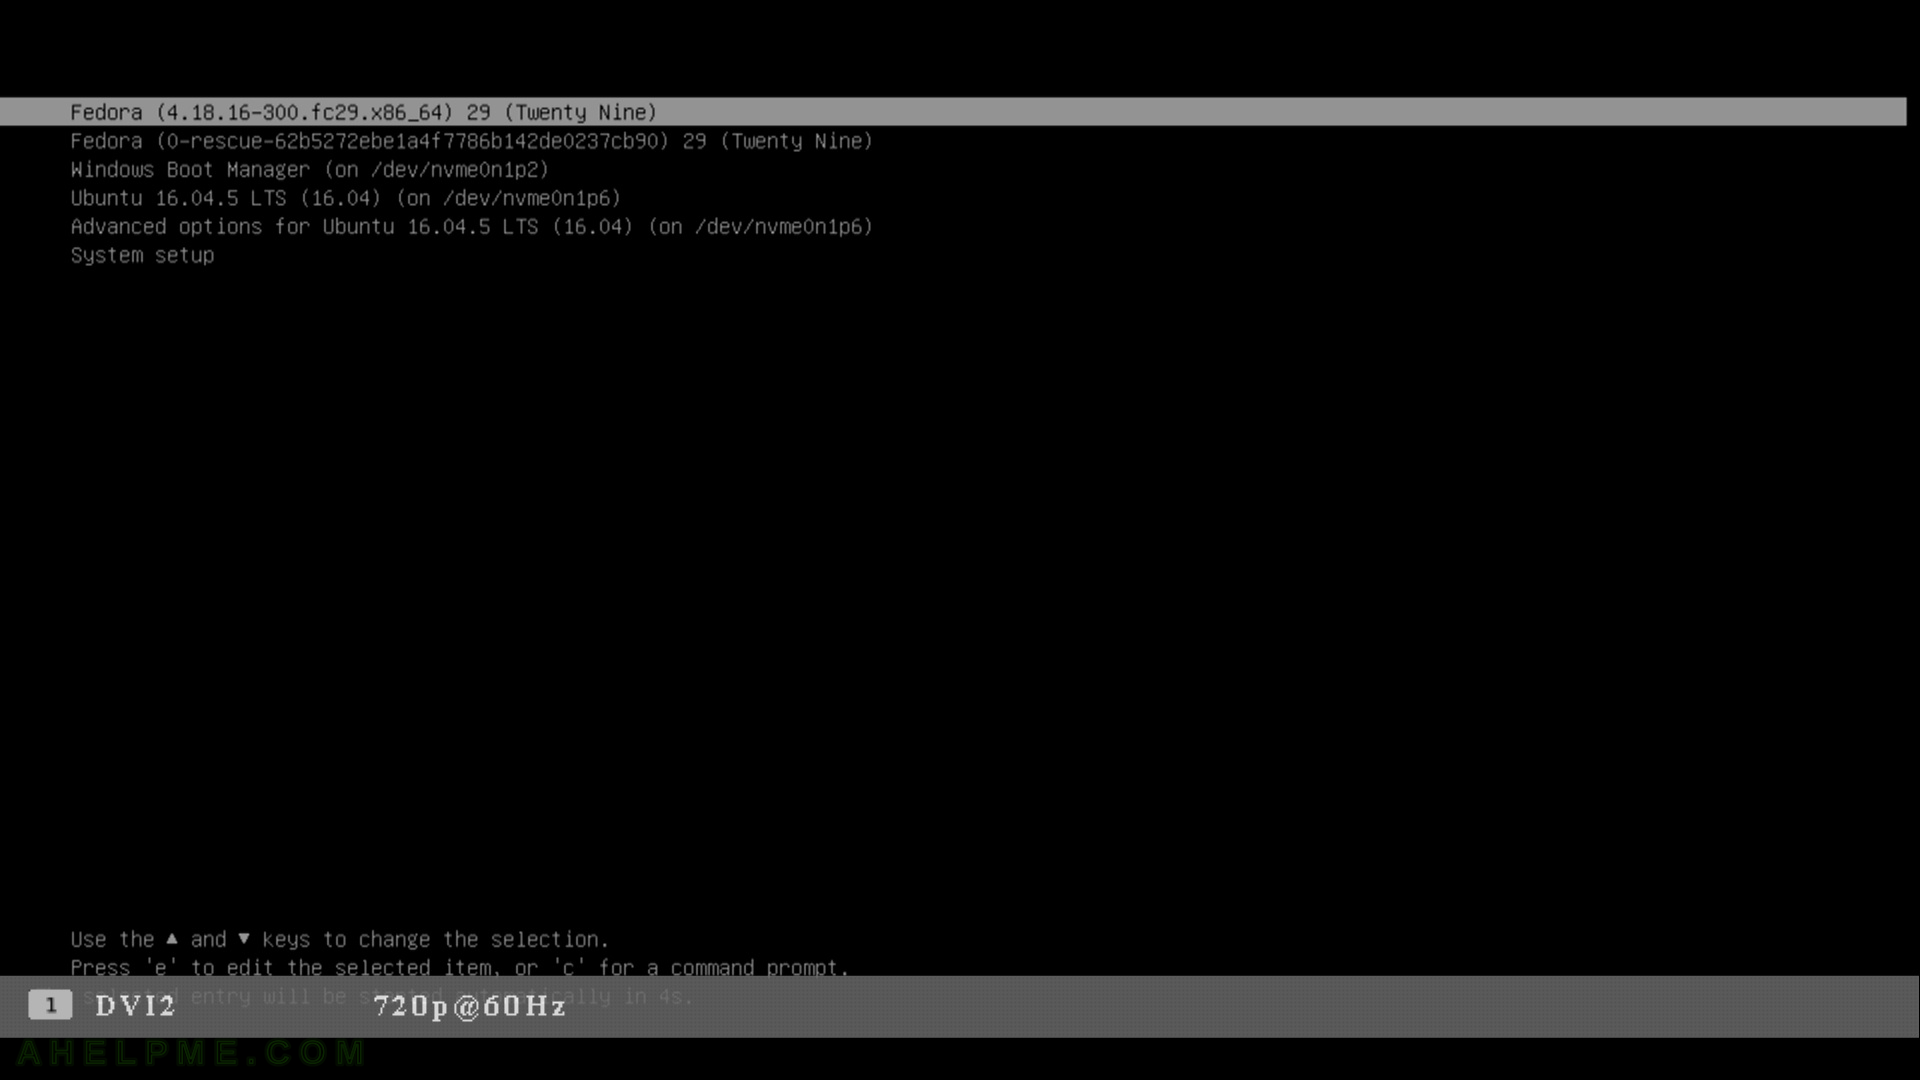
SCREENSHOT 1) Grub2 – Fedora 29 is selected by default.

The other Operating systems are Windows 10 and Ubuntu 16.04 LTS.

main menu
Grub2 – Fedora 29 selected

Keep on reading!

Install Fedora 29 KDE Plasma Desktop (KDE GUI)

This tutorial will show you the simple steps of installing a modern Linux Distribution Fedora 29 KDE Plasma Desktop with KDE for the user graphical interface. First we present the basic steps for installing the Operating system in addition to your present operating systems (here we have two: Windows 10 and Ubuntu 16) and then you can see some screenshots of the installed system and the look and feel of it. We have another tutorials showing more screenshots of the installed and working Fedora 29 (Gnome and KDE plasma) – so you can decide which of them to try first – coming soon.

The Fedora 29 KDE Plasma Desktop comes with

  • Xorg X server – 1.20.1
  • linux kernel – 4.18.16
  • KDE Plasma version: 5.13.5
  • KDE Frameworks version: 5.50.0
  • QT version: 5.11.1

The installation process is very similar to the old Install Fedora 27 KDE Plasma Desktop. Our system was pretty new – Asus X399 with AMD Ryzen Threadripper 1950X and NVIDIA 1080 TI and the setup loaded successfully and there were no problems till the end.

We used the following ISO for the installation process:

https://download.fedoraproject.org/pub/fedora/linux/releases/29/Spins/x86_64/iso/Fedora-KDE-Live-x86_64-29-1.2.iso

It is a LIVE image so you can try it before installing. The easiest way is just to download the image and burn it to a DVD disk and then follow the installation below:

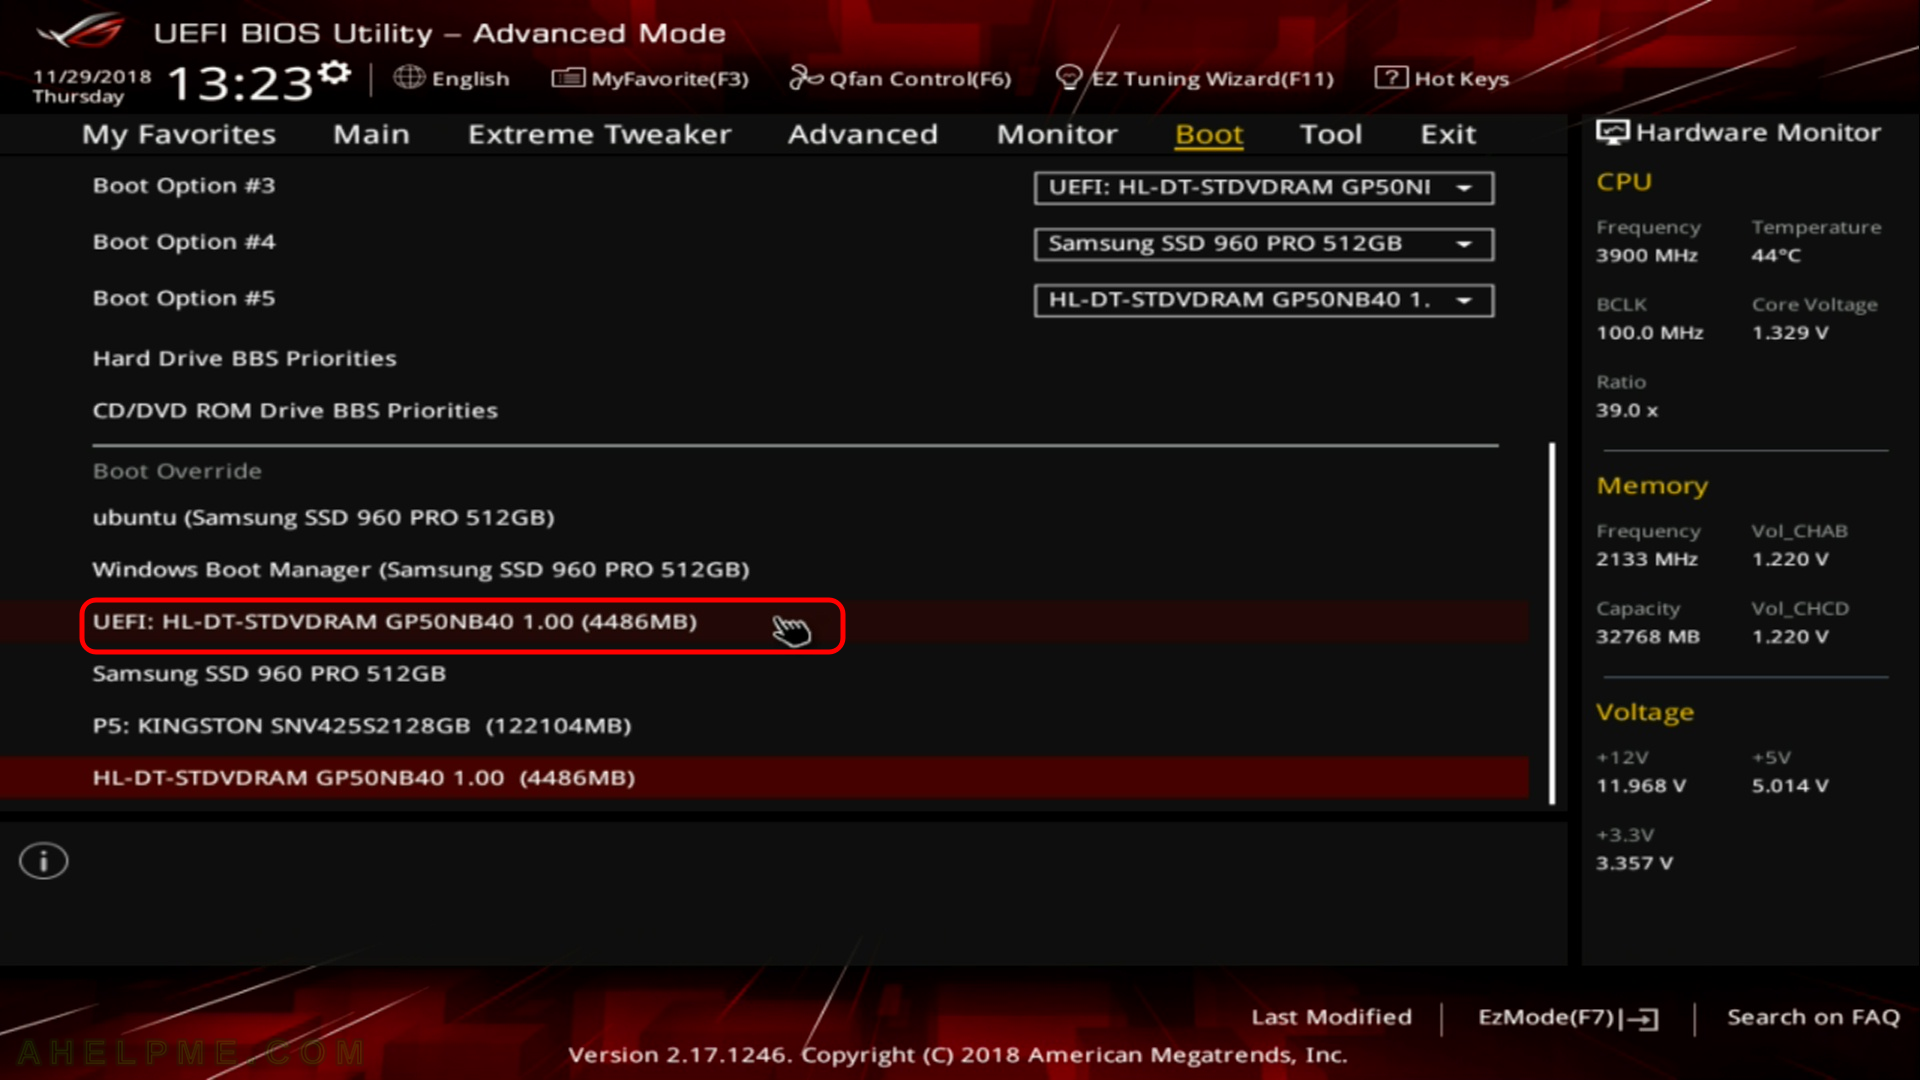
SCREENSHOT 1) Here is our “UEFI BIOS->Boot->Boot Override” and in most modern motherboard you can choose to override the default boot devices.

Choose the “UEFI: HL-DT-STDVDRAM…” to boot and install Fedora KDE 29 with UEFI support. You should do this, because most of the new hardware like video cards would not work properly without beeing in UEFI mode.

main menu
Boot from DVD/USB Installation

Keep on reading!

How to compile xmr-stak (2.5) under CentOS 6 for CPU mining cryptocurrencies in November 2018

In continuing our crypto series with xmr-stak we update the old article How to compile xmr-stak (2.4.5) under CentOS 7 for CPU mining cryptocurrencies with the new version 2.5 and tested the build procedure with the old CentOS 6.

In crypto mining it is important to have latest version of the mining software, because crypto world is super dynamic with thousands crypto currency and tens of algos, which ever month might be changed and updated!

Thanks to xmr-stak we can have one application capable of mining many different cryptocurrencies based on different algorithms. XMR-STAK is GPU and CPU miner, here we present only the CPU ability. Here are the steps you should do to install (in fact install dependencies and compile the miner) and to begin CPU mining:

STEP 1) Update your system and install the following dependencies

Because xmr-stak need a newer version of GNU GCC than the CentOS ships with you must install GNU GCC 5.1 at least. Because the latest versions have better optimizations for the processors we use here GNU GCC 7 from Software Collection repository – more information for this repository here: How to install new gcc and development tools under CentOS 7

[root@srv ~]# yum update -y
[root@srv ~]# yum install -y centos-release-scl epel-release
[root@srv ~]# yum install -y cmake3 devtoolset-7-gcc* hwloc-devel libmicrohttpd-devel openssl openssl-devel make git screen

STEP 2) Compile the mining program xmr-stak

[root@srv ~]# scl enable devtoolset-7 bash
[root@srv ~]# git clone https://github.com/fireice-uk/xmr-stak.git
Initialized empty Git repository in /root/xmr-stak/.git/
remote: Enumerating objects: 1, done.
remote: Counting objects: 100% (1/1), done.
remote: Total 6002 (delta 0), reused 1 (delta 0), pack-reused 6001
Receiving objects: 100% (6002/6002), 1.86 MiB | 1.02 MiB/s, done.
Resolving deltas: 100% (4283/4283), done.
[root@srv ~]# mkdir xmr-stak/build
[root@srv ~]# cd xmr-stak/build
[root@srv build]# export CFLAGS="-O2 -march=native -msse3 -fomit-frame-pointer -pipe"
[root@srv build]# export CHOST="x86_64-pc-linux-gnu"
[root@srv build]# export CXXFLAGS="${CFLAGS}"
[root@srv build]# export LDFLAGS="-Wl,-O1"
[root@srv build]# cmake3 .. -DCUDA_ENABLE=OFF -DOpenCL_ENABLE=OFF
-- The C compiler identification is GNU 7.3.1
-- The CXX compiler identification is GNU 7.3.1
-- Check for working C compiler: /opt/rh/devtoolset-7/root/usr/bin/cc
-- Check for working C compiler: /opt/rh/devtoolset-7/root/usr/bin/cc -- works
-- Detecting C compiler ABI info
-- Detecting C compiler ABI info - done
-- Detecting C compile features
-- Detecting C compile features - done
-- Check for working CXX compiler: /opt/rh/devtoolset-7/root/usr/bin/c++
-- Check for working CXX compiler: /opt/rh/devtoolset-7/root/usr/bin/c++ -- works
-- Detecting CXX compiler ABI info
-- Detecting CXX compiler ABI info - done
-- Detecting CXX compile features
-- Detecting CXX compile features - done
-- Looking for pthread.h
-- Looking for pthread.h - found
-- Looking for pthread_create
-- Looking for pthread_create - not found
-- Looking for pthread_create in pthreads
-- Looking for pthread_create in pthreads - not found
-- Looking for pthread_create in pthread
-- Looking for pthread_create in pthread - found
-- Found Threads: TRUE  
-- Found OpenSSL: /usr/lib64/libssl.so;/usr/lib64/libcrypto.so (found version "1.0.1e") 
-- The ASM compiler identification is GNU
-- Found assembler: /opt/rh/devtoolset-7/root/usr/bin/cc
-- Configuring done
-- Generating done
-- Build files have been written to: /root/xmr-stak/build
[root@srv build]# make -j 8
Scanning dependencies of target xmr-stak-asm
[  3%] Building ASM object CMakeFiles/xmr-stak-asm.dir/xmrstak/backend/cpu/crypto/asm/cryptonight_v8_main_loop.S.o
[  6%] Linking C static library bin/libxmr-stak-asm.a
[  6%] Built target xmr-stak-asm
Scanning dependencies of target xmr-stak-c
[ 10%] Building C object CMakeFiles/xmr-stak-c.dir/xmrstak/backend/cpu/crypto/c_blake256.c.o
[ 13%] Building C object CMakeFiles/xmr-stak-c.dir/xmrstak/backend/cpu/crypto/c_jh.c.o
[ 20%] Building C object CMakeFiles/xmr-stak-c.dir/xmrstak/backend/cpu/crypto/c_keccak.c.o
[ 20%] Building C object CMakeFiles/xmr-stak-c.dir/xmrstak/backend/cpu/crypto/c_groestl.c.o
[ 24%] Building C object CMakeFiles/xmr-stak-c.dir/xmrstak/backend/cpu/crypto/c_skein.c.o
[ 27%] Linking C static library bin/libxmr-stak-c.a
[ 27%] Built target xmr-stak-c
Scanning dependencies of target xmr-stak-backend
[ 34%] Building CXX object CMakeFiles/xmr-stak-backend.dir/xmrstak/jconf.cpp.o
[ 34%] Building CXX object CMakeFiles/xmr-stak-backend.dir/xmrstak/backend/cpu/cpuType.cpp.o
[ 37%] Building CXX object CMakeFiles/xmr-stak-backend.dir/xmrstak/backend/cpu/jconf.cpp.o
[ 44%] Building CXX object CMakeFiles/xmr-stak-backend.dir/xmrstak/version.cpp.o
[ 44%] Building CXX object CMakeFiles/xmr-stak-backend.dir/xmrstak/backend/cpu/hwlocMemory.cpp.o
[ 55%] Building CXX object CMakeFiles/xmr-stak-backend.dir/xmrstak/backend/cpu/minethd.cpp.o
[ 55%] Building CXX object CMakeFiles/xmr-stak-backend.dir/xmrstak/backend/backendConnector.cpp.o
[ 55%] Building CXX object CMakeFiles/xmr-stak-backend.dir/xmrstak/backend/globalStates.cpp.o
[ 58%] Building CXX object CMakeFiles/xmr-stak-backend.dir/xmrstak/backend/cpu/crypto/cryptonight_common.cpp.o
[ 62%] Building CXX object CMakeFiles/xmr-stak-backend.dir/xmrstak/http/httpd.cpp.o
[ 65%] Building CXX object CMakeFiles/xmr-stak-backend.dir/xmrstak/http/webdesign.cpp.o
[ 68%] Building CXX object CMakeFiles/xmr-stak-backend.dir/xmrstak/misc/console.cpp.o
[ 72%] Building CXX object CMakeFiles/xmr-stak-backend.dir/xmrstak/misc/executor.cpp.o
[ 75%] Building CXX object CMakeFiles/xmr-stak-backend.dir/xmrstak/misc/telemetry.cpp.o
[ 79%] Building CXX object CMakeFiles/xmr-stak-backend.dir/xmrstak/misc/uac.cpp.o
[ 82%] Building CXX object CMakeFiles/xmr-stak-backend.dir/xmrstak/misc/utility.cpp.o
[ 86%] Building CXX object CMakeFiles/xmr-stak-backend.dir/xmrstak/net/jpsock.cpp.o
[ 89%] Building CXX object CMakeFiles/xmr-stak-backend.dir/xmrstak/net/socket.cpp.o
[ 93%] Linking CXX static library bin/libxmr-stak-backend.a
[ 93%] Built target xmr-stak-backend
Scanning dependencies of target xmr-stak
[ 96%] Building CXX object CMakeFiles/xmr-stak.dir/xmrstak/cli/cli-miner.cpp.o
[100%] Linking CXX executable bin/xmr-stak
[100%] Built target xmr-stak

Execute the program to see if everything is OK. With the help output you can see how many algorithms are supported as of version 2.5 of xmr-stak:

[root@srv build]# cd bin
[root@srv bin]# ./xmr-stak --help
Usage: xmr-stak [OPTION]...
 
  -h, --help                 show this help
  -v, --version              show version number
  -V, --version-long         show long version number
  -c, --config FILE          common miner configuration file
  -C, --poolconf FILE        pool configuration file
  --benchmark BLOCKVERSION   ONLY do a benchmark and exit
  --benchwait WAIT_SEC             ... benchmark wait time
  --benchwork WORK_SEC             ... benchmark work time
  --noCPU                    disable the CPU miner backend
  --cpu FILE                 CPU backend miner config file
  -i --httpd HTTP_PORT       HTTP interface port
 
The following options can be used for automatic start without a guided config,
If config exists then this pool will be top priority.
  -o, --url URL              pool url and port, e.g. pool.usxmrpool.com:3333
  -O, --tls-url URL          TLS pool url and port, e.g. pool.usxmrpool.com:10443
  -u, --user USERNAME        pool user name or wallet address
  -r, --rigid RIGID          rig identifier for pool-side statistics (needs pool support)
  -p, --pass PASSWD          pool password, in the most cases x or empty ""
  --use-nicehash             the pool should run in nicehash mode
  --currency NAME            currency to mine

Supported coin options: 
        - aeon7
        - bbscoin
        - bittube
        - cryptonight
        - cryptonight_bittube2
        - cryptonight_masari
        - cryptonight_haven
        - cryptonight_heavy
        - cryptonight_lite
        - cryptonight_lite_v7
        - cryptonight_lite_v7_xor
        - cryptonight_v7
        - cryptonight_v8
        - cryptonight_v7_stellite
        - graft
        - haven
        - intense
        - masari
        - monero
        - qrl
        - ryo
        - stellite
        - turtlecoin

Version: xmr-stak 2.5.2 752fd1e
Brought to by fireice_uk and psychocrypt under GPLv3.

Technical details of a default Fedora 29 Workstation installation

This article is for those of you who do not want to install a how new operating system only to discover some technical details about the default installation like, disk layout, packages included, software versions and so on. Here we are going to review in several sections what is like to have a default installation of Fedora Workstation 29.

Software

The Fedora 29 Workstation you can have

  • Xorg X server – 1.20.1
  • GNOME (the GUI) – 3.30.1
  • linux kernel – 4.18.16
  • linux-firmware – 20180913 (87.git44d4fca9.fc29)
  • QT – 5.11.1
  • libc – 2.28
  • gnu gcc – 8.2.1 / installed by default
  • coreutils – 8.30
  • dnf – 4.0.4
  • cups – 2.2.8
  • MySQL server – 8.0.12
  • PHP – 7.2.11
  • Go Lang – 1.11
  • python2.7 – 2.7.15
  • python3 (default) – 3.7.0 / installed by default
  • perl – 5.28.0 / installed by default
  • ruby – 2.5.1
  • OpenJDK – “11-ea” 2018-09-25 / installed by default

Note: Not all of the above software comes installed by default.
Installed packages are 1613 occupying 5.9G space:

[root@localhost ~]# dnf list installed|wc -l
1613
[root@localhost ~]# df -h /
Filesystem               Size  Used Avail Use% Mounted on
/dev/mapper/fedora-root   49G  5.9G   41G  13% /

Keep on reading!

Review of freshly installed Fedora 29 Workstation (Gnome GUI)

After the tutorial of Install Fedora Workstation 29 (Gnome GUI) this tutorial is mainly to see what to expect from a freshly installed Fedora 27 Workstation – the look and feel of the GUI (Gnome – version 3.30).

  • Xorg X server – 1.20.1
  • GNOME (the GUI) – 3.30.1
  • linux kernel – 4.18.16

The idea of this tutorial is just to see what to expect from Fedora 29 Workstation (Gnome)the look and feel of the GUI, the default installed programs and their look and how to do some basic steps with them. Here you’ll find more than 110 screenshots and not so many text we do not want to turn this review of many text and version information and 3 meaningless screenshot, which you cannot see anything for the user interface, which these days is the primary goal of a Desktop system. You can expect more of this kind reviews in the future…
You can find similar article for Fedora Workstation 27 – Review of freshly installed Fedora 27 Workstation (Gnome GUI).
And for all installation and review tutorials we use real workstations not virtual environments!

SCREENSHOT 1)

main menu
Keep on reading!

Install Fedora Workstation 29 (Gnome GUI)

This tutorial will show you the simple steps of installing a modern Linux Distribution like Fedora 29 Workstation with Gnome for the user graphical interface. First we present the basic steps for installing the Operating system in addition to your present operating systems (here we have two: Windows 10 and Ubuntu 16) and then you can see some screenshots of the installed system and the look and feel of it. We have another tutorials showing more screenshots of the installed and working Fedora 29 (Gnome and KDE plasma) – so you can decide which of them to try first – coming soon.

The Fedora 29 Workstation comes with

  • Xorg X server – 1.20.1
  • GNOME (the GUI) – 3.30.1
  • linux kernel – 4.18.16

Check out our article about what software is included in Fedora 29 Workstation

The installation process is very similar to the old Fedora Workstation 27 and Fedora Workstation 28, in fact the main difference is the creation of an user, which the setup is not responsible anymore, the creation of an user is done by the first boot after installation. Our system was pretty new – Asus X399 with AMD Ryzen Threadripper 1950X and NVIDIA 1080 Ti and the setup loaded successfully and there were no problems till the end.

We used the following ISO for the installation process:

https://download.fedoraproject.org/pub/fedora/linux/releases/29/Workstation/x86_64/iso/Fedora-Workstation-Live-x86_64-29-1.2.iso

It is a LIVE image so you can try it before installing. The easiest way is just to download the image and burn it to a DVD disk and then follow the installation below:

STEP 1) Here is our “UEFI BIOS->Boot->Boot Override” and in most modern motherboard you can choose to override the default boot devices.

Choose the “UEFI: HL-DT-STDVDRAM…” to boot and install Fedora Workstation 29 with UEFI support. You should do this, because most of the new hardware like video cards would not work properly without beeing in UEFI mode.

main menu
Boot from DVD/USB Installation

Keep on reading!

Install Fedora Workstation 28 (Gnome GUI)

This tutorial will show you the simple steps of installing a modern Linux Distribution like Fedora 28 Workstation with Gnome for the user graphical interface. First we present the basic steps for installing the Operating system in addition to your present operating systems (here we have two: Windows 10 and Ubuntu 18) and then you can see some screenshots of the installed system and the look and feel of it. We have another tutorials showing more screenshots of the installed and working Fedora 28 (Gnome and KDE plasma) – so you can decide which of them to try first – coming soon.

The installation process is very similar to the old Fedora Workstation 27, in fact the main difference is the creation of an user, which the setup is not responsible anymore, the creation of an user is done by the first boot after installation. Our system was pretty new – Asus X399 with AMD Ryzen Threadripper 1950X and NVIDIA 1080 Ti and the setup loaded successfully and there were no problems till the end.

We used the following ISO for the installation process:

https://download.fedoraproject.org/pub/fedora/linux/releases/28/Workstation/x86_64/iso/Fedora-Workstation-Live-x86_64-28-1.1.iso

It is a LIVE image so you can try it before installing. The easiest way is just to download the image and burn it to a DVD disk and then follow the installation below:

STEP 1) If you booted from the DVD you would get this first screen – select “Start Fedora-Workstation-Live 28” and hit Enter

main menu
Start Fedora-Workstation-Live 28

Keep on reading!

How to compile xmr-stak (2.4.5) under Fedora 28 for CPU mining cryptocurrencies

Thanks to xmr-stak we can have one application capable of mining many different cryptocurrencies based on different algorithms. XMR-STAK is GPU and CPU miner, here we present only the CPU ability under Fedora 28, not all setups have a good video GPU, but you can have a decent CPU, which could be used to mine! For example AMD Ryzen Threadripper 1950X has a good performance on my crypto algorithms, even a better performance than the GPU mining.
Here we use AMD Ryzen Threadripper 1950X, which has 12 cores and 32 threads. Our setup is ASUS ROG ZENITH EXTREME (X399 Chipset) motherboard with 32G (4x8G CROSSHAIR VI HERO) DIMM DDR4 Synchronous Unbuffered (Unregistered) 2133 MHz (0.5 ns) and AMD Ryzen Threadripper 1950X. It can do 1253.5 cryptonight_v7 hashes per second.
Here are the steps you should do to install (in fact install dependencies and compile the miner) and to begin CPU mining:

Update your system and install the needed dependencies

[myuser@localhost ~]$ sudo dnf -y update
[sudo] password for myuser: 
Fedora 28 - x86_64 - Updates                                                                                                        9.5 MB/s |  18 MB     00:01    
Last metadata expiration check: 0:00:04 ago on  2.07.2018 (Mon) 16:52:23 UTC.
Dependencies resolved.                                                    
....
....
Complete!
[myuser@localhost ~]$ sudo reboot
[myuser@localhost ~]$ sudo dnf -y install gcc gcc-c++ hwloc-devel libmicrohttpd-devel libstdc++-static make openssl-devel cmake git screen
....
....
Installed:
  cmake.x86_64 3.11.2-1.fc28            gcc-c++.x86_64 8.1.1-1.fc28           hwloc-devel.x86_64 1.11.9-1.fc28         libmicrohttpd-devel.x86_64 1:0.9.59-2.fc28
  libstdc++-static.x86_64 8.1.1-1.fc28  openssl-devel.x86_64 1:1.1.0h-3.fc28  screen.x86_64 4.6.2-3.fc28               cmake-data.noarch 3.11.2-1.fc28           
  cmake-filesystem.x86_64 3.11.2-1.fc28 cmake-rpm-macros.noarch 3.11.2-1.fc28 gmp-c++.x86_64 1:6.1.2-7.fc28            gmp-devel.x86_64 1:6.1.2-7.fc28           
  gnutls-c++.x86_64 3.6.2-3.fc28        gnutls-dane.x86_64 3.6.2-3.fc28       gnutls-devel.x86_64 3.6.2-3.fc28         hwloc-libs.x86_64 1.11.9-1.fc28           
  ibacm.x86_64 16.2-3.fc28              jsoncpp.x86_64 1.8.4-3.fc28           keyutils-libs-devel.x86_64 1.5.10-6.fc28 krb5-devel.x86_64 1.16.1-7.fc28           
  libcom_err-devel.x86_64 1.43.8-2.fc28 libibcm.x86_64 16.2-3.fc28            libibumad.x86_64 16.2-3.fc28             libkadm5.x86_64 1.16.1-7.fc28             
  libmicrohttpd.x86_64 1:0.9.59-2.fc28  libselinux-devel.x86_64 2.8-1.fc28    libsepol-devel.x86_64 2.8-1.fc28         libstdc++-devel.x86_64 8.1.1-1.fc28       
  libtasn1-devel.x86_64 4.13-2.fc28     libuv.x86_64 1:1.20.3-1.fc28          libverto-devel.x86_64 0.3.0-5.fc28       nettle-devel.x86_64 3.4-2.fc28            
  p11-kit-devel.x86_64 0.23.12-1.fc28   pcre2-devel.x86_64 10.31-4.fc28       pcre2-utf32.x86_64 10.31-4.fc28          rdma-core-devel.x86_64 16.2-3.fc28        
  rhash.x86_64 1.3.5-2.fc28             unbound-libs.x86_64 1.7.3-1.fc28      zlib-devel.x86_64 1.2.11-8.fc28

STEP 2) Compile the mining program xmr-stak

[myuser@localhost ~]$ git clone https://github.com/fireice-uk/xmr-stak.git
Cloning into 'xmr-stak'...
remote: Counting objects: 4931, done.
remote: Total 4931 (delta 0), reused 0 (delta 0), pack-reused 4930
Receiving objects: 100% (4931/4931), 1.45 MiB | 2.07 MiB/s, done.
Resolving deltas: 100% (3515/3515), done.
[myuser@localhost ~]$ mkdir xmr-stak/build
[myuser@localhost ~]$ cd xmr-stak/build
[myuser@localhost build]$ export CFLAGS="-O2 -march=native -msse3 -fomit-frame-pointer -pipe"
[myuser@localhost build]$ export CHOST="x86_64-pc-linux-gnu"
[myuser@localhost build]$ export CXXFLAGS="${CFLAGS}"
[myuser@localhost build]$ export LDFLAGS="-Wl,-O1"
[myuser@localhost build]$ cmake .. -DCUDA_ENABLE=OFF -DOpenCL_ENABLE=OFF
-- The C compiler identification is GNU 8.1.1
-- The CXX compiler identification is GNU 8.1.1
-- Check for working C compiler: /usr/bin/cc
-- Check for working C compiler: /usr/bin/cc -- works
-- Detecting C compiler ABI info
-- Detecting C compiler ABI info - done
-- Detecting C compile features
-- Detecting C compile features - done
-- Check for working CXX compiler: /usr/bin/c++
-- Check for working CXX compiler: /usr/bin/c++ -- works
-- Detecting CXX compiler ABI info
-- Detecting CXX compiler ABI info - done
-- Detecting CXX compile features
-- Detecting CXX compile features - done
-- Looking for pthread.h
-- Looking for pthread.h - found
-- Looking for pthread_create
-- Looking for pthread_create - not found
-- Looking for pthread_create in pthreads
-- Looking for pthread_create in pthreads - not found
-- Looking for pthread_create in pthread
-- Looking for pthread_create in pthread - found
-- Found Threads: TRUE  
-- Found OpenSSL: /usr/lib64/libcrypto.so (found version "1.1.0h") 
-- Configuring done
-- Generating done
-- Build files have been written to: /home/myuser/xmr-stak/build
[myuser@localhost build]$ make -j 16
Scanning dependencies of target xmr-stak-c
[  3%] Building C object CMakeFiles/xmr-stak-c.dir/xmrstak/backend/cpu/crypto/c_blake256.c.o
[  7%] Building C object CMakeFiles/xmr-stak-c.dir/xmrstak/backend/cpu/crypto/c_groestl.c.o
[ 11%] Building C object CMakeFiles/xmr-stak-c.dir/xmrstak/backend/cpu/crypto/c_skein.c.o
[ 15%] Building C object CMakeFiles/xmr-stak-c.dir/xmrstak/backend/cpu/crypto/c_keccak.c.o
[ 19%] Building C object CMakeFiles/xmr-stak-c.dir/xmrstak/backend/cpu/crypto/c_jh.c.o
[ 23%] Linking C static library bin/libxmr-stak-c.a
[ 23%] Built target xmr-stak-c
Scanning dependencies of target xmr-stak-backend
[ 26%] Building CXX object CMakeFiles/xmr-stak-backend.dir/xmrstak/version.cpp.o
[ 34%] Building CXX object CMakeFiles/xmr-stak-backend.dir/xmrstak/backend/cpu/hwlocMemory.cpp.o
[ 34%] Building CXX object CMakeFiles/xmr-stak-backend.dir/xmrstak/backend/globalStates.cpp.o
[ 42%] Building CXX object CMakeFiles/xmr-stak-backend.dir/xmrstak/jconf.cpp.o
[ 42%] Building CXX object CMakeFiles/xmr-stak-backend.dir/xmrstak/backend/cpu/minethd.cpp.o
[ 46%] Building CXX object CMakeFiles/xmr-stak-backend.dir/xmrstak/backend/backendConnector.cpp.o
[ 57%] Building CXX object CMakeFiles/xmr-stak-backend.dir/xmrstak/http/httpd.cpp.o
[ 57%] Building CXX object CMakeFiles/xmr-stak-backend.dir/xmrstak/backend/cpu/crypto/cryptonight_common.cpp.o
[ 57%] Building CXX object CMakeFiles/xmr-stak-backend.dir/xmrstak/backend/cpu/jconf.cpp.o
[ 61%] Building CXX object CMakeFiles/xmr-stak-backend.dir/xmrstak/http/webdesign.cpp.o
[ 65%] Building CXX object CMakeFiles/xmr-stak-backend.dir/xmrstak/misc/executor.cpp.o
[ 69%] Building CXX object CMakeFiles/xmr-stak-backend.dir/xmrstak/misc/console.cpp.o
[ 73%] Building CXX object CMakeFiles/xmr-stak-backend.dir/xmrstak/misc/uac.cpp.o
[ 76%] Building CXX object CMakeFiles/xmr-stak-backend.dir/xmrstak/misc/utility.cpp.o
[ 80%] Building CXX object CMakeFiles/xmr-stak-backend.dir/xmrstak/net/jpsock.cpp.o
[ 84%] Building CXX object CMakeFiles/xmr-stak-backend.dir/xmrstak/misc/telemetry.cpp.o
[ 88%] Building CXX object CMakeFiles/xmr-stak-backend.dir/xmrstak/net/socket.cpp.o
[ 92%] Linking CXX static library bin/libxmr-stak-backend.a
[ 92%] Built target xmr-stak-backend
Scanning dependencies of target xmr-stak
[ 96%] Building CXX object CMakeFiles/xmr-stak.dir/xmrstak/cli/cli-miner.cpp.o
[100%] Linking CXX executable bin/xmr-stak
[100%] Built target xmr-stak

Execute the program to see if everything is OK. With the help output you can see how many algorithms are supported as of version 2.4.5 of xmr-stak.

[myuser@localhost build]$ cd bin
[myuser@localhost bin]$ ./xmr-stak --help
Usage: xmr-stak [OPTION]...
 
  -h, --help                 show this help
  -v, --version              show version number
  -V, --version-long         show long version number
  -c, --config FILE          common miner configuration file
  -C, --poolconf FILE        pool configuration file
  --benchmark BLOCKVERSION   ONLY do a benchmark and exit
  --benchwait WAIT_SEC             ... benchmark wait time
  --benchwork WORK_SEC             ... benchmark work time
  --noCPU                    disable the CPU miner backend
  --cpu FILE                 CPU backend miner config file
  -i --httpd HTTP_PORT       HTTP interface port
 
The following options can be used for automatic start without a guided config,
If config exists then this pool will be top priority.
  -o, --url URL              pool url and port, e.g. pool.usxmrpool.com:3333
  -O, --tls-url URL          TLS pool url and port, e.g. pool.usxmrpool.com:10443
  -u, --user USERNAME        pool user name or wallet address
  -r, --rigid RIGID          rig identifier for pool-side statistics (needs pool support)
  -p, --pass PASSWD          pool password, in the most cases x or empty ""
  --use-nicehash             the pool should run in nicehash mode
  --currency NAME            currency to mine

Supported coin options: 
        - aeon7
        - bbscoin
        - croat
        - cryptonight
        - cryptonight_masari
        - cryptonight_haven
        - cryptonight_heavy
        - cryptonight_lite
        - cryptonight_lite_v7
        - cryptonight_lite_v7_xor
        - cryptonight_v7
        - cryptonight_v7_stellite
        - edollar
        - electroneum
        - graft
        - haven
        - intense
        - ipbc
        - karbo
        - masari
        - monero7
        - stellite
        - sumokoin
        - turtlecoin

Version: xmr-stak 2.4.5 b3f79de
Brought to by fireice_uk and psychocrypt under GPLv3.

Electroneum CPU mining with XMR-STAK

Using Cryptonote V7 Variant 1 (aka. “monerov7″/”cryptonight_v7”) algorithm. First run.
Couple of important questions to answer:

  • Please enter the currency that you want to mine: cryptonight_v7
  • Username (wallet address or pool login): etnk111111111111111111111111111111111111111111111111111111111111111111111111111111111111111 – this is your address, put here your real public wallet address, DO NOT PUT THIS FALSE ADDRESS
  • Pool address: pool.etn.spacepools.org:3333 – the pool address to use, we use etn.spacepools.org pool
  • Username (wallet address or pool login): your email address
[myuser@localhost bin]$ screen -R mining
[myuser@srv bin]# sudo sysctl -w vm.nr_hugepages=128
[sudo] password for myuser: 
vm.nr_hugepages = 128
[myuser@localhost bin]$ ./xmr-stak 
Please enter:
- Do you want to use the HTTP interface?
Unlike the screen display, browser interface is not affected by the GPU lag.
If you don't want to use it, please enter 0, otherwise enter port number that the miner should listen on
0
Configuration stored in file 'config.txt'
Please enter:
- Please enter the currency that you want to mine: 
        - aeon7
        - bbscoin
        - croat
        - cryptonight
        - cryptonight_masari
        - cryptonight_haven
        - cryptonight_heavy
        - cryptonight_lite
        - cryptonight_lite_v7
        - cryptonight_lite_v7_xor
        - cryptonight_v7
        - cryptonight_v7_stellite
        - edollar
        - electroneum
        - graft
        - haven
        - intense
        - ipbc
        - karbo
        - masari
        - monero7
        - stellite
        - sumokoin
        - turtlecoin

cryptonight_v7
- Pool address: e.g. pool.example.com:3333
pool.etn.spacepools.org:3333
- Username (wallet address or pool login):
etnk111111111111111111111111111111111111111111111111111111111111111111111111111111111111111
- Password (mostly empty or x):
myuser@example.com
- Rig identifier for pool-side statistics (needs pool support). Can be empty:

- Does this pool port support TLS/SSL? Use no if unknown. (y/N)
N
- Do you want to use nicehash on this pool? (y/n)
n
- Do you want to use multiple pools? (y/n)
n
Pool configuration stored in file 'pools.txt'
-------------------------------------------------------------------
xmr-stak 2.4.5 b3f79de

Brought to you by fireice_uk and psychocrypt under GPLv3.
Based on CPU mining code by wolf9466 (heavily optimized by fireice_uk).

Configurable dev donation level is set to 2.0%

You can use following keys to display reports:
'h' - hashrate
'r' - results
'c' - connection
-------------------------------------------------------------------
[2018-07-02 17:19:11] : Mining coin: cryptonight_v7
[2018-07-02 17:19:11] : CPU configuration stored in file 'cpu.txt'
[2018-07-02 17:19:11] : Starting 1x thread, affinity: 0.
[2018-07-02 17:19:11] : hwloc: memory pinned
[2018-07-02 17:19:11] : Starting 1x thread, affinity: 1.
[2018-07-02 17:19:11] : hwloc: memory pinned
[2018-07-02 17:19:11] : Starting 1x thread, affinity: 2.
[2018-07-02 17:19:11] : hwloc: memory pinned
[2018-07-02 17:19:11] : Starting 1x thread, affinity: 3.
[2018-07-02 17:19:11] : hwloc: memory pinned
[2018-07-02 17:19:11] : Starting 1x thread, affinity: 4.
[2018-07-02 17:19:11] : hwloc: memory pinned
[2018-07-02 17:19:11] : Starting 1x thread, affinity: 5.
[2018-07-02 17:19:11] : hwloc: memory pinned
[2018-07-02 17:19:11] : Starting 1x thread, affinity: 6.
[2018-07-02 17:19:11] : hwloc: memory pinned
[2018-07-02 17:19:11] : Starting 1x thread, affinity: 7.
[2018-07-02 17:19:11] : hwloc: memory pinned
[2018-07-02 17:19:11] : Starting 1x thread, affinity: 8.
[2018-07-02 17:19:11] : hwloc: memory pinned
[2018-07-02 17:19:11] : Starting 1x thread, affinity: 9.
[2018-07-02 17:19:11] : hwloc: memory pinned
[2018-07-02 17:19:11] : Starting 1x thread, affinity: 10.
[2018-07-02 17:19:11] : hwloc: memory pinned
[2018-07-02 17:19:11] : Starting 1x thread, affinity: 11.
[2018-07-02 17:19:11] : hwloc: memory pinned
[2018-07-02 17:19:11] : Starting 1x thread, affinity: 12.
[2018-07-02 17:19:11] : hwloc: memory pinned
[2018-07-02 17:19:11] : Starting 1x thread, affinity: 13.
[2018-07-02 17:19:11] : hwloc: memory pinned
[2018-07-02 17:19:11] : Starting 1x thread, affinity: 14.
[2018-07-02 17:19:11] : hwloc: memory pinned
[2018-07-02 17:19:11] : Starting 1x thread, affinity: 15.
[2018-07-02 17:19:11] : hwloc: memory pinned
[2018-07-02 17:19:11] : Fast-connecting to pool.etn.spacepools.org:3333 pool ...
[2018-07-02 17:19:11] : Pool pool.etn.spacepools.org:3333 connected. Logging in...
[2018-07-02 17:19:11] : Difficulty changed. Now: 50000.
[2018-07-02 17:19:11] : Pool logged in.
RESULT REPORT
Difficulty       : 18840
Good results     : 141 / 141 (100.0 %)
Avg result time  : 15.5 sec
Pool-side hashes : 2908063

Top 10 best results found:
|  0 |         16095047 |  1 |          1495311 |
|  2 |          1054682 |  3 |           405522 |
|  4 |           347343 |  5 |           313062 |
|  6 |           311532 |  7 |           298945 |
|  8 |           181473 |  9 |           158732 |

Error details:
Yay! No errors.
HASHRATE REPORT - CPU
| ID |    10s |    60s |    15m | ID |    10s |    60s |    15m |
|  0 |   77.3 |   77.1 |   77.2 |  1 |   77.7 |   77.6 |   77.7 |
|  2 |   77.5 |   77.4 |   77.5 |  3 |   77.6 |   77.6 |   77.7 |
|  4 |   78.5 |   78.5 |   78.4 |  5 |   78.5 |   78.5 |   78.4 |
|  6 |   78.5 |   78.5 |   78.4 |  7 |   78.5 |   78.4 |   78.4 |
|  8 |   78.5 |   78.5 |   78.5 |  9 |   78.5 |   78.5 |   78.5 |
| 10 |   78.6 |   78.5 |   78.5 | 11 |   78.6 |   78.5 |   78.5 |
| 12 |   78.5 |   78.5 |   78.5 | 13 |   78.6 |   78.5 |   78.5 |
| 14 |   78.5 |   78.5 |   78.5 | 15 |   78.5 |   78.5 |   78.5 |
Totals (CPU):  1252.5 1251.7 1252.0 H/s
-----------------------------------------------------------------
Totals (ALL):   1252.5 1251.7 1252.0 H/s
Highest:  1253.5 H/s
-----------------------------------------------------------------

Here is the all and only the commands to execute (in a script):

sudo dnf -y update
sudo reboot
sudo dnf -y install gcc gcc-c++ hwloc-devel libmicrohttpd-devel libstdc++-static make openssl-devel cmake git screen
git clone https://github.com/fireice-uk/xmr-stak.git
mkdir xmr-stak/build
cd xmr-stak/build
export CFLAGS="-O2 -march=native -msse3 -fomit-frame-pointer -pipe"
export CHOST="x86_64-pc-linux-gnu"
export CXXFLAGS="${CFLAGS}"
export LDFLAGS="-Wl,-O1"
cmake .. -DCUDA_ENABLE=OFF -DOpenCL_ENABLE=OFF
make -j 16
cd bin
./xmr-stak