This tutorial will show you the simple steps of installing a modern Linux Distribution like Fedora 30 Workstation with Gnome for the user graphical interface. First, we present the basic steps for installing the Operating system in addition to your present operating systems (here we also have Windows 10) and then you can see some screenshots of the installed system and the look and feel of it. We have other tutorials showing more screenshots of the installed and working Fedora 29 (Gnome and KDE plasma) – so you can decide which of them to try first – coming soon.
The Fedora 30 Workstation comes with
- Xorg X server – 1.20.4 XWayland is used by default
- GNOME (the GUI) – 3.32.1
- linux kernel – 5.0.9
Check out our article about what software is included in comming soon.
The installation process is very similar to the old Fedora Workstation 27, Fedora Workstation 28 and Fedora Workstation 29, in fact the main difference is the creation of an user, which the setup is not responsible anymore, the creation of an user is done by the first boot after installation. Our system was pretty good – Asus X399 with AMD Ryzen Threadripper 1950X and NVIDIA 1080 Ti and the setup loaded successfully and there were no problems till the end.
We used the following ISO for the installation process:
https://download.fedoraproject.org/pub/fedora/linux/releases/30/Workstation/x86_64/iso/Fedora-Workstation-Live-x86_64-30-1.2.iso
It is a LIVE image so you can try it before installing. The easiest way is just to download the image and burn it to a DVD disk and then follow the installation below:
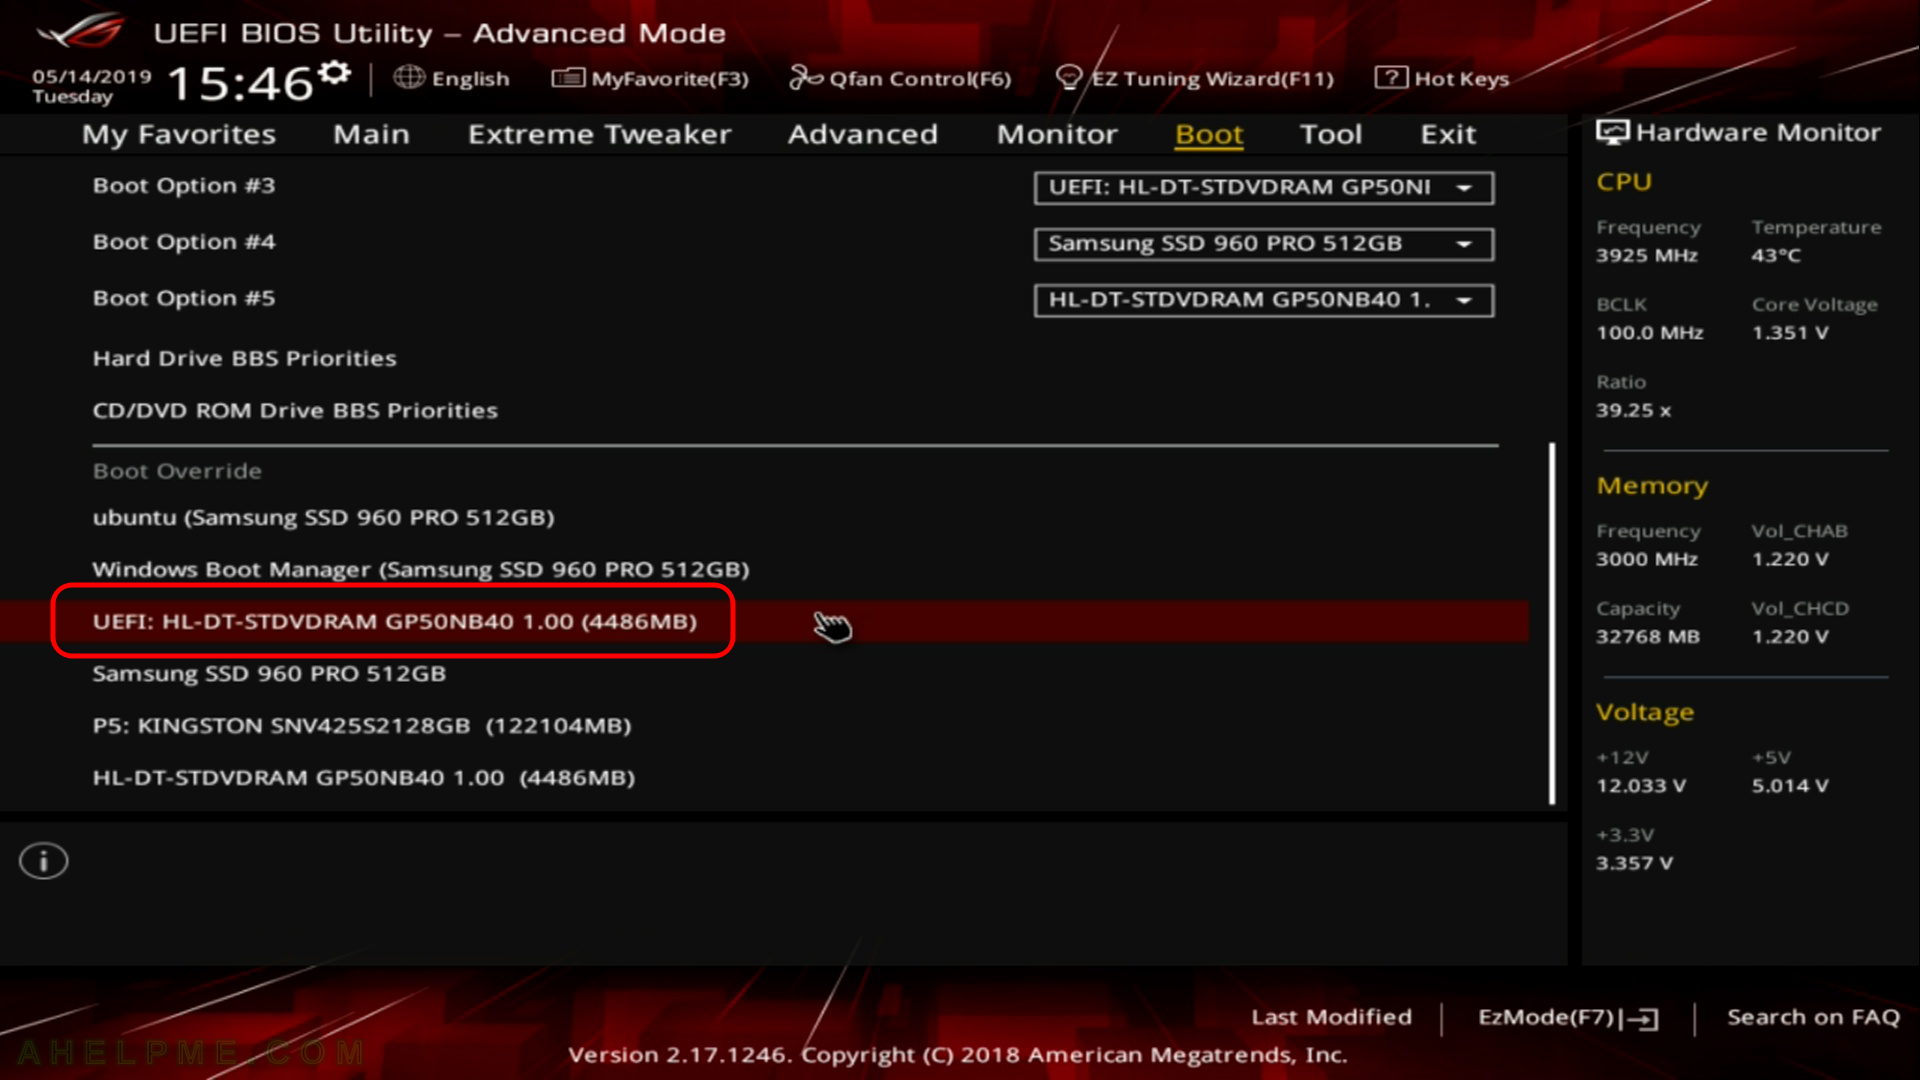
SCREENSHOT 1) Here is our “UEFI BIOS->Boot->Boot Override” and in most modern motherboard you can choose to override the default boot devices.
Choose the “UEFI: HL-DT-STDVDRAM…” to boot and install Fedora Workstation 30 with UEFI support. You should do this, because most of the new hardware like video cards would not work properly without being in UEFI mode.
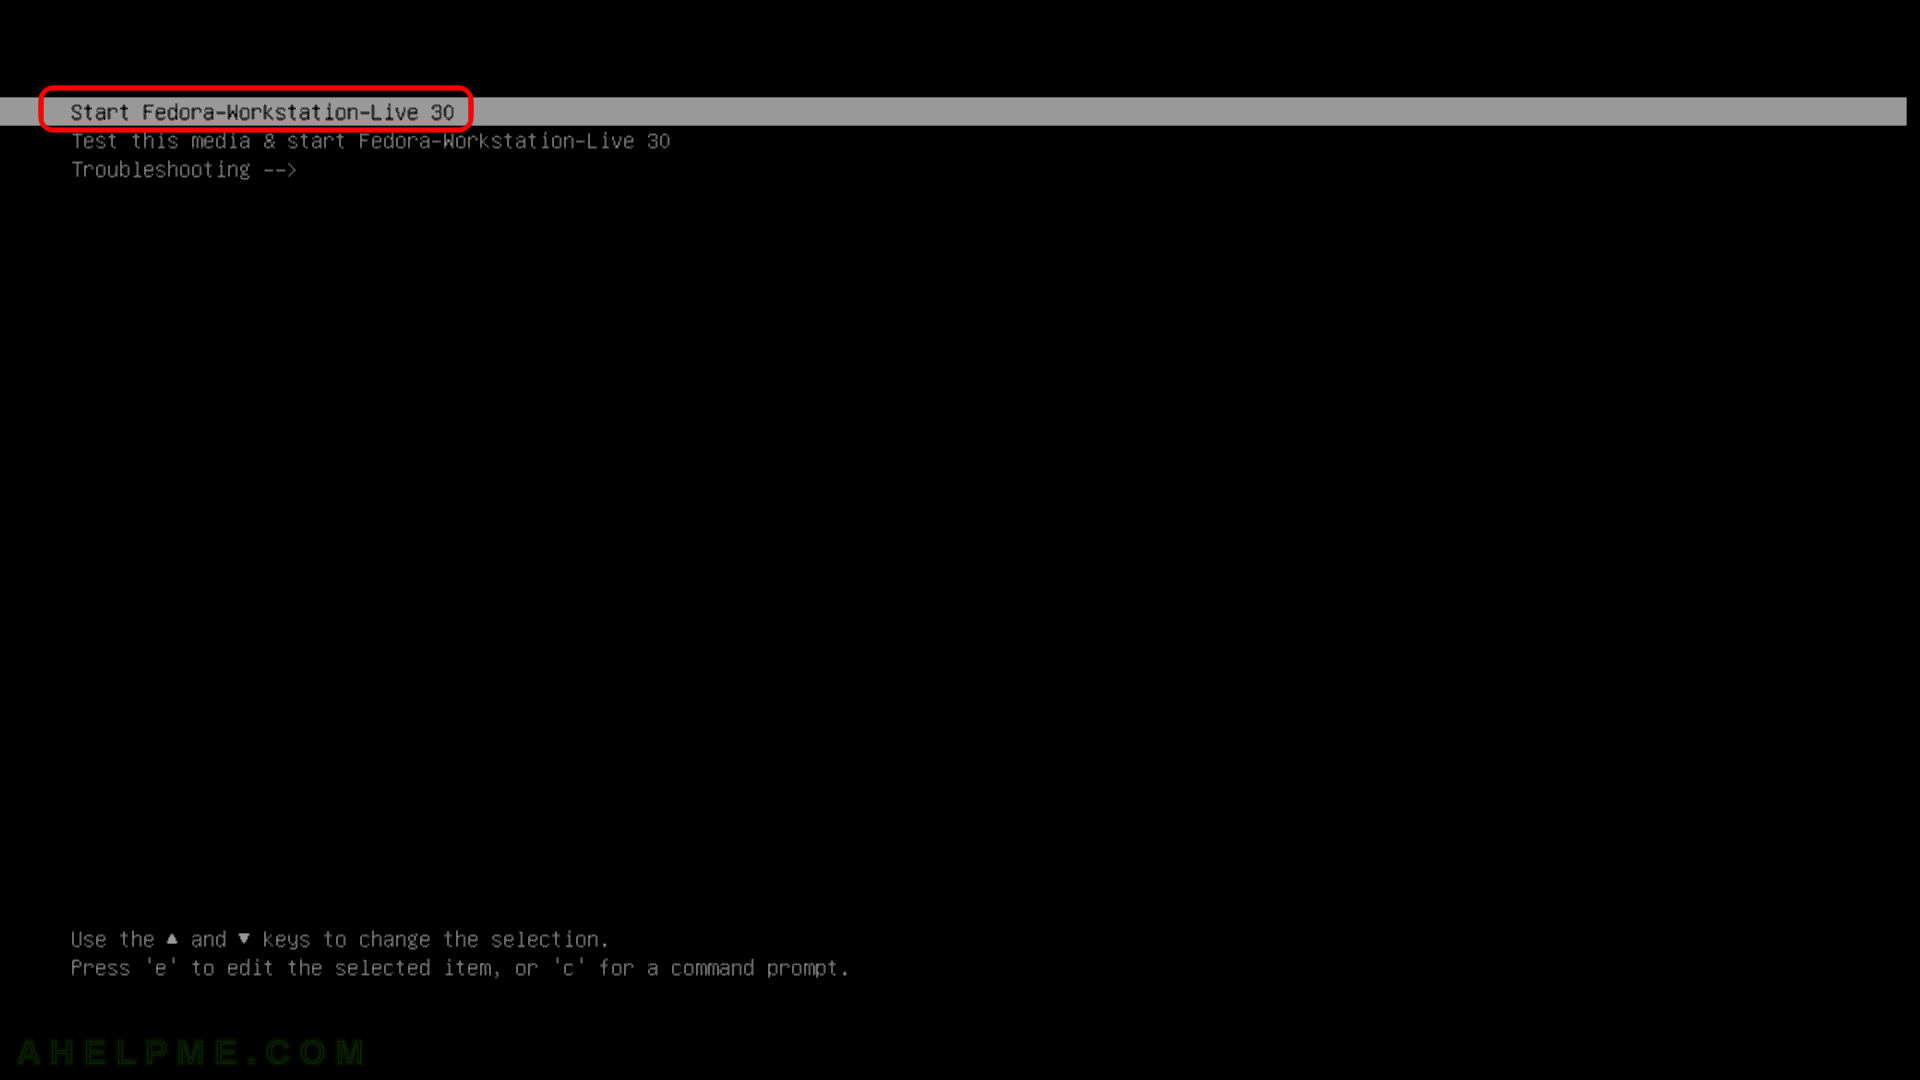
SCREENSHOT 2) If you booted from the DVD you would get this first screen – select “Start Fedora-Workstation-Live 30” and hit Enter
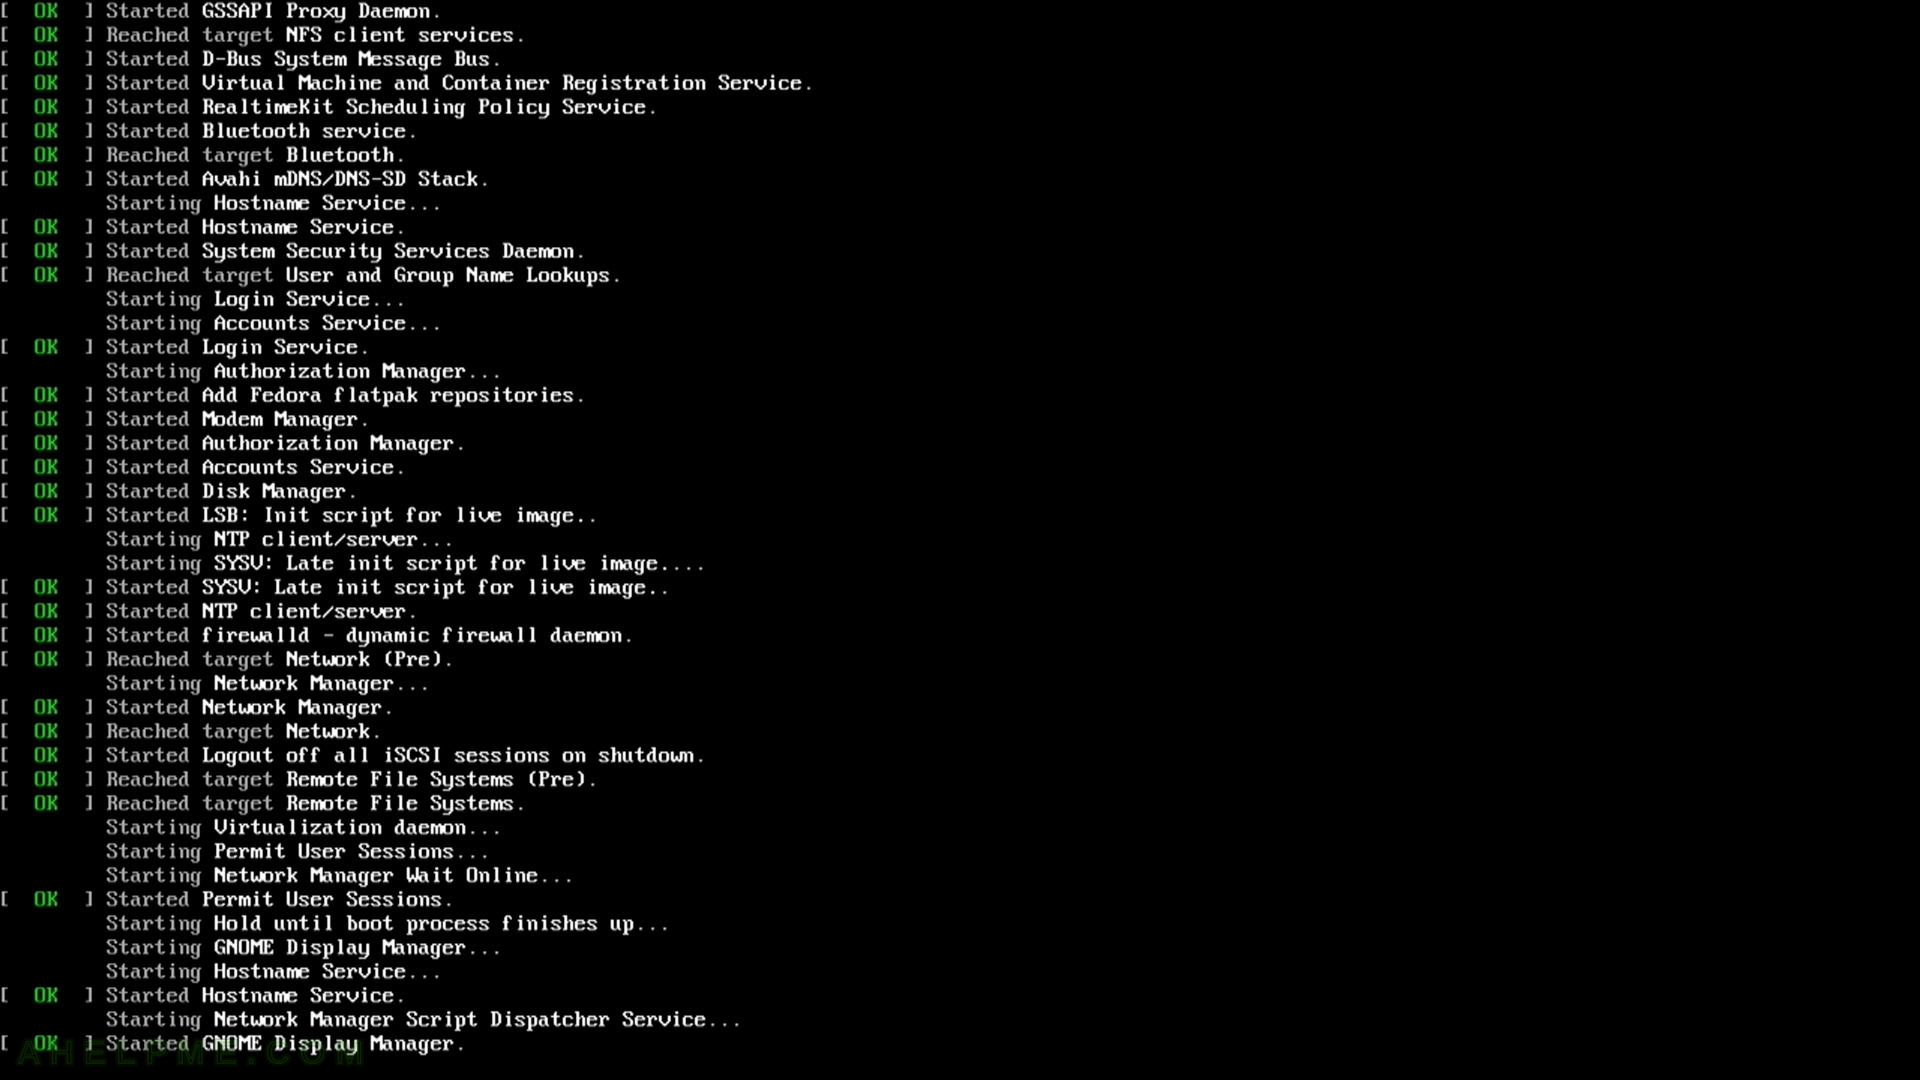
SCREENSHOT 3) The kernel and the live system are loading…
SCREENSHOT 4) When the system load successfully you’ll be in a Live Fedora Workstation 30 so you can test it if you like.
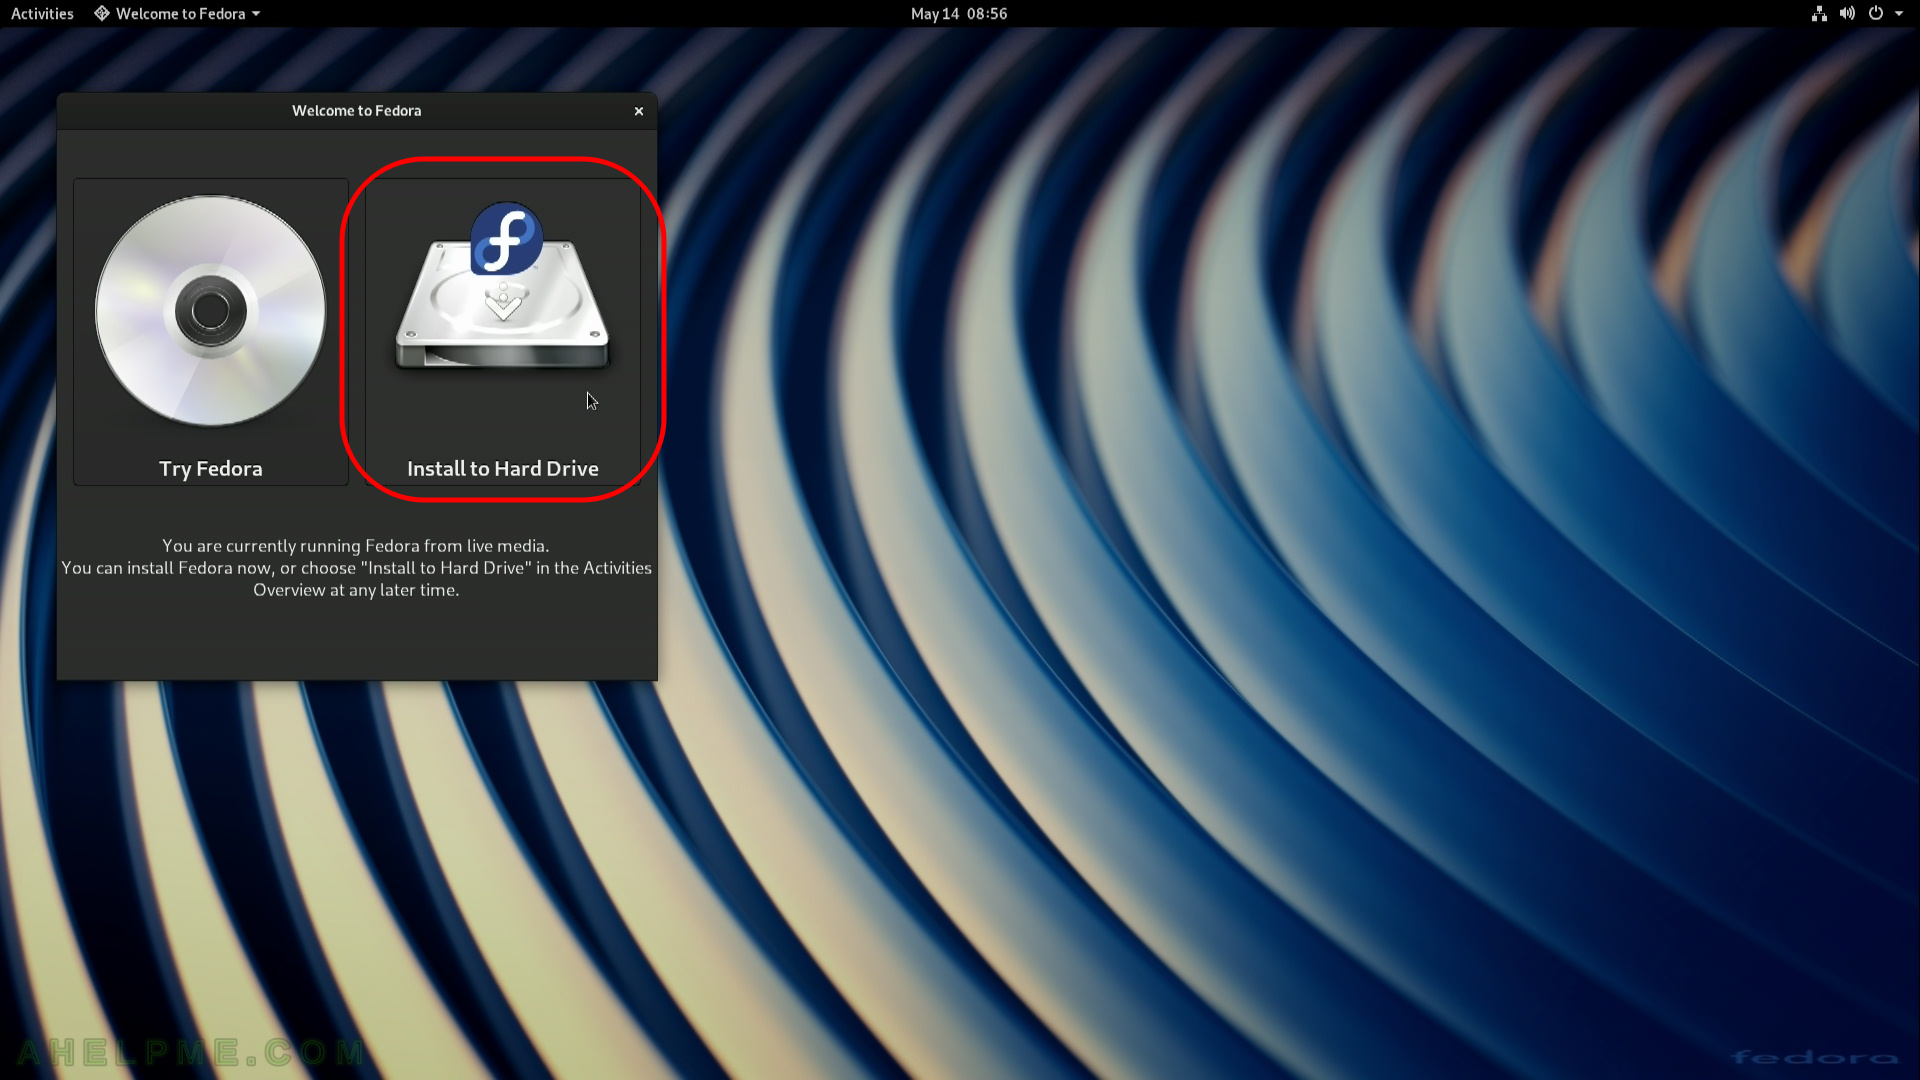
Click on “Install to Hard Drive” to install the system.
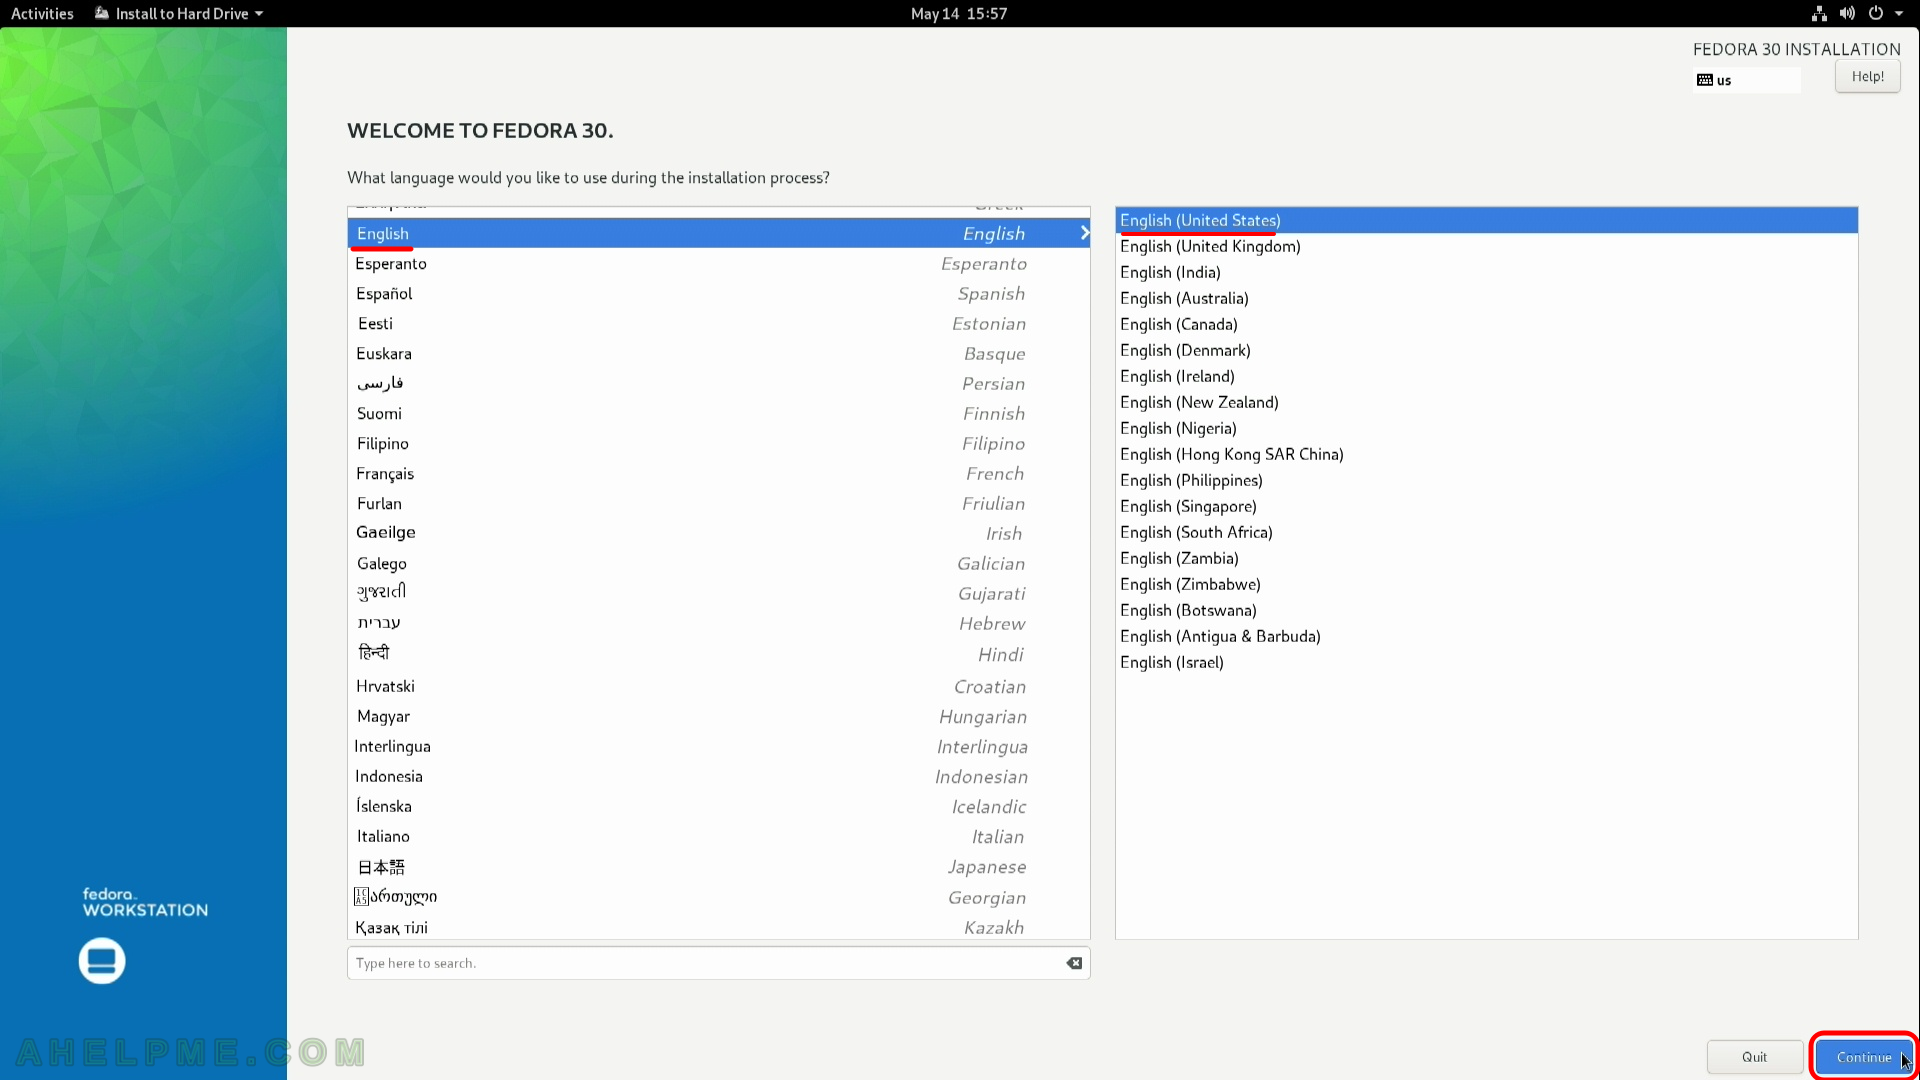
SCREENSHOT 5) Choose your system language. Here we selected the English.
The setup will guide you through the steps in the language you select here and the installed system will use the selected language as default.
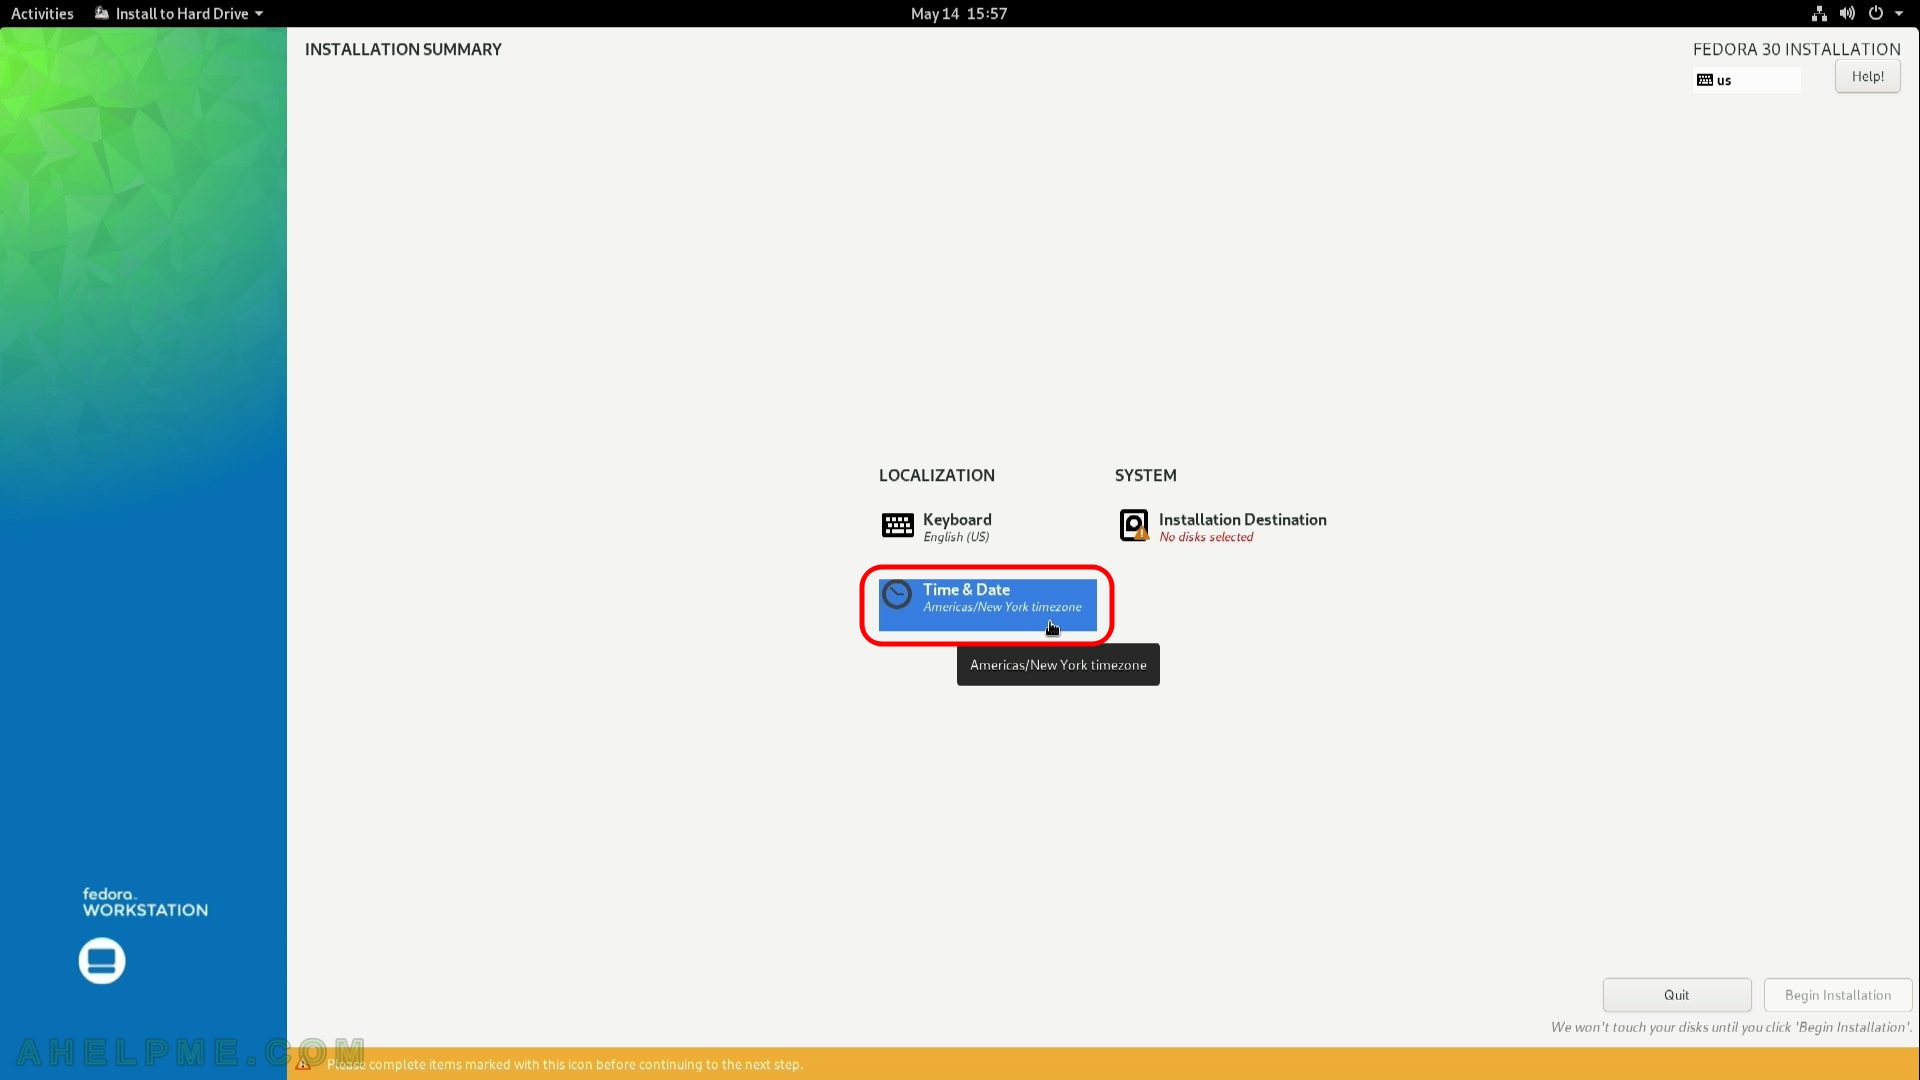
SCREENSHOT 6) Select time zone menu.
This menu might not be enabled at first and if it is not you should proceed with the next menu and when you return here it will get enabled.
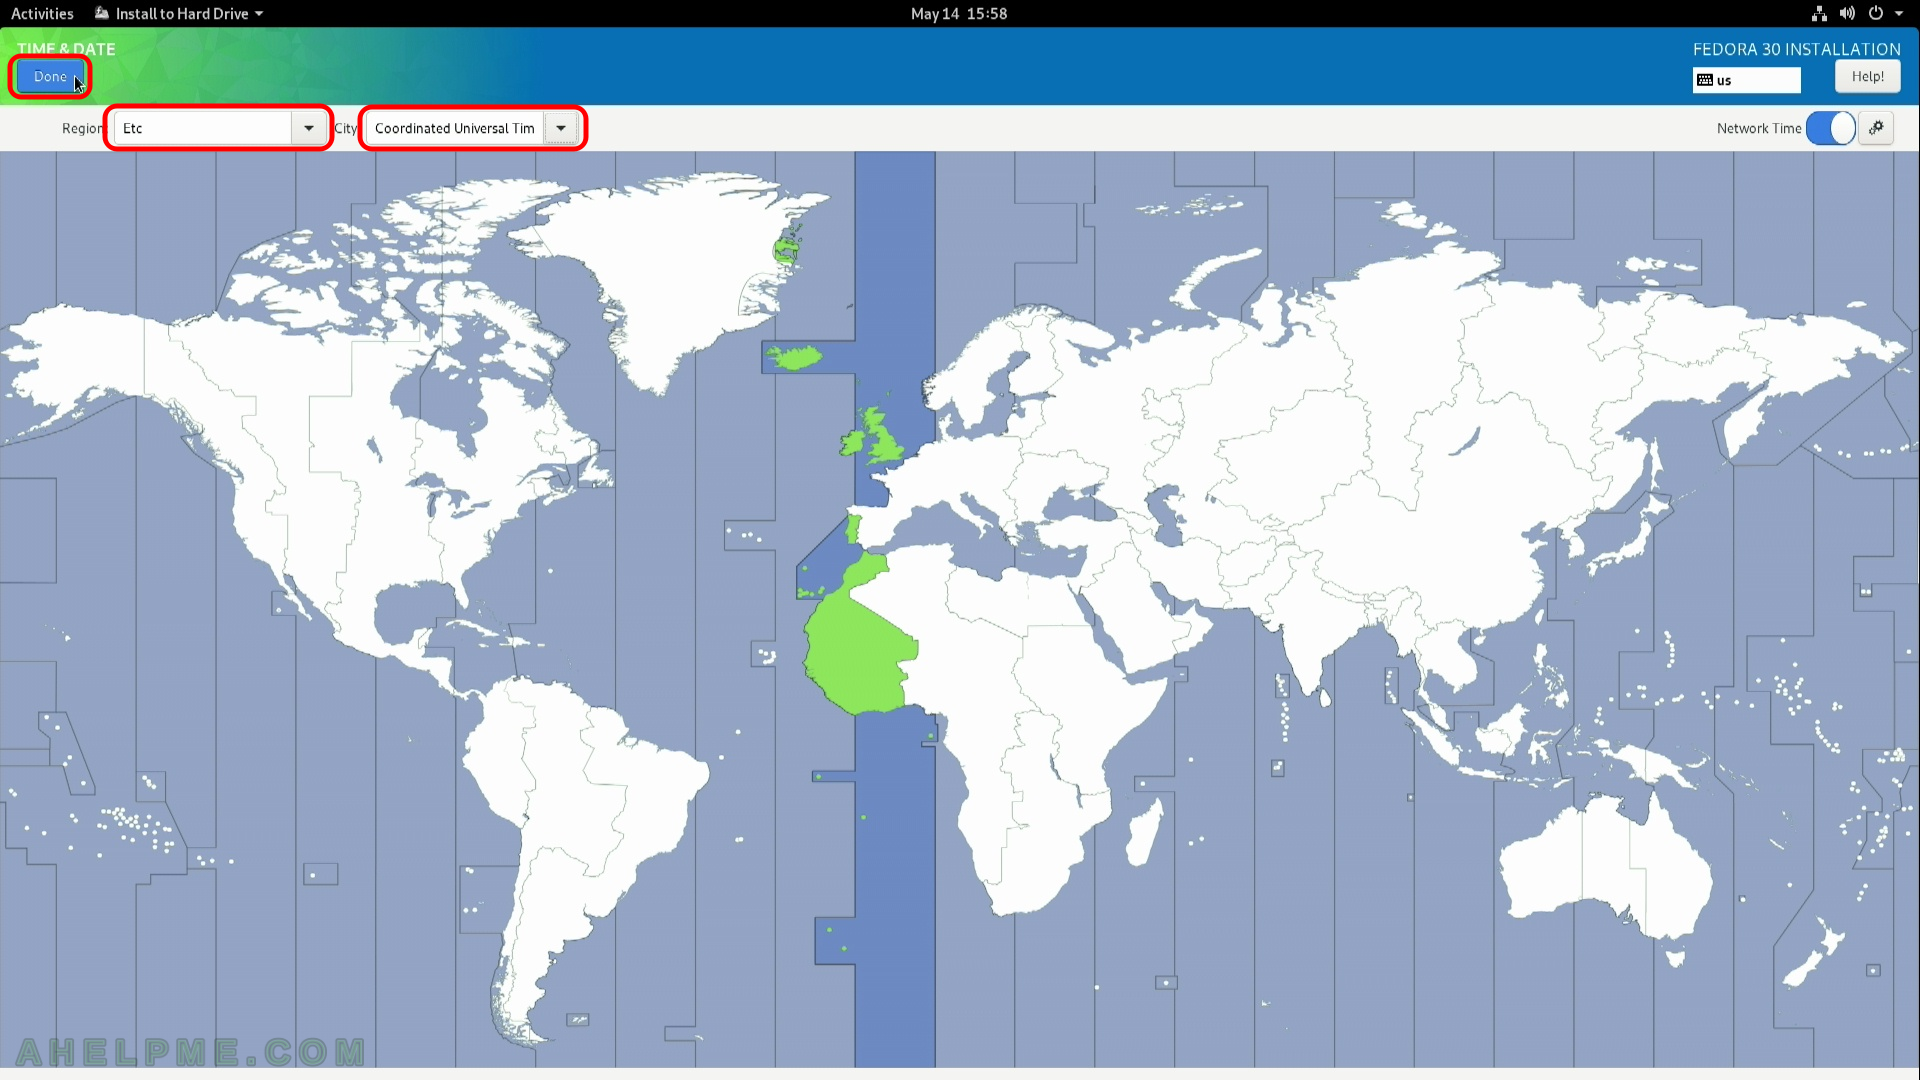
SCREENSHOT 7) Select your time zone – here we selected UTC (Universal Coordinated Time), but you can choose your time zone if it is not the right one by default.
You even may point with the mouse to your country on the map.
SCREENSHOT 8) Installation destination – on which device you want to install the Fedora 30 Workstation.
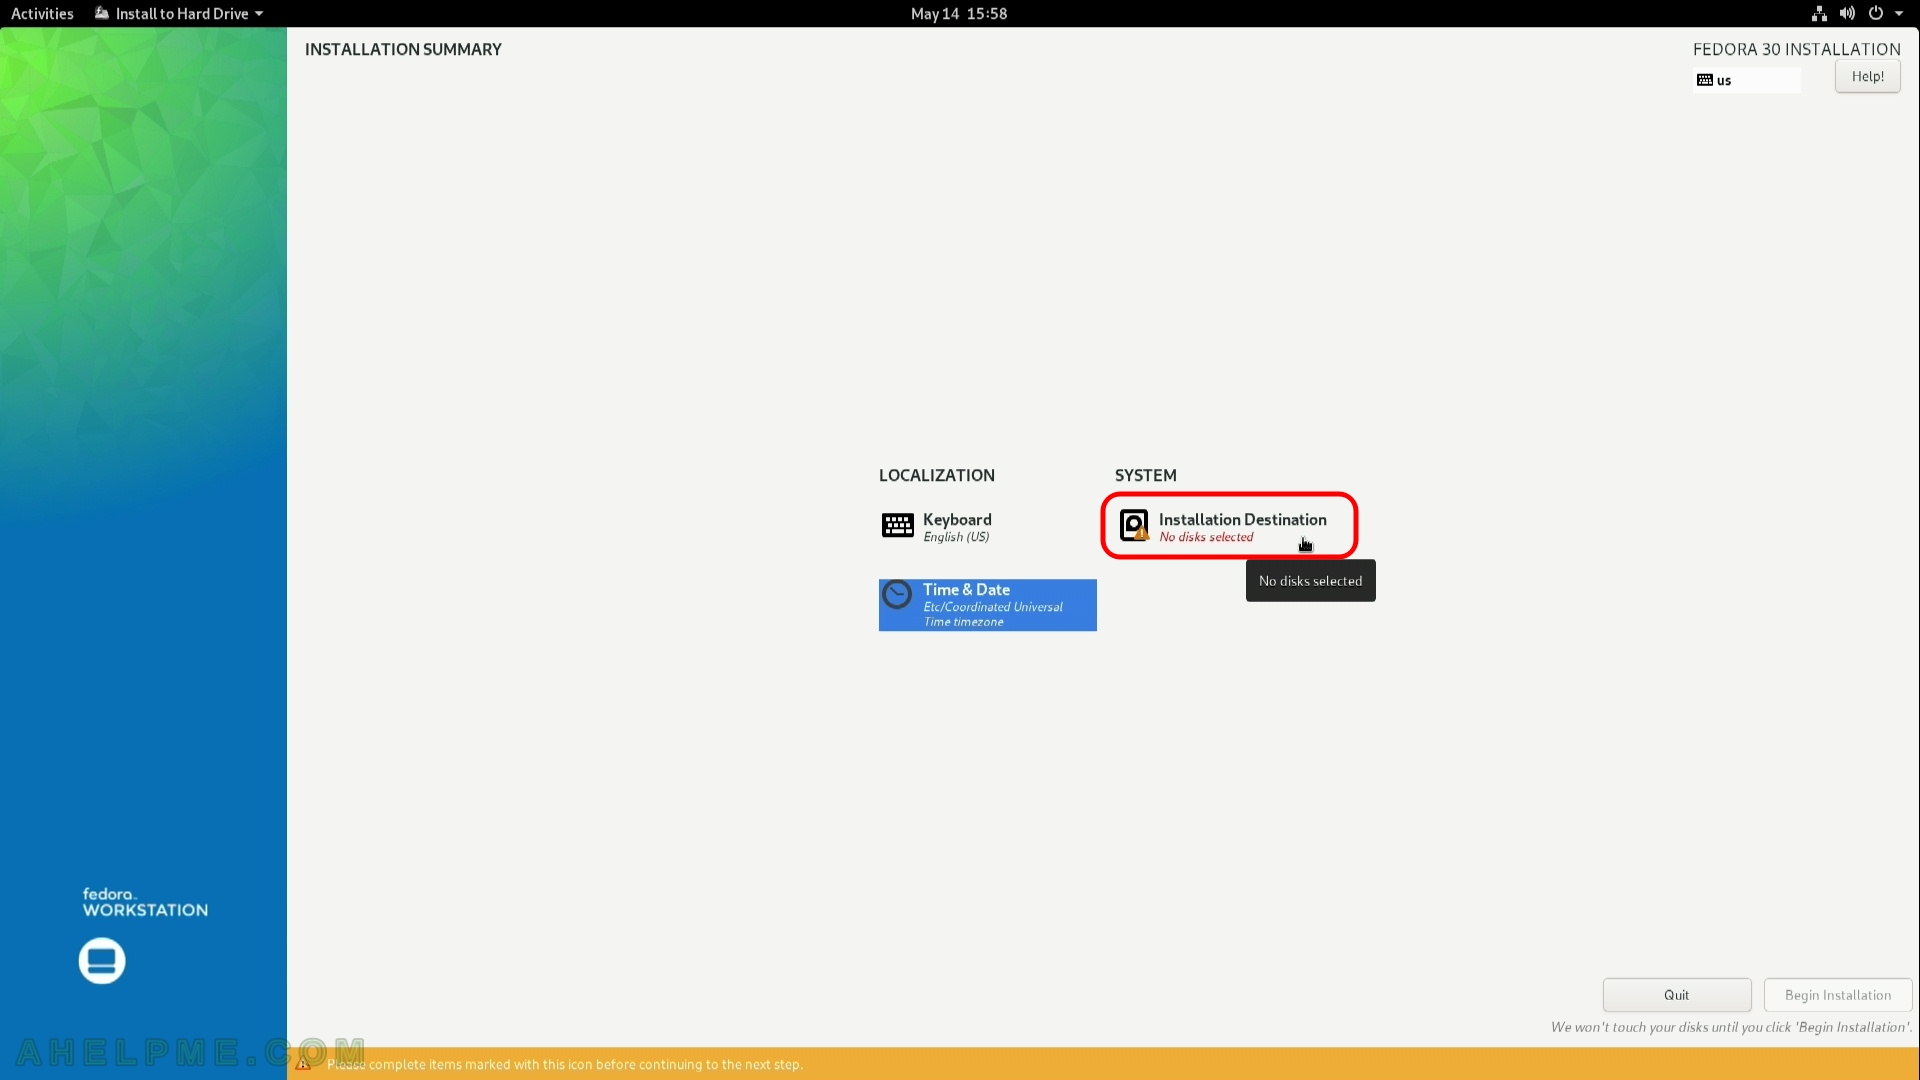
SCREENSHOT 9) Installation destination – choose your disk to install Fedora 30.
Ensure the automatic storage configuration is selected. This might erase all of the data on the disk and will install a clean copy with default disk layout. If you do not have enough space on the selected disk, the setup will ask you to erase the data on the disk (next few steps will show your the setup). If the disk is blank it will not ask you anything. If you want a specific installation you should choose “Custom” or “Advanced Custom(Blivet-GUI)” (these options are beoynd the scope of this article). Click on “Done” – no confirmation will be asked.

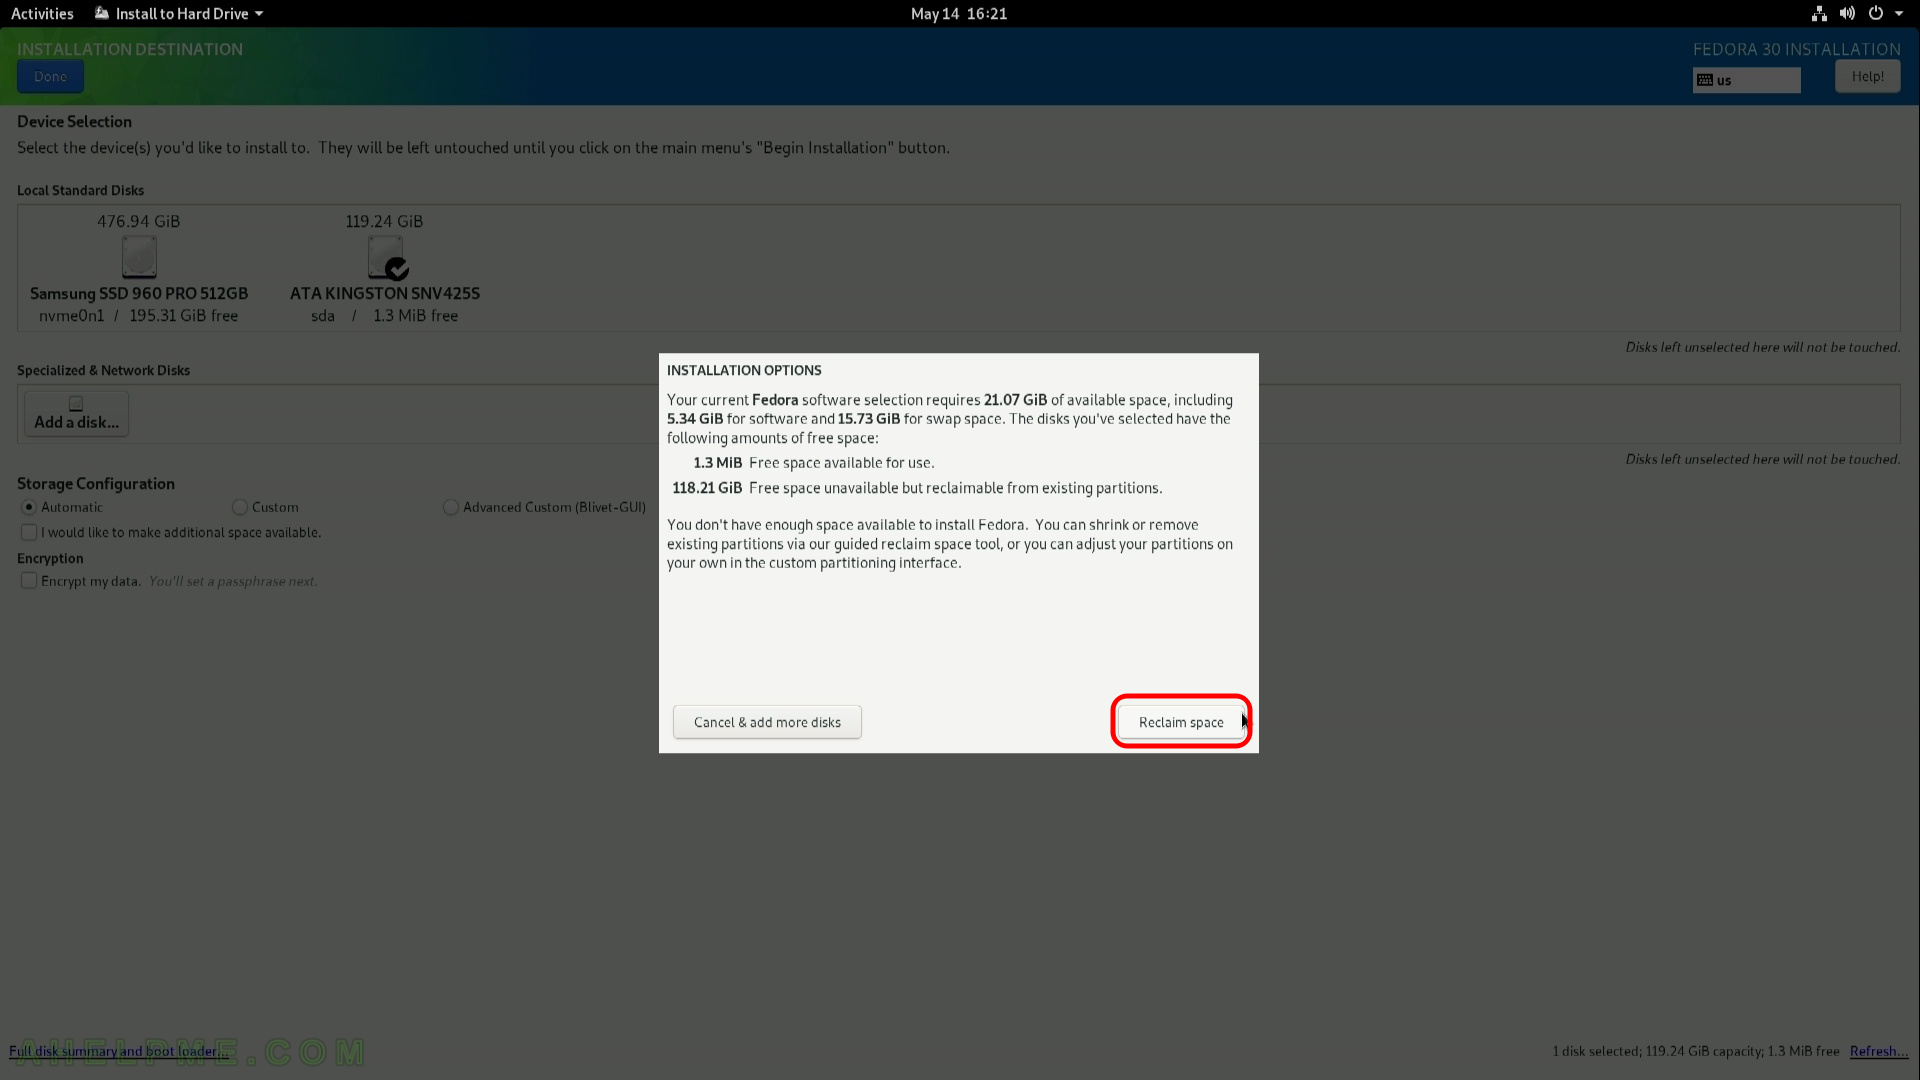
SCREENSHOT 10) Fedora 30 needs 21.07 GiB of available space on the selected disk at least!
If there is below the requested size of free (available disk) space the setup will offer you to free some space by removing existing data (partitions). If the selected disk is with important data and you do not know what you are doing, stop and don’t continue! If this hard drive is with no important data you may proceed by clickin on “Reclaim space”.