Moving existing Elasticsearch and Kibana installation from CentOS 7 to CentOS Stream 9

main menu
install Elasticsearch and Kibana

Despite having only two additional installed software under CentOS 7 it is not a good idea to just try upgrading only CentOS 7 to CentOS Stream 9. There is no clear and supported path for upgrading from CentOS 7 to CentOS Stream 9 and even to the older one CentOS 8 (or CentOS Stream 8). The best way is to just make a clean install of CentOS Stream 9 and copy all the Elasticsearch and Kibana files and this article is how to do it without problems.
Here is the plan to move the existing installation of Elasticsearch and Kibana services from CentOS 7 to CentOS Stream 9:

  1. Make a clean install of CentOS Stream 9
  2. Update the current Elasticsearch and Kibana installations to their last versions (from their branch or minor versions).
  3. Add Elasticsearch and Kibana repositories to the new system. Tune the system crypto policies.
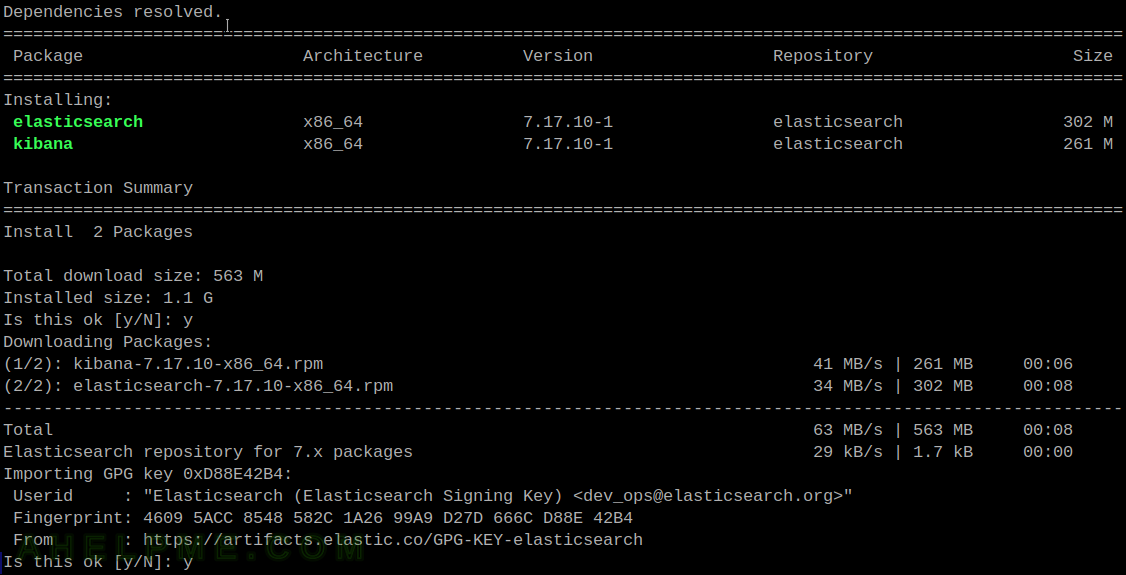
  4. Install Elasticsearch and Kibana software packages, but do not start the services.
  5. Copy Elasticsearch and Kibana important files such as the index directory and the configuration directories. Check the user and group IDs of the files.
  6. Start the Elasticsearch and Kibana services.

In this example, the installation of the new server is just starting a new LXC container, which will host the Elasticsearch and Kibana services. There is no difference between using a container or a physical machine. With LXC container it is easier to copy the needed files such as the Elasticsearch index files, which may be tens of terabytes or more, and various configuration files.

STEP 1) Make a clean install of CentOS Stream 9

Check out the following article on the purpose – Network installation of CentOS Stream 9 (20220606.0) – minimal server installation or if LXC container is preferred – Run LXC CentOS Stream 9 container with bridged network under CentOS Stream 9.

Creating a LXC container of CentOS Stream 9 is really simple and fast:

[root@srv ~]# lxc-create --template download -n kibana.u1x2.com -- --dist centos --release 9-Stream --arch amd64
The cached copy has expired, re-downloading...
Downloading the image index
Downloading the rootfs
Downloading the metadata
The image cache is now ready
Unpacking the rootfs

---
You just created a Centos 9-Stream x86_64 (20230511_19:27) container.

Then tune the network following the above article. It is a good idea when configuring the network to preserve the original UUIDs and network addresses (MAC address, too) of the LXC containers network and the inner container’s interface.
So copy the UUID from /var/lib/lxc/loganalyzer-old/rootfs/etc/sysconfig/network-scripts/ifcfg-eth0 to the CentOS Stream 9 network configuration – /var/lib/lxc/loganalyzer/rootfs/etc/NetworkManager/system-connections/ethernet-eth0.nmconnection, which uses NetworkManager. And the LXC container’s MAC address: the variable lxc.net.0.hwaddr from /var/lib/lxc/loganalyzer/config to /var/lib/lxc/loganalyzer/config.
The last step is to run the newly installed system. No errors in the output signals for a successful start-up of the LXC container with the name loganalyzer.

[root@srv ~]# lxc-start -n loganalyzer
[root@srv ~]# 

STEP 2) Upgrade the current Elasticsearch and Kibana installations to their last versions (from their branch or minor versions).

For example, if the current Elasticsearch is version 7. It is good to upgrade it to the latest version from 7.x before proceeding with the next steps.
The current installed versions of Elasticsearch and Kibana software are from the branch 77.17.4-1 and the latest version is 7.17.10-1.
Check in the old system with (CentOS 7):

[root@loganalyzer-old ~]# yum list installed|egrep -e "(elasticsearch|kibana)"
elasticsearch.x86_64               7.17.4-1                               @elasticsearch
kibana.x86_64                      7.17.4-1                               @elasticsearch

Keep on reading!

Review of freshly installed CentOS Stream 9 Workstation (Gnome GUI)

After the tutorial of Install CentOS Stream 9 Workstation (Gnome GUI) this tutorial is mainly to see what to expect from a freshly installed CentOS Stream 9 Workstation installation – the look and feel of the GUI (Gnome – version 40).

  • Xorg X server – 1.20.11
  • GNOME (the GUI) – 40.4.0
  • linux kernel – 5.14.0

More technical details are available for the server installation, which is not different from the workstation but the GUI (Gnome) installed – Software and technical details of CentOS Stream 9 minimal install. The later article may be of interest to developers, too. The CentOS Stream 9 Workstation install may install all of the listed software for CentOS Stream 9 Server.
The idea of this tutorial is just to see what to expect from CentOS Stream 9 Workstation (Gnome)the look and feel of the GUI, the default installed programs and their look and how to do some basic steps with them. Here the reader finds more than 125 screenshots and not so many text the main idea is not to distract the user with much text and version information and 3 meaningless screenshot, which the reader cannot see anything for the user interface, but these days the user interface is the primary goal of a Desktop system. More reviews of the kind will follow in the future …

CentOS is a pretty stable Linux Distribution System, which follows the paid Red Hat enterprise RHEL 9. And if the user really just wants a stable OS with a GUI for the next let’s say 5-10 years with support and fast security updates the CentOS Stream 9 might be perfect for it! Developing on this platform should be easy, too, because it supports all kind of virtualization and despite it may not include the bleeding edge libraries and software, it is easy enough to install latest software in a full or para virtualization or a container!

For all installation and review articles real workstations are used, not virtual environments!

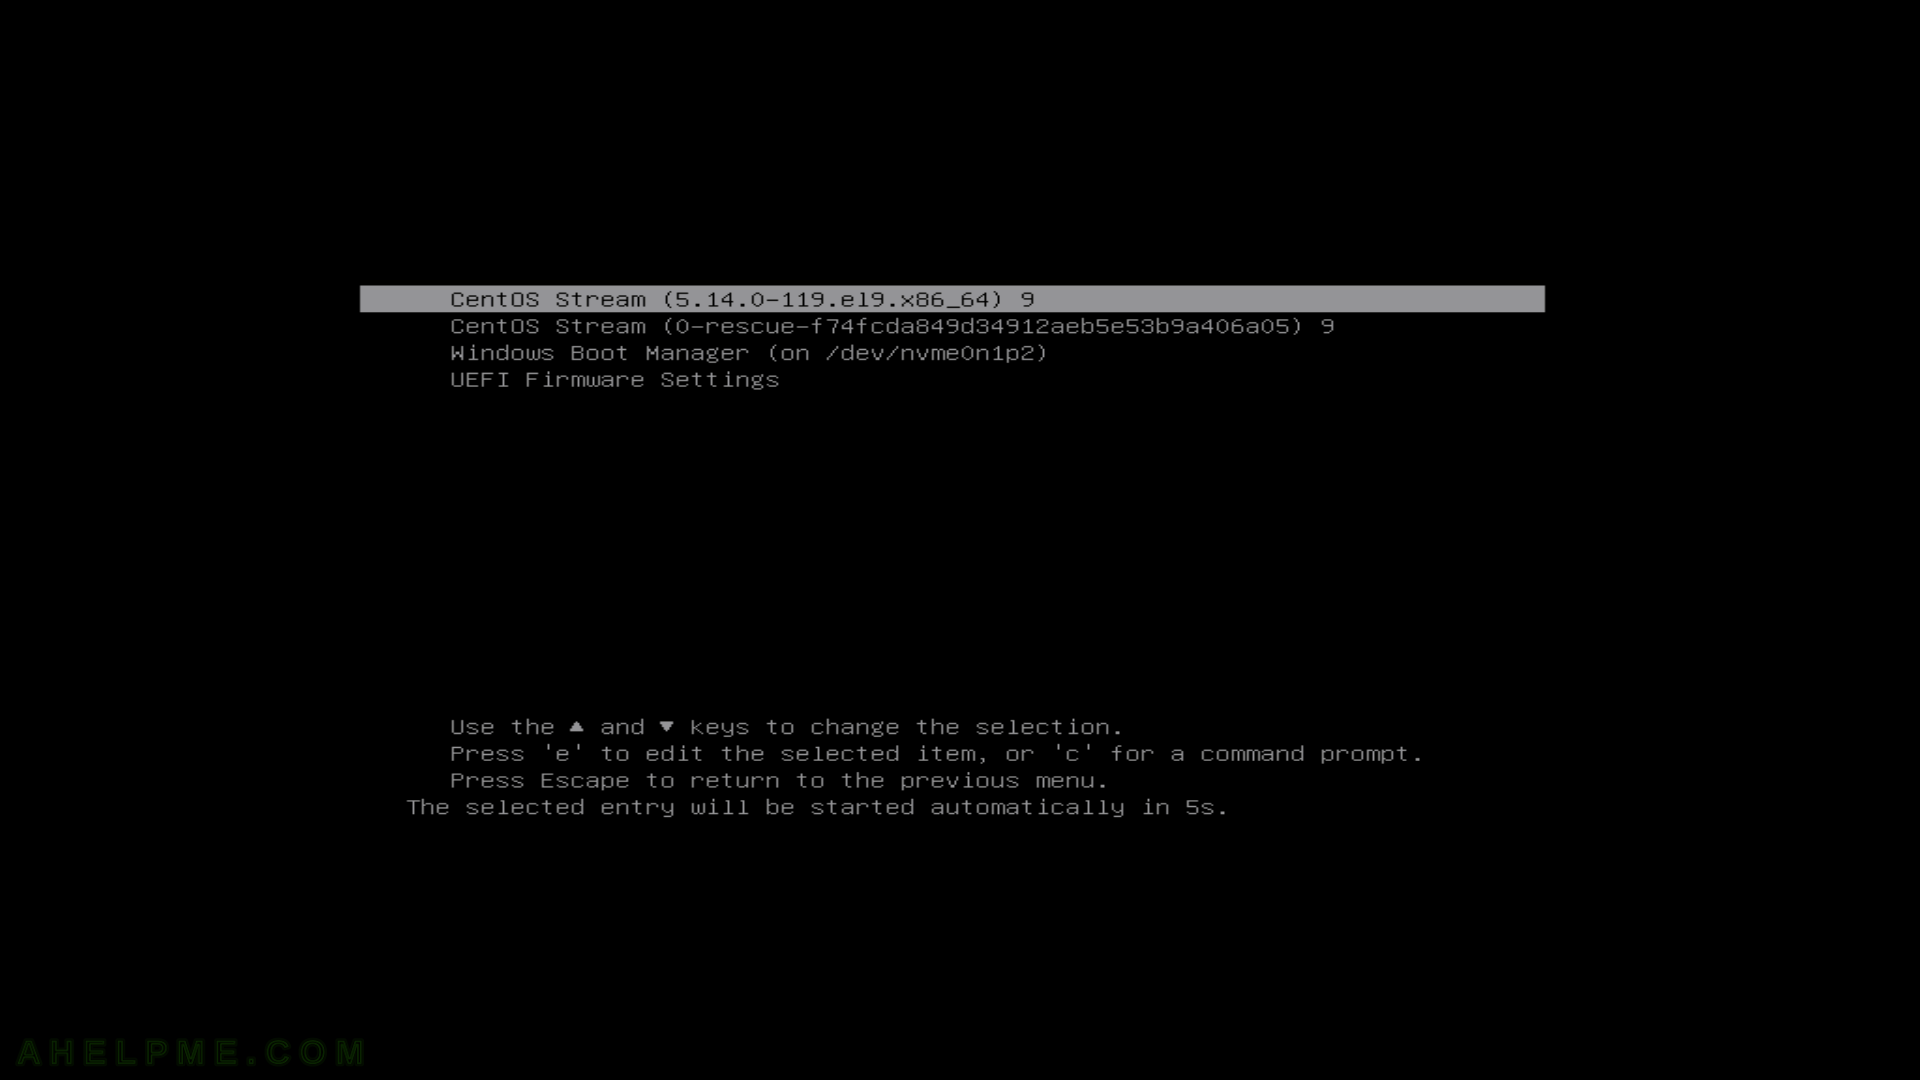
SCREENSHOT 1) Fedora Linux (5.14.0-119.el9.x86_64) 9

main menu
grub 2.06 entry boot

Keep on reading!

Install CentOS Stream 9 Workstation (Gnome GUI)

This is the latest CentOS version with a graphical interface Gnome for a workstation. If you are a developer or just a Linux user, which want to have a pretty stable Operating System, the CentOS Stream 9 may be an option for you. CentOS Stream 9 is based and follows the RedHat Enterprise Linux 9 – paid Linux for the enterprise world, which is available for free thanks to the Open-source Software. CentOS Stream 9 will receive all the updates from the paid Linux system RHEL 9 and the support will be 10 years from now. 5 years of full support and 5 more years of security updates. The use of CentOS Stream 9 assures the user to have a stable and secure Linux operating system, which will not bring fundamental changes and breaks things periodically as of a more enthusiastic Linux Distributions. More information for the system here – Software and technical details of CentOS Stream 9 minimal install and Software comparison Ubuntu server 22.04 LTS vs CentOS Stream 9 head-to-head
The CentOS Stream 9 has a generic installation wizard for multiple type of installations – server, server with gui, user workstation and so on. This article is to show what options to enable to install a user workstation with CentOS Stream 9 with a graphical interface – Gnome. Most of the people think CentOS as a server Linux Distribution, but in fact, it is ideal for a workstation, too, especially with the grade of stability and security these days.
This article uses network installation with the following media: http://mirror.stream.centos.org/9-stream/BaseOS/x86_64/iso/CentOS-Stream-9-latest-x86_64-boot.iso which always points to the latest release of the CentOS Stream 9. The network installation will choose automatically the best mirror to download the packages for the system. There is an option to use an off-line installation with an 8G ISO disk. Check out for more ISOs here – http://mirror.stream.centos.org/9-stream/BaseOS/x86_64/iso/

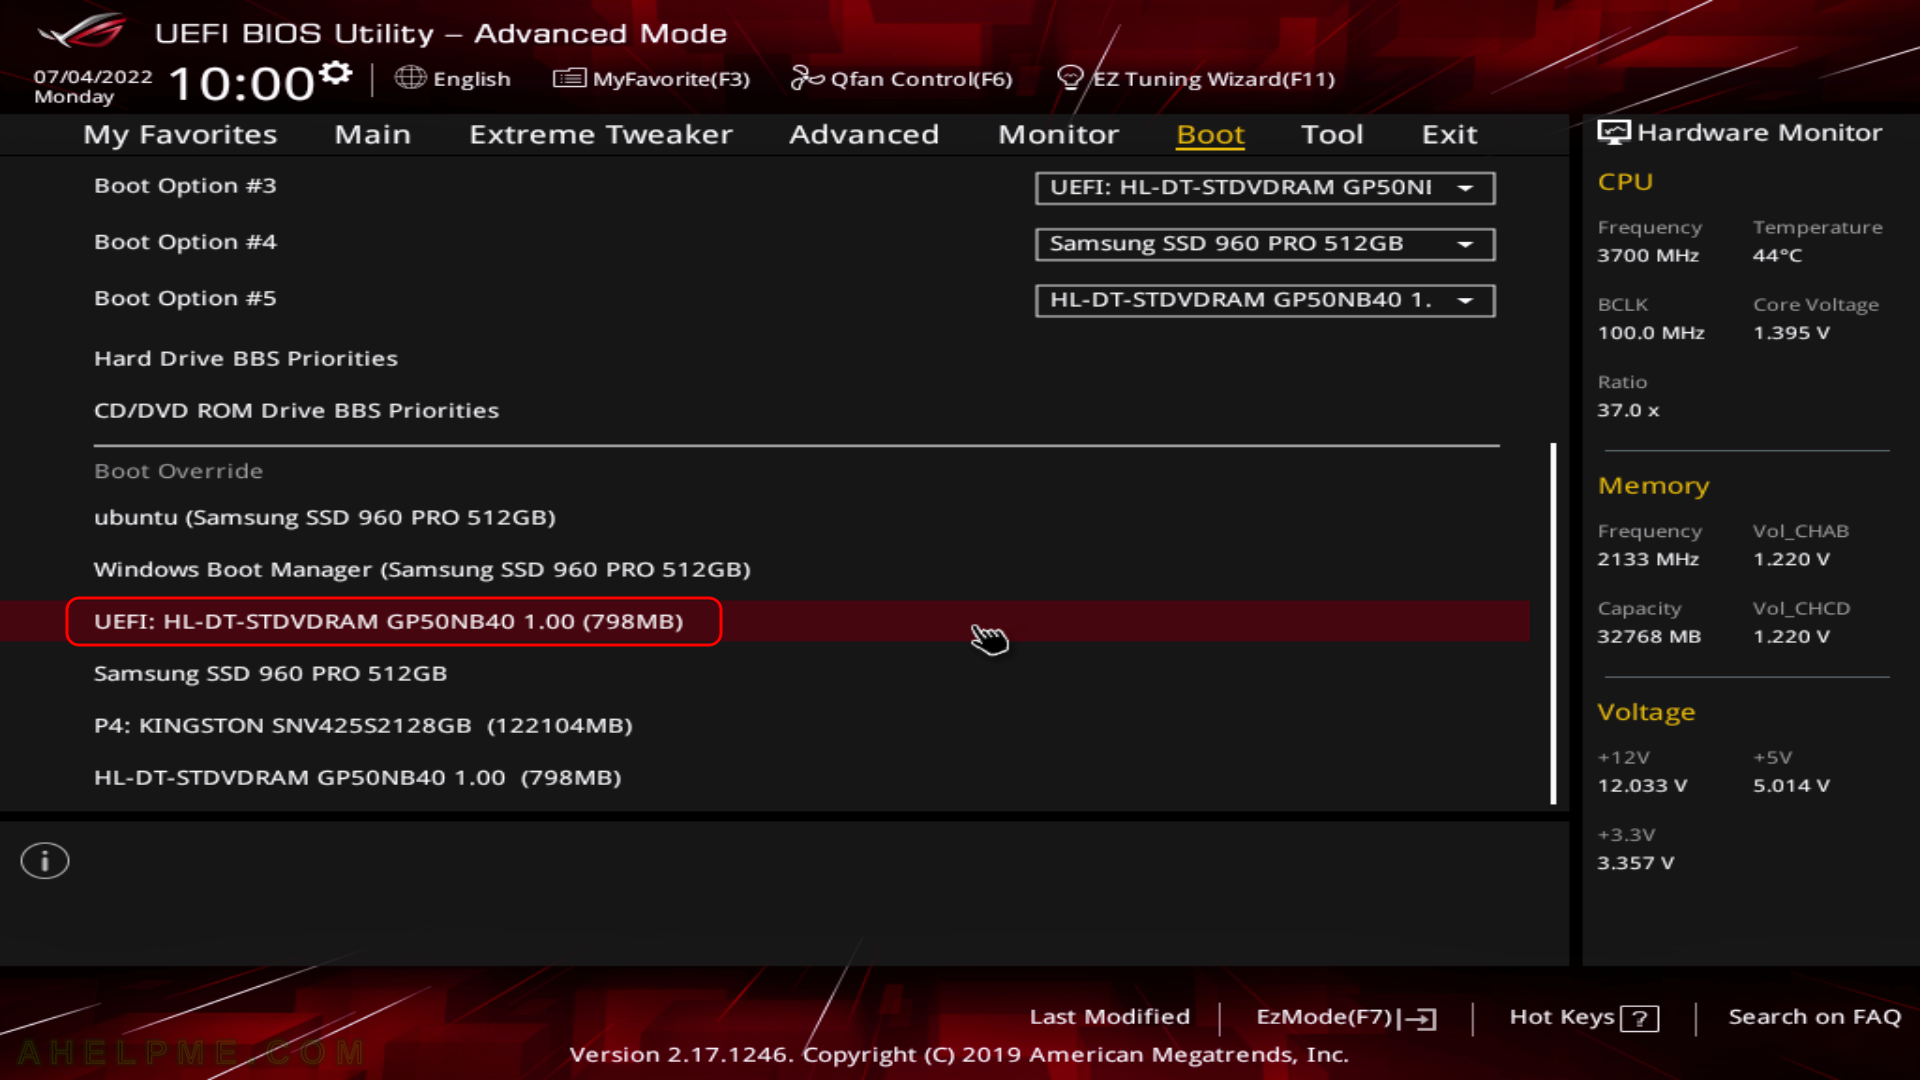
SCREENSHOT 1) Boot from the UEFI DVD-ROM device.

It is the same with the USB bootable removable drive. Choose the UEFI USB drive and boot the installation live drive.

main menu
UEFI BIOS DVD-ROM boot

Keep on reading!

Install and use collectd under CentOS Stream 9 using OpsTools

collectd is a daemon, which collects system data and statistics and it may send them over the network to a back-end data. Under CentOS Stream 9 the collectd package has been removed from the CentOS Stream 9 repositories. Special Interest Groups (SIG), which is a group of CentOS Community, provides and supports multiple small repositories for different Linux utilities and tools. One of the SIG‘s repositories is OpsTools, which provides a package for collectd daemon and multiple collectd modules packed in separate packages.

To use collectd under CentOS Stream 9 a CentOS Community repository should be installed – OpsTools.

Steps to install and use the collectd daemon:

dnf install -y centos-release-opstools
dnf install -y collectd

It’s worth noting that all the Linux distribution, which tries to track and be compatible with Red Hat Enterprise Linux like Rocky Linux will have the same problem with missing collectd package. So the SIG OpsTools repository should be also possible to install under all of these Linux distributions.

Here is the output of installing the above packages under CentOS Stream 9:

[root@srv ~]# dnf install -y centos-release-opstools
Last metadata expiration check: 0:00:23 ago on Wed 22 Jun 2022 02:05:19 PM UTC.
Dependencies resolved.
======================================================================================
 Package                       Architecture Version         Repository           Size
======================================================================================
Installing:
 centos-release-opstools       noarch       1-12.el9s       extras-common       8.4 k

Transaction Summary
======================================================================================
Install  1 Package

Total download size: 8.4 k
Installed size: 1.7 k
Downloading Packages:
centos-release-opstools-1-12.el9s.noarch.rpm           62 kB/s | 8.4 kB     00:00    
--------------------------------------------------------------------------------------
Total                                                  22 kB/s | 8.4 kB     00:00     
Running transaction check
Transaction check succeeded.
Running transaction test
Transaction test succeeded.
Running transaction
  Preparing        :                                                              1/1 
  Installing       : centos-release-opstools-1-12.el9s.noarch                     1/1 
  Verifying        : centos-release-opstools-1-12.el9s.noarch                     1/1 

Installed:
  centos-release-opstools-1-12.el9s.noarch                                            

Complete!
[root@srv ~]# dnf install -y collectd
CentOS Stream 9 - OpsTools - collectd                  12 kB/s |  41 kB     00:03    
Dependencies resolved.
======================================================================================
 Package          Architecture   Version                Repository               Size
======================================================================================
Installing:
 collectd         x86_64         5.12.0-7.el9s          centos-opstools         673 k
Installing dependencies:
 yajl             x86_64         2.1.0-20.el9           appstream                38 k

Transaction Summary
======================================================================================
Install  2 Packages

Total download size: 711 k
Installed size: 2.2 M
Downloading Packages:
(1/2): yajl-2.1.0-20.el9.x86_64.rpm                   179 kB/s |  38 kB     00:00    
(2/2): collectd-5.12.0-7.el9s.x86_64.rpm              1.1 MB/s | 673 kB     00:00    
--------------------------------------------------------------------------------------
Total                                                 594 kB/s | 711 kB     00:01     
CentOS Stream 9 - OpsTools - collectd                 1.0 MB/s | 1.0 kB     00:00    
Importing GPG key 0x51BC2A13:
 Userid     : "CentOS OpsTools SIG (https://wiki.centos.org/SpecialInterestGroup/OpsTools) <security@centos.org>"
 Fingerprint: 7872 8176 9AD7 3878 85EE A649 4FD9 5327 51BC 2A13
 From       : /etc/pki/rpm-gpg/RPM-GPG-KEY-CentOS-SIG-OpsTools
Key imported successfully
Running transaction check
Transaction check succeeded.
Running transaction test
Transaction test succeeded.
Running transaction
  Preparing        :                                                              1/1 
  Installing       : yajl-2.1.0-20.el9.x86_64                                     1/2 
  Installing       : collectd-5.12.0-7.el9s.x86_64                                2/2 
  Running scriptlet: collectd-5.12.0-7.el9s.x86_64                                2/2 
  Verifying        : collectd-5.12.0-7.el9s.x86_64                                1/2 
  Verifying        : yajl-2.1.0-20.el9.x86_64                                     2/2 

Installed:
  collectd-5.12.0-7.el9s.x86_64                yajl-2.1.0-20.el9.x86_64               

Complete!

collectd default configuration

The default configuration comments all the lines in /etc/collectd.conf except one, which includes all the files under /etc/collectd.d/. So the logic is to have a separate file for each collectd plugin. By default, there are 5 default configuration files activating 5 plugins:
Keep on reading!

Software comparison Ubuntu server 22.04 LTS vs CentOS Stream 9 head-to-head

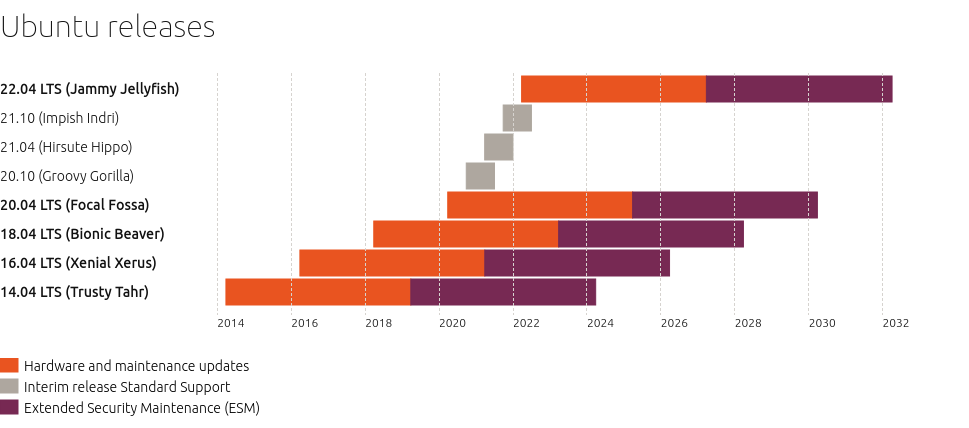
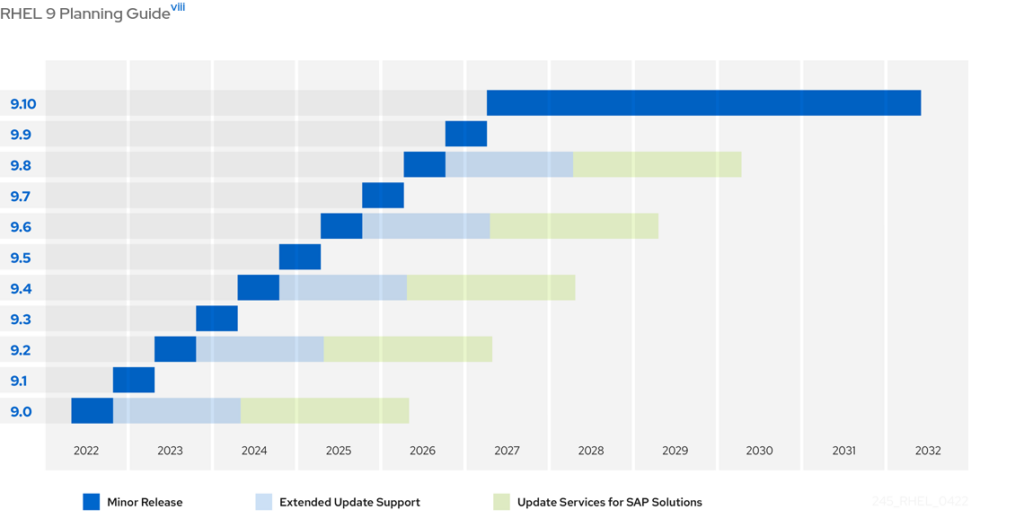
The following article compares two different and very popular for servers Linux distros with Ubuntu Server 22.04 LTS (Jammy) and CentOS Stream 9. These are the latest versions released in the past month. Bear in mind, that they have different release cycle, but the these are the system with log support up to 2032! The two Linux distors Ubuntu Server 22.04 LTS (Jammy) and CentOS Stream 9 support is till 2032! Here is the links to their life cycle and what kind of support could be expected in the time frame of 10 years:

In the Desktop world upgrading to the new and latest version of a Linux distribution is almost mandatory, but in the server world, upgrading is more complicated. The first step in updating a server is to check what software versions come with the new distribution version and then check whether the running custom (application) software supports the software versions. For example, updating to a new distribution version, which comes with PHP 8.1, but the current application supports only 7.4 is not very wise and in addition, the current version may have years of support in the future.

Lately, with the virtualization and container software and it is more common to choose a long-living Linux distribution for the host and more short-living with bleeding edge technologies for the guest environments. So check out the Fedora 36 Server Edition articles in the site – Minimal network installation of Fedora 36 Server, Software and technical details of Fedora Server 36 including cockpit screenshots and the comparison software table between Ubuntu 22.04 LTS and Fedora 36 Server EditionSoftware comparison Ubuntu server 22.04 LTS vs Fedora 36 server edition – head-to-head.

Software comparison table – Ubuntu 22.06 LTS vs CentOS Stream 9 (20220606.0) as of June 2022:

SoftwareUbuntu 22.04CentOS Stream 9
Support10 years (April 2032)10 years (31.03.2032)
Linux kernel5.15.05.14.0
libc2.352.34
OpenSSL.
3.0.2
1.1.1k
3.0.1
GNU GCC9.4.0
10.3.0
11.2.0
12-20220302
.
.
11.3.1
.
PHP8.18.0.13
Python2.7.18
3.10.4
.
3.9.10
Perl5.34.05.32.1
Ruby3.03.0.3
OpenJDK8u312-b07
11.0.15
17.0.3
18~36ea-1
1.8.0.332.b09
11.0.15.0.10
17.0.3.0.7
.
Go lang1.13.8
1.17.3
1.18.1
.
1.17.5
.
Rust1.58.11.61.0
llvm11.1.0
12.0.1
13.0.1
14.0.0
.
.
.
14.0.0
nodejs12.22.9
.
.
16.14.0
Subversion1.14.11.14.1
Git2.34.12.31.1
Apache2.4.522.4.53
Nginx1.18.01.20.1
MySQL server8.0.298.0.28
MariaDB10.6.710.5.13
PostgreSQL14.213.7
SQLite2.8.17
3.37.2
.
3.34.1
Xorg X server1.22.1.11.20.11
Gnome Shell42.040.10
qemu6.27.0.0
docker|podman20.10.124.1.0
lxc5.0.0.

For more detailed overview the two systems check out the following articles – Software and technical overview of Ubuntu server 22.04 LTS and Software and technical details of CentOS Stream 9 minimal install.

Copy of the Life cycle plans of Ubuntu server 22.04 and CentOS Stream 9 (Red Hat Enterprise Linux 9) of the official sources only for time-freeze feature:

Ubuntu 22.04 LTS
CentOS Stream 9 (RHEL 9)