This is the latest CentOS version with a graphical interface Gnome for a workstation. If you are a developer or just a Linux user, which want to have a pretty stable Operating System, the CentOS Stream 9 may be an option for you. CentOS Stream 9 is based and follows the RedHat Enterprise Linux 9 – paid Linux for the enterprise world, which is available for free thanks to the Open-source Software. CentOS Stream 9 will receive all the updates from the paid Linux system RHEL 9 and the support will be 10 years from now. 5 years of full support and 5 more years of security updates. The use of CentOS Stream 9 assures the user to have a stable and secure Linux operating system, which will not bring fundamental changes and breaks things periodically as of a more enthusiastic Linux Distributions. More information for the system here – Software and technical details of CentOS Stream 9 minimal install and Software comparison Ubuntu server 22.04 LTS vs CentOS Stream 9 head-to-head
The CentOS Stream 9 has a generic installation wizard for multiple type of installations – server, server with gui, user workstation and so on. This article is to show what options to enable to install a user workstation with CentOS Stream 9 with a graphical interface – Gnome. Most of the people think CentOS as a server Linux Distribution, but in fact, it is ideal for a workstation, too, especially with the grade of stability and security these days.
This article uses network installation with the following media: http://mirror.stream.centos.org/9-stream/BaseOS/x86_64/iso/CentOS-Stream-9-latest-x86_64-boot.iso which always points to the latest release of the CentOS Stream 9. The network installation will choose automatically the best mirror to download the packages for the system. There is an option to use an off-line installation with an 8G ISO disk. Check out for more ISOs here – http://mirror.stream.centos.org/9-stream/BaseOS/x86_64/iso/
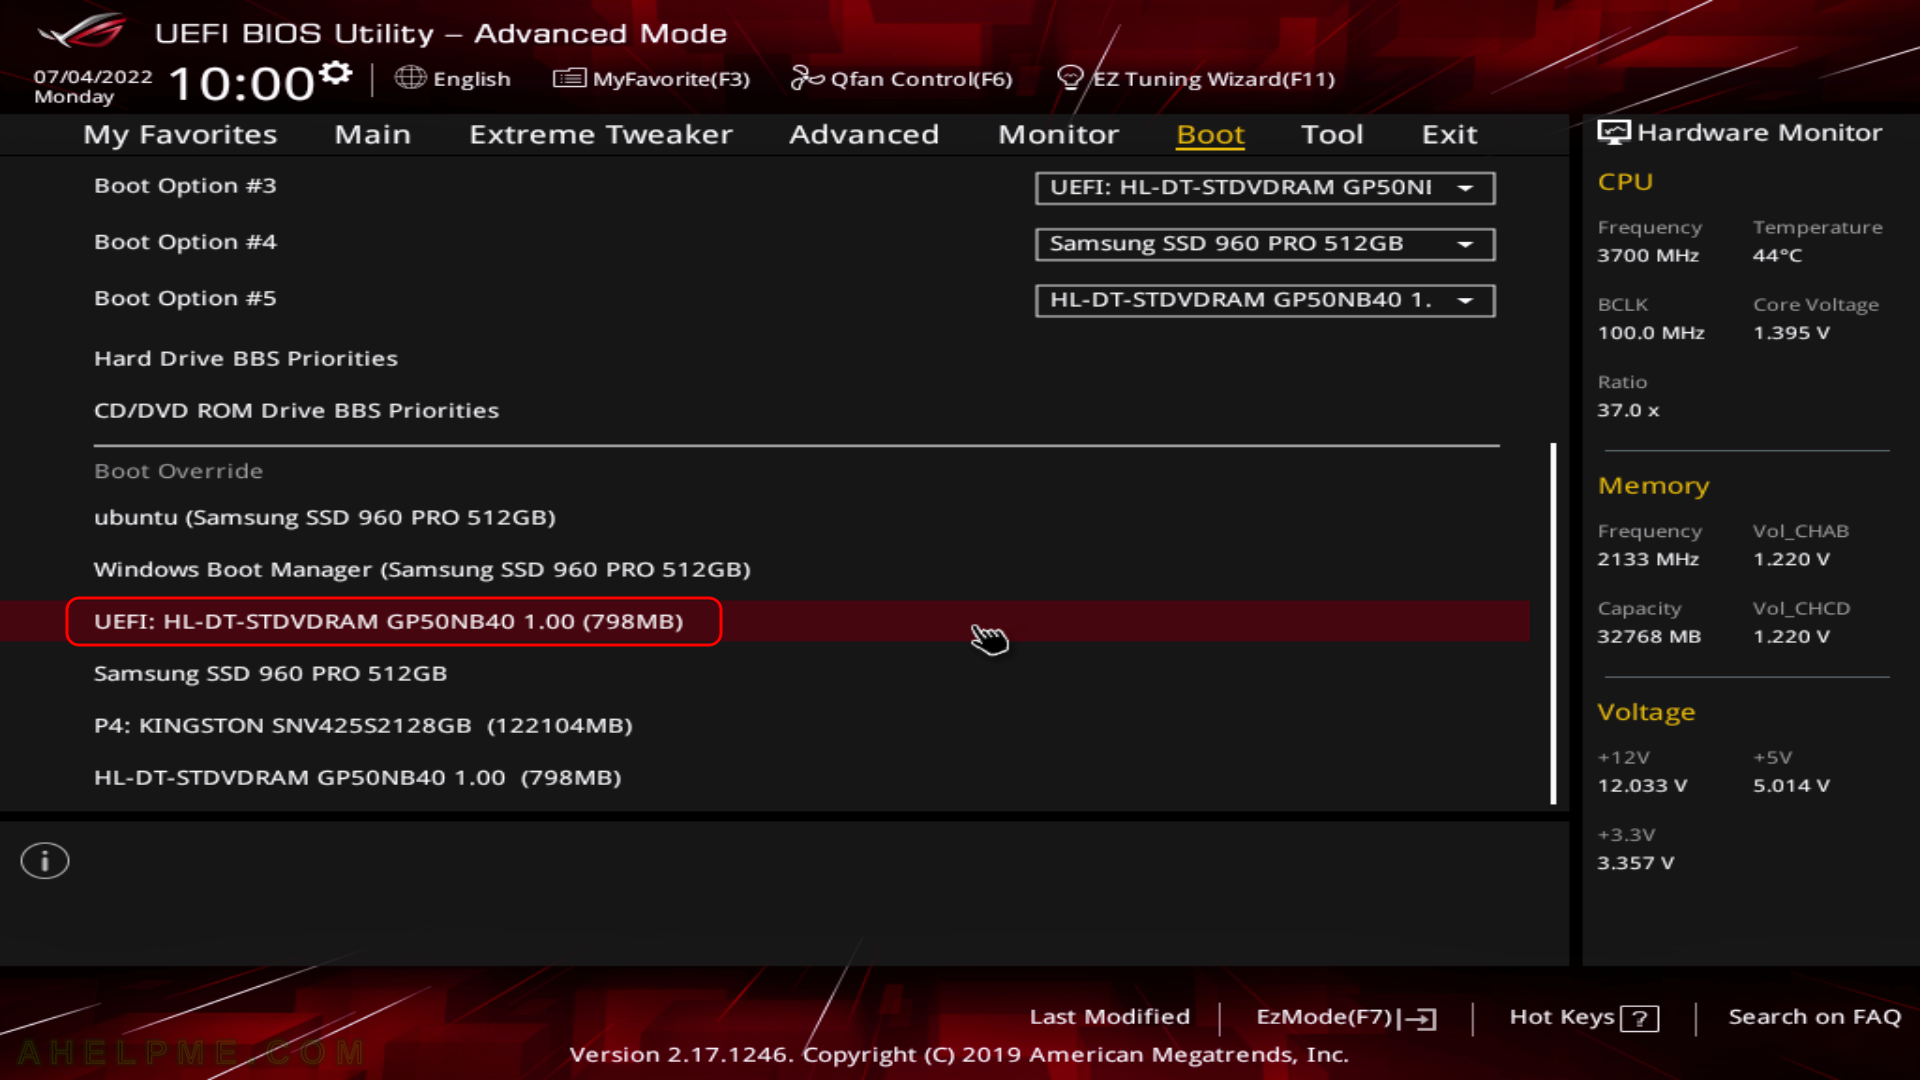
SCREENSHOT 1) Boot from the UEFI DVD-ROM device.
It is the same with the USB bootable removable drive. Choose the UEFI USB drive and boot the installation live drive.
SCREENSHOT 2) If you booted from the DVD you would get this first screen – select “Install CentOS Stream 9” and hit Enter

SCREENSHOT 3) The kernel and the live system are loading…

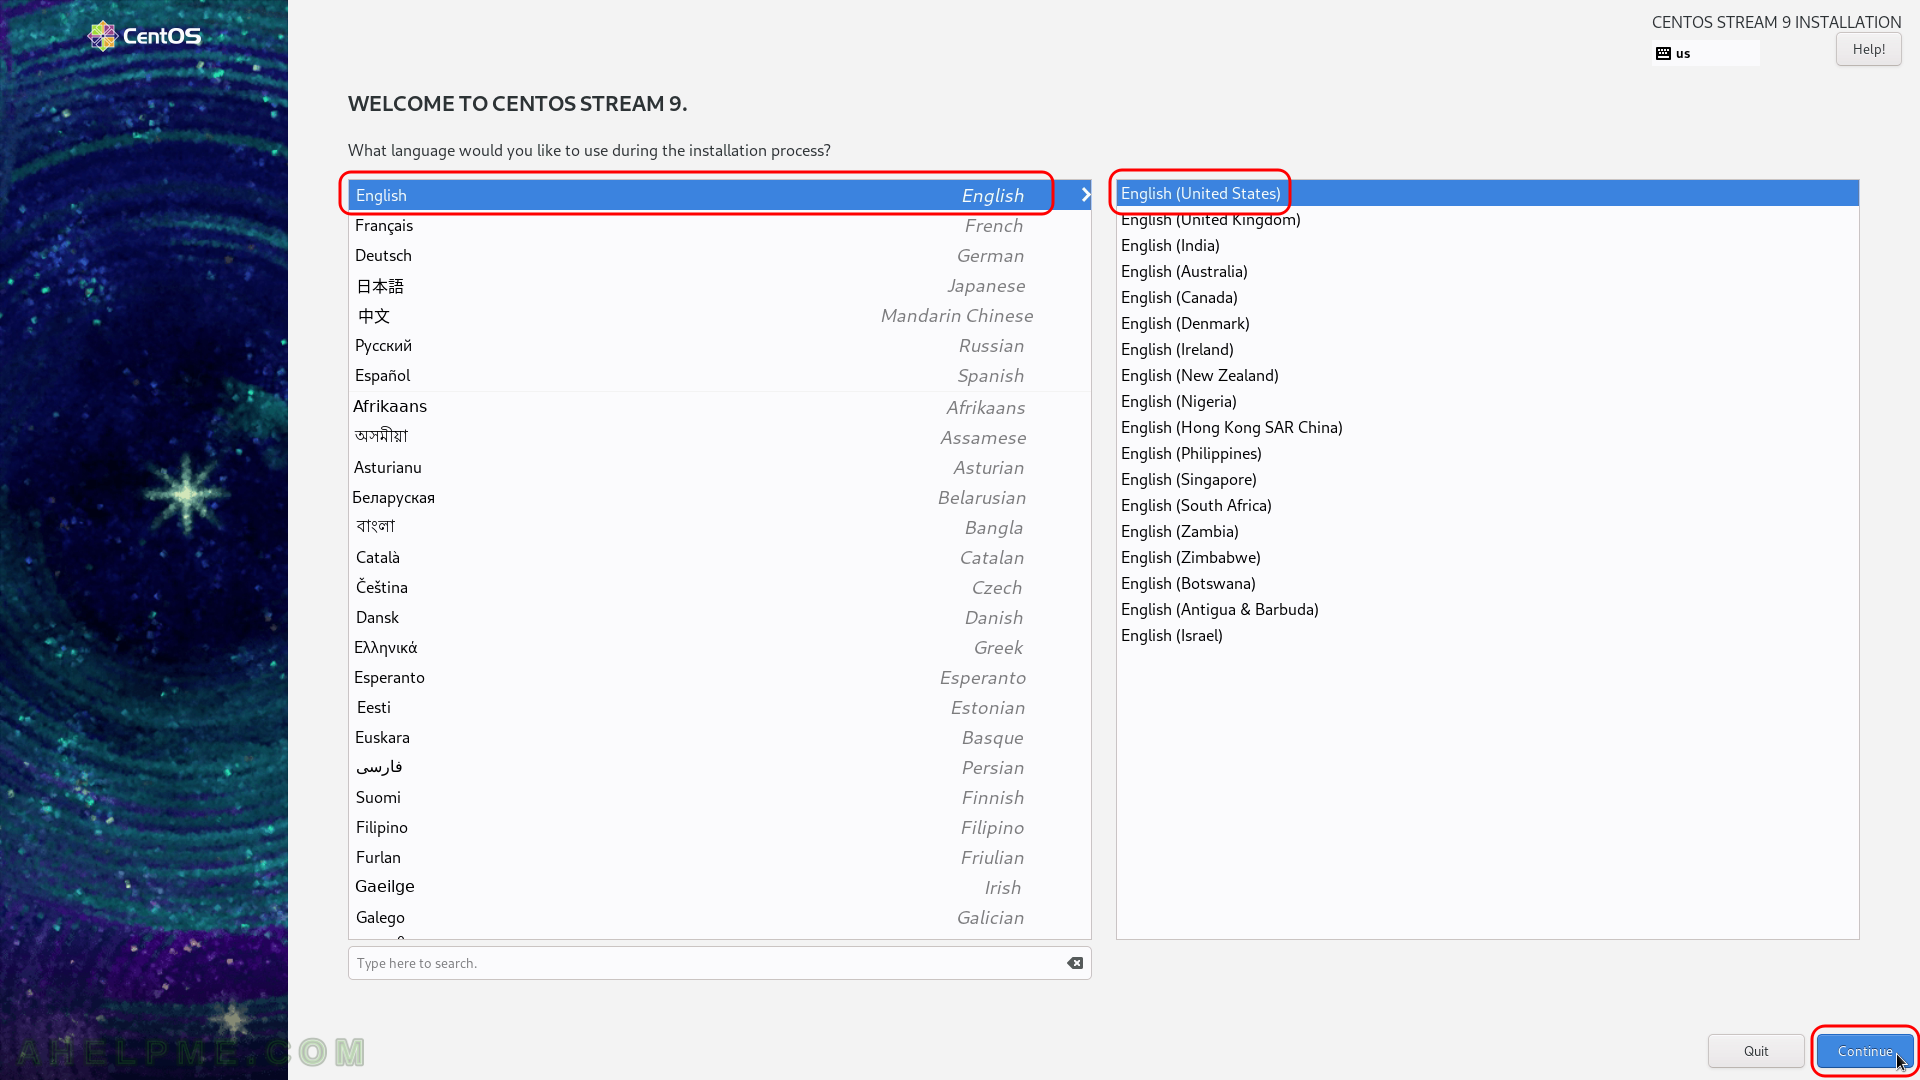
SCREENSHOT 4) Choose your system language. Here we selected the English.
The setup will guide you through the steps in the language you select here and the installed system will use the selected language as default.
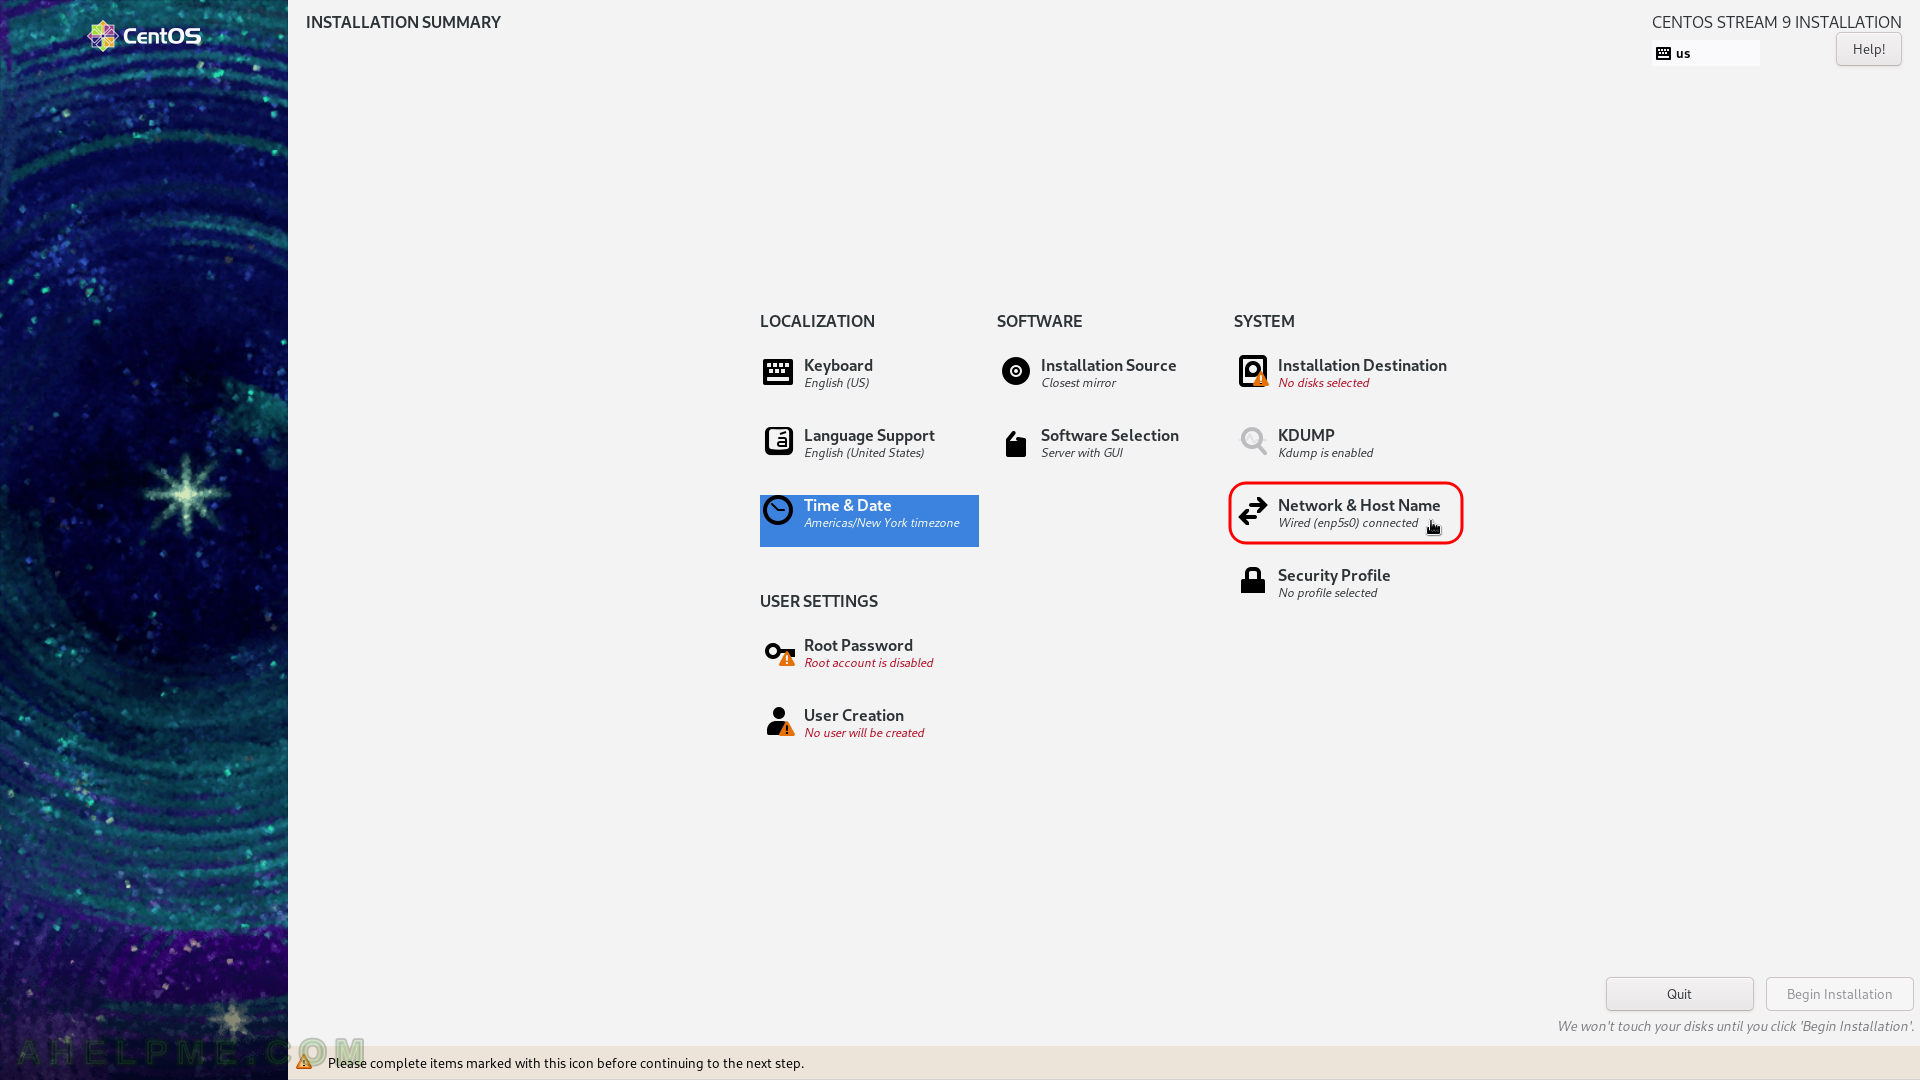
SCREENSHOT 5) Select time and date menu to set the time and date and the time zone of the system, which is very important.
Click on “Time & Date”.

SCREENSHOT 6) Select your time zone – here we selected New York time, but you can choose your time zone if it is not the right one by default.
You even may point with the mouse to your country on the map. Click on “Done” when you are ready.

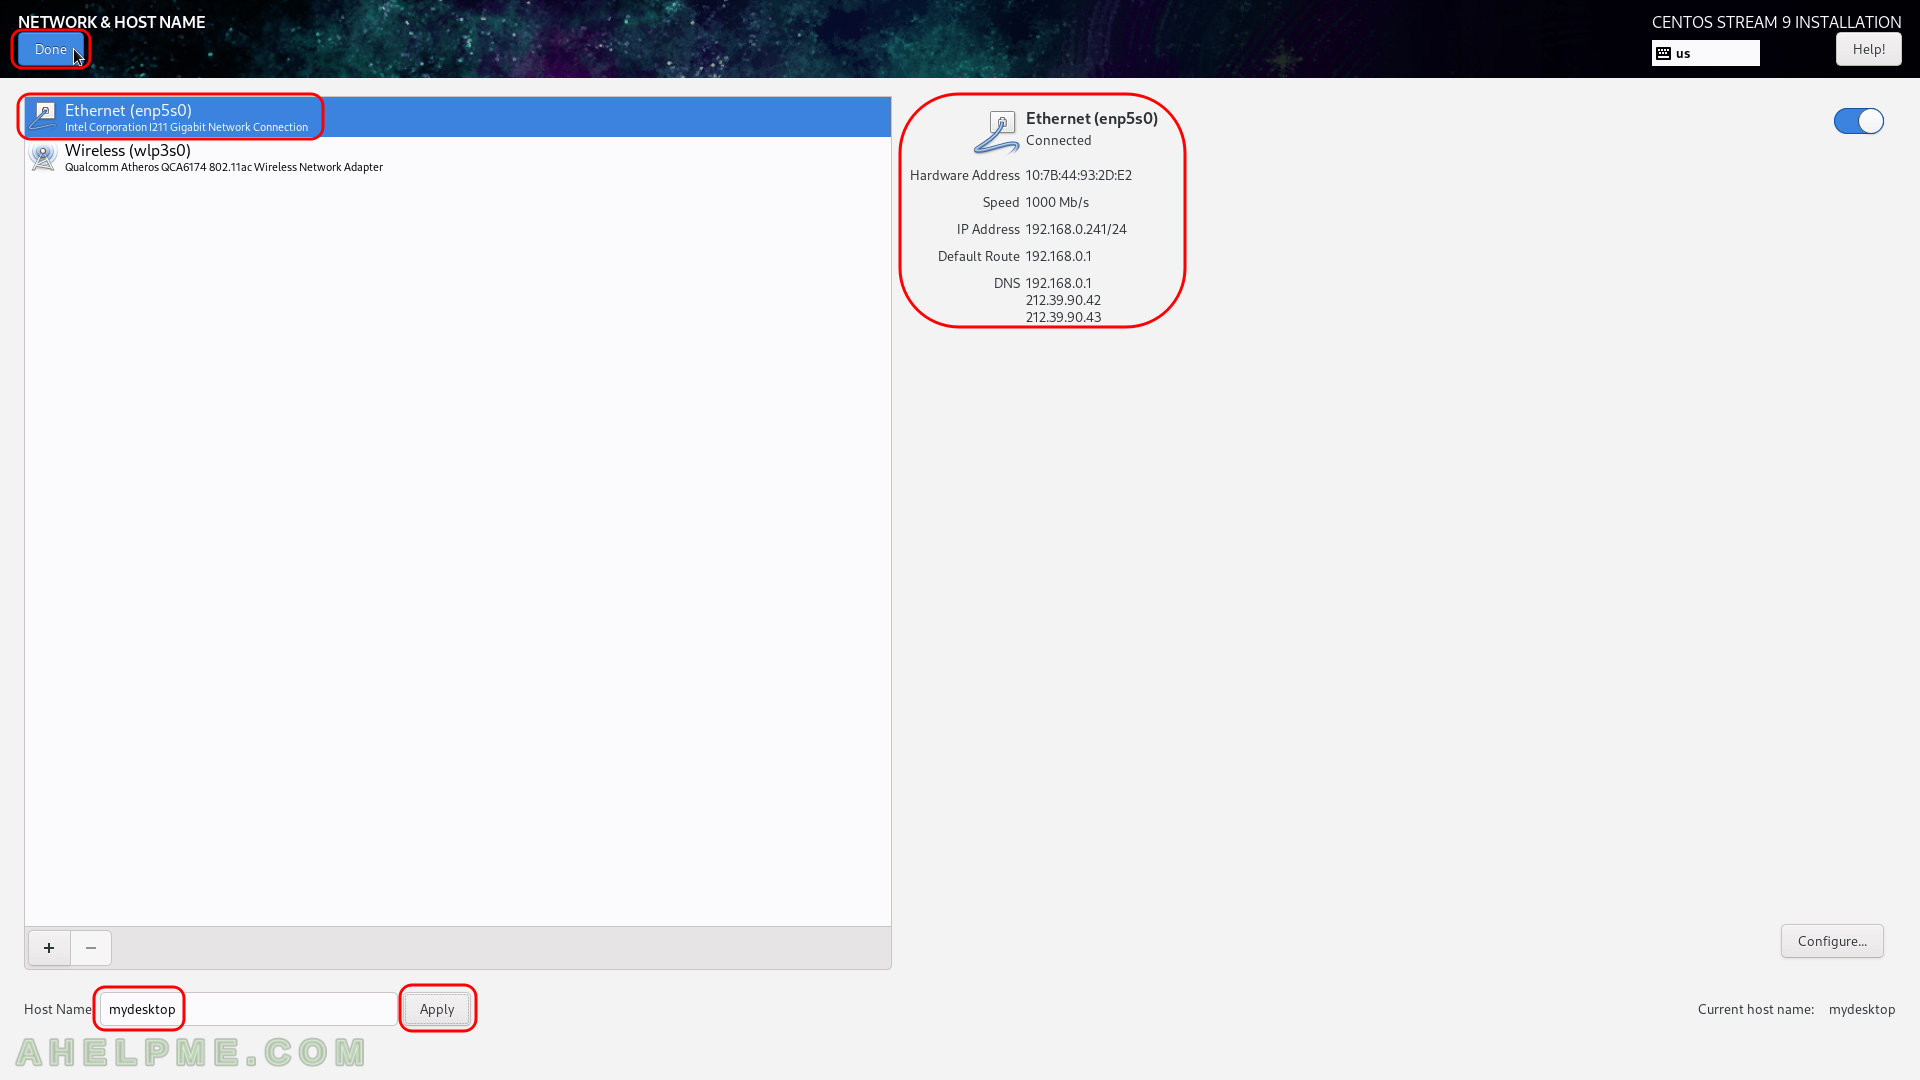
SCREENSHOT 7) Set the connectivity of your machine.
By default the DHCP will try setting an IP.
SCREENSHOT 8) The setup will auto-detect the adapter with the working network and it will try setting an IP from the router.
Set the host name of your machine in the left bottom text box and click on “Apply”. If a manual IP is required to be set use the “Configure…” at the right corner. You can see our Ethernet adapter enp5s0 is configured successfully it has IP and the link is up (connected to the 1000 Mb/s network).
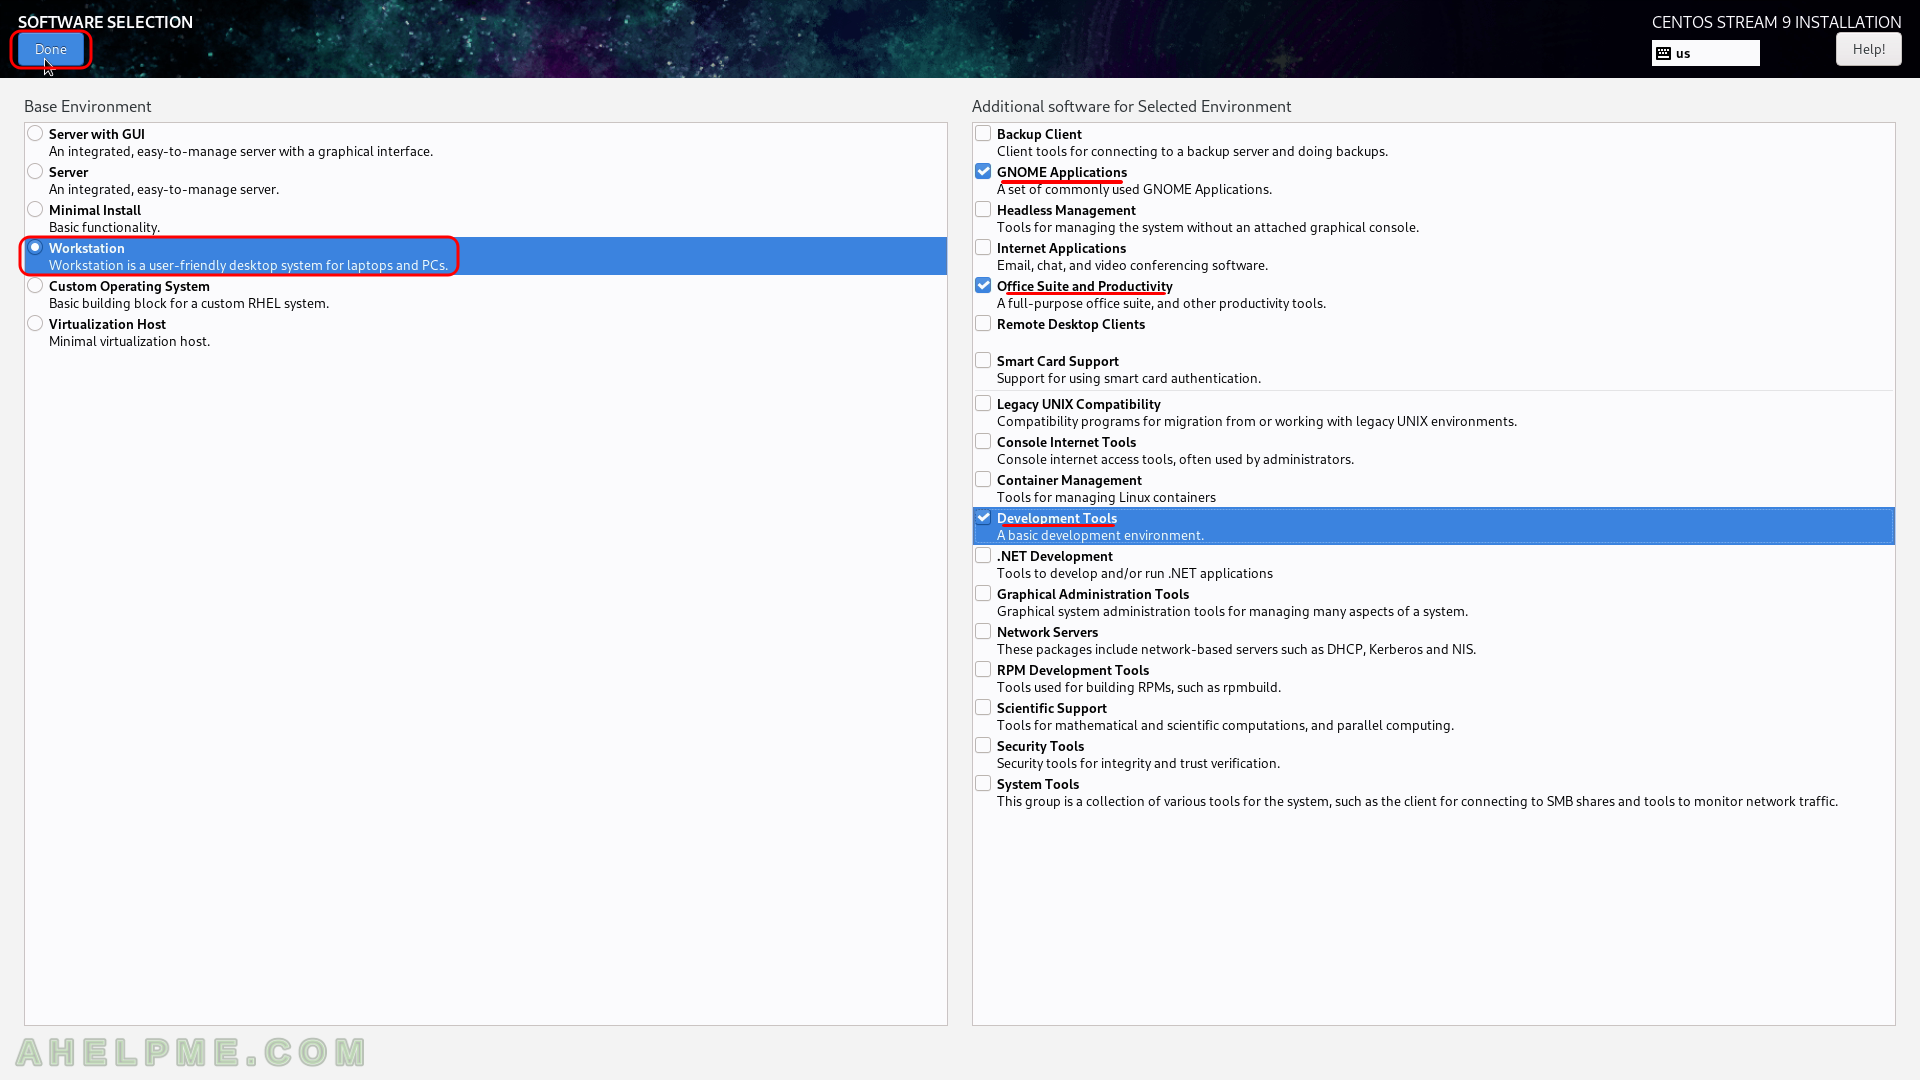
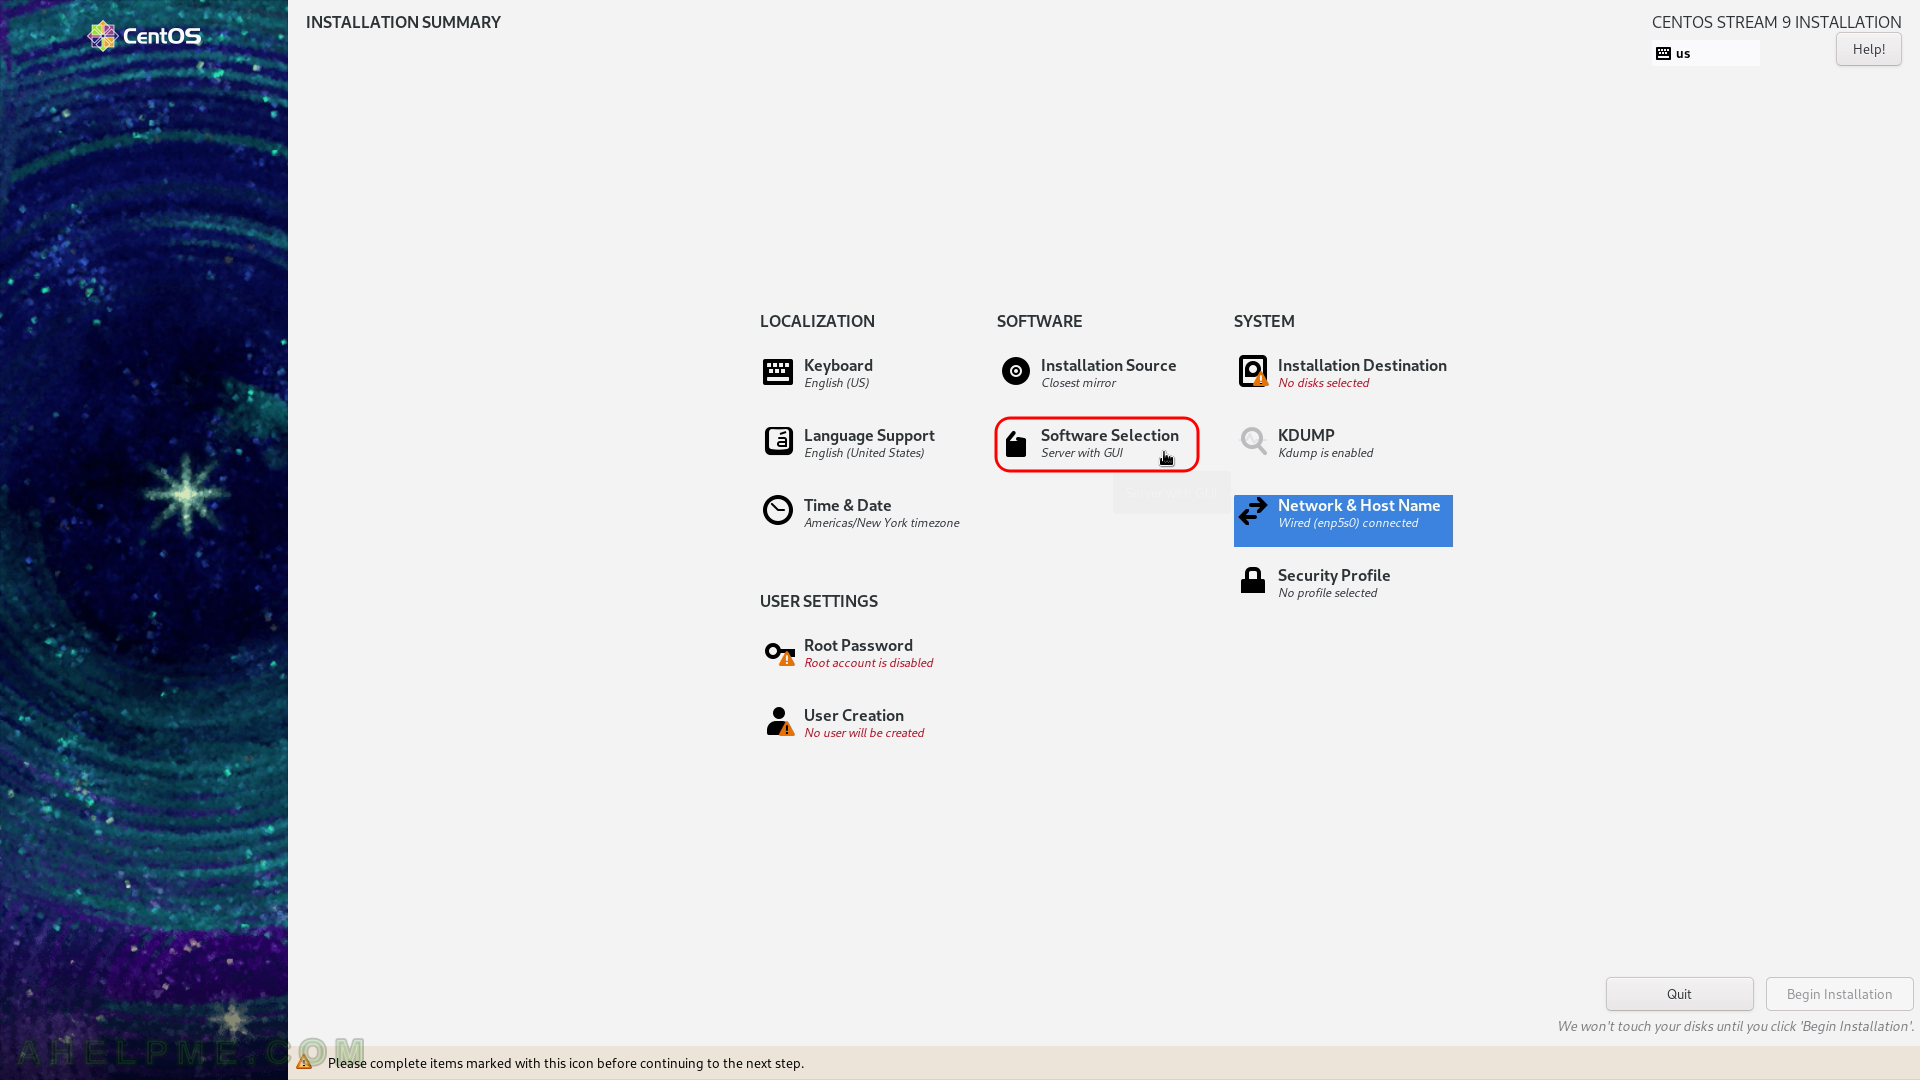
SCREENSHOT 9) Select what software you would like the setup to install at first.
SCREENSHOT 10) By default, it is selected “Workstation”, which means the setup will install a GNOME for GUI, Office Suite and Productivity and Development Tools.
As i can be seen there are multiple additional options for Workstation on the right. Workstation includes Backup Client, GNOME Applications, Headless Management, Internet Applications, Office Suite and Productivity, Remote Desktop Clients, Smart Card Support, Legacy UNIX Compatibility, Console Internet Tools (often for system administrators), Container Management (container tools), Development Tools, .NET Development, Graphical Administration Tools, Network Servers, RPM Development Tools, Scientific Support, Security Tools and System Tools.