Minimal net install is useful when a dedicated server is installed from a IPMI KVM or Dell iDRAC, HP iLO, IBM IMM or where the initial client side download of files need to be minimal.
CentOS Stream 9 is receives the updates before Red Hat Enterprise Linux (RHEL) and there is no versioning except the major release, which is 9. So the CentOS Stream 9 receives the updates for Red Hat Enterprise Linux (RHEL) 9. On monthly or less basis CentOS community releases a stable ISO with a temporary time version like this one CentOS Stream 9 (20220606.0).
Continuously delivered distro that tracks just ahead of Red Hat Enterprise Linux (RHEL) development
For amd64 the net of CentOS Stream 9 install bootable media is located here (now the current latest release is 20220606.0, but you may check the last release. for the time you follow this howto):
Note there is no minimal CD for offline installation. Boot CD is to just boot and make “network installation” installation and there is a big fat DVD of 8.1 Gbytes to install offline.
Download it and put it on a CD or USB, the boot from it and follow the steps bellow:
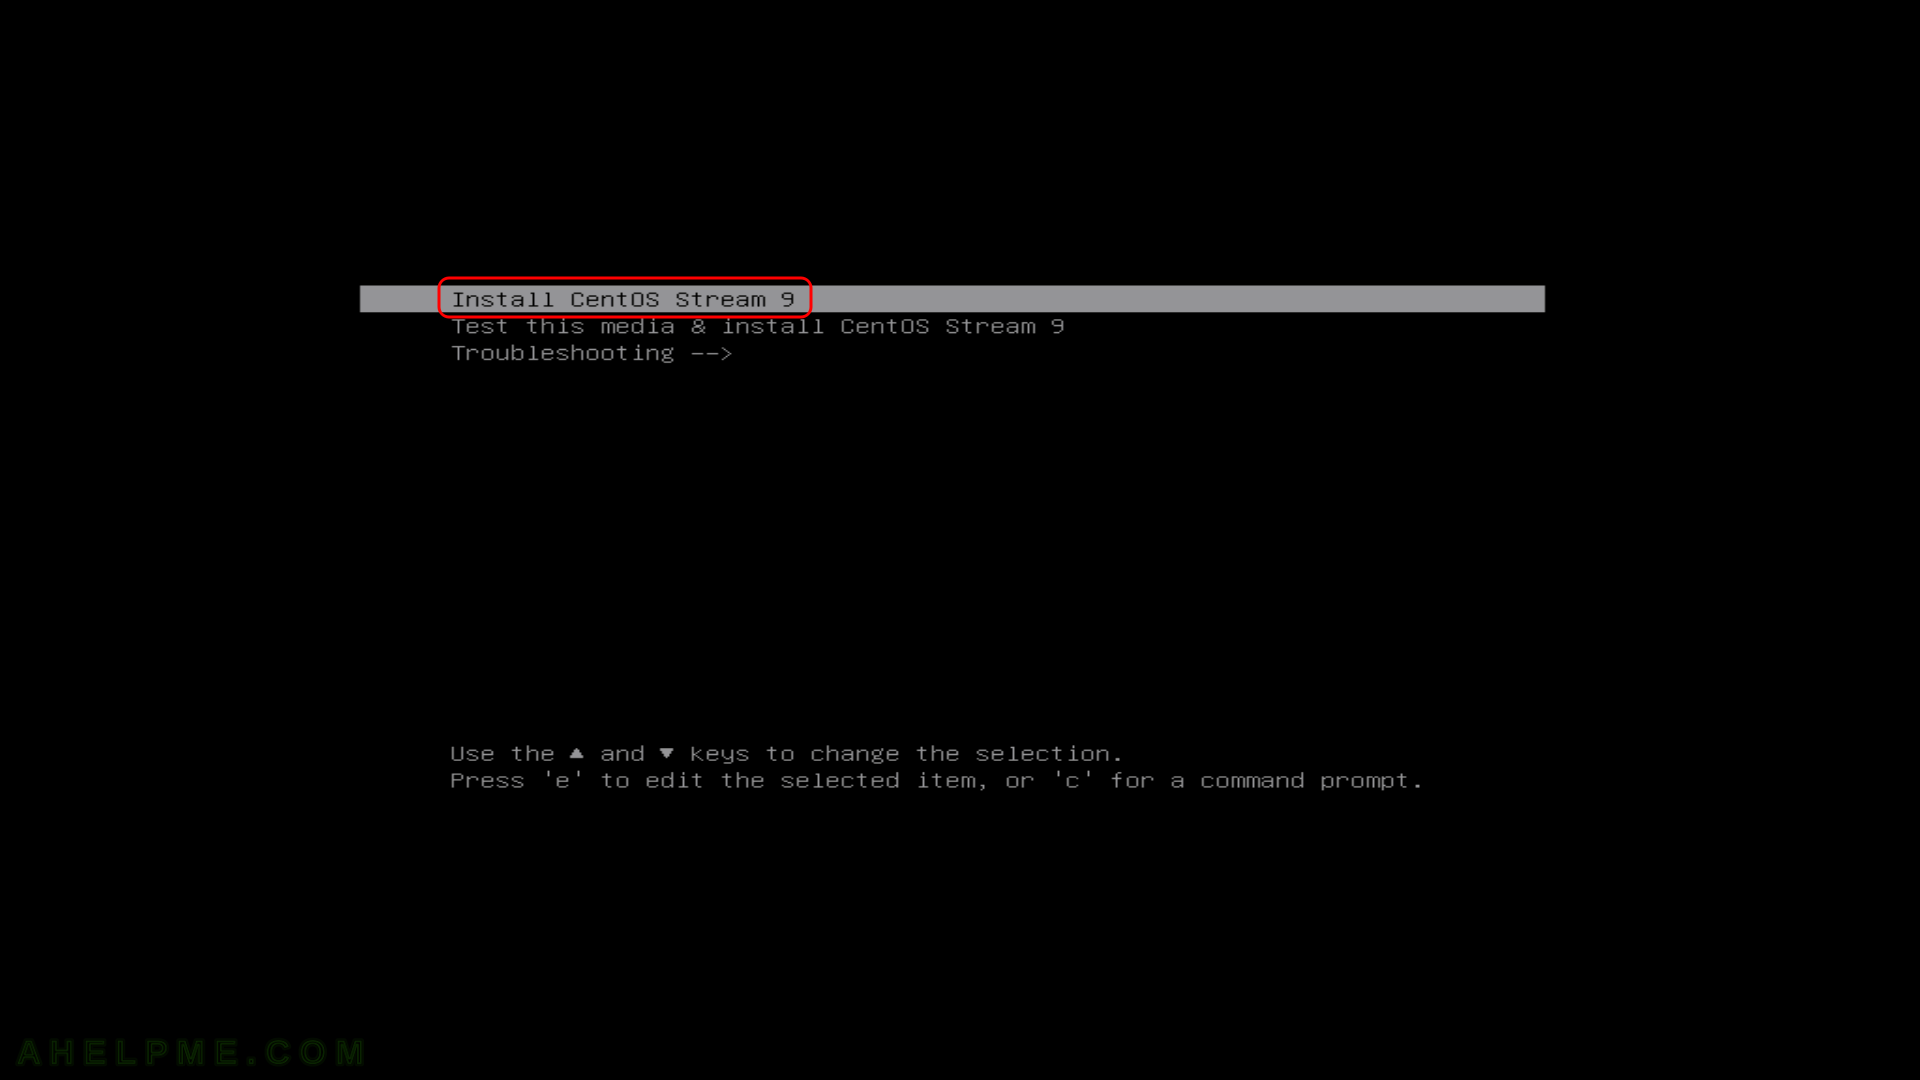
SCREENSHOT 1) If you booted from the DVD you would get this first screen – select “Install CentOS Stream 9” and hit Enter
Start installation
SCREENSHOT 2) The kernel and the live system are loading…
Booting from the DVD
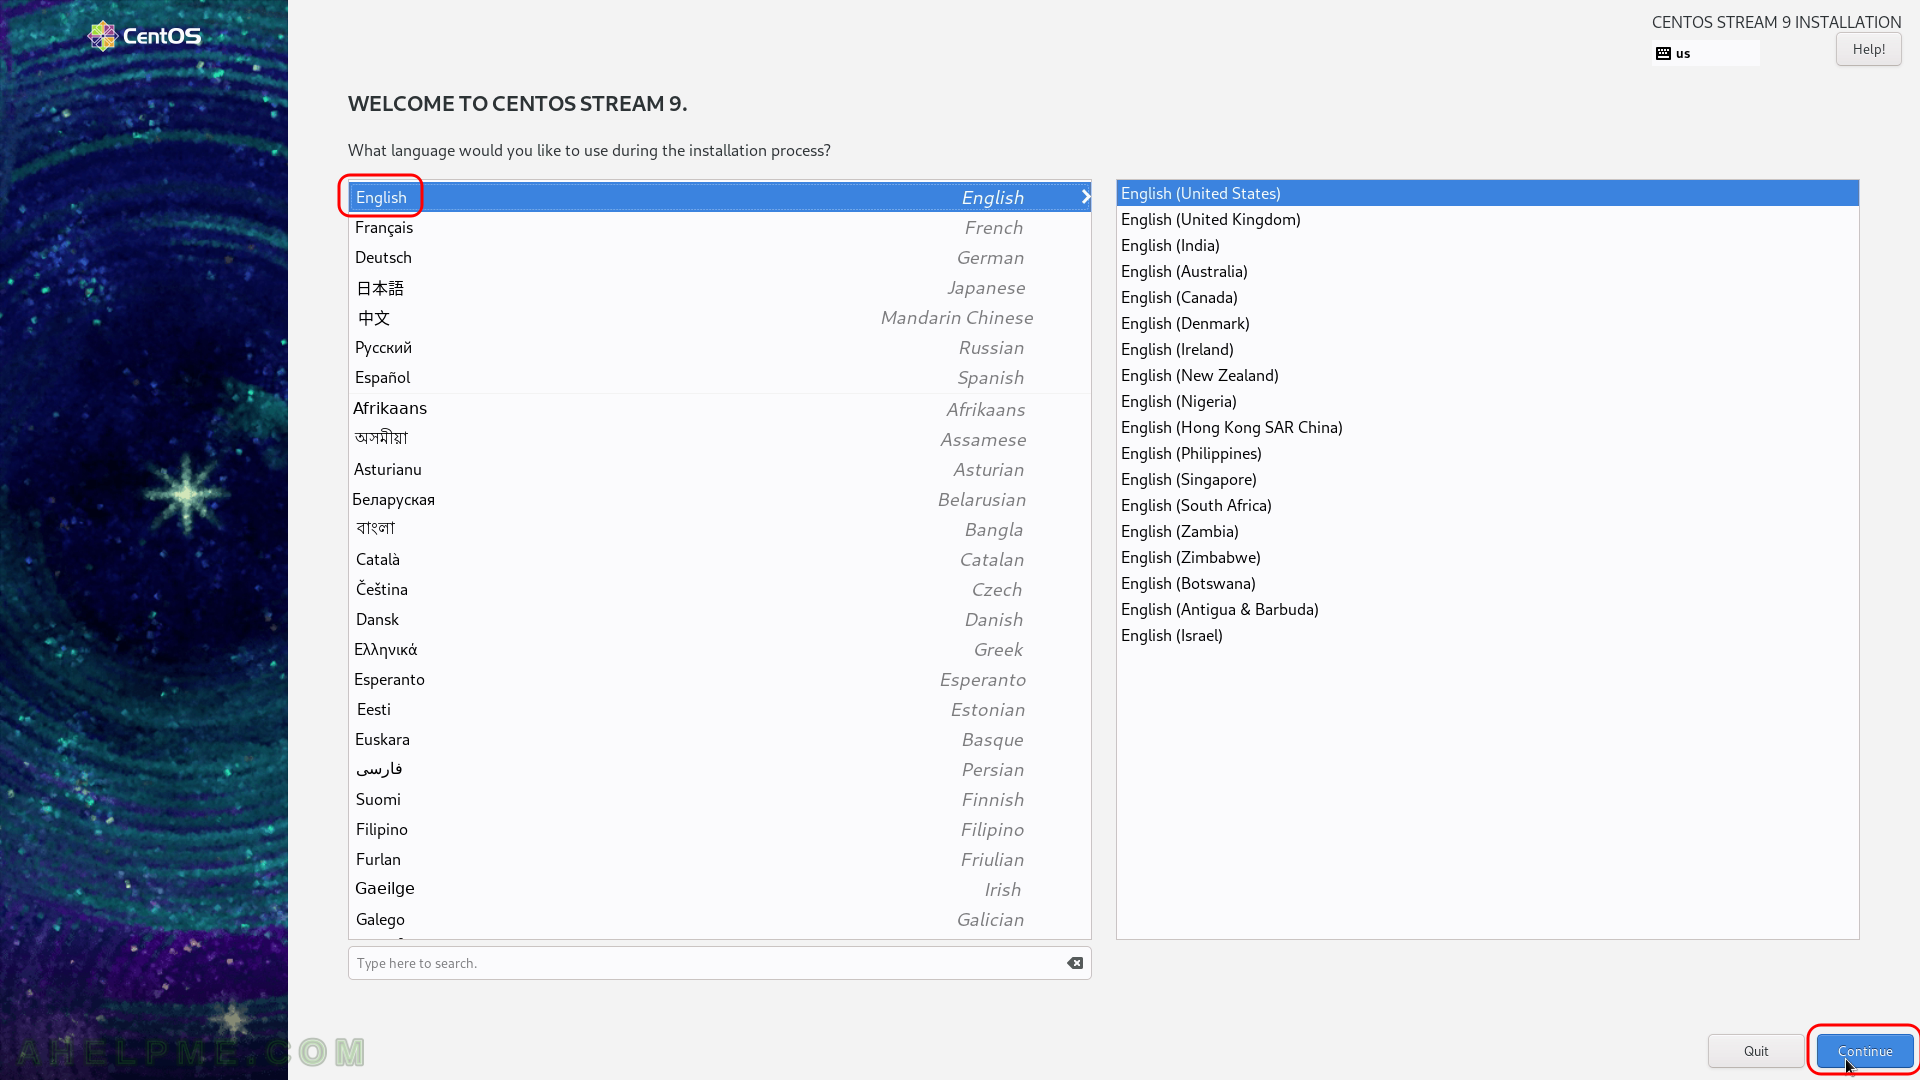
SCREENSHOT 3) Choose your system language. Here we selected the English.
The setup will guide you through the steps in the language you select here and the installed system will use the selected language as default. Choose your system language
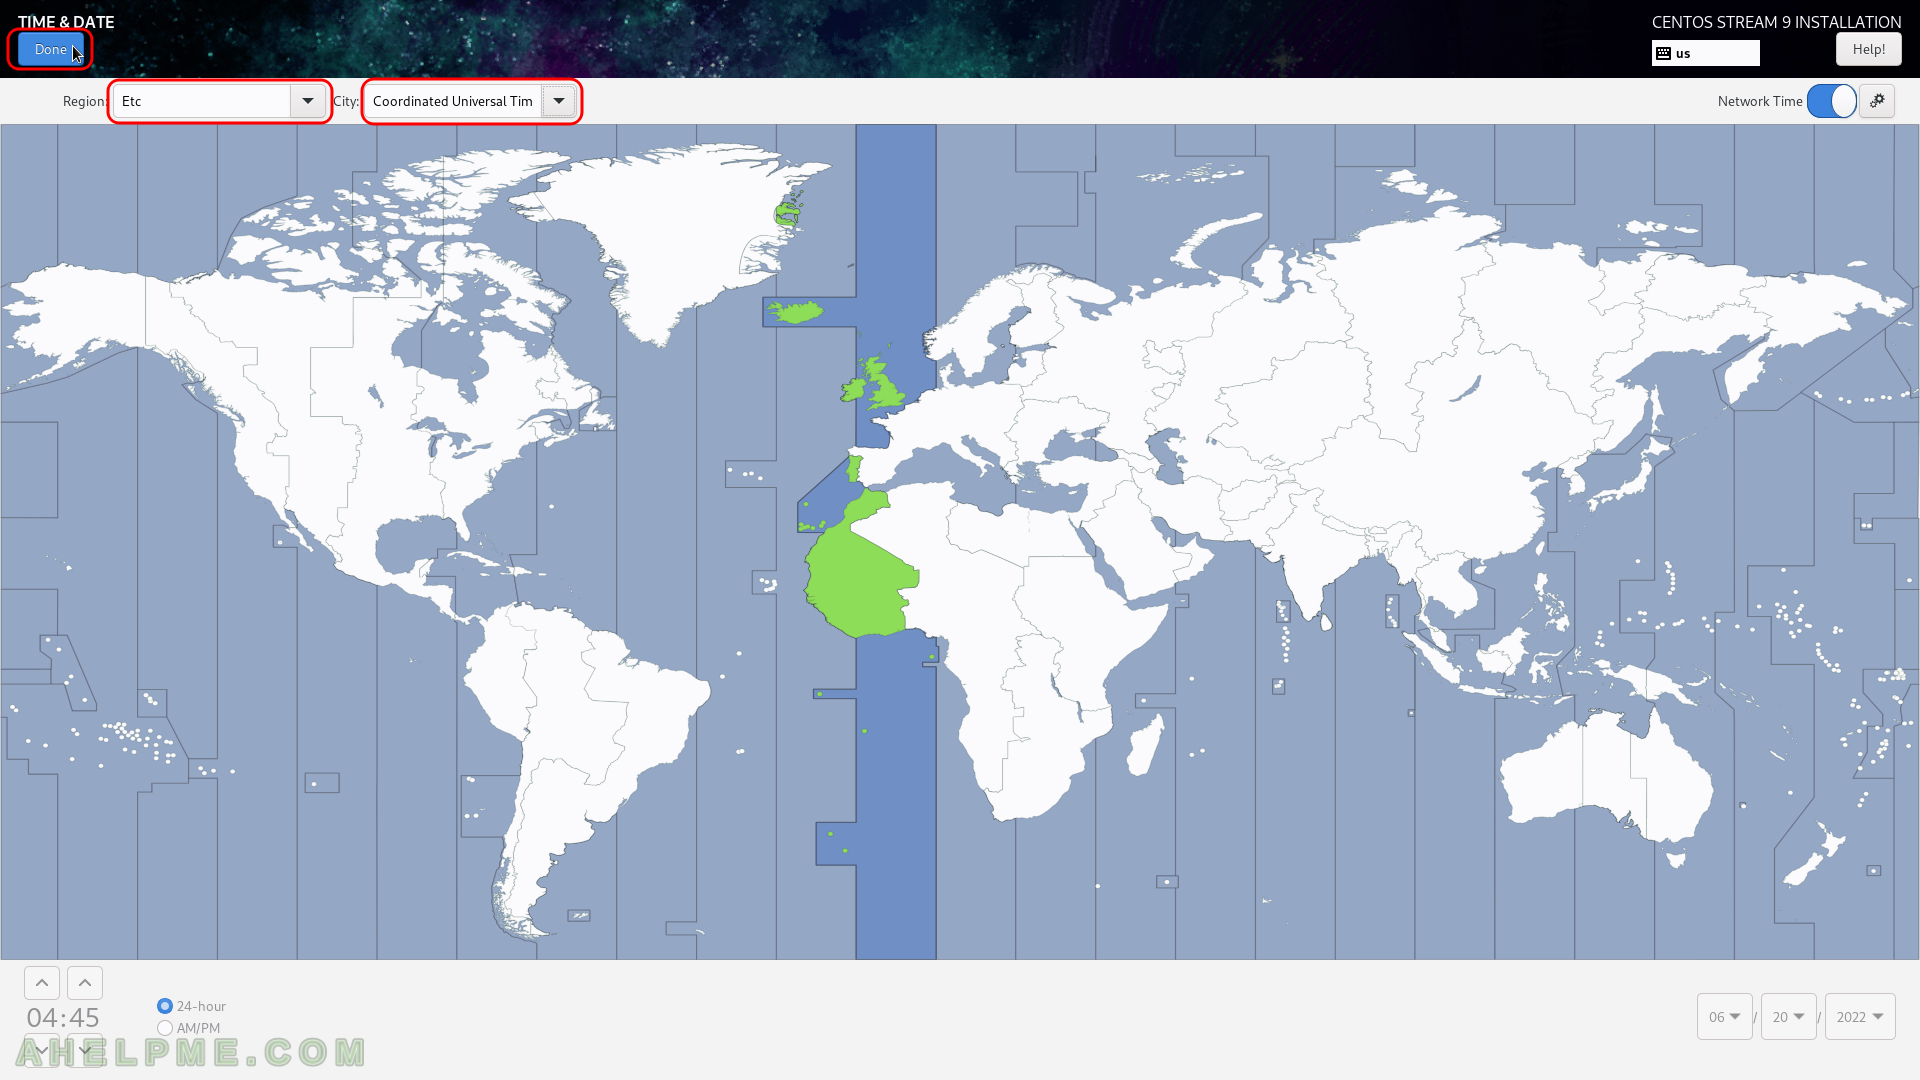
SCREENSHOT 4) Select time and date menu to set the time and date and the time zone of the system, which is very important.
Click on “Time & Date”. Time & Date
SCREENSHOT 5) Select your time zone – here we selected UTC (Universal Coordinated Time), but you can choose your time zone if it is not the right one by default.
You even may point with the mouse to your country on the map. Click on “Done” when you are ready. DATE & TIME
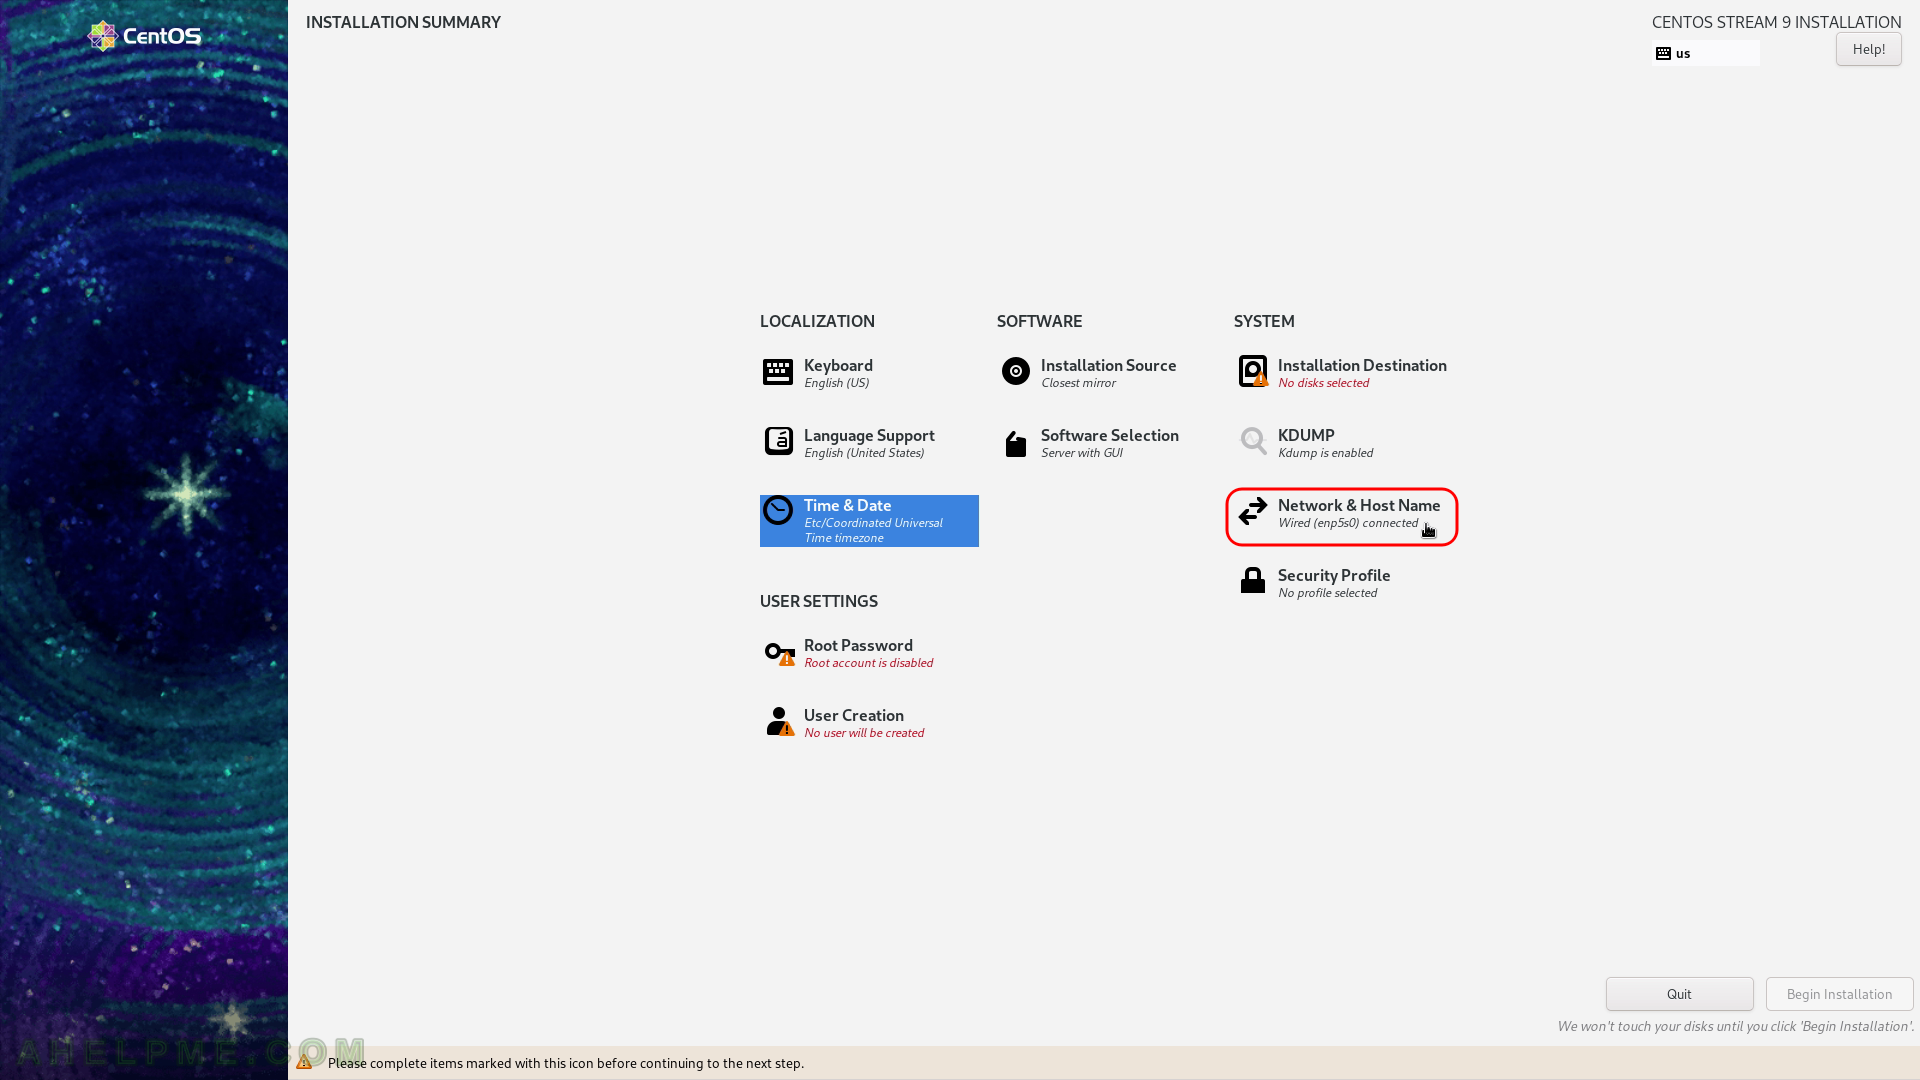
SCREENSHOT 6) Set the connectivity of your server.
Because this is network installation you cannot proceed with the installation without a working network. Network & Host Name
SCREENSHOT 7) Click on the network adapter you are going to use for the Internet to select it and then click on “Configure…” button bottom right. Network & Host Name – Configure
SCREENSHOT 8) Set the IP of the server
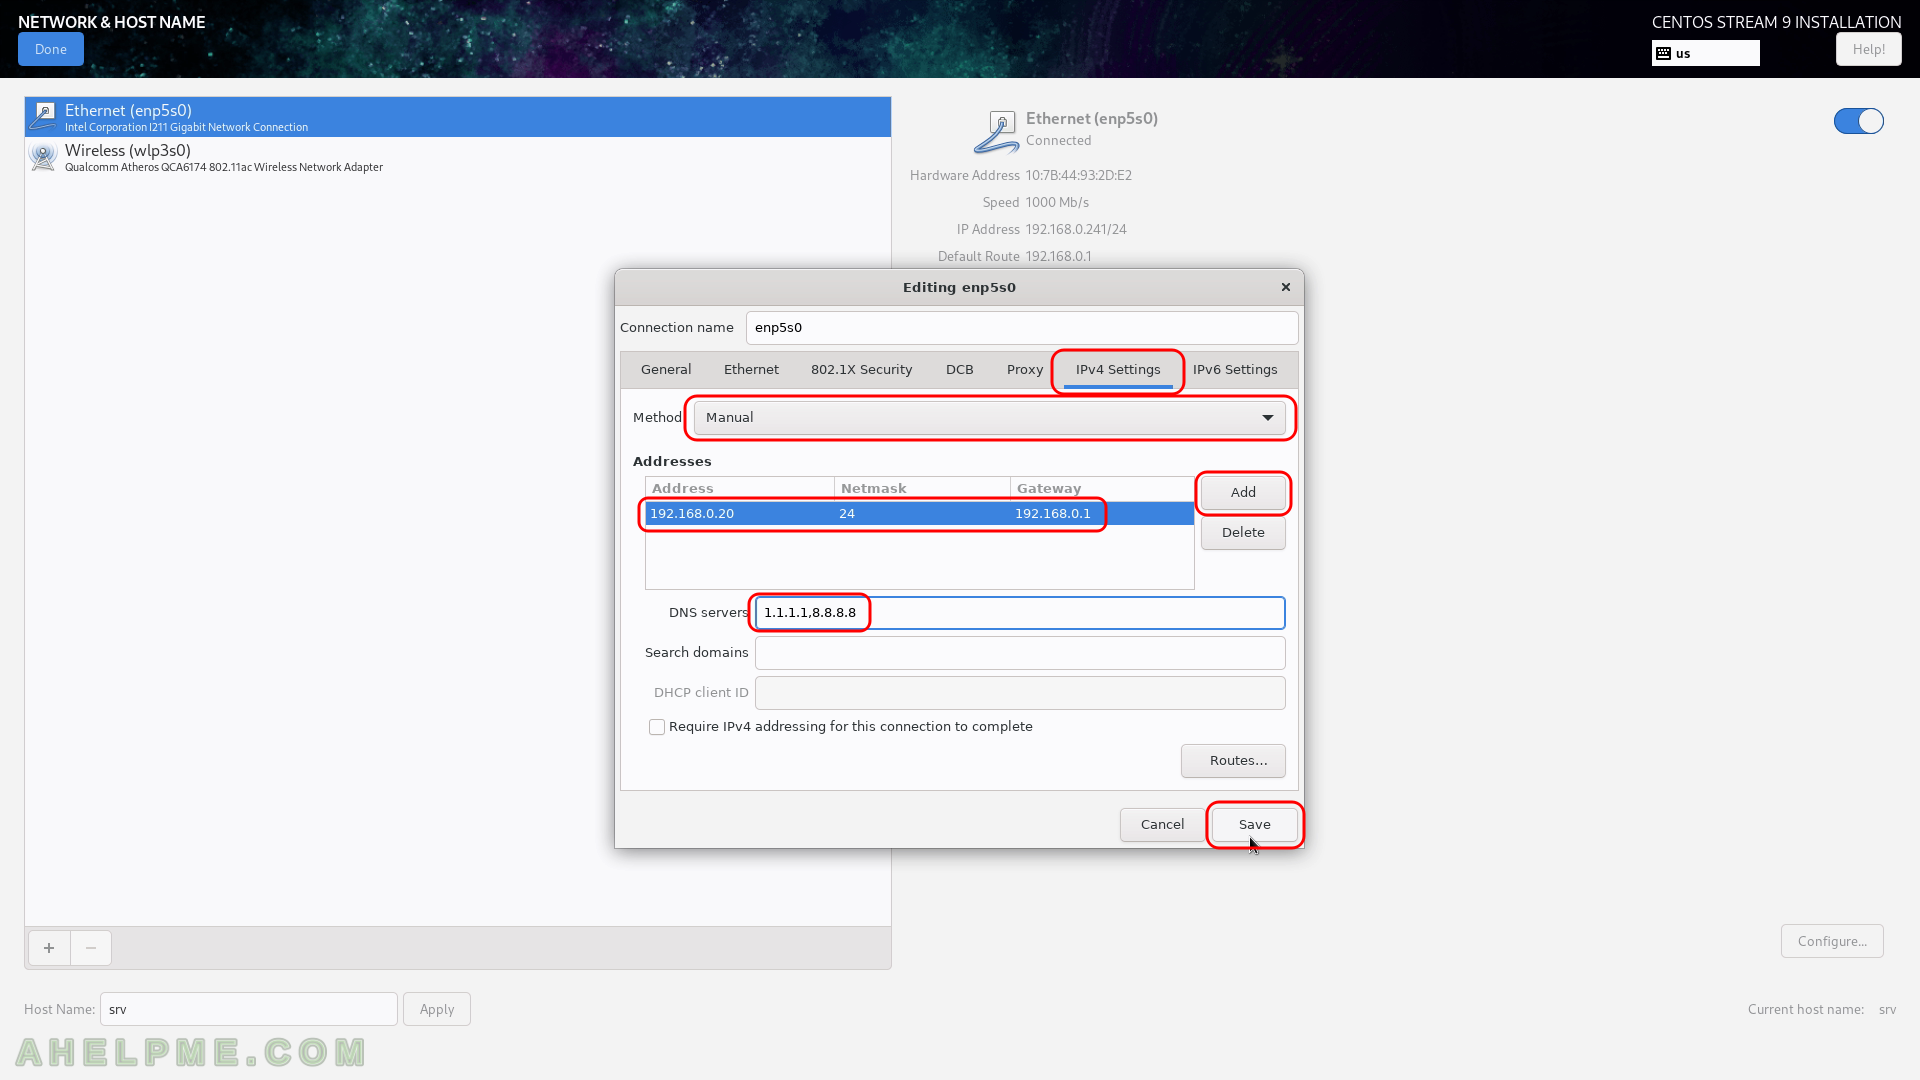
First, click on “IPv4 Settings” and set to “Manual” from the dropdown menu “Method”, then click on “Add” and in each of the three text boxes fill the network settings of your choice. We have filled the text fields with local IP and settings. Add DNS servers separating them with comas and click on “General” tab. Network & Host Name – Configure IPv4 Settings
SCREENSHOT 9) Click on “Done” if you are ready.
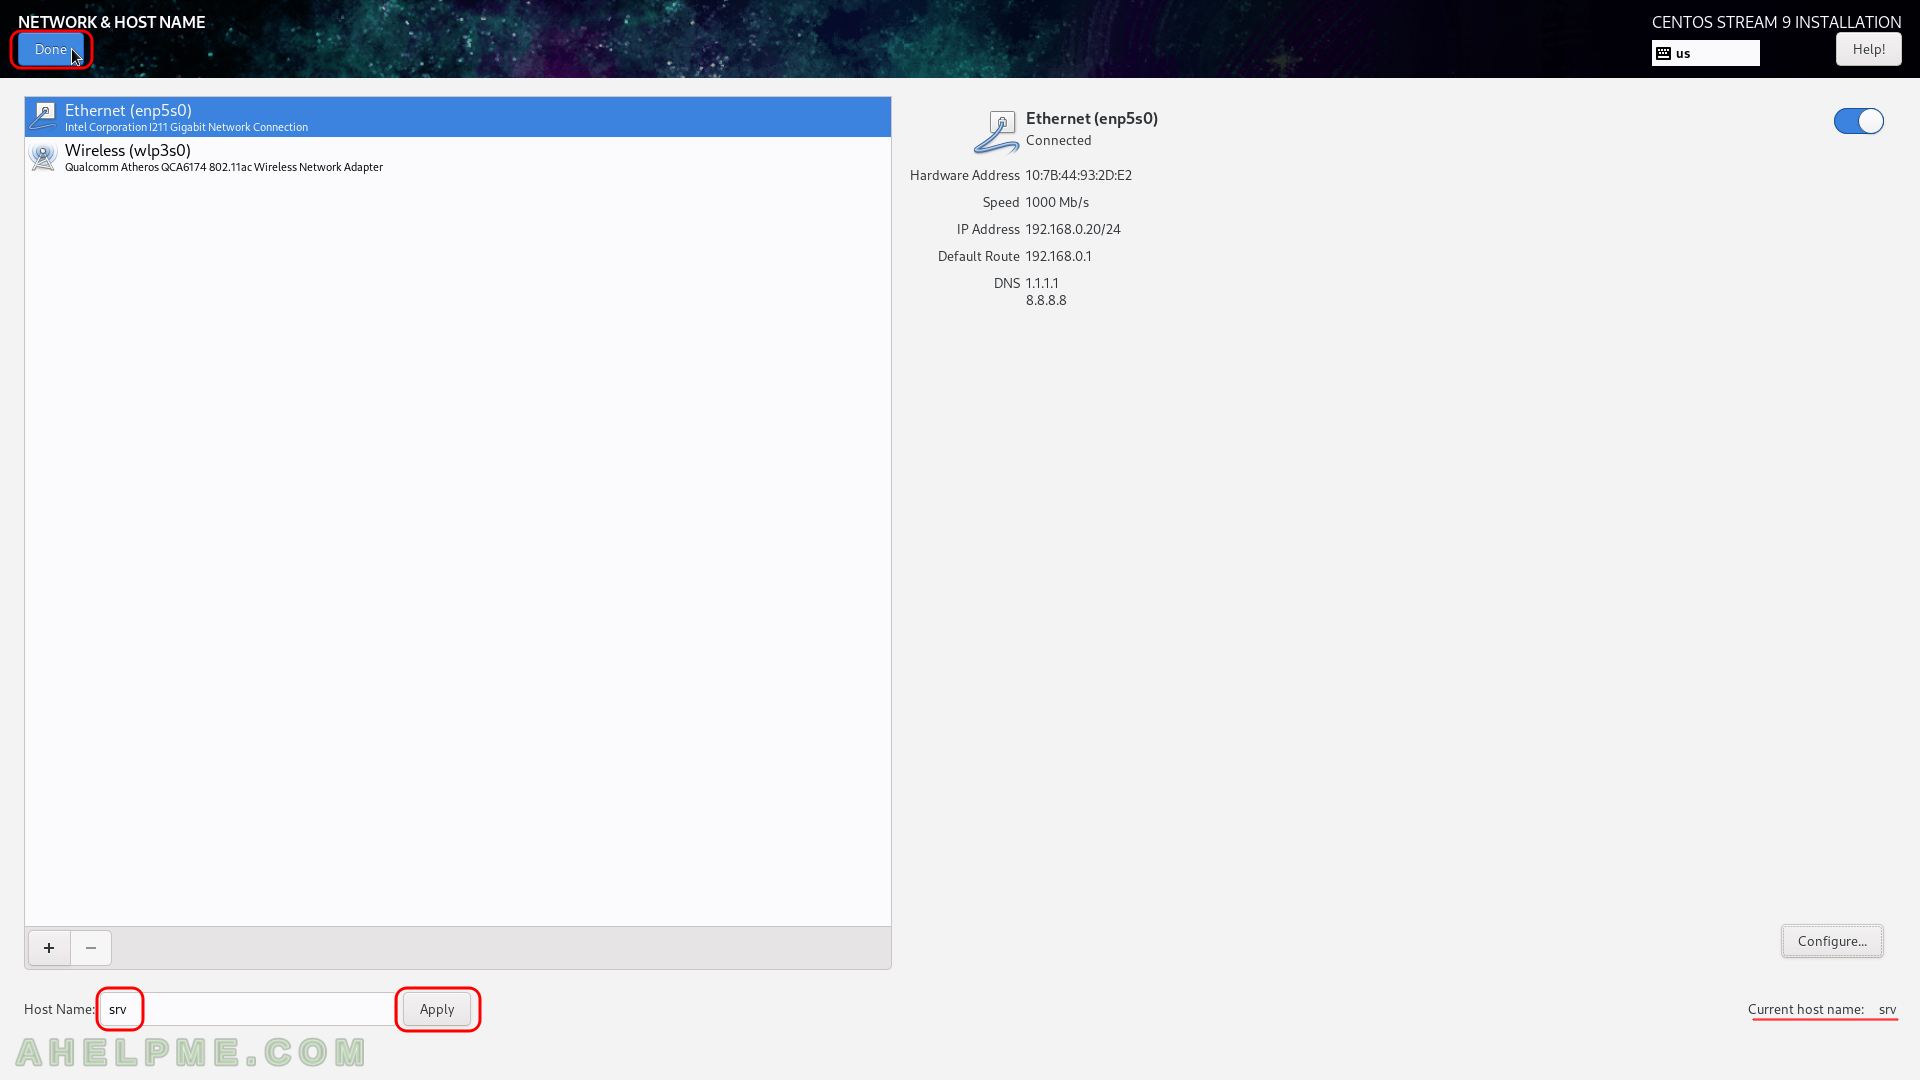
You can see our Ethernet adapter enp5s0 is configured successfully it has IP and the link is up (connected to the 1000 Mb/s network). Set the host name of your machine in the left bottom text box and click on “Apply”. Then click on “Done”. Network & Host Name – Ready
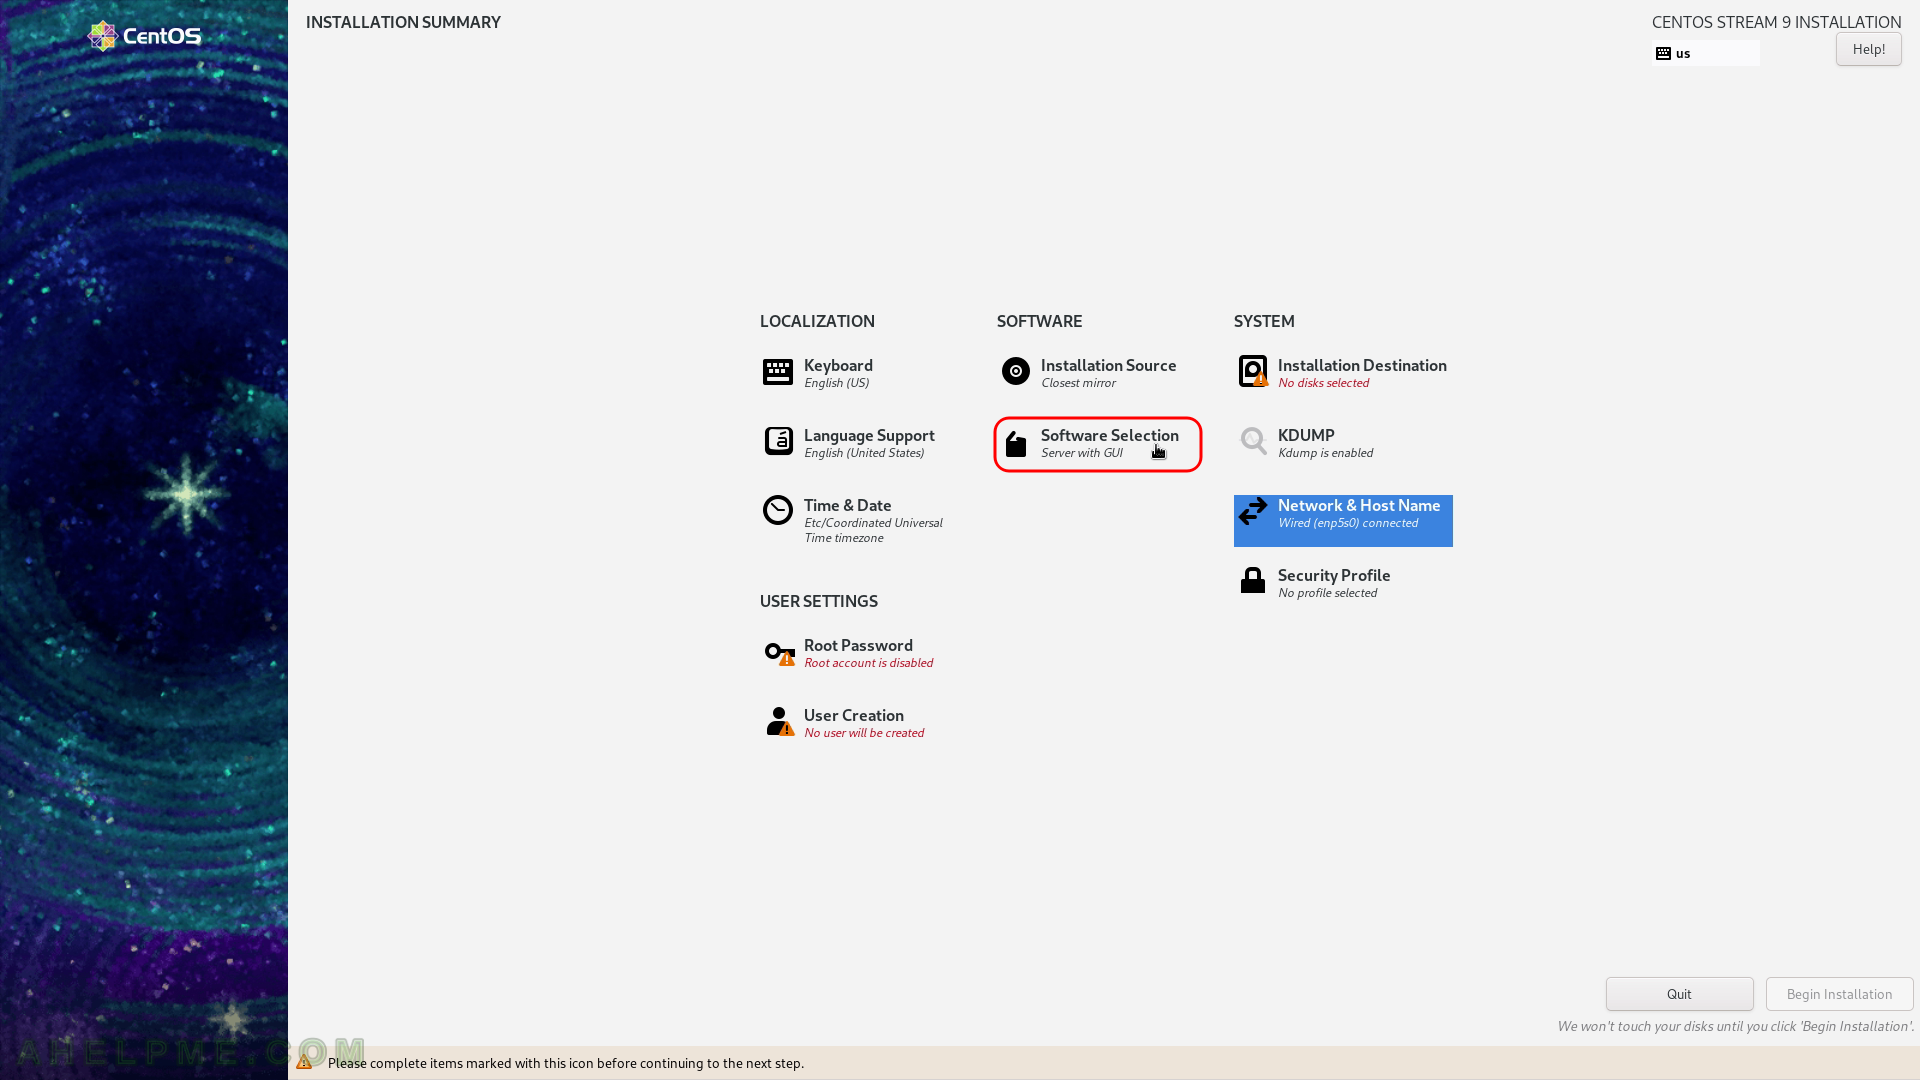
SCREENSHOT 10) Select what software you would like the setup to install at first.
We use technologies like cookies to store and/or access device information. We do this to improve browsing experience and to show (non-) personalized ads. Consenting to these technologies will allow us to process data such as browsing behavior or unique IDs on this site. Not consenting or withdrawing consent, may adversely affect certain features and functions.
Functional
Always active
The technical storage or access is strictly necessary for the legitimate purpose of enabling the use of a specific service explicitly requested by the subscriber or user, or for the sole purpose of carrying out the transmission of a communication over an electronic communications network.
Preferences
The technical storage or access is necessary for the legitimate purpose of storing preferences that are not requested by the subscriber or user.
Statistics
The technical storage or access that is used exclusively for statistical purposes.The technical storage or access that is used exclusively for anonymous statistical purposes. Without a subpoena, voluntary compliance on the part of your Internet Service Provider, or additional records from a third party, information stored or retrieved for this purpose alone cannot usually be used to identify you.
Marketing
The technical storage or access is required to create user profiles to send advertising, or to track the user on a website or across several websites for similar marketing purposes.