Delete an Offline RAID6 virtual drive and create a new one with AVAGO storcli

Offline virtual device means it cannot be used because the missing or bad or failed disks are more than the fault tolerance it is offering. In this case, there is a RAID 6 on a AVAGO MegaRAID 3018 controller with 2 x RAID6 virtual drives with 6 disks each. One of the virtual drives misses 3 of the 6 disks in the group, so this virtual drive is in Offline state and it cannot be repaired. Three new disks are put to replace the failed disks. Here is what command to issue with the AVAGO command-line utility storcli under CentOS 7 to delete and then create a healthy new RAID 6 virtual drive:

  1. Delete the Offline virtual drive.
  2. Create a new RAID 6 virtual drive with 6 disks.
  3. Initialize the newly create virtual drive to make it consistent.

On each step, it is included additional show storcli commands to better preset what happens in reality and how the controller reflects the changes.
The initial state of the whole configuration is shown below:

[root@srv ~]# /opt/MegaRAID/storcli/storcli64 /c0 show
Generating detailed summary of the adapter, it may take a while to complete.

CLI Version = 007.0709.0000.0000 Aug 14, 2018
Operating system = Linux 3.10.0-957.1.3.el7.x86_64
Controller = 0
Status = Success
Description = None

Product Name = AVAGO 3108 MegaRAID
Serial Number = FW-AC5CMJEAARBWA
SAS Address =  500304802426b600
PCI Address = 00:01:00:00
System Time = 09/20/2022, 14:09:12
Mfg. Date = 00/00/00
Controller Time = 09/20/2022, 14:09:08
FW Package Build = 24.21.0-0028
BIOS Version = 6.36.00.2_4.19.08.00_0x06180202
FW Version = 4.680.00-8290
Driver Name = megaraid_sas
Driver Version = 07.705.02.00-rh1
Current Personality = RAID-Mode 
Vendor Id = 0x1000
Device Id = 0x5D
SubVendor Id = 0x15D9
SubDevice Id = 0x809
Host Interface = PCI-E
Device Interface = SAS-12G
Bus Number = 1
Device Number = 0
Function Number = 0
Drive Groups = 2

TOPOLOGY :
========

----------------------------------------------------------------------------
DG Arr Row EID:Slot DID Type  State BT      Size PDC  PI SED DS3  FSpace TR 
----------------------------------------------------------------------------
 0 -   -   -        -   RAID6 OfLn  N  43.654 TB dflt N  N   dflt N      N  
 0 0   -   -        -   RAID6 Dgrd  N  43.654 TB dflt N  N   dflt N      N  
 0 0   0   -        -   DRIVE Msng  -  10.913 TB -    -  -   -    -      N  
 0 0   1   8:1      13  DRIVE Onln  N  10.913 TB dflt N  N   dflt -      N  
 0 0   2   8:2      10  DRIVE Onln  N  10.913 TB dflt N  N   dflt -      N  
 0 0   3   -        -   DRIVE Msng  -  10.913 TB -    -  -   -    -      N  
 0 0   4   8:4      11  DRIVE Onln  N  10.913 TB dflt N  N   dflt -      N  
 0 0   5   -        -   DRIVE Msng  -  10.913 TB -    -  -   -    -      N  
 1 -   -   -        -   RAID6 Optl  N  43.654 TB dflt N  N   dflt N      N  
 1 0   -   -        -   RAID6 Optl  N  43.654 TB dflt N  N   dflt N      N  
 1 0   0   8:6      20  DRIVE Onln  N  10.913 TB dflt N  N   dflt -      N  
 1 0   1   8:7      19  DRIVE Onln  N  12.732 TB dflt N  N   dflt -      N  
 1 0   2   8:8      18  DRIVE Onln  N  10.913 TB dflt N  N   dflt -      N  
 1 0   3   8:9      15  DRIVE Onln  N  10.913 TB dflt N  N   dflt -      N  
 1 0   4   8:10     12  DRIVE Onln  N  10.913 TB dflt N  N   dflt -      N  
 1 0   5   8:11     14  DRIVE Onln  N  10.913 TB dflt N  N   dflt -      N  
----------------------------------------------------------------------------

DG=Disk Group Index|Arr=Array Index|Row=Row Index|EID=Enclosure Device ID
DID=Device ID|Type=Drive Type|Onln=Online|Rbld=Rebuild|Dgrd=Degraded
Pdgd=Partially degraded|Offln=Offline|BT=Background Task Active
PDC=PD Cache|PI=Protection Info|SED=Self Encrypting Drive|Frgn=Foreign
DS3=Dimmer Switch 3|dflt=Default|Msng=Missing|FSpace=Free Space Present
TR=Transport Ready

Virtual Drives = 2

VD LIST :
=======

------------------------------------------------------------------
DG/VD TYPE  State Access Consist Cache Cac sCC      Size Name     
------------------------------------------------------------------
0/0   RAID6 OfLn  RW     No      RAWBD -   ON  43.654 TB storage1 
1/1   RAID6 Optl  RW     Yes     RAWBD -   ON  43.654 TB storage2 
------------------------------------------------------------------

Cac=CacheCade|Rec=Recovery|OfLn=OffLine|Pdgd=Partially Degraded|Dgrd=Degraded
Optl=Optimal|RO=Read Only|RW=Read Write|HD=Hidden|TRANS=TransportReady|B=Blocked|
Consist=Consistent|R=Read Ahead Always|NR=No Read Ahead|WB=WriteBack|
AWB=Always WriteBack|WT=WriteThrough|C=Cached IO|D=Direct IO|sCC=Scheduled
Check Consistency

Physical Drives = 12

PD LIST :
=======

---------------------------------------------------------------------------------
EID:Slt DID State DG      Size Intf Med SED PI SeSz Model                Sp Type 
---------------------------------------------------------------------------------
8:0       9 UGood -  12.732 TB SATA HDD N   N  512B ST14000NM001G-2KJ103 D  -    
8:1      13 Onln  0  10.913 TB SATA HDD N   N  512B ST12000NM0007-2A1101 U  -    
8:2      10 Onln  0  10.913 TB SATA HDD N   N  512B ST12000NM0007-2A1101 U  -    
8:3      17 UGood -  12.732 TB SATA HDD N   N  512B ST14000NM001G-2KJ103 D  -    
8:4      11 Onln  0  10.913 TB SATA HDD N   N  512B ST12000NM001G-2MV103 U  -    
8:5      16 UGood -  12.732 TB SATA HDD N   N  512B ST14000NM001G-2KJ103 D  -    
8:6      20 Onln  1  10.913 TB SATA HDD N   N  512B ST12000NM0007-2A1101 U  -    
8:7      19 Onln  1  12.732 TB SATA HDD N   N  512B ST14000NM001G-2KJ103 U  -    
8:8      18 Onln  1  10.913 TB SATA HDD N   N  512B ST12000NM0007-2A1101 U  -    
8:9      15 Onln  1  10.913 TB SATA HDD N   N  512B ST12000NM0007-2A1101 U  -    
8:10     12 Onln  1  10.913 TB SATA HDD N   N  512B ST12000NM0007-2A1101 U  -    
8:11     14 Onln  1  10.913 TB SATA HDD N   N  512B ST12000NM0007-2A1101 U  -    
---------------------------------------------------------------------------------

EID-Enclosure Device ID|Slt-Slot No.|DID-Device ID|DG-DriveGroup
DHS-Dedicated Hot Spare|UGood-Unconfigured Good|GHS-Global Hotspare
UBad-Unconfigured Bad|Onln-Online|Offln-Offline|Intf-Interface
Med-Media Type|SED-Self Encryptive Drive|PI-Protection Info
SeSz-Sector Size|Sp-Spun|U-Up|D-Down/PowerSave|T-Transition|F-Foreign
UGUnsp-Unsupported|UGShld-UnConfigured shielded|HSPShld-Hotspare shielded
CFShld-Configured shielded|Cpybck-CopyBack|CBShld-Copyback Shielded


Cachevault_Info :
===============

------------------------------------
Model  State   Temp Mode MfgDate    
------------------------------------
CVPM02 Optimal 28C  -    2018/01/11 
------------------------------------

The show storcli command for the first virtual drive “/c0/v0” is also possible:

[root@srv ~]# /opt/MegaRAID/storcli/storcli64 /c0/v0 show all
CLI Version = 007.0709.0000.0000 Aug 14, 2018
Operating system = Linux 3.10.0-957.1.3.el7.x86_64
Controller = 0
Status = Success
Description = None


/c0/v0 :
======

------------------------------------------------------------------
DG/VD TYPE  State Access Consist Cache Cac sCC      Size Name     
------------------------------------------------------------------
0/0   RAID6 OfLn  RW     No      RAWBD -   ON  43.654 TB storage1 
------------------------------------------------------------------

Cac=CacheCade|Rec=Recovery|OfLn=OffLine|Pdgd=Partially Degraded|Dgrd=Degraded
Optl=Optimal|RO=Read Only|RW=Read Write|HD=Hidden|TRANS=TransportReady|B=Blocked|
Consist=Consistent|R=Read Ahead Always|NR=No Read Ahead|WB=WriteBack|
AWB=Always WriteBack|WT=WriteThrough|C=Cached IO|D=Direct IO|sCC=Scheduled
Check Consistency


PDs for VD 0 :
============

---------------------------------------------------------------------------------
EID:Slt DID State DG      Size Intf Med SED PI SeSz Model                Sp Type 
---------------------------------------------------------------------------------
8:1      13 Onln   0 10.913 TB SATA HDD N   N  512B ST12000NM0007-2A1101 U  -    
8:2      10 Onln   0 10.913 TB SATA HDD N   N  512B ST12000NM0007-2A1101 U  -    
8:4      11 Onln   0 10.913 TB SATA HDD N   N  512B ST12000NM001G-2MV103 U  -    
---------------------------------------------------------------------------------

EID-Enclosure Device ID|Slt-Slot No.|DID-Device ID|DG-DriveGroup
DHS-Dedicated Hot Spare|UGood-Unconfigured Good|GHS-Global Hotspare
UBad-Unconfigured Bad|Onln-Online|Offln-Offline|Intf-Interface
Med-Media Type|SED-Self Encryptive Drive|PI-Protection Info
SeSz-Sector Size|Sp-Spun|U-Up|D-Down/PowerSave|T-Transition|F-Foreign
UGUnsp-Unsupported|UGShld-UnConfigured shielded|HSPShld-Hotspare shielded
CFShld-Configured shielded|Cpybck-CopyBack|CBShld-Copyback Shielded


VD0 Properties :
==============
Strip Size = 1.0 MB
Number of Blocks = 93746888704
VD has Emulated PD = Yes
Span Depth = 1
Number of Drives Per Span = 6
Write Cache(initial setting) = WriteBack
Disk Cache Policy = Disk's Default
Encryption = None
Data Protection = Disabled
Active Operations = None
Exposed to OS = Yes
OS Drive Name = N/A
Creation Date = 19-12-2018
Creation Time = 06:11:08 AM
Emulation type = default
Cachebypass size = Cachebypass-64k
Cachebypass Mode = Cachebypass Intelligent
Is LD Ready for OS Requests = Yes
SCSI NAA Id = 600304802426b60023ac9d7c0a7a305b
SCSI Unmap = No

Keep on reading!

Smart Array P440 – create multiple RAID 0 at once using Smart Storage Administrator

This article shows how to create multiple RAID 0 drives for each disk at once. For example, a controller with 4 disks using this feature you can create 4 groups of devices with one logical drive in it with RAID 0 type.

This is feature is a kind of HBA mode, but on steroids, because it uses the cache of the controller and the hardware controller (Smart Array) optimizations.

All of your disks and the space in them will be available to the OS, but through the Virtual Drive logic of HPE Smart Array. If you check out the article and why you may need JBOD here – Smart Array P440 – enable or disable HBA mode using Smart Storage Administrator it is mainly because of some file systems such as ZFS or Btrfs (even LVM and device mapper devices) have many more features than a hardware controller. So with this feature, you can easily have your disk “exported” to the OS and use the raid or more complex feature of ZFS, Btrfs, LVM, device mapper or another setup, but using the controller optimizations and cache.
Be careful this setup could lead to much bigger risk of data loss on power outrages if write-back cache optimization is enabled. And the more complicated the file system (or device mapper) setup is the more problems it has on power outrages without battery unit back-up in the controller. Always use this feature with a healthy battery in the controller.

How to create multiple RAID 0 Virtual Devices on each disk attached to the controller at once:

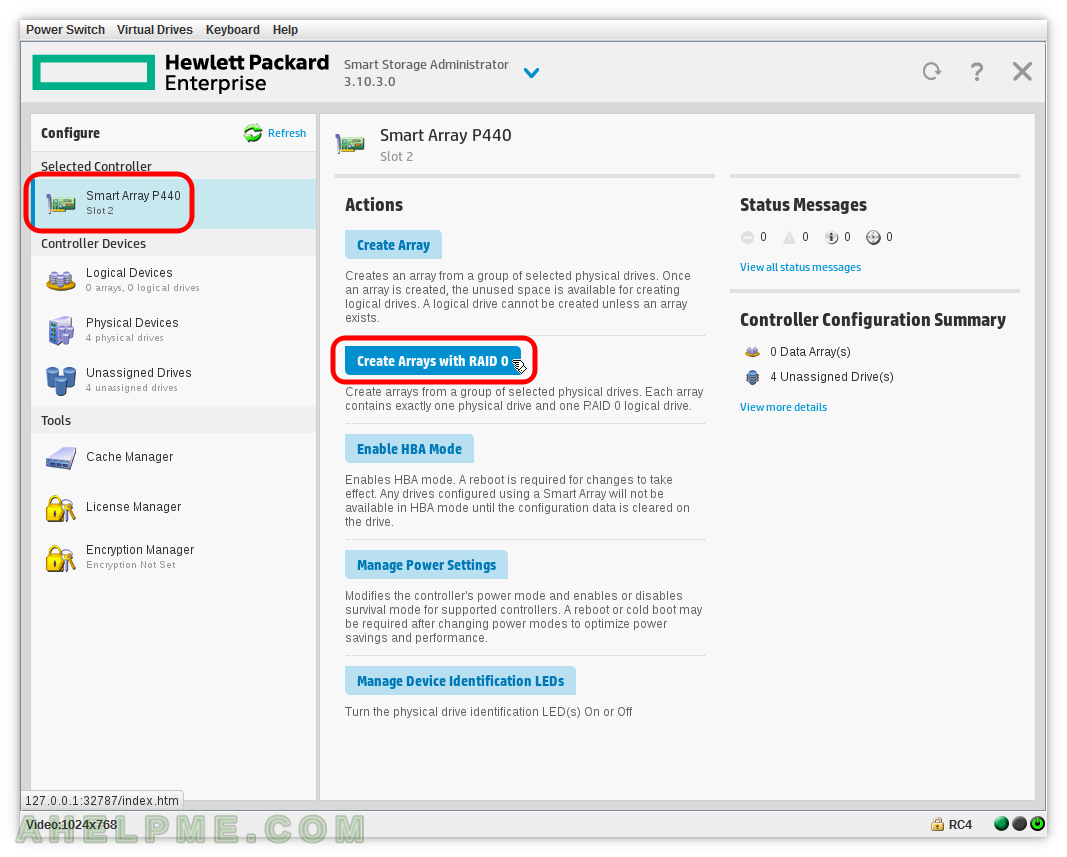
STEP 1) Click on the controller “Create Arrays with RAID 0” on the left to create multiple arrays of type RAID 0 at once.

main menu
Create Arrays with RAID 0

Keep on reading!

Smart Array P440 – enable or disable HBA mode using Smart Storage Administrator

As a continuation of our series about HPE Smart Array P440 controller here how you can enable HBA mode of your controller. There are various scenarios why you may want to enable HBA such as:

  • JBOD mode -to use the disks in a sophisticated file system like ZFS, brtfs and more (or LVM, device mapper logical devices). You may have more features in the created logical device (or file system) – caching or managing the disks and so on
  • not using the cache (RAM) of the controller, so it may lower the risk of data loss caused by power outages
  • more platform independent when using software RAID / device mapper devices. When you create virtual drives in hardware mode, you must use only this type of proprietary controller or some compatible of the same company. When using software solution like software RAID or LVM (and the controller is in JBOD) you can move the disks with no problem to other hardware without the hardware controller.
  • * Some old controller (not this one) might have problems with SSDs such as timings when the disks start; when failing a disk (the SSD would probably fail with read-only, which means it could not be removed from the array and the metadata header cannot be changed to remove the disk); no TRIM support, which is essential for the disk endurance and many more.

After the screenshots, you can see the part of the Linux dmesg command with the lines related to the HP HPSA Driver and how the system sees the disks.
The following screenshots start with a controller in hardware mode in (HPE terms – Smart Array Mode), then enable the HBA mode, the OS will see the disks as JBOD and then again enable the hardware mode (Smart Array Mode):

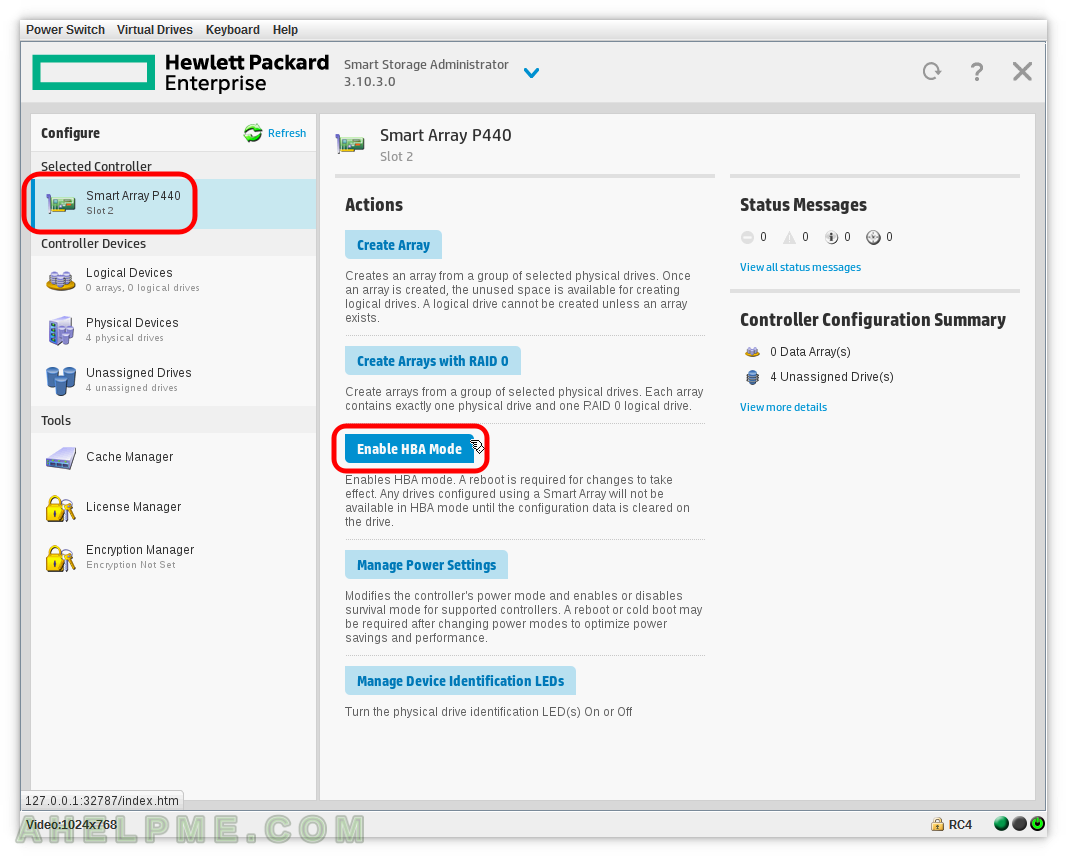
SCREENSHOT 1) Click on the controller “Smart Array P440” on the left and then “Enable HBA Mode” to enable JBOD mode.

main menu
Enable HBA Mode

Keep on reading!

Smart Array P440 – create multiple Logical Drives with different RAID Levels in one Array using Smart Storage Administrator

This article is to show you what different type of RAID logical drives and what strip size could be created on one Array consisted of multiple physical devices like hard drives or SSDs.
The following logical drives could be created or modified on Smart Array P440 with Smart Storage Administrator:

  • Multiple different RAID types with different strip sizes!!!
  • All RAID types could be modified and you could change the strip size to any type offered by the controller
  • Bigger RAID type logical drives could be change to smaller RAID type logical drives. Such as logical drives of RAID 5 type could be converted to RAID 0, RAID 1, RAID 6 with any strip size on-the-fly without losing your data. Read on to see all of the RAID type modifications you an make.

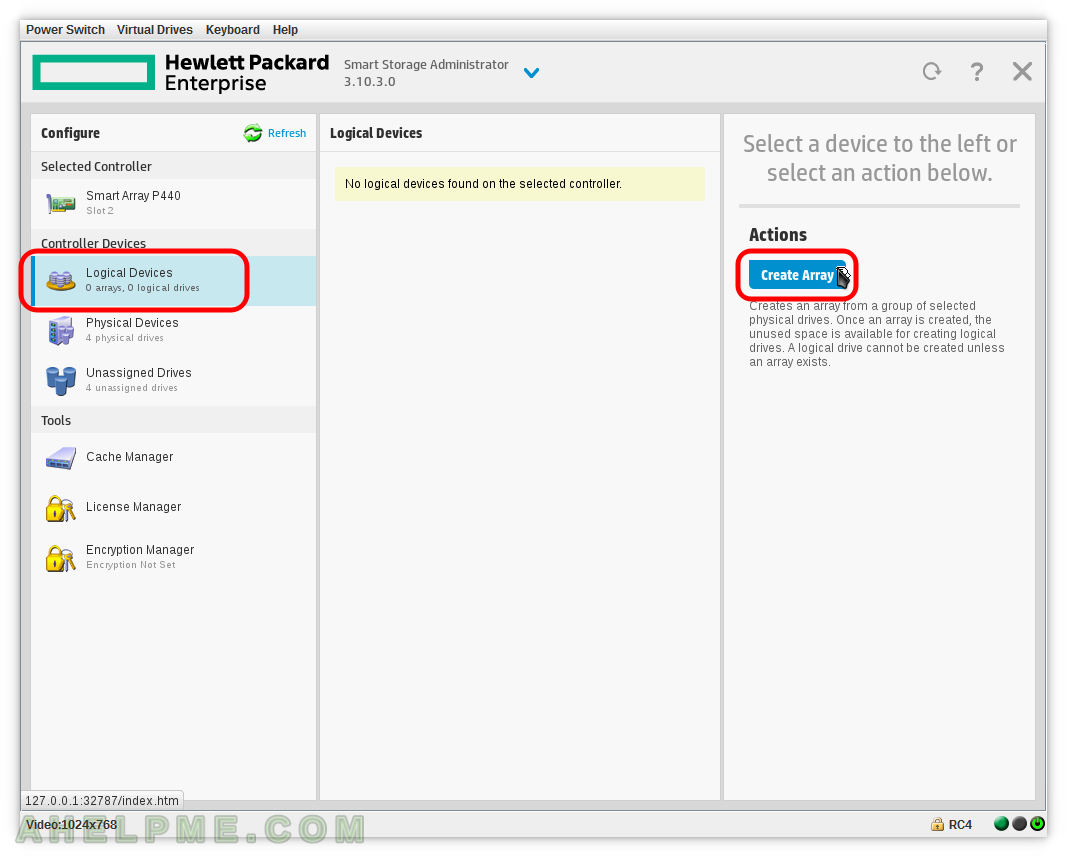
SCREENSHOT 1) Click on “Create Array” to create a new array.

main menu
Logical Drives

Keep on reading!

Smart Array P440 – create RAID 1+0 (RAID 10) using Smart Storage Administrator

This article is to show how to create RAID 1+0 in Smart Array P440 hardware controller and what kind of migration is possible from RAID 1+0 on this controller.

Existing RAID 1+0 could be migrated to RAID 0 or RAID 5 or RAID 6 (so the RAID Level transformation is possible) with different Stip size (any of the supported in the controller) on-the-fly with no data loss!

No data loss is available to the tested server HP ProLiant DL160 GEN9, check the manual for your generation.
You may check our more detail article on how to start HPE Smart Storage Administrator on your server here: Review of Smart Array P440 on a server HP ProLiant DL160 Gen9 using iLO – create, modify, delete array and view controller settings

There are the steps to create RAID 1+0 using Smart Storage Administrator:

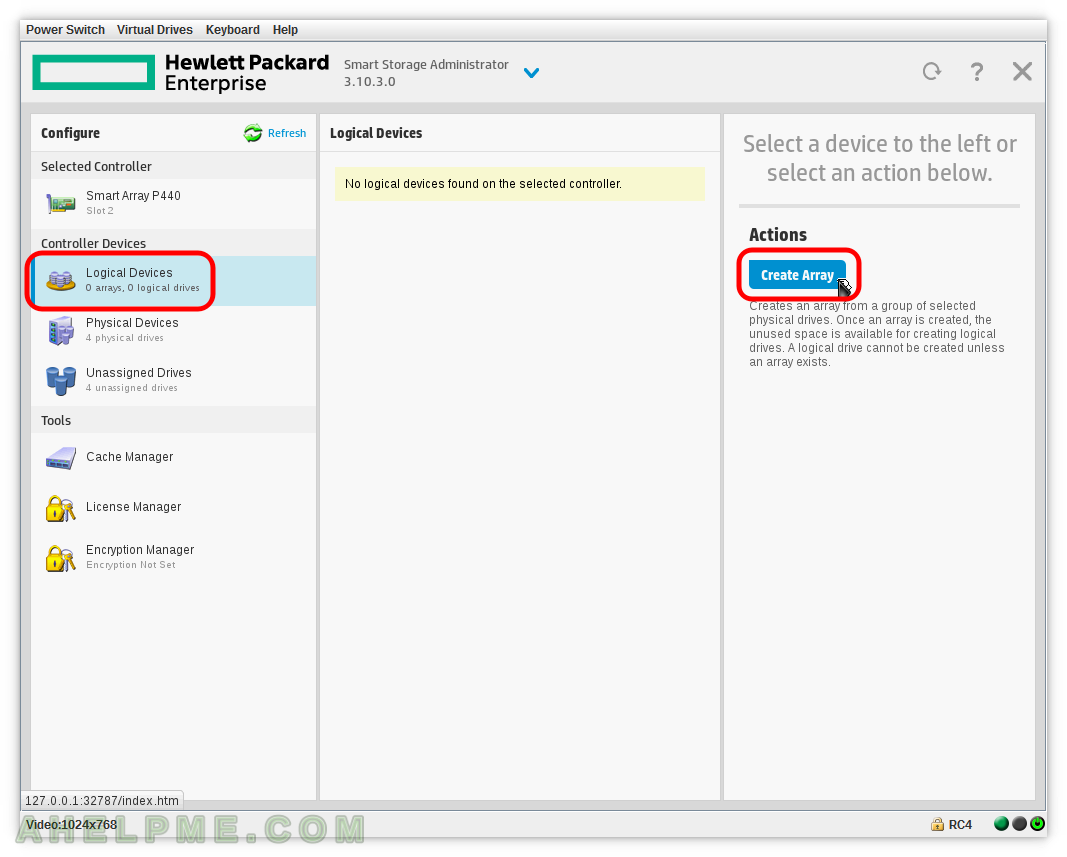
STEP 1) Click on “Create Array” to create a new array.

main menu
Logical Devices

Keep on reading!

Smart Array P440 – create RAID 6 using Smart Storage Administrator

This article is to show how to create RAID 6 (ADG) in Smart Array P440 hardware controller and what kind of migration is possible from RAID 6 on this controller.

Existing RAID 6 could be migrated to RAID 0 or RAID 5 or RAID 1+0 (so the RAID Level transformation is possible) with different Stip size (any of the supported in the controller) on-the-fly with no data loss!

No data loss is available to the tested server HP ProLiant DL160 GEN9, check the manual for your generation.
You may check our more detail article on how to start HPE Smart Storage Administrator on your server here: Review of Smart Array P440 on a server HP ProLiant DL160 Gen9 using iLO – create, modify, delete array and view controller settings

There are the steps to create RAID 6 (ADG) using Smart Storage Administrator:

STEP 1) Click on “Create Array” to create a new array.

main menu
Logical Devices

Keep on reading!

Smart Array P440 – create RAID 5 using Smart Storage Administrator

This article is to show how to create RAID 5 in Smart Array P440 hardware controller and what kind of migration is possible from RAID 5 on this controller.

Existing RAID 5 could be migrated to RAID 0 or RAID 5 (so the RAID Level transformation is possible) with different Stip size (any of the supported in the controller) on-the-fly with no data loss!

No data loss is available to the tested server HP ProLiant DL160 GEN9, check the manual for your generation.
You may check our more detail article on how to start HPE Smart Storage Administrator on your server here: Review of Smart Array P440 on a server HP ProLiant DL160 Gen9 using iLO – create, modify, delete array and view controller settings

There are the steps to create RAID 5 using Smart Storage Administrator:

STEP 1) Click on “Create Array” to create a new array.

main menu
Logical Devices

Keep on reading!

Smart Array P440 – create RAID 0 using Smart Storage Administrator

This article is to show how to create RAID 0 in Smart Array P440 hardware controller and what kind of migration is possible from RAID 0 on this controller.

Existing RAID 0 could be migrated only to the same RAID 0 (so no possible RAID Level transformation) with different Stip size (any of the supported in the controller) on-the-fly with no data loss!

You may check our more detail article on how to start HPE Smart Storage Administrator on your server here: Review of Smart Array P440 on a server HP ProLiant DL160 Gen9 using iLO – create, modify, delete array and view controller settings

There are the steps to create RAID 0 using Smart Storage Administrator:

STEP 1) Click on “Create Array” to create a new array.

main menu
Logical Devices

Keep on reading!