This article is to show how to create RAID 5 in Smart Array P440 hardware controller and what kind of migration is possible from RAID 5 on this controller.
Existing RAID 5 could be migrated to RAID 0 or RAID 5 (so the RAID Level transformation is possible) with different Stip size (any of the supported in the controller) on-the-fly with no data loss!
No data loss is available to the tested server HP ProLiant DL160 GEN9, check the manual for your generation.
You may check our more detail article on how to start HPE Smart Storage Administrator on your server here: Review of Smart Array P440 on a server HP ProLiant DL160 Gen9 using iLO – create, modify, delete array and view controller settings
There are the steps to create RAID 5 using Smart Storage Administrator:
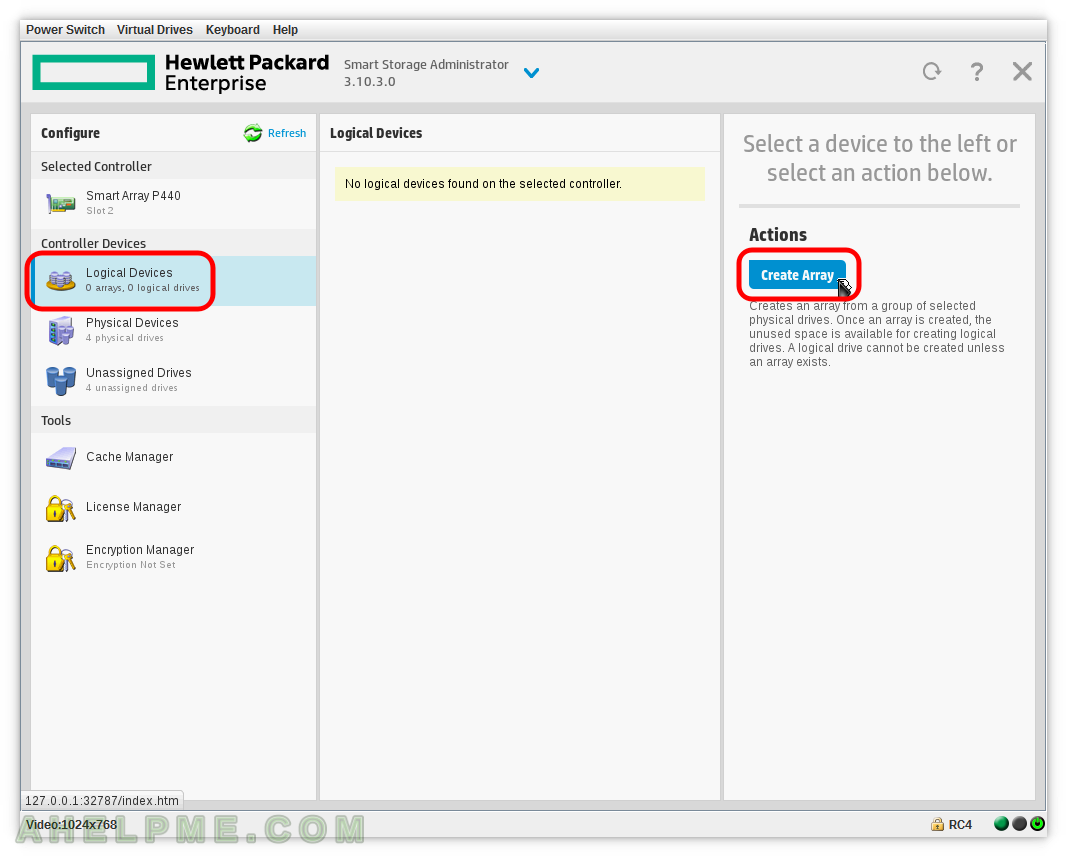
STEP 1) Click on “Create Array” to create a new array.
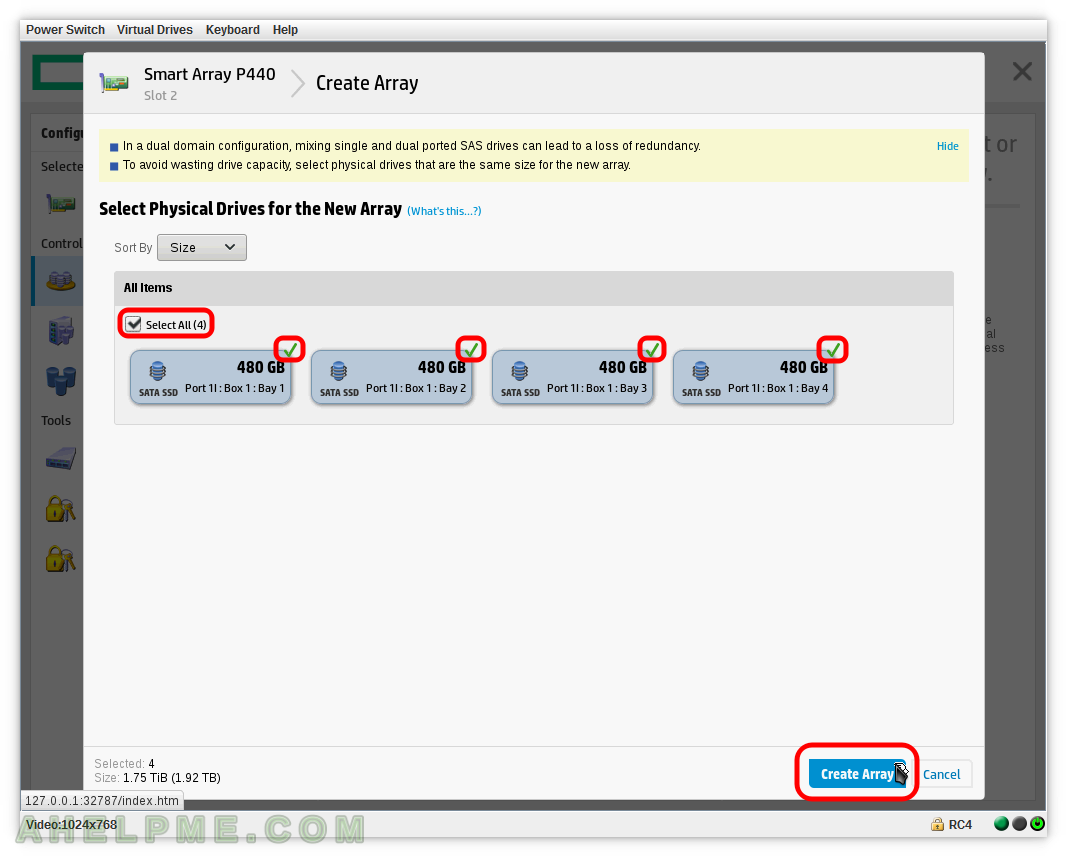
STEP 2) Select the disks, which will be included in the new array.
You could use “Select All” to select all disks at once. Then click on “Create Array”.
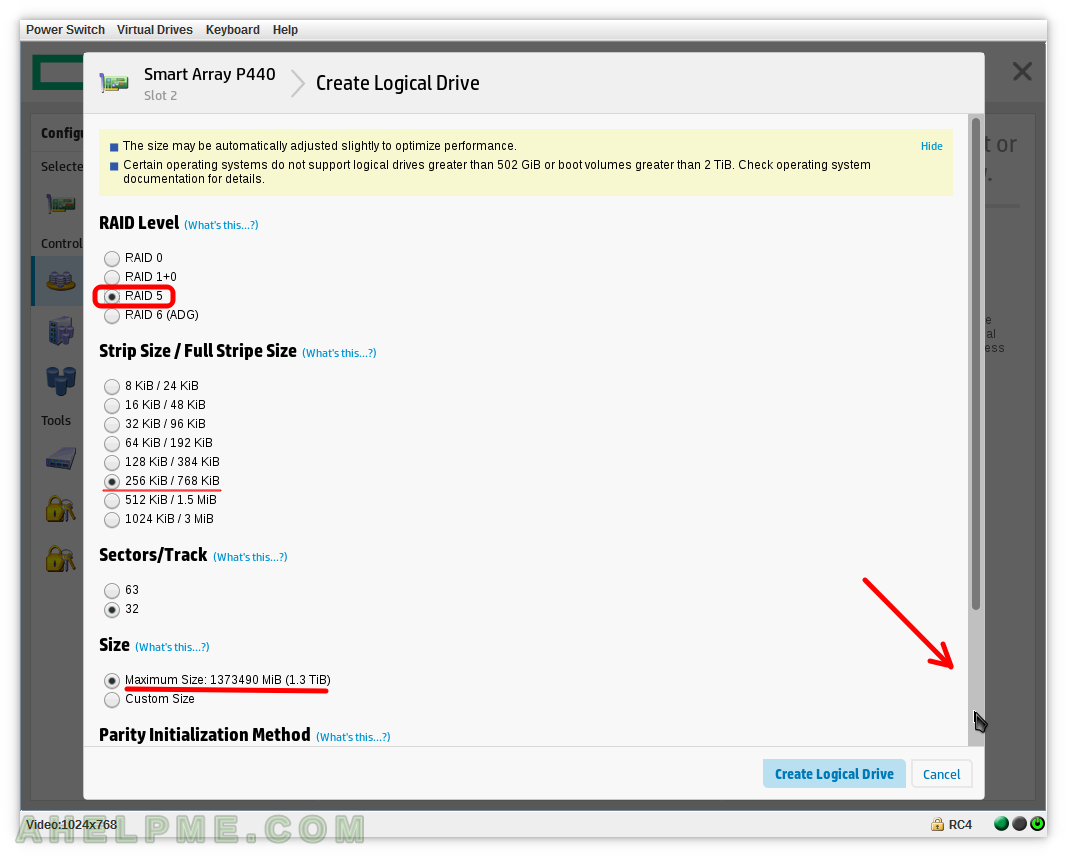
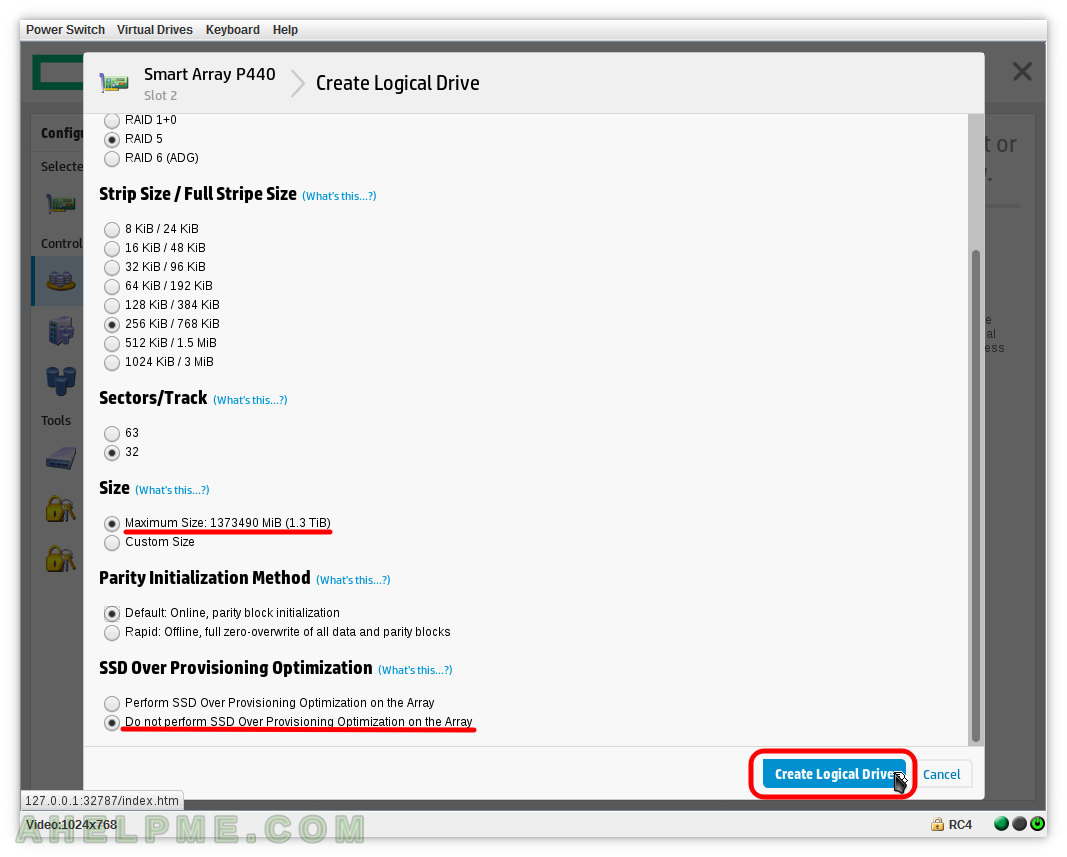
STEP 3) Set various features of the array – RAID Level to RAID 5.
Choose wisely your Strip size according to your workload. Here we selected 256 KiB and the Full Stripe Size is 3 (selected disks -1 for redundancy i.e. parity) x 256 KiB = 768 KiB. The size of the array, you could choose less than the maxium and then to create another array (even with different RAID Level than this one despite using the same disks).
STEP 4) Leave “Parity Initialization Method” as default – no use not to be able to use your disks when initialization is in progress.
Select “Do not perform SSD Over Provisioning Optimization on the Array” if you do not want to zeroing your devices before using them and click on “Create Logical Drive” button.
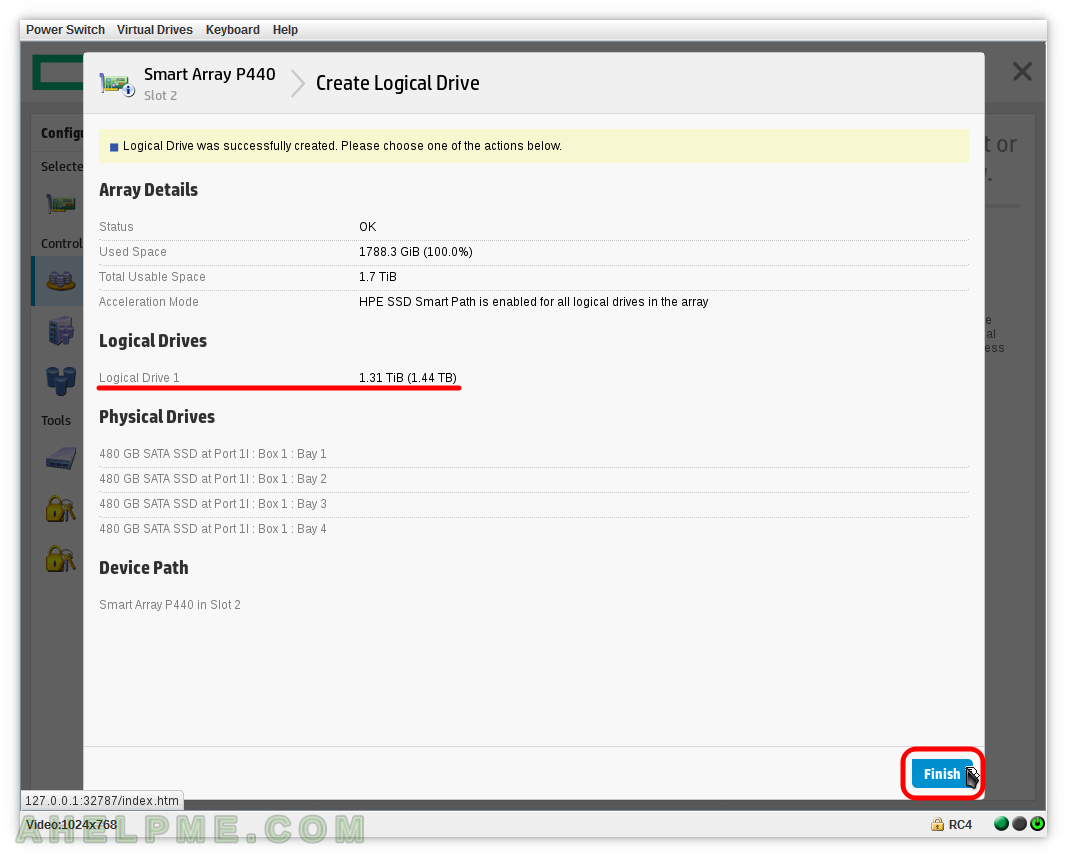
STEP 5) Logical Drive on the new array was successfully created.
This is informative page to show you what was created. Click on “Finish” to exit the “Create Array” process.
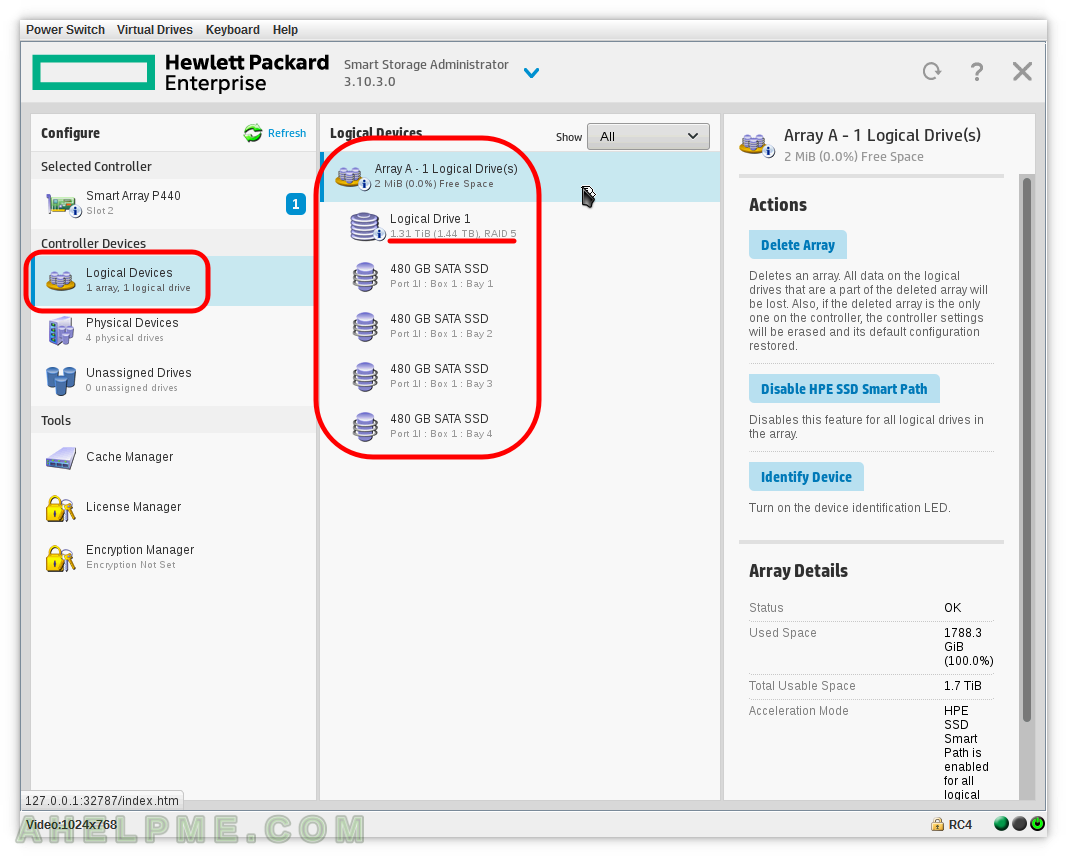
STEP 6) Overview of the Array and the Logical Drives.
An array with name “Array A” has been created, which hosts “Logical Drive 1” consisting of 4 disks.
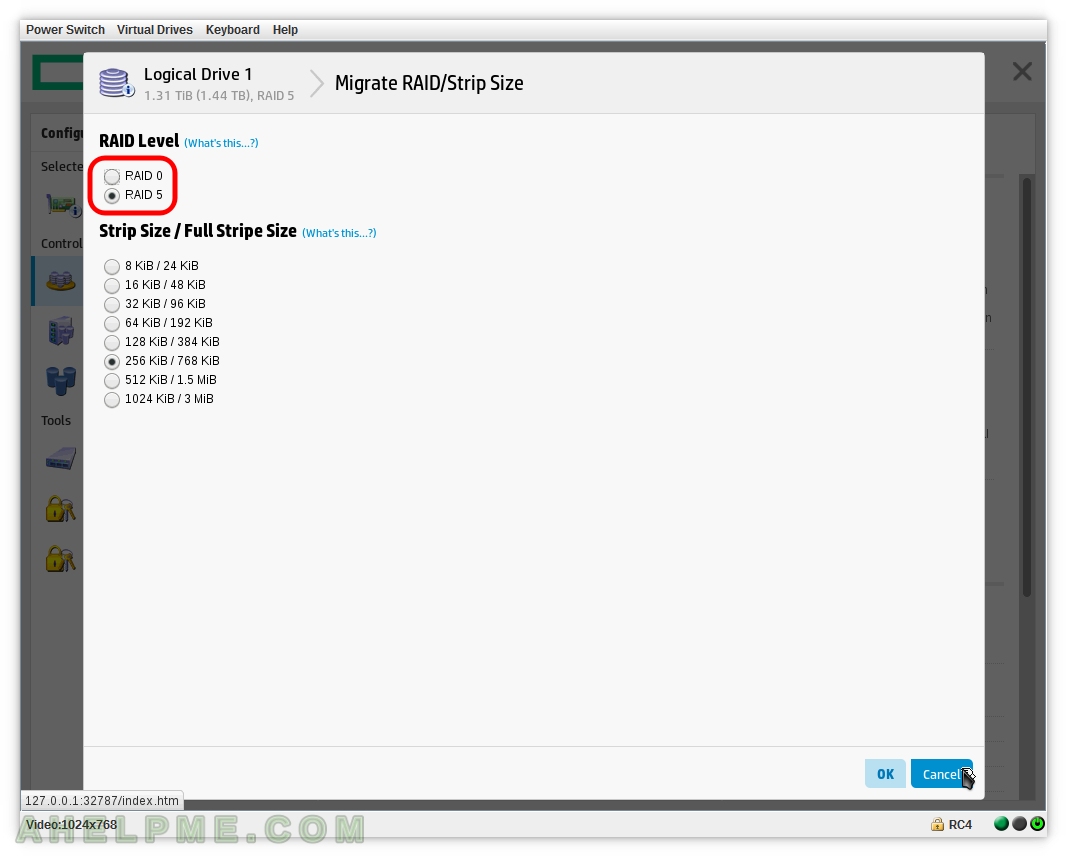
STEP 7) Select the controller, the Logical Devices on the left, the “Logical Drive 1” from “Array A” and then “Migrate RAID/Strip Size”
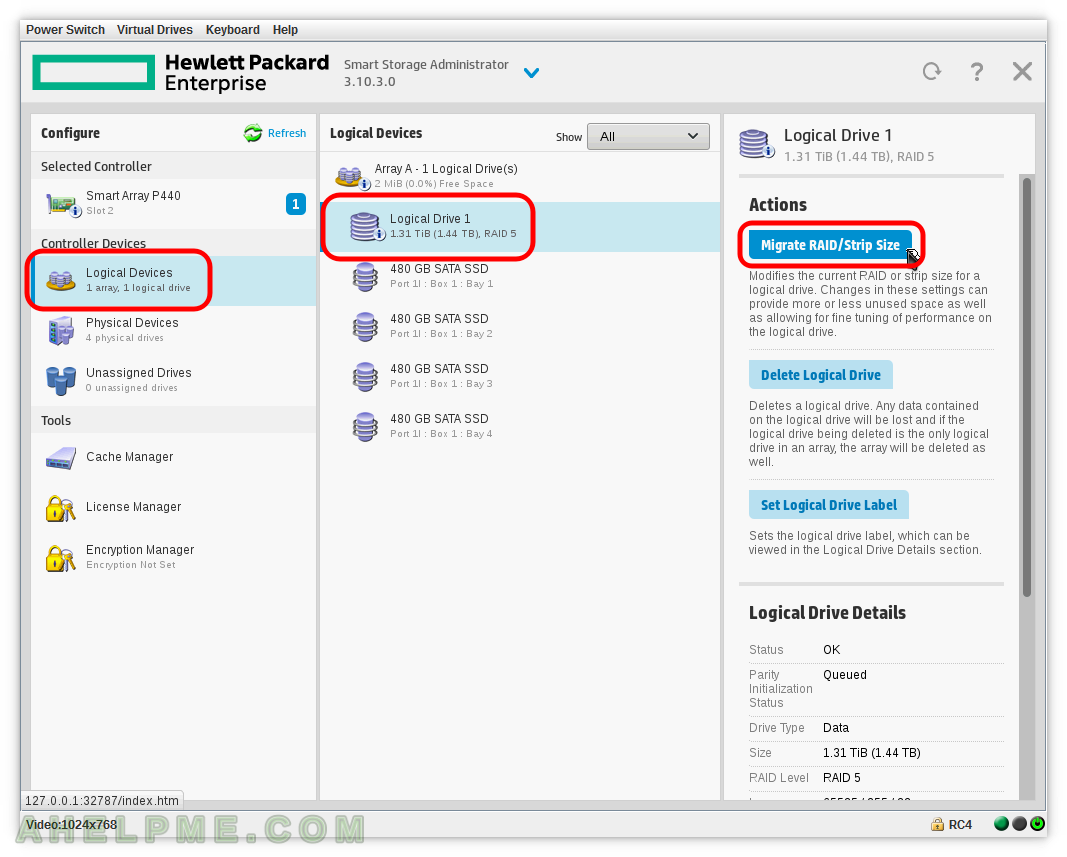
STEP 8) This image show what options you have – RAID 5 could be migrated to RAID 0 and RAID 5 Level
RAID 5 uses less space than RAID 0, that’s why you can transform RAID 5 to RAID 0 (on-the-fly without losing data). You can change to any available Strip Size on-the-fly without losing data!