Minimal net install is useful when a dedicated server is installed from a IPMI KVM or Dell iDRAC, HP iLO, IBM IMM or where the initial client side download of files need to be minimal.
For amd64 CentOS 8 BaseOS the net install bootable media is located here (now the current latest release is 8.0.1950, but you can check the last directory with 8.
http://mirror.leaseweb.com/centos/8/isos/x86_64/CentOS-8-x86_64-1905-boot.iso
Note there is no minimal CD for offline installation anymore. Boot CD is to just boot and make “netinstall” installation and a big fat DVD of 6.6Gbytes to install offline.
Software details of CentOS 8 minimal install could be found here – Technical details of a default CentOS 8.0.1950 minimal installation
Download it and put it on a cd or usb, the boot from it and follow the steps bellow:
STEP 1) Enter the BIOS of your machine (desktop or server) to change the boot order.
You can try F11 on most servers to have the boot menu. Here we use DEL to enter the UEFI BIOS.

STEP 2) Here is our “UEFI BIOS->Boot->Boot Override” and in most modern motherboard you can choose to override the default boot devices.
Choose the “UEFI: HL-DT-STDVDRAM…” to boot and install CentOS 8 with UEFI support. You should do this, because most of the new hardware like video cards would not work properly without beeing in UEFI mode.

STEP 3) If you booted from the DVD you would get this first screen – select “Install CentOS Linux 8.0.1905” and hit Enter

STEP 4) The kernel and the live system are loading…

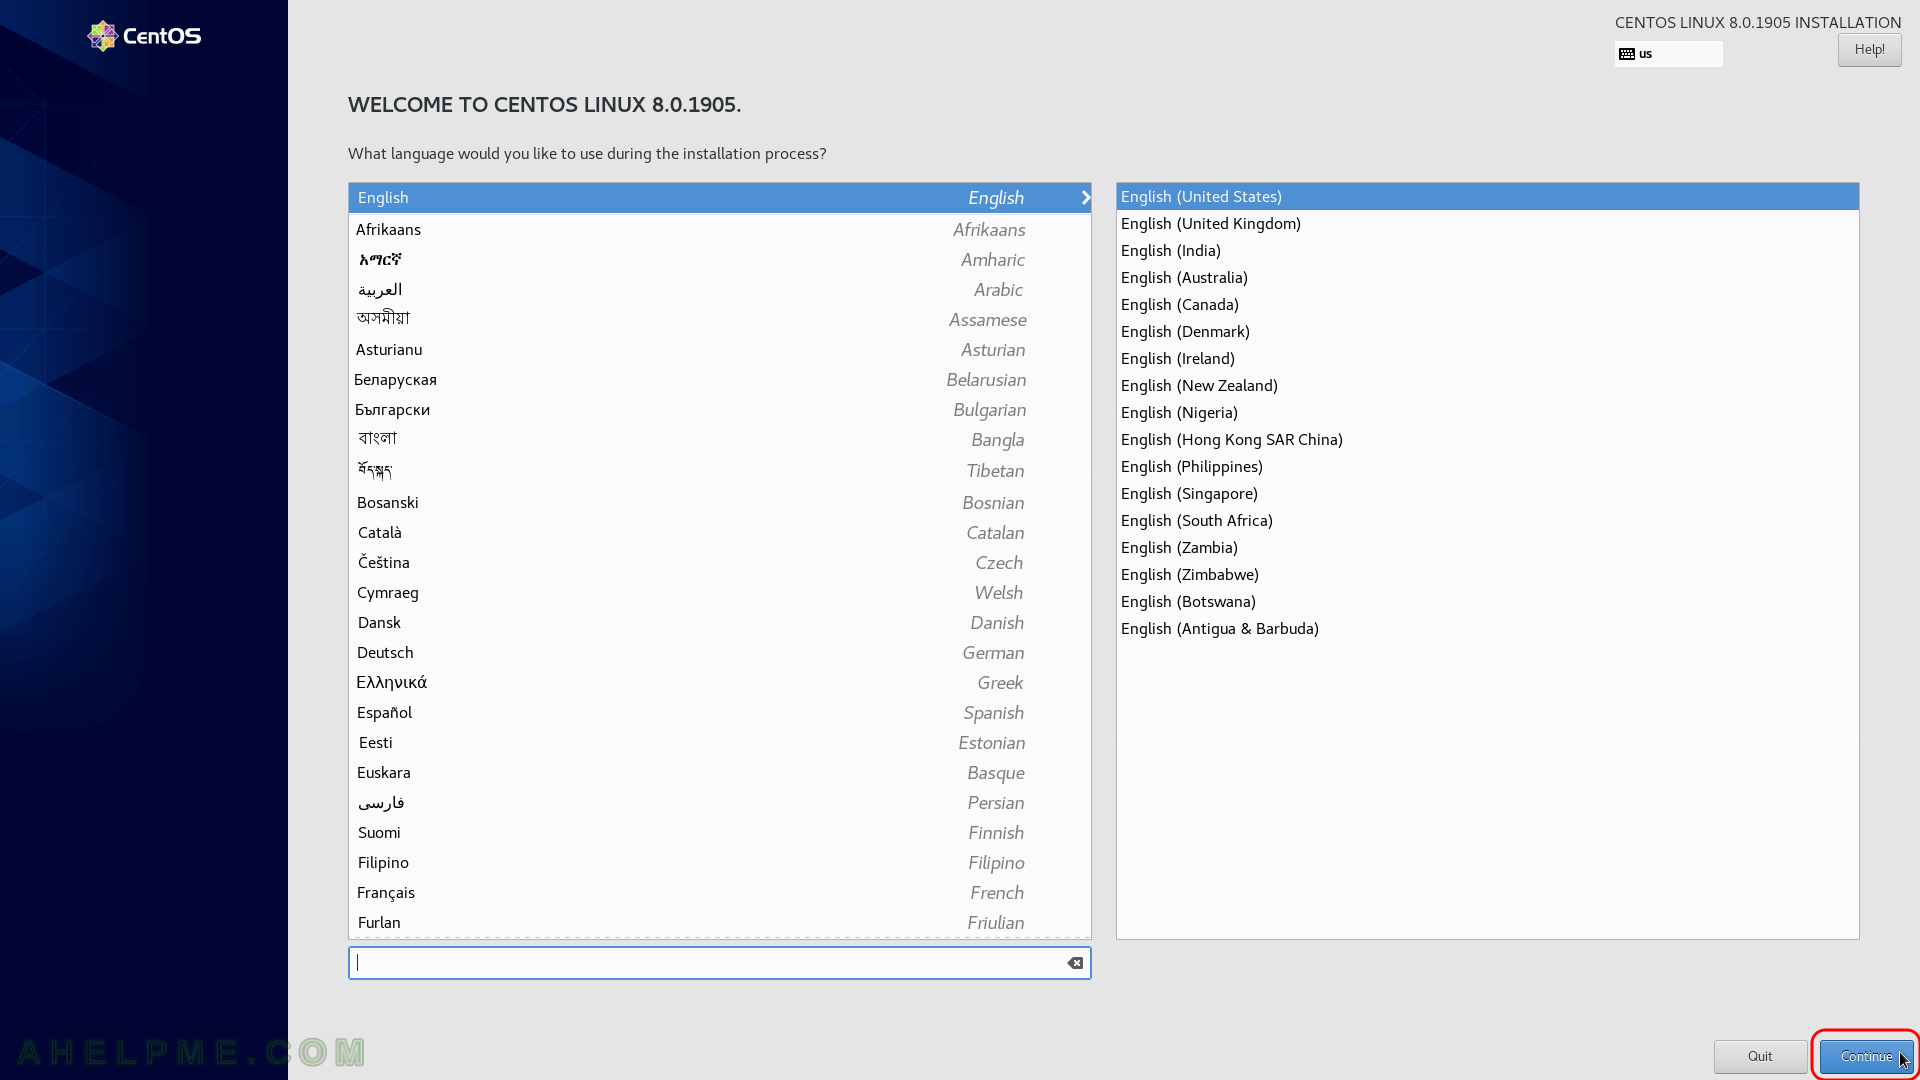
STEP 5) Choose your system language. Here we selected the English.
The setup will guide you through the steps in the language you select here and the installed system will use the selected language as default.
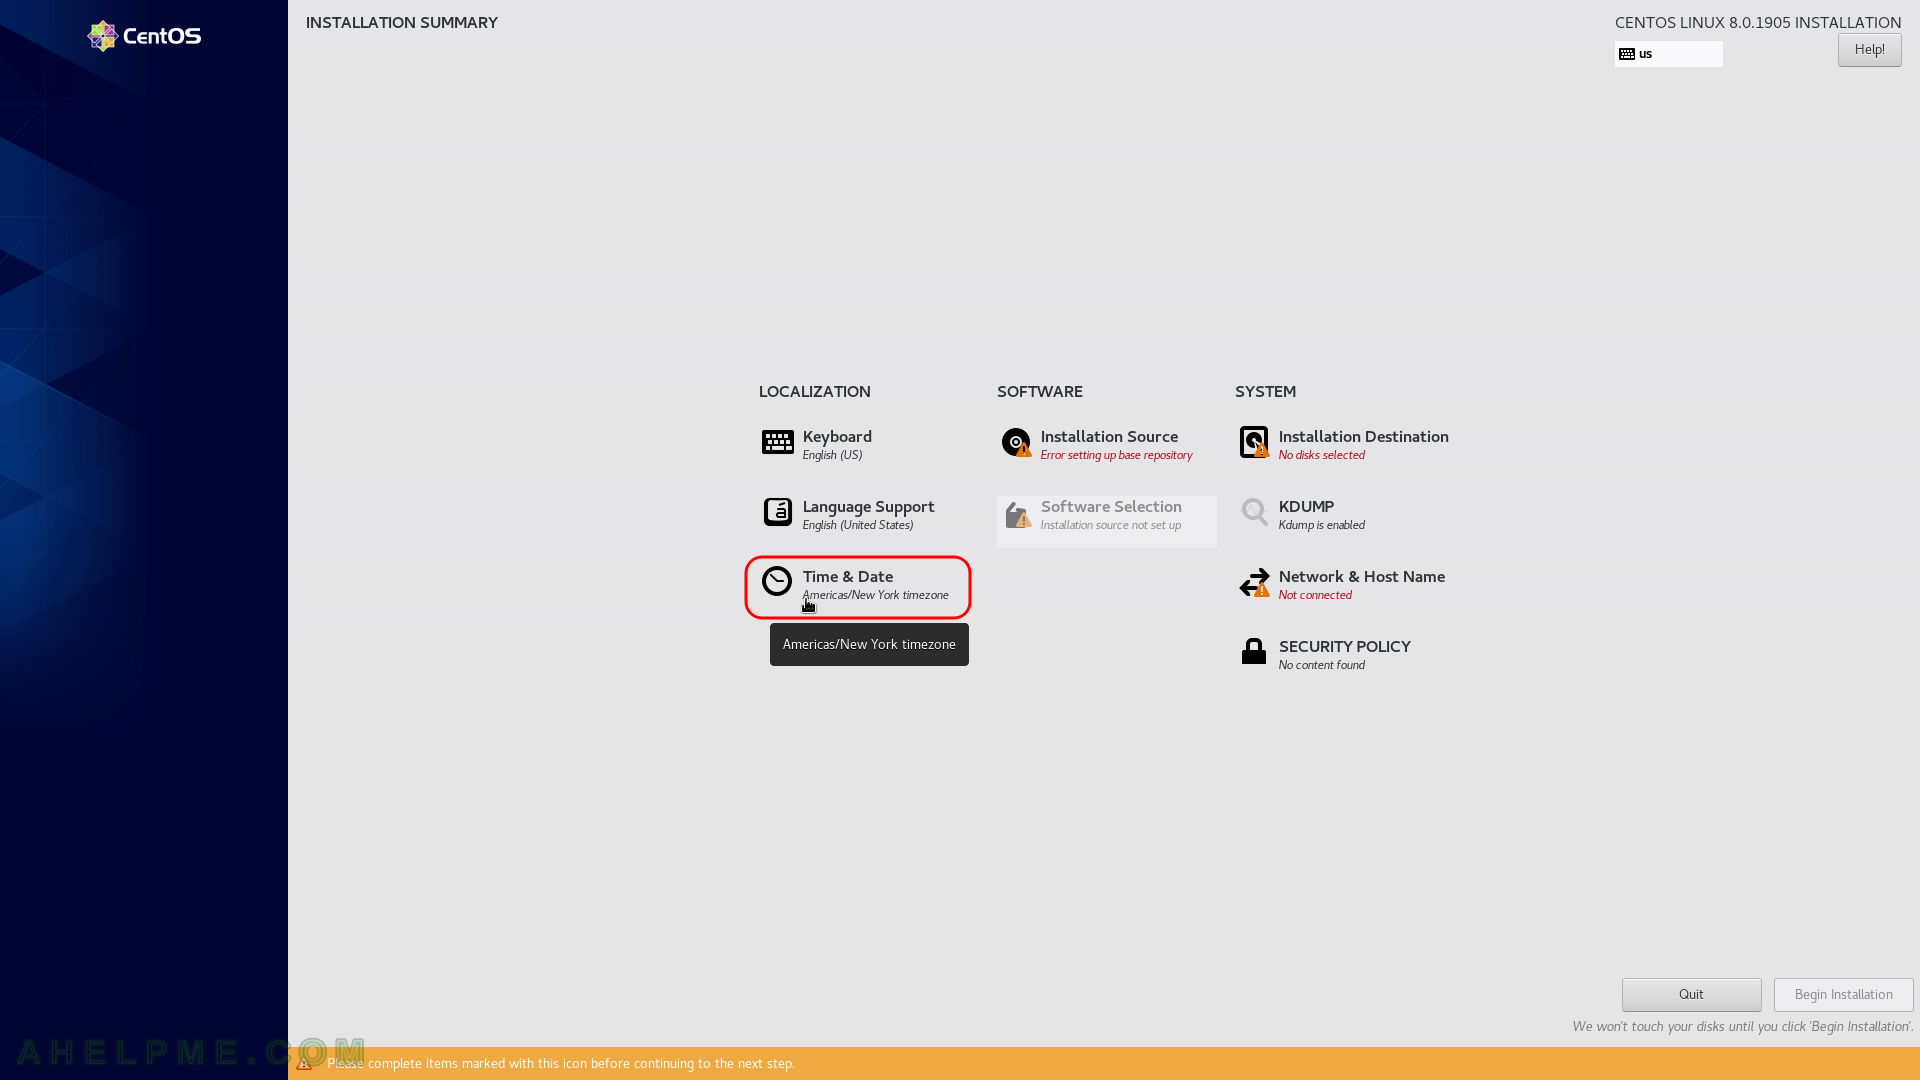
STEP 6) Select time and date menu to set the time and date and the time zone of the system, which is very important. Click on “Time & Date”.
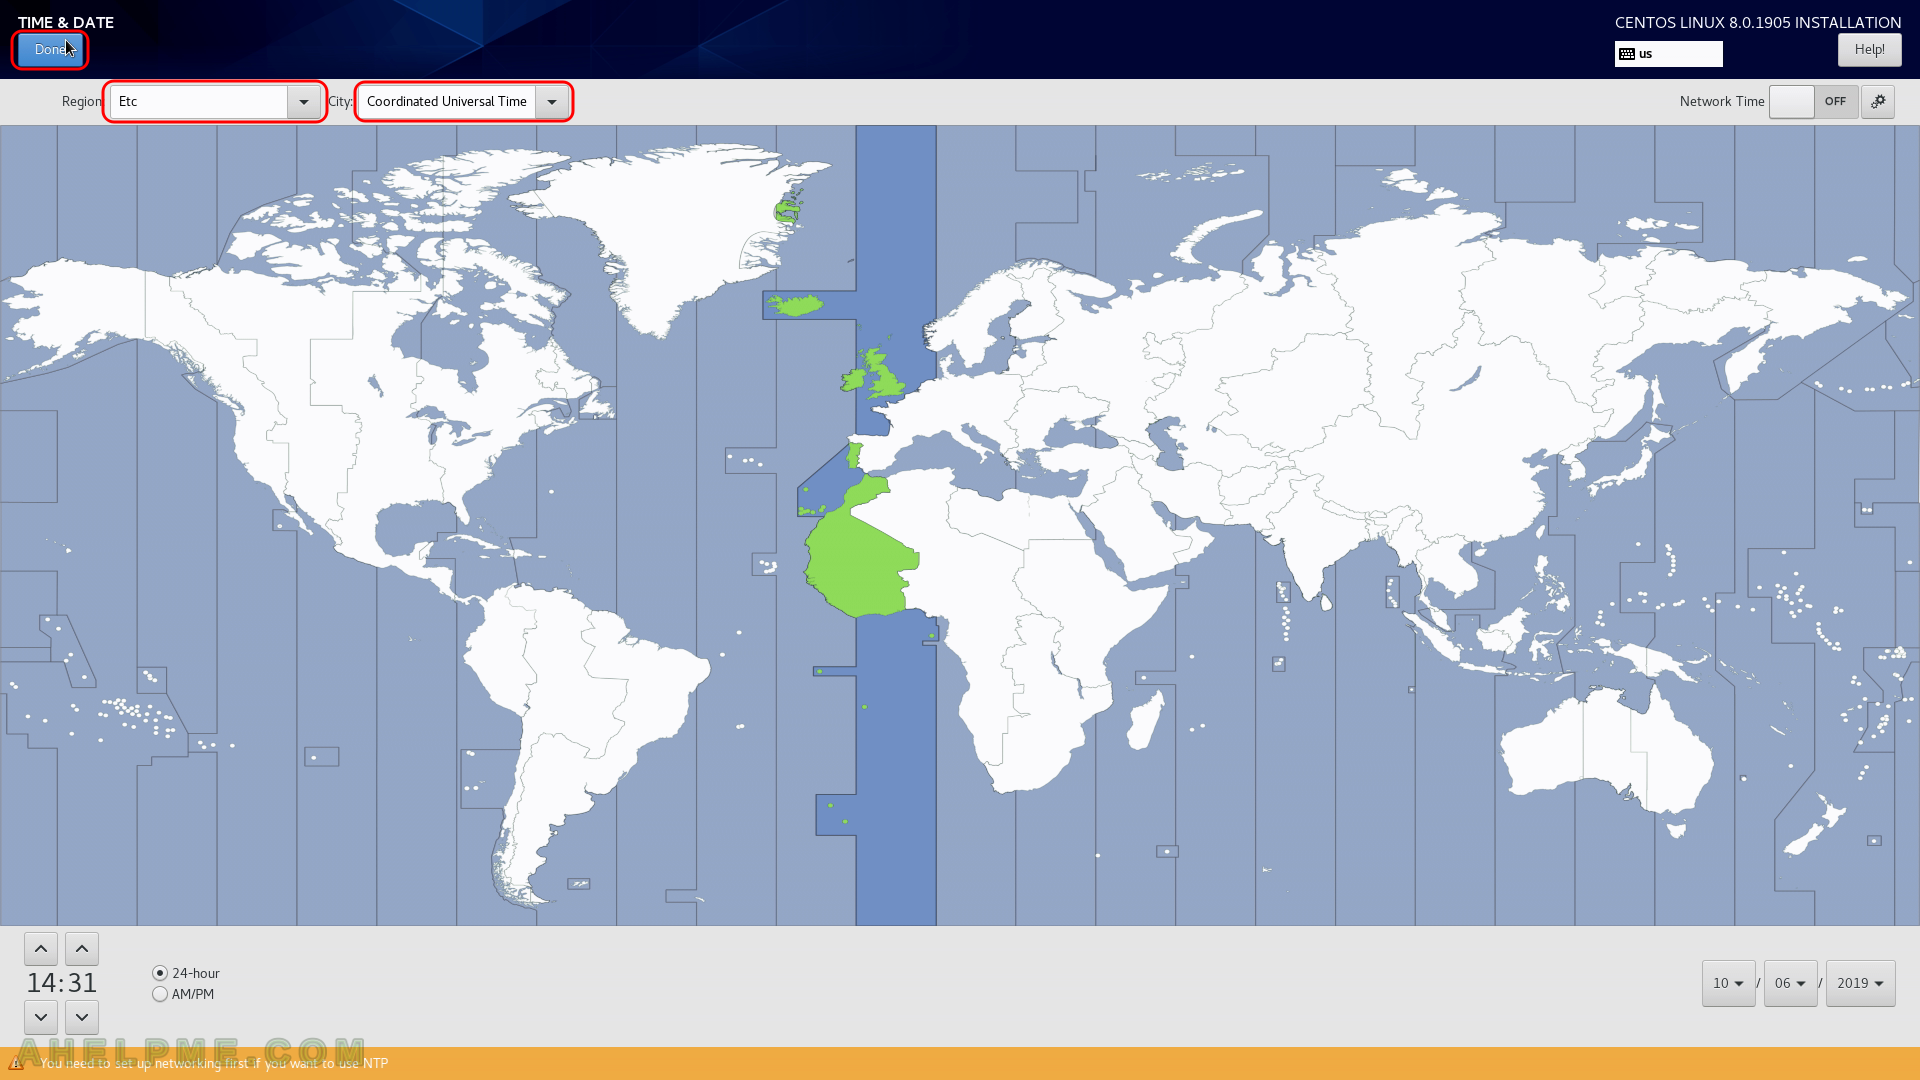
STEP 7) Select your time zone – here we selected UTC (Universal Coordinated Time), but you can choose your time zone if it is not the right one by default.
You even may point with the mouse to your country on the map. Click on “Done” when you are ready.
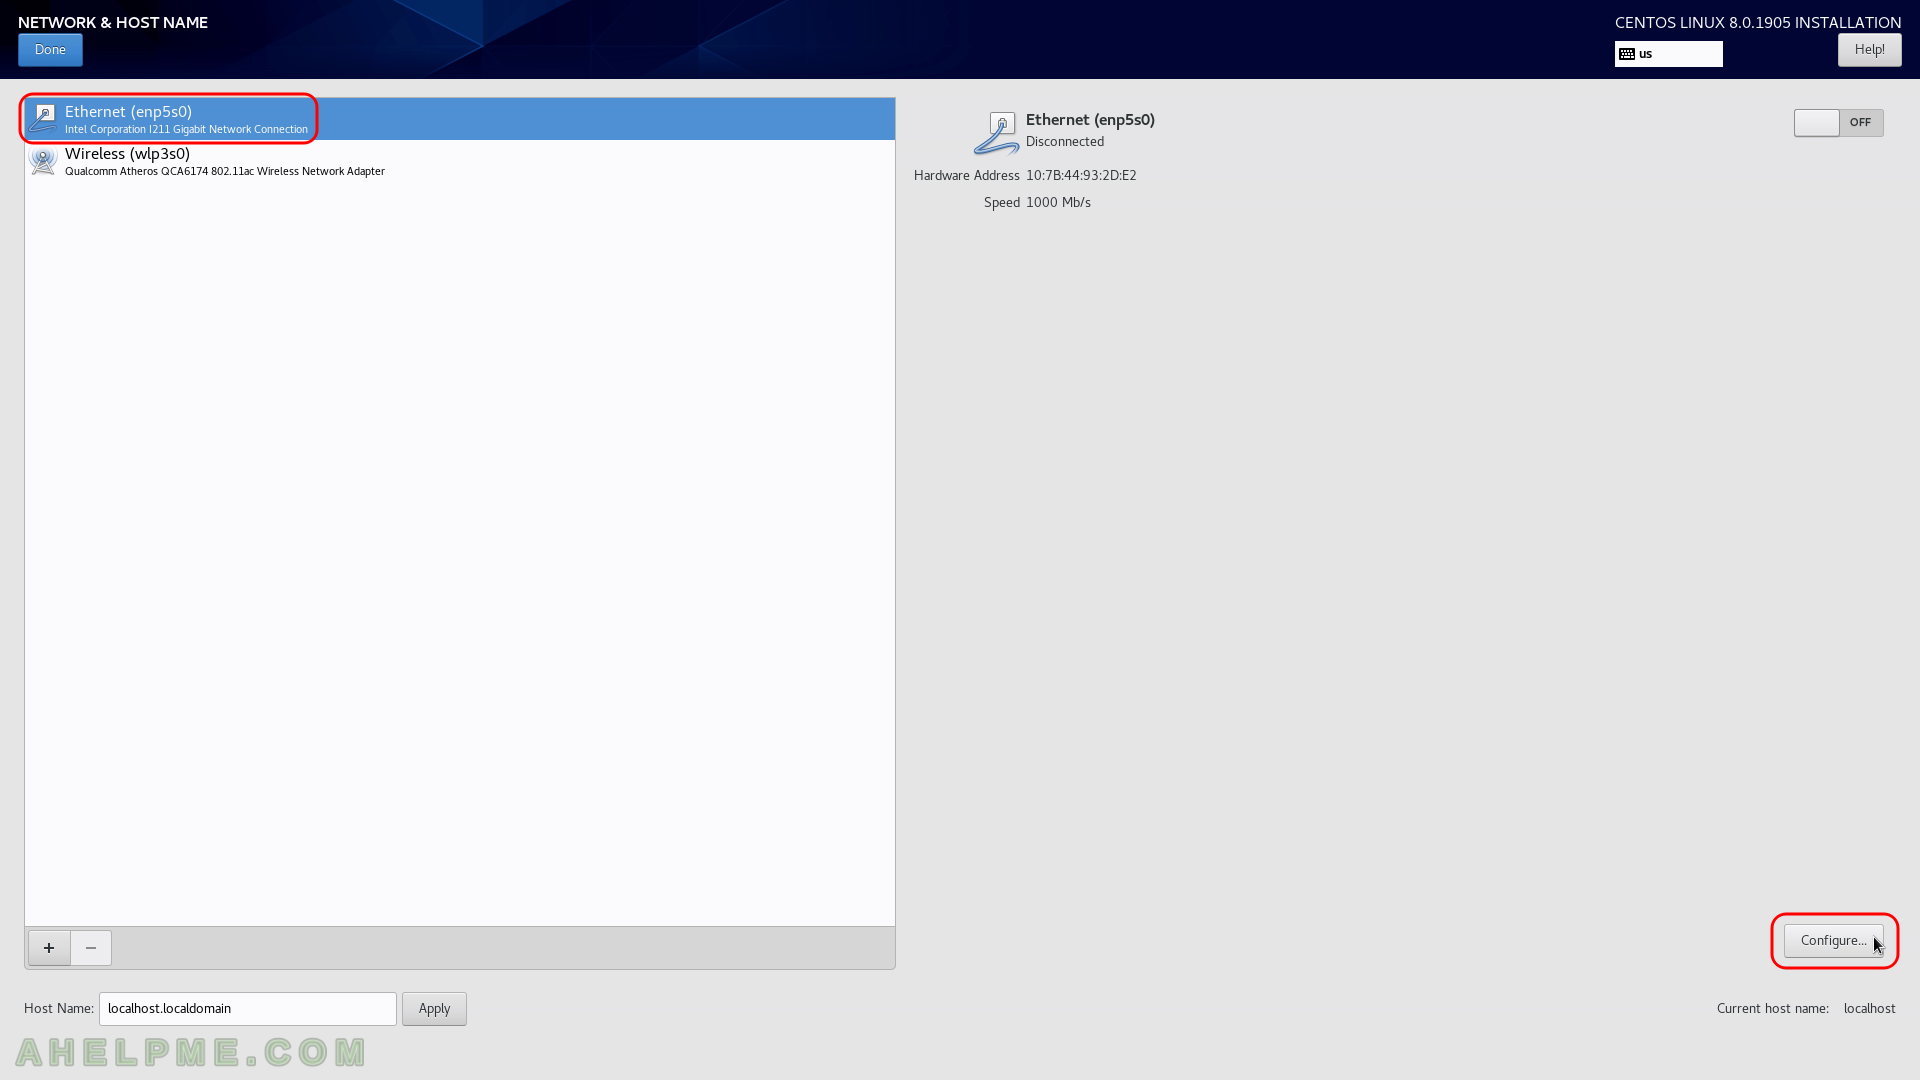
STEP 8) Set the connectivity of your server. Because this is network installation you cannot proceed with the installation without a working network.
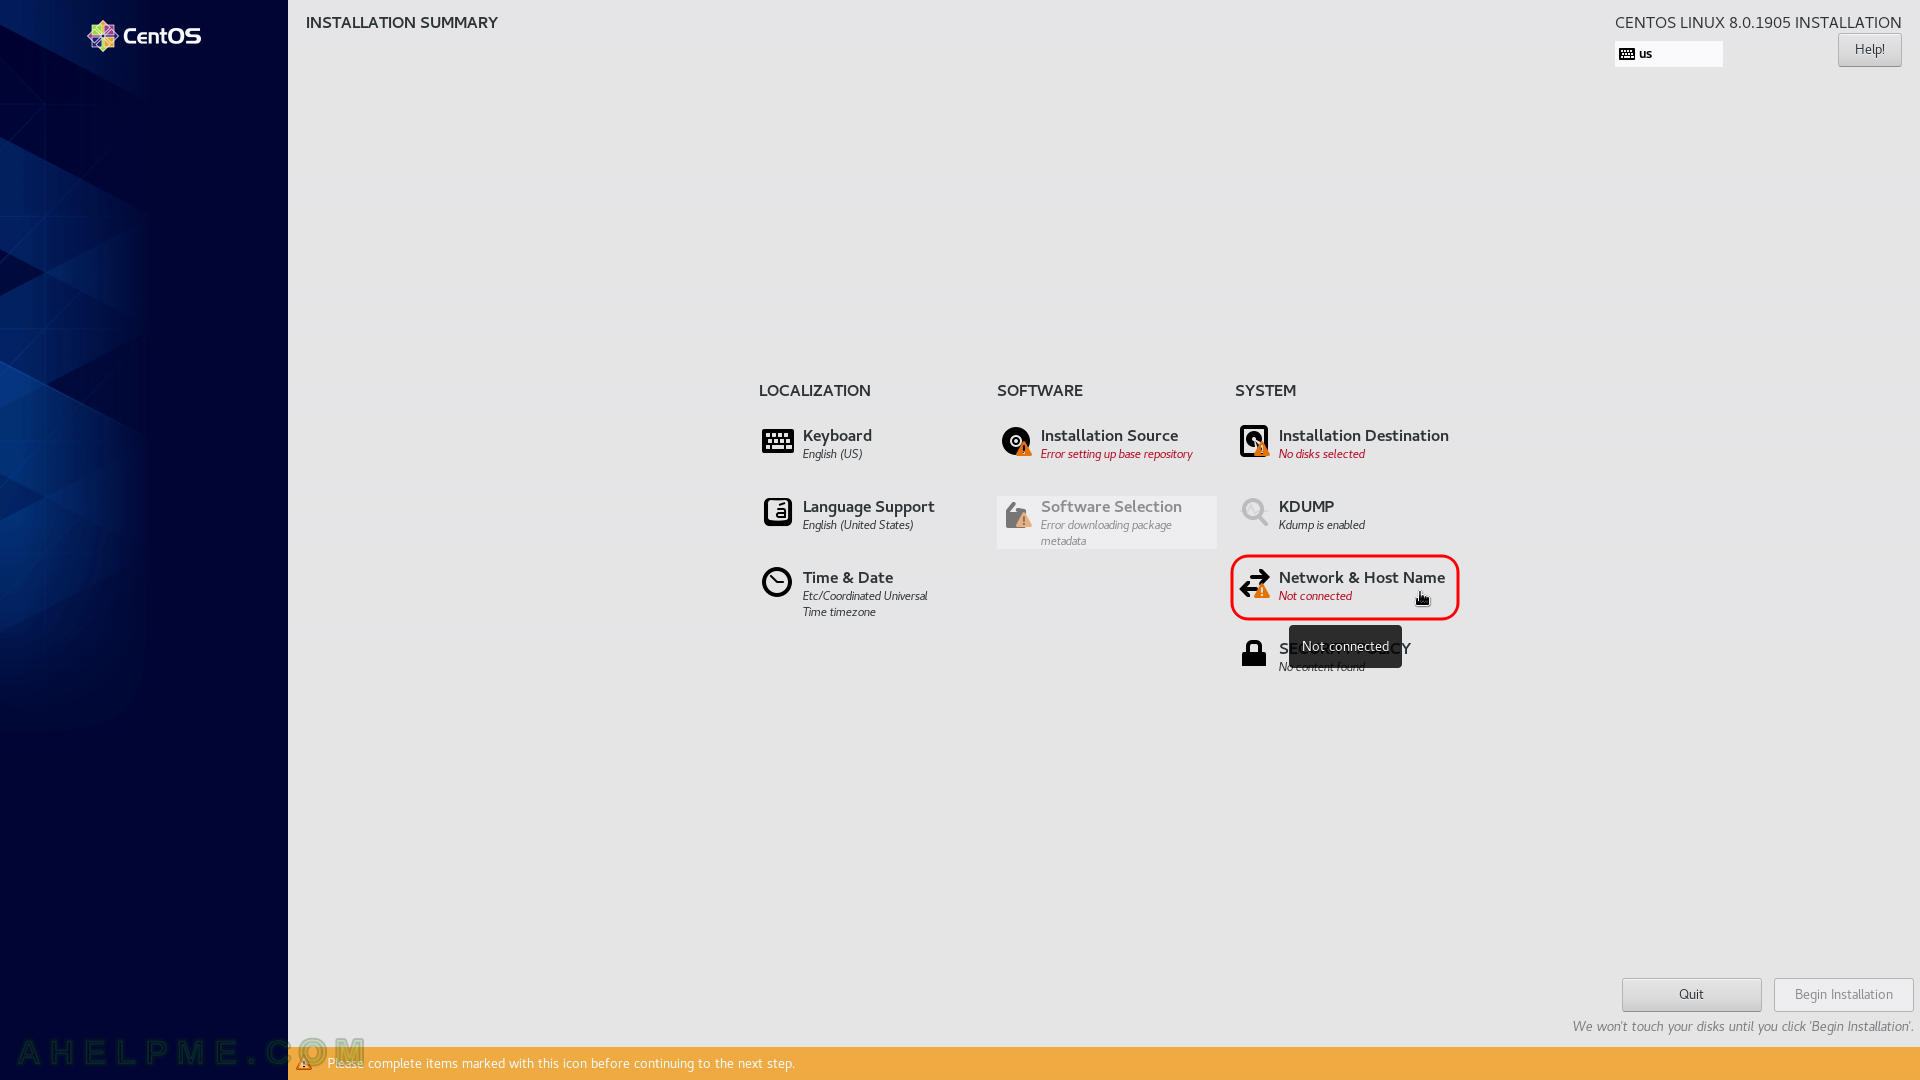
STEP 9) Click on the network adapter you are going to use for the Internet to select it and then click on “Configure…” button bottom right.
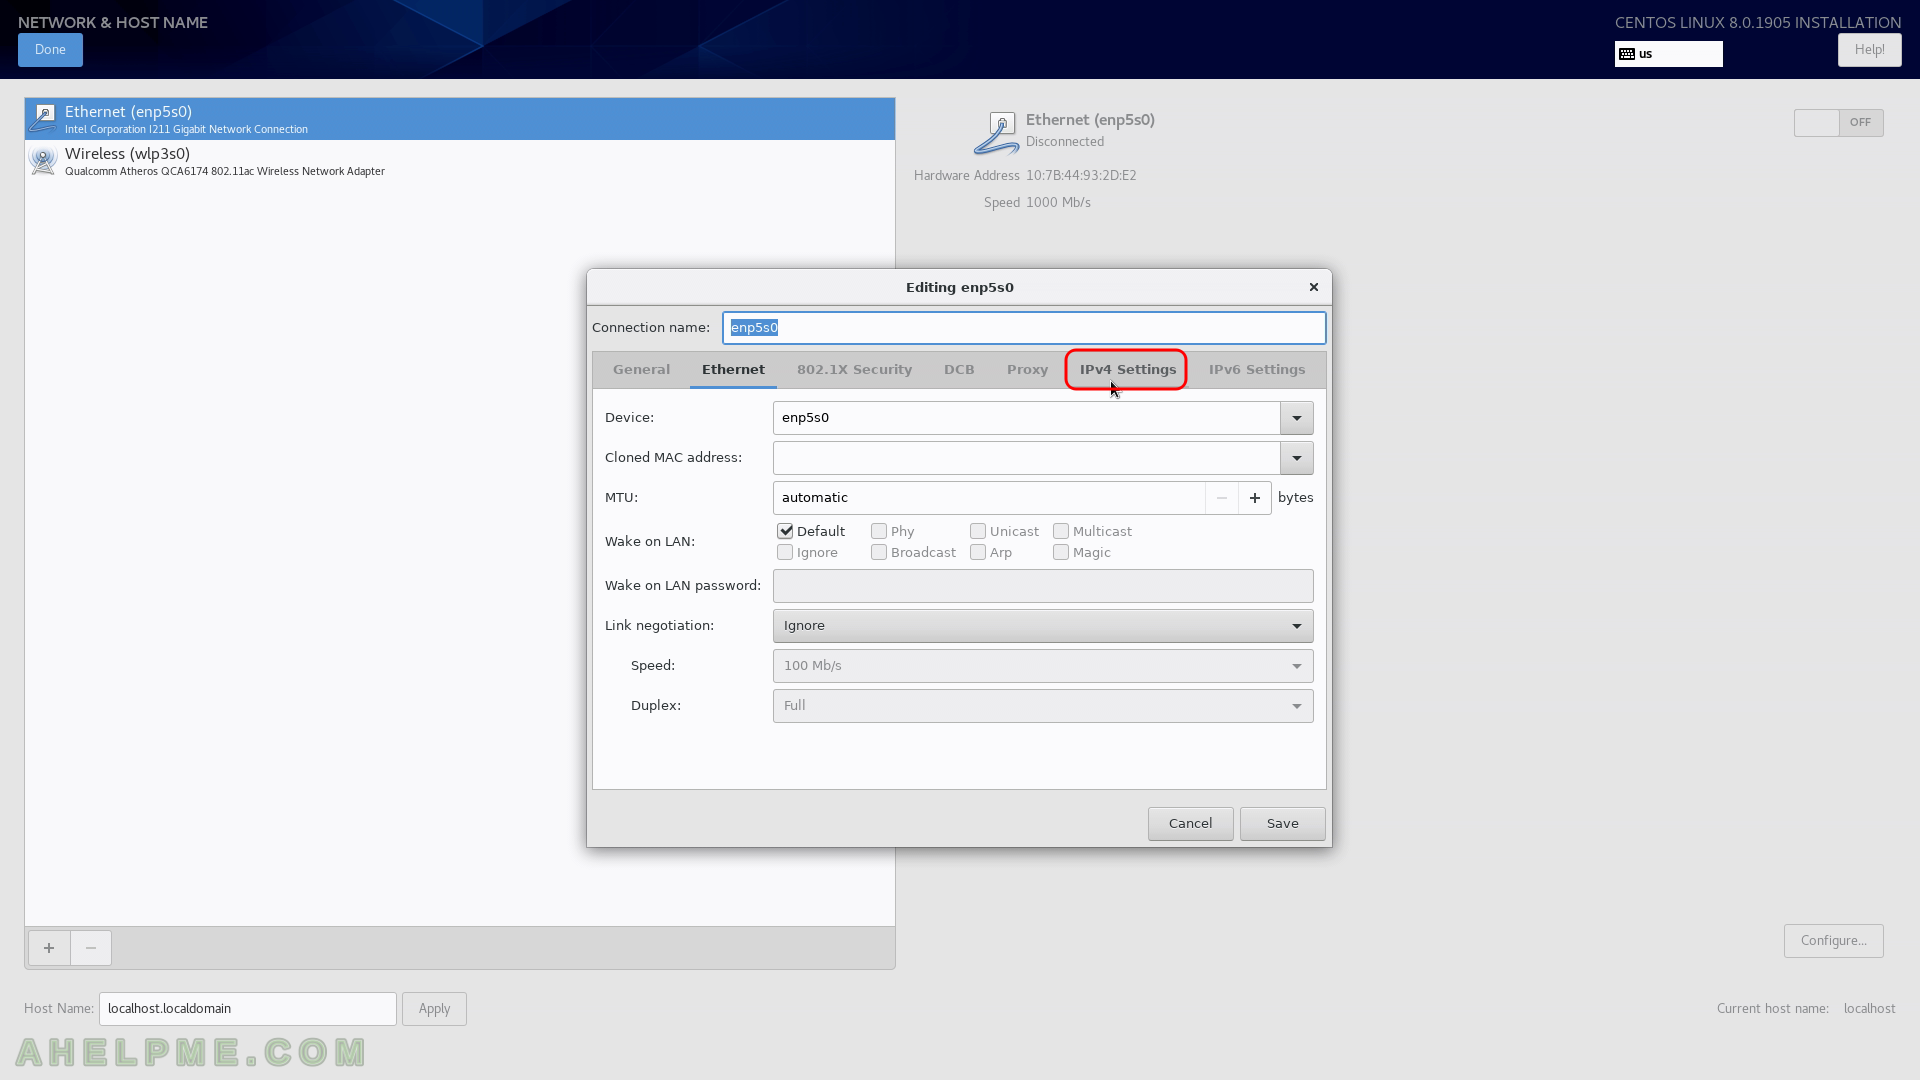
STEP 10) Click on IPv4 to set an IPv4 IP.
I am so much happy for coming across this solution. I could not figure it out passing the installation stage that has to do with software and luckily this helps a lot