SCREENSHOT 21) Confirm to delete the old root paritition by clicking on “Delete It”.
DO NOT check the “Delete all file systems which are only used by CentOS Linux 7.7.1908 for x86_64” (or used by “Unknown”), because it will remove all system partitions but also the storage data partition, which we want to keep.

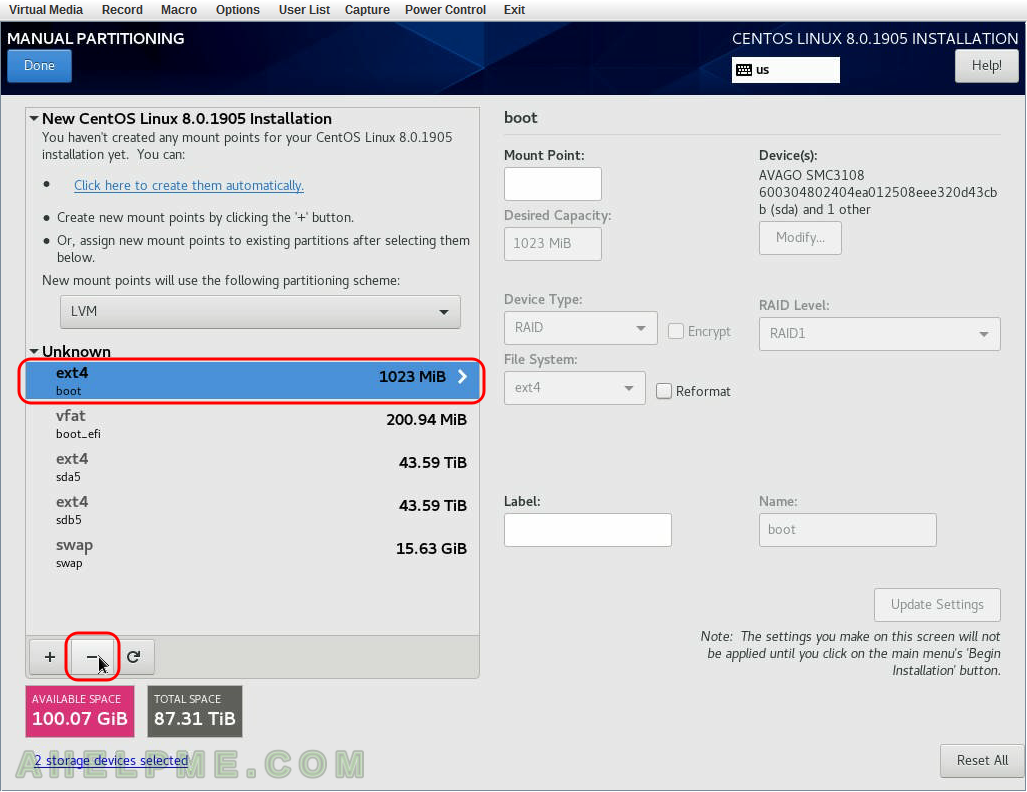
SCREENSHOT 22) Click on “Unknown” (after deleting the root partition the setup does not recognize the old system anymore) to show what partition exists in our old installation.
Select the boot paritition “/boot” and click on the minus “-” button below to remove the old boot partition.
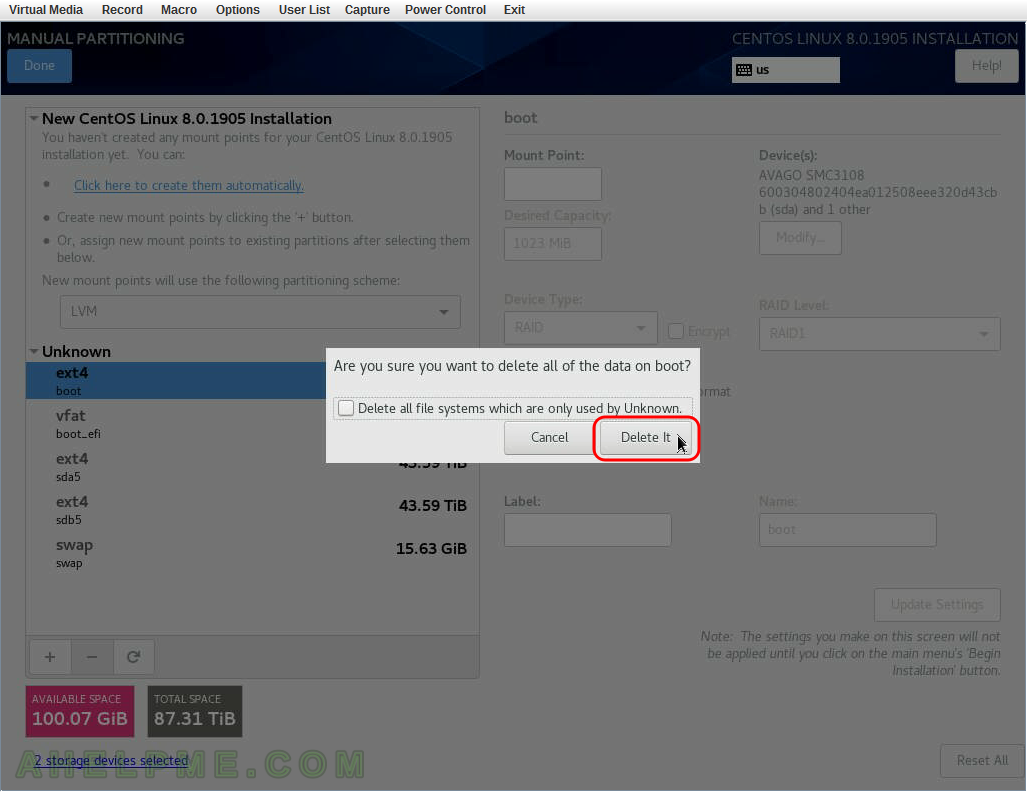
SCREENSHOT 23) Confirm to delete the old boot paritition by clicking on “Delete It”.
DO NOT check the “Delete all file systems which are only used by Unknown (or other name), because it will remove all system partitions but also the storage data partition, which we want to keep.
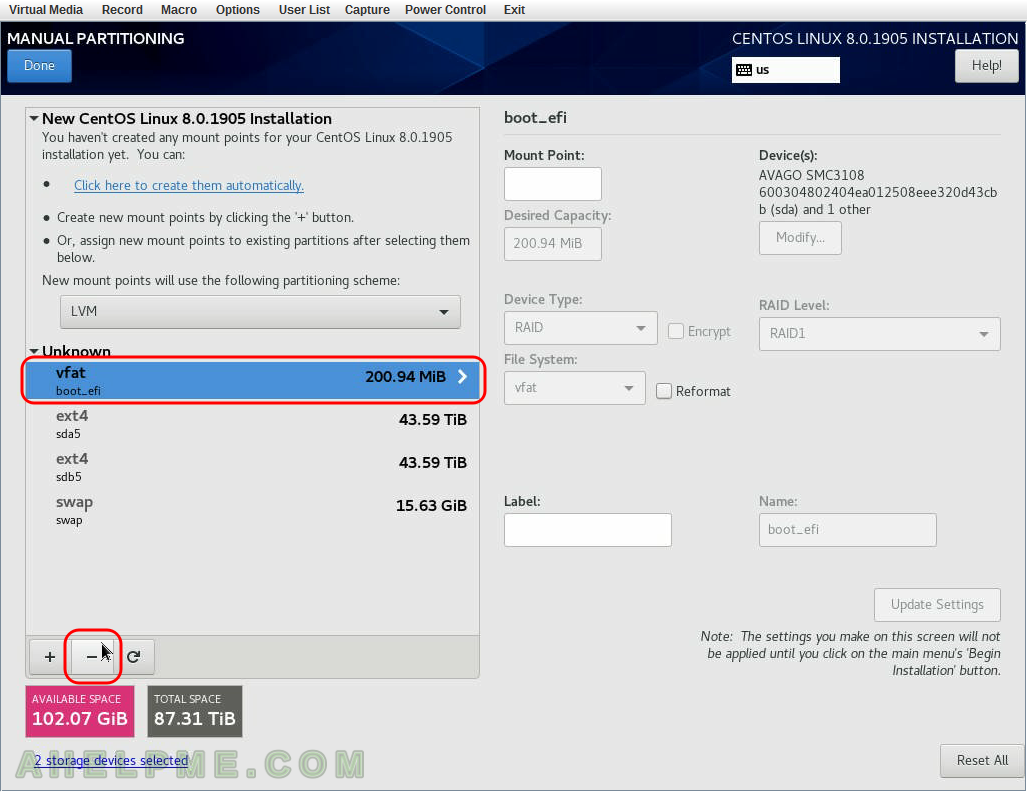
SCREENSHOT 24) Click on “Unknown” (after deleting the root partition the setup does not recognize the old system anymore) to show what partition exists in our old installation.
Select the boot_efi paritition and click on the minus “-” button below to remove the old boot_efi partition. This is the special efi partition to enable the Linux distribution to boot in UEFI mode.
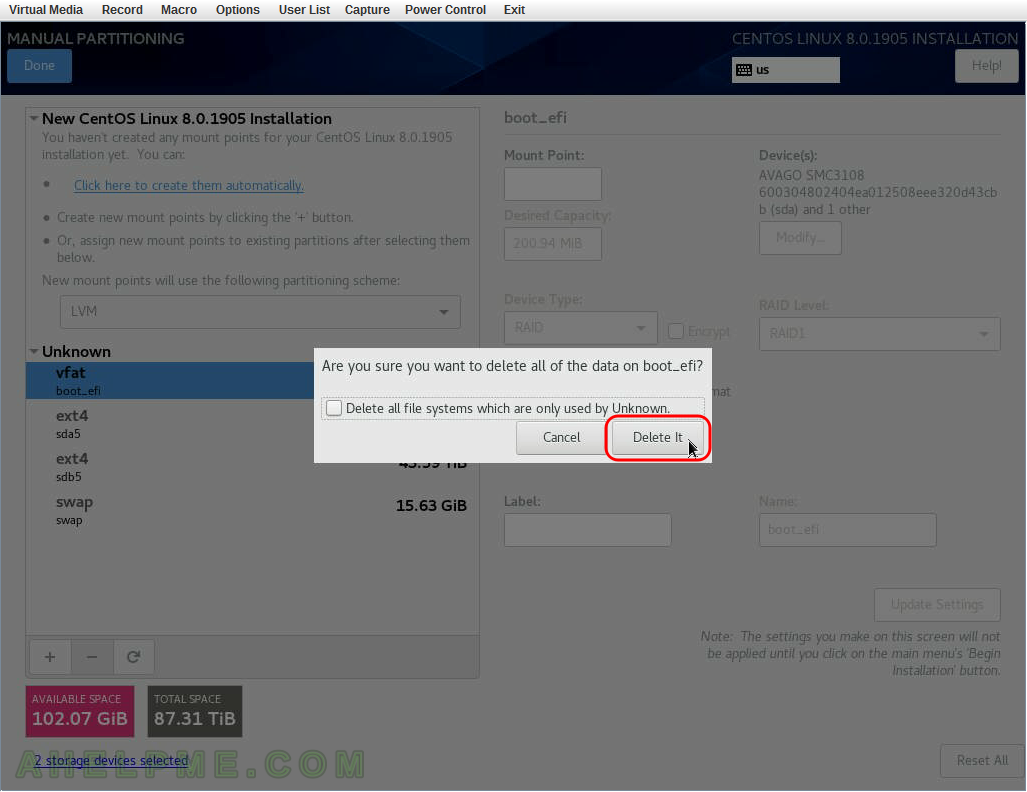
SCREENSHOT 25) Confirm to delete the old boot_efi paritition by clicking on “Delete It”.
DO NOT check the “Delete all file systems which are only used by Unknown (or other name), because it will remove all system partitions but also the storage data partition, which we want to keep.
SCREENSHOT 26) Click on “Unknown” (after deleting the root partition the setup does not recognize the old system anymore) to show what partition exists in our old installation.
Select the swap paritition and click on the minus “-” button below to remove the old swap partition.

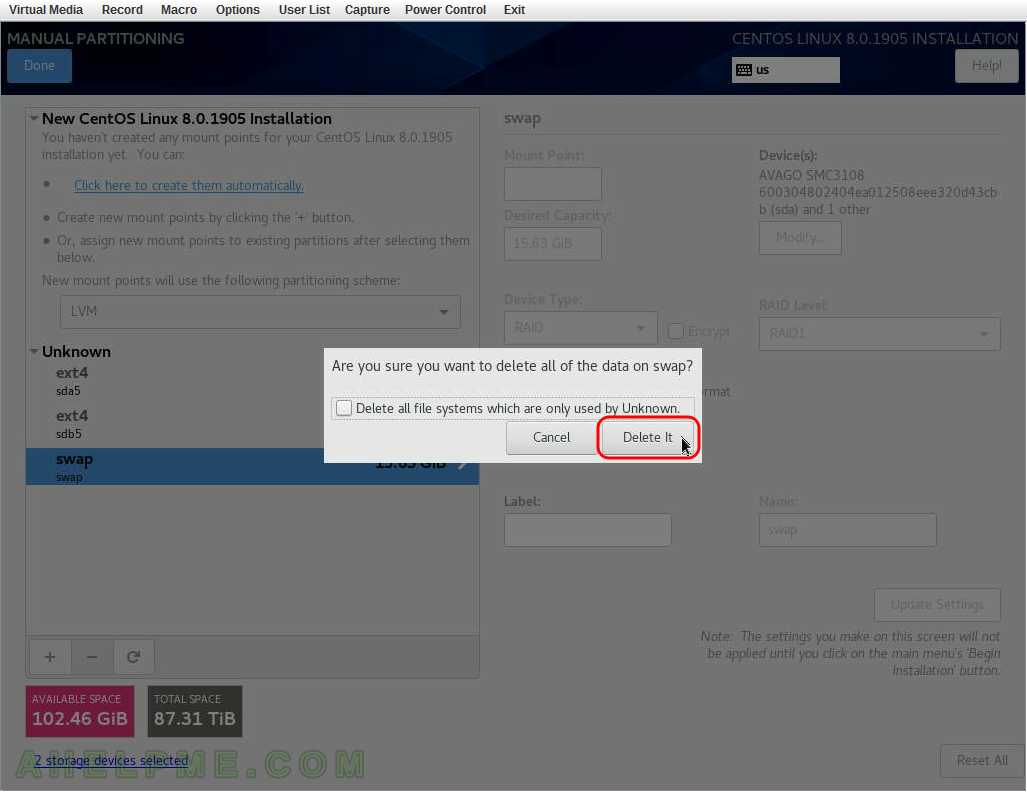
SCREENSHOT 27) Confirm to delete the old swap paritition by clicking on “Delete It”.
DO NOT check the “Delete all file systems which are only used by Unknown (or other name), because it will remove all system partitions but also the storage data partition, which we want to keep.
SCREENSHOT 28) Select “Standard Partition” for partitioning scheme, because we want to use RAID1 for the system partitions lately in the setup. Then click on “Click here to create them automatically” to let the setup create the needed partitions for CentOS 8 UEFI installation using the unallocated space freed from the steps above. At least ~20G is need to proceed with the setup.

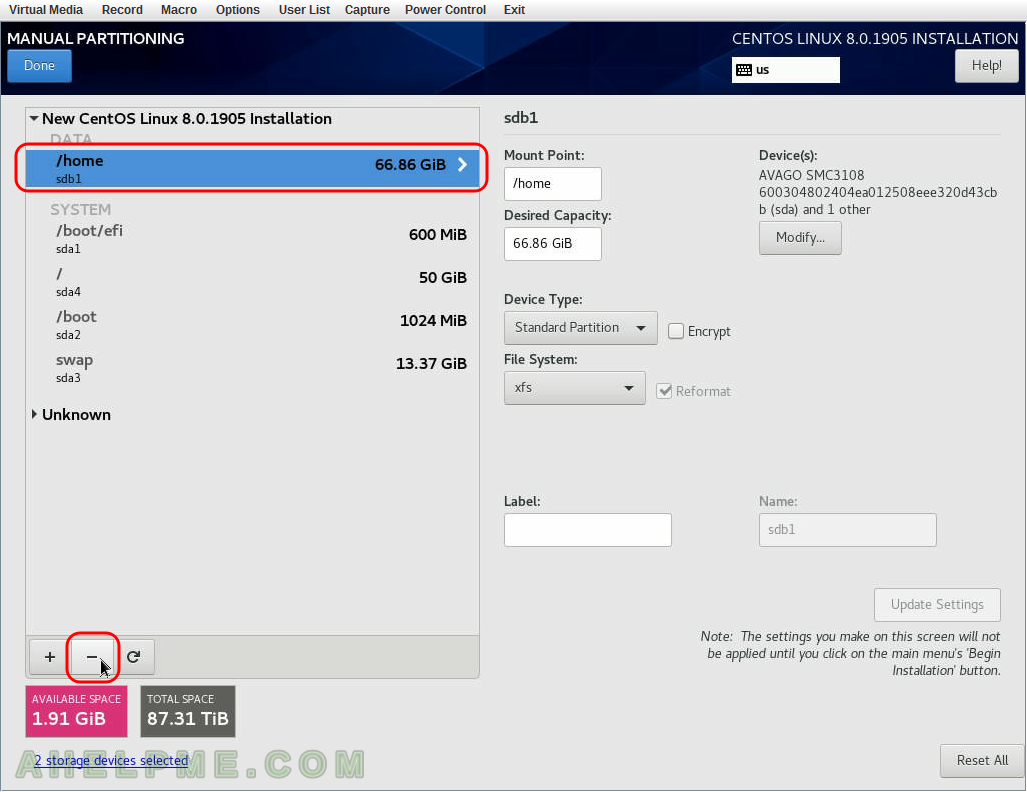
SCREENSHOT 29) Delete the newly created home mount, because we want to use this free space for RAID1 setup.
Select the boot paritition “/home” and click on the minus “-” button below to remove the new home partition.
SCREENSHOT 30) Select the boot efi partition and change “Device Type:” to “RAID” and “RAID Level:” to “RAID1”.
To save the configuration click on “Update Settings”.

One thought on “Install CentOS 8 over the old OS and preserve the storage partitions”