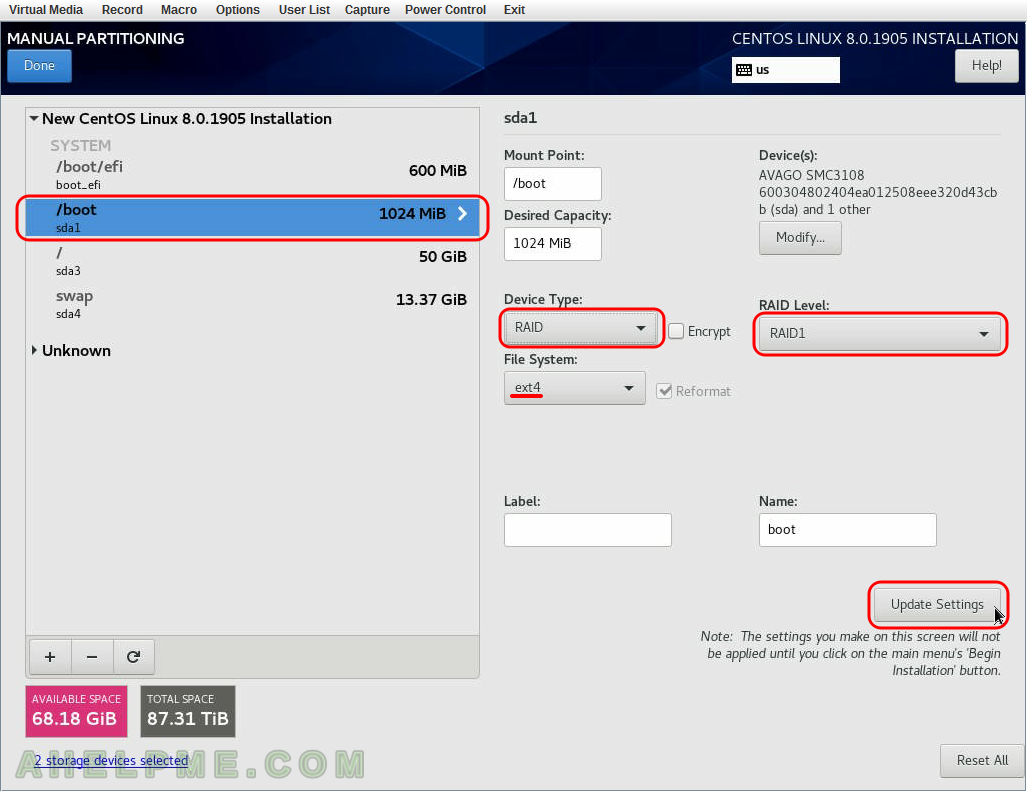
SCREENSHOT 31) Select the boot partition and change “Device Type:” to “RAID” and “RAID Level:” to “RAID1” (and change the file system to ext4 if you do not prefer the default xfs selection).
To save the configuration click on “Update Settings”.
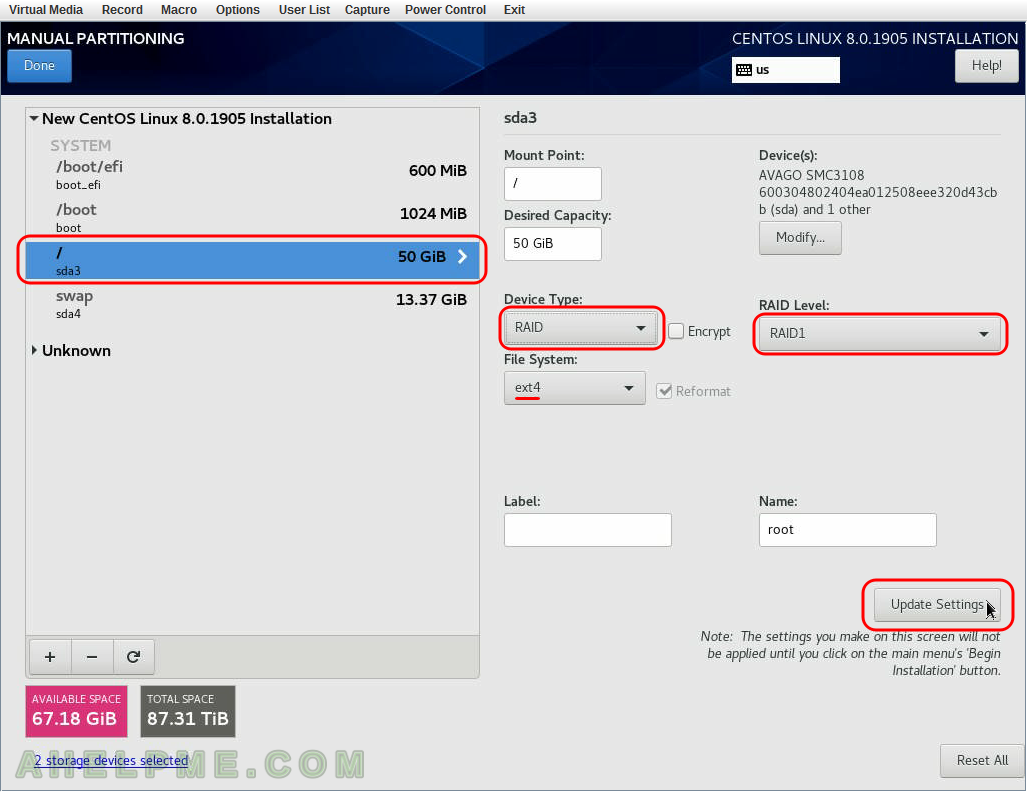
SCREENSHOT 32) Select the root partition and change “Device Type:” to “RAID” and “RAID Level:” to “RAID1” (and change the file system to ext4 if you do not prefer the default xfs selection).
To save the configuration click on “Update Settings”.
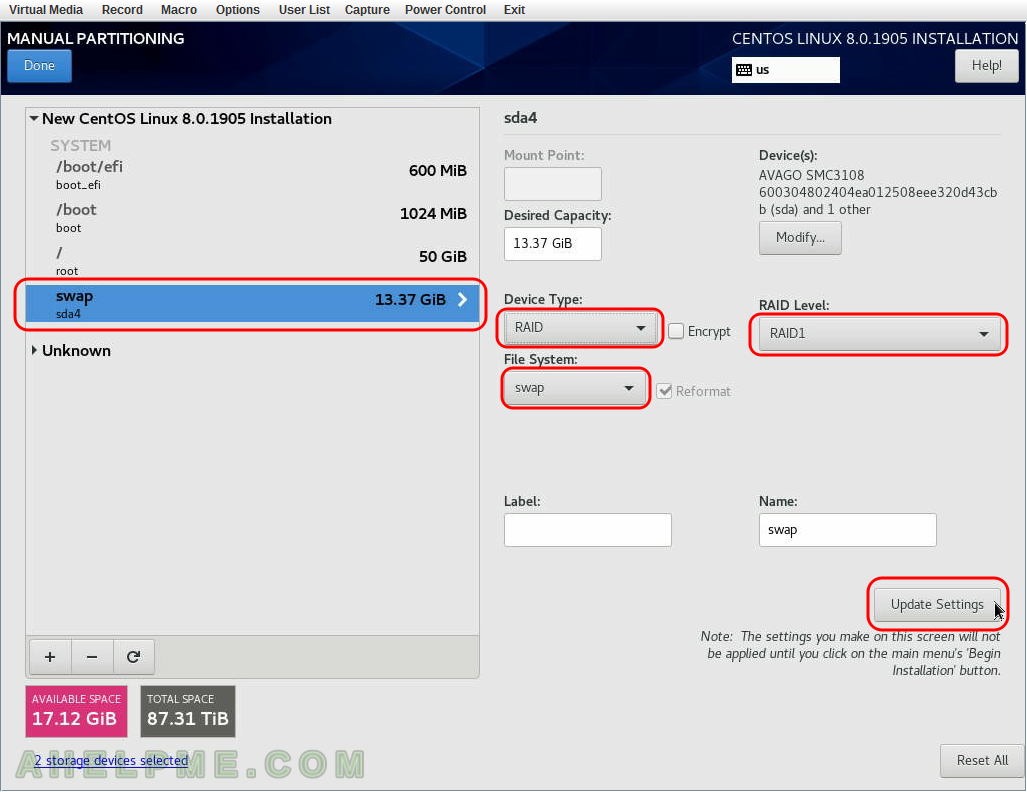
SCREENSHOT 33) Select the boot partition and change “Device Type:” to “RAID” and “RAID Level:” to “RAID1”.
To save the configuration click on “Update Settings”.
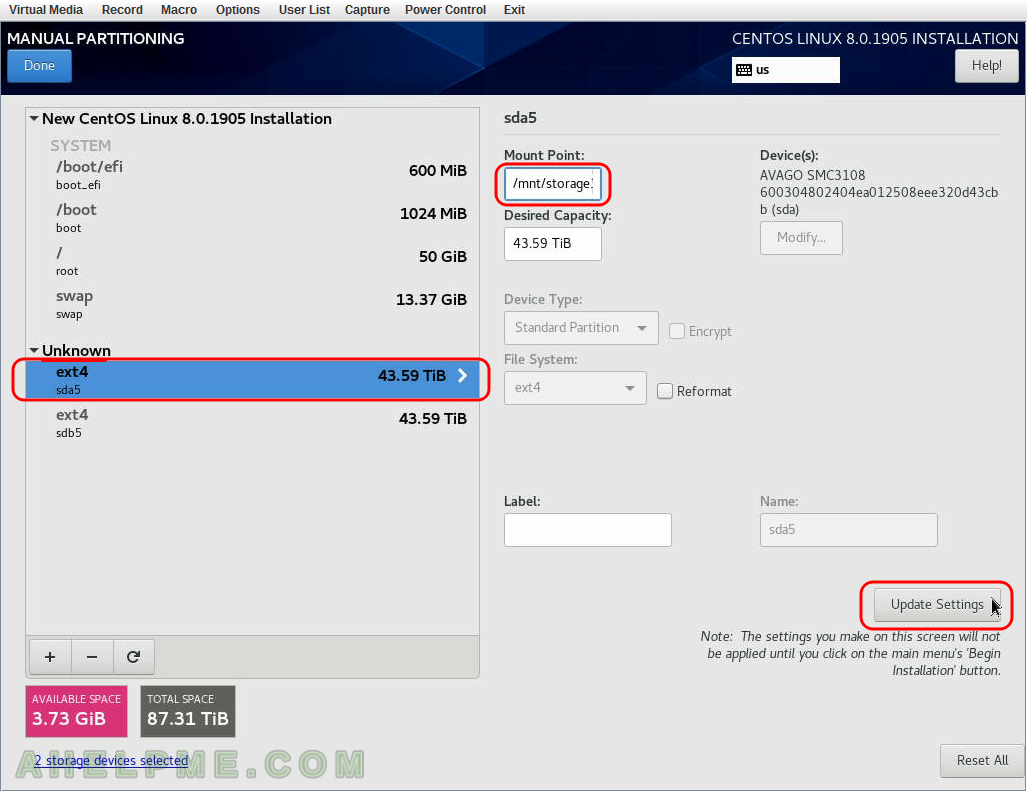
SCREENSHOT 34) Click on “Unknown” to list the old storage partitions and select the first one (in the case it is sda5). Set the mount point, for example “/mnt/storage1”
To save the configuration click on “Update Settings”.
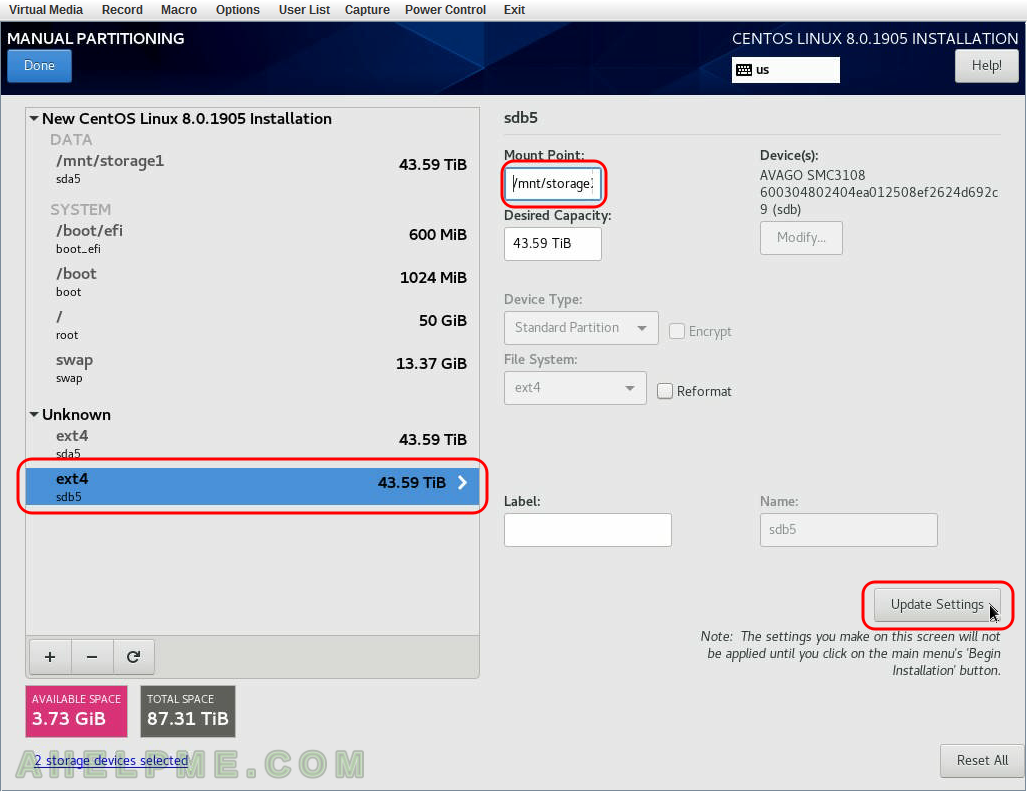
SCREENSHOT 35) Click on “Unknown” to list the old storage partitions and select the second one (in the case it is sdb5). Set the mount point, for example “/mnt/storage2”
To save the configuration click on “Update Settings”.
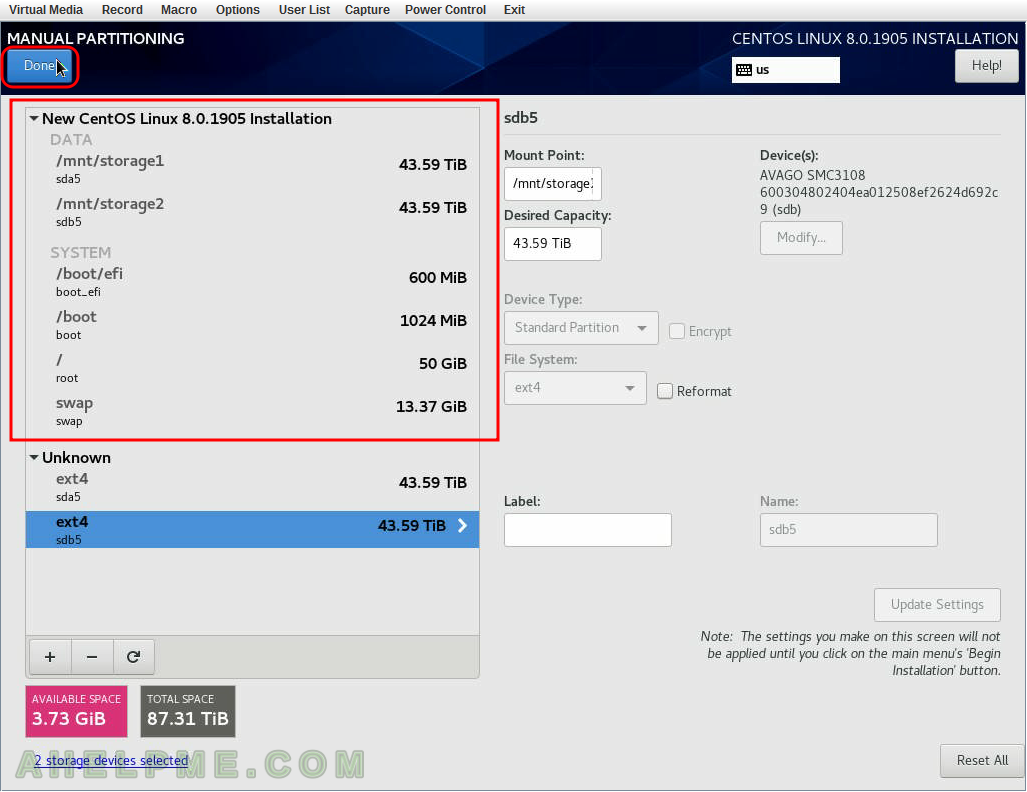
SCREENSHOT 36) New partition layout and mounts are listed under “New CentOS Linux 8.0.1905 Installation”. Click “Done” if everything looks good.
Till now nothing has been written to the disks.
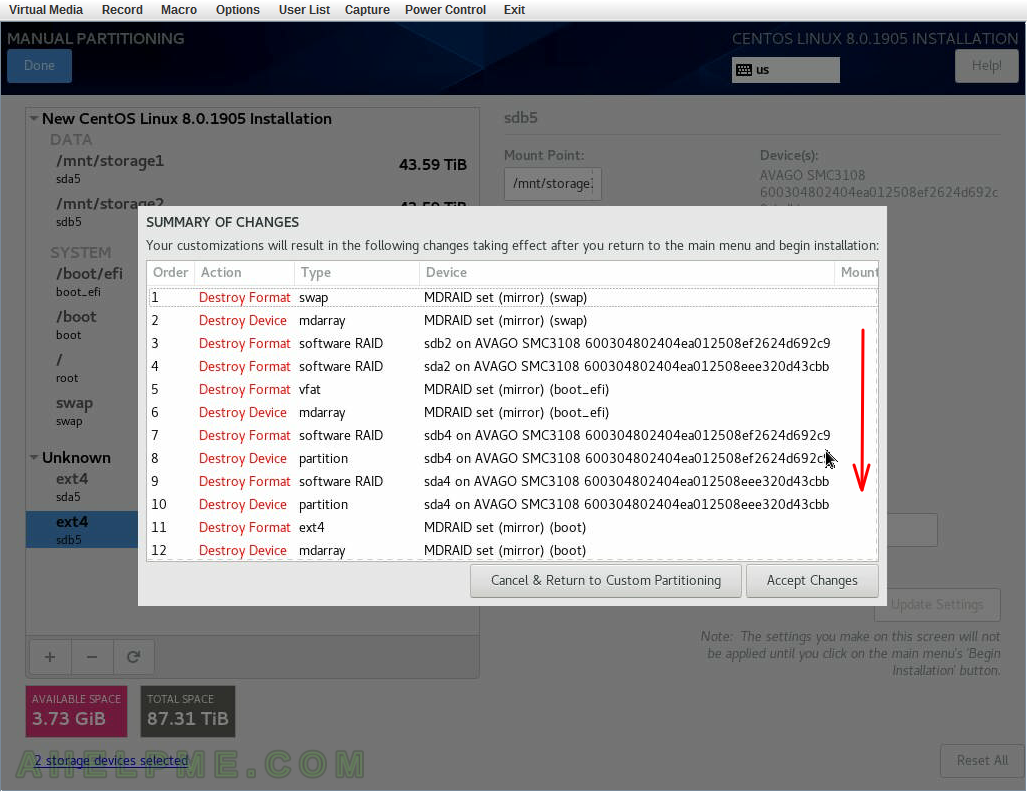
SCREENSHOT 37) This is the first screen of the changes, which will be written to the disk.
First jobs are to remove the old partitions we selected few steps above. Scroll down for more information.
SCREENSHOT 38) This is the second screen of the changes, which will be written to the disk.
Second screen with more jobs are to remove the old partitions we selected few steps above. Scroll down for more information.
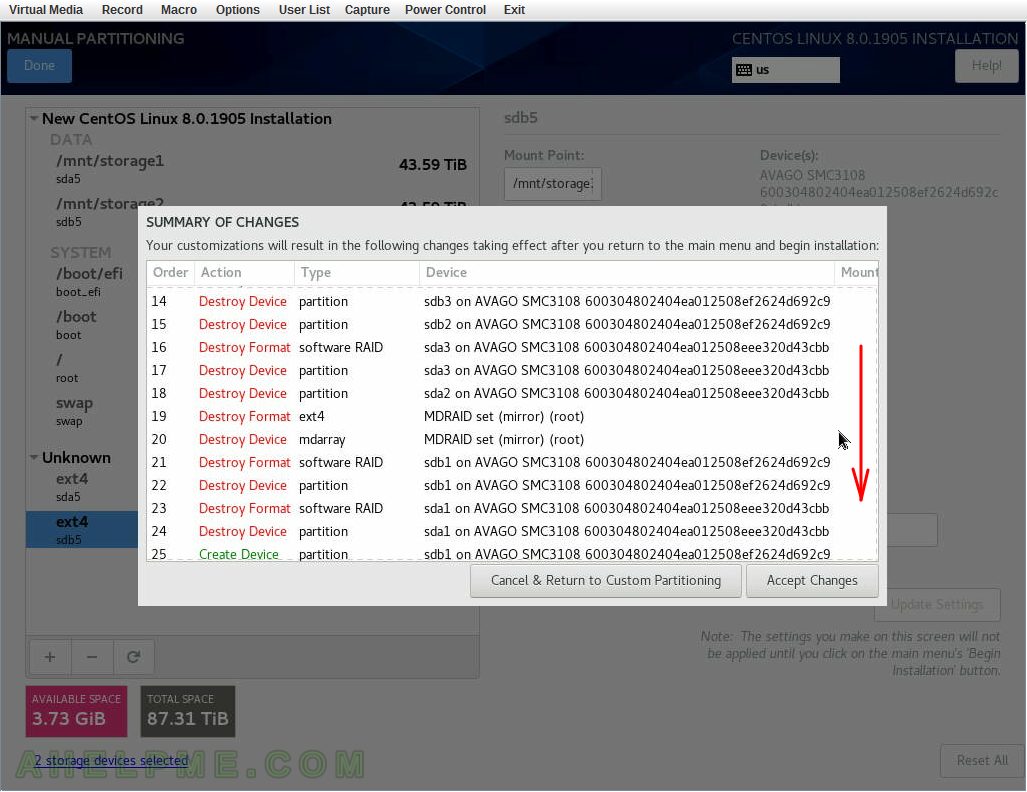
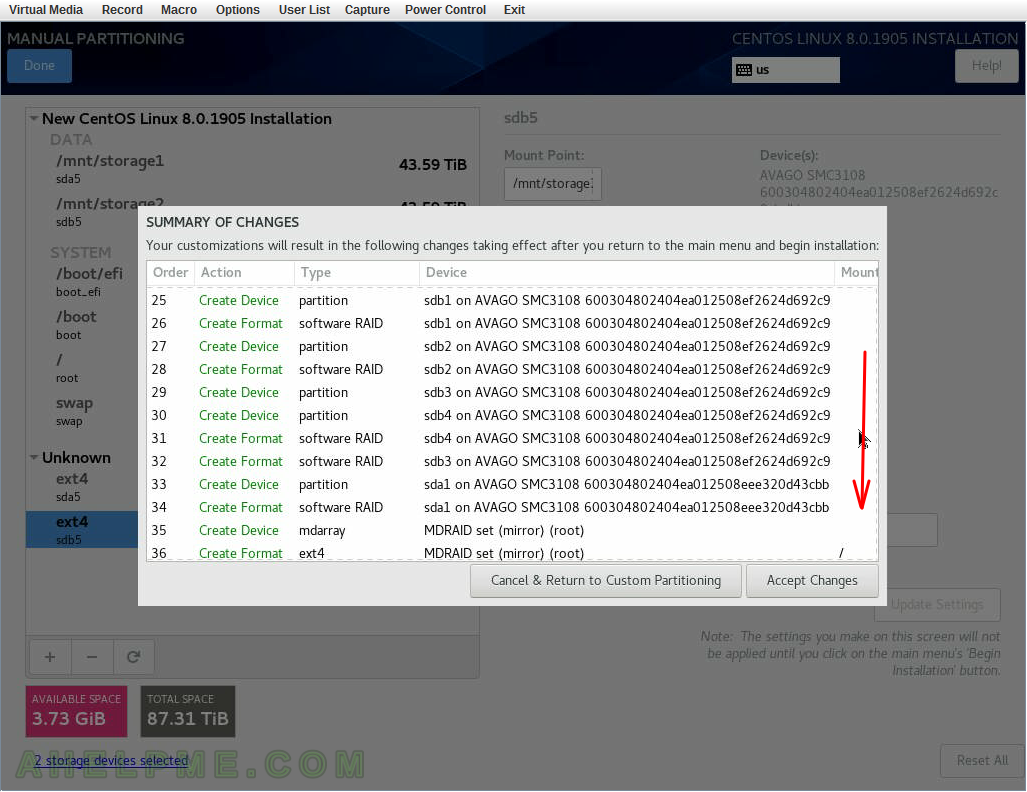
SCREENSHOT 39) This is the third screen of the changes, which will be written to the disk.
Third screen with jobs for creating partitions for the new installation. Scroll down for more information.
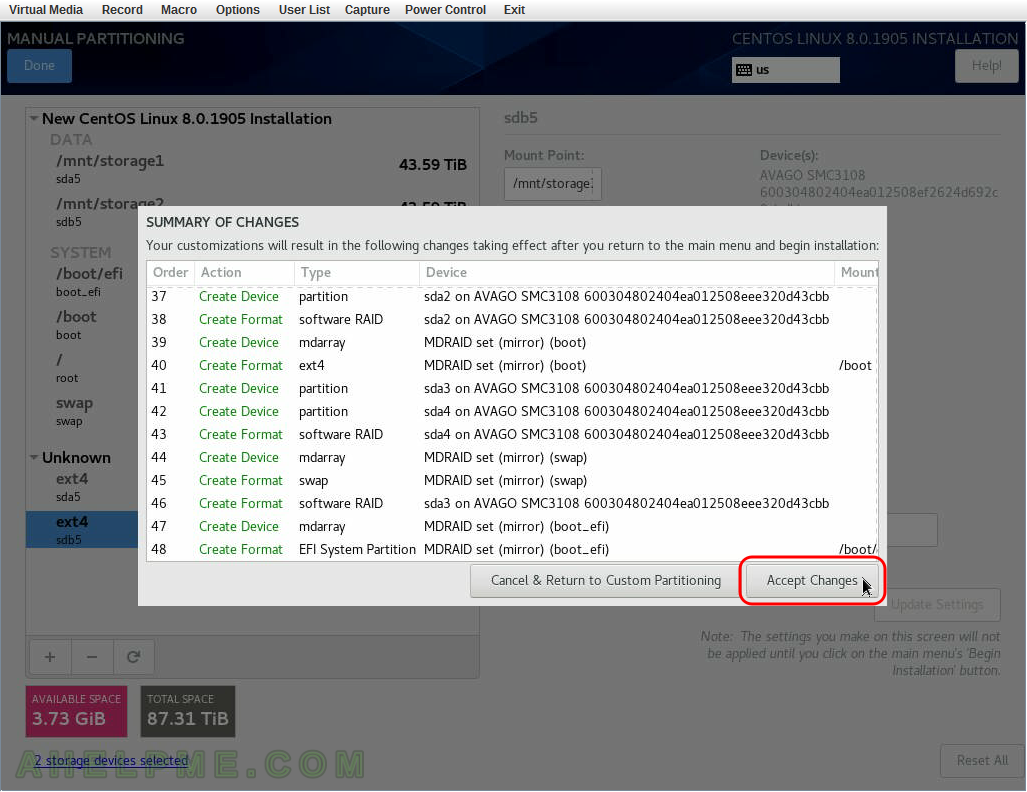
SCREENSHOT 40) This is the forth screen of the changes, which will be written to the disk.
Forth screen with jobs for creating partitions for the new installation. Click on “Accept Changes” to configure the setup what jobs to do to create the new partitioning layout. The next steps starts the whole process (“Begin Installation”). So till you click “Begin Installation” you may revert the changes on the disk layout if you enter this menu again or interrupt the installation setup.
One thought on “Install CentOS 8 over the old OS and preserve the storage partitions”