This article is to show how the user could install CentOS 8 (the steps are the same with CentOS 7) with a much complex network setup such as Bonding device in 802.3ad mode (LACP – Link Aggregation Control Protocol).
The whole installation procedure is not included here, but there are couple of other article on the subject “Install CentOS 7 or CentOS 8”:
- How to do a network installation of CentOS 8 (8.0.1950) – minimal server installation
- Howto do a netinstall of CentOS 7 (7.4.1708) – minimal server installation
- Install CentOS 8 over the old OS and preserve the storage partitions
Similar configuration files will be generated as in Configure Bond (802.3ad LACP) device in CentOS 8 – configuration files
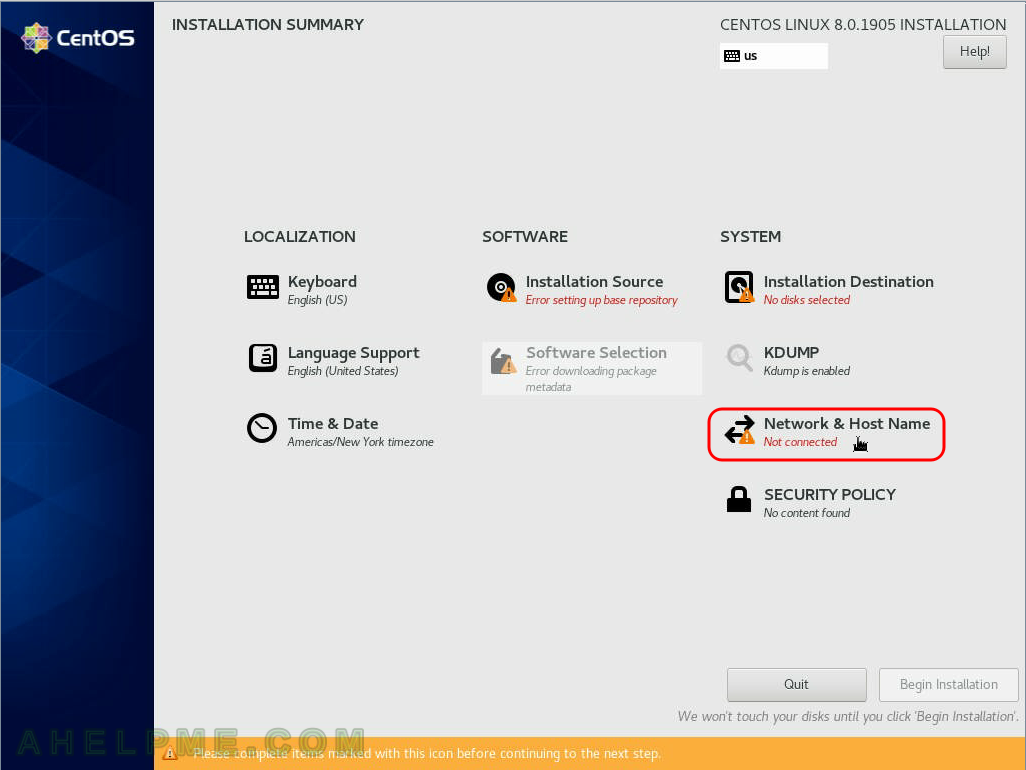
SCREENSHOT 1) Click on “Network and Host Name” to configure the machine networking.
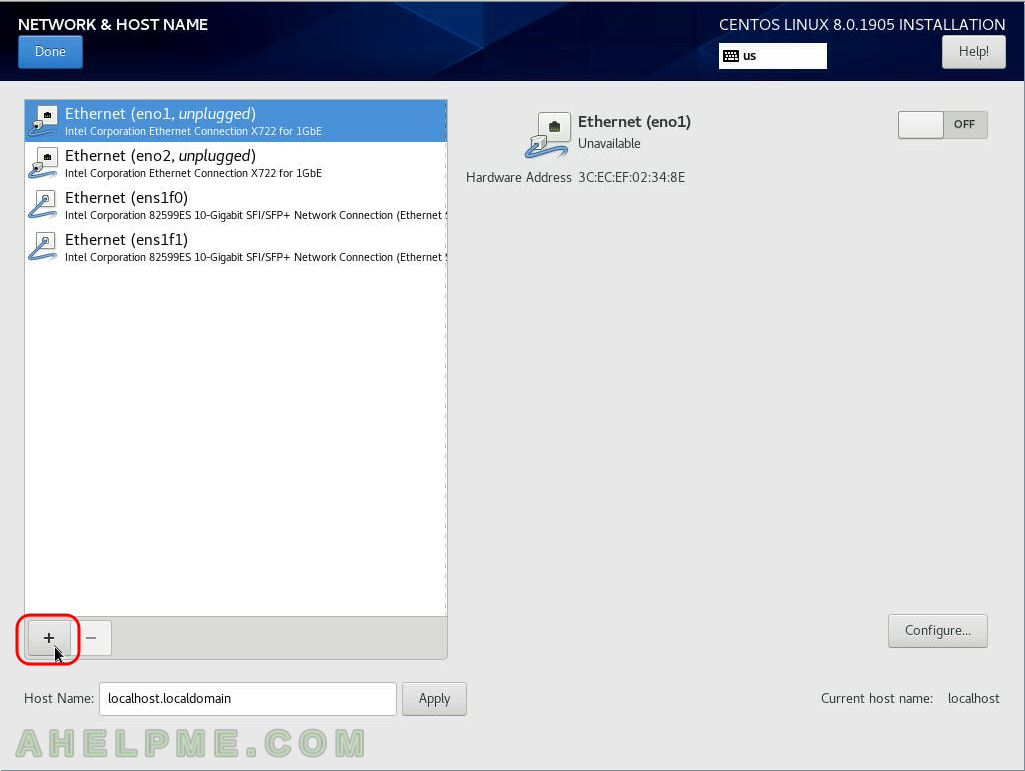
SCREENSHOT 2) Add a new network device by clicking on the plus button at the bottom of the Device List.
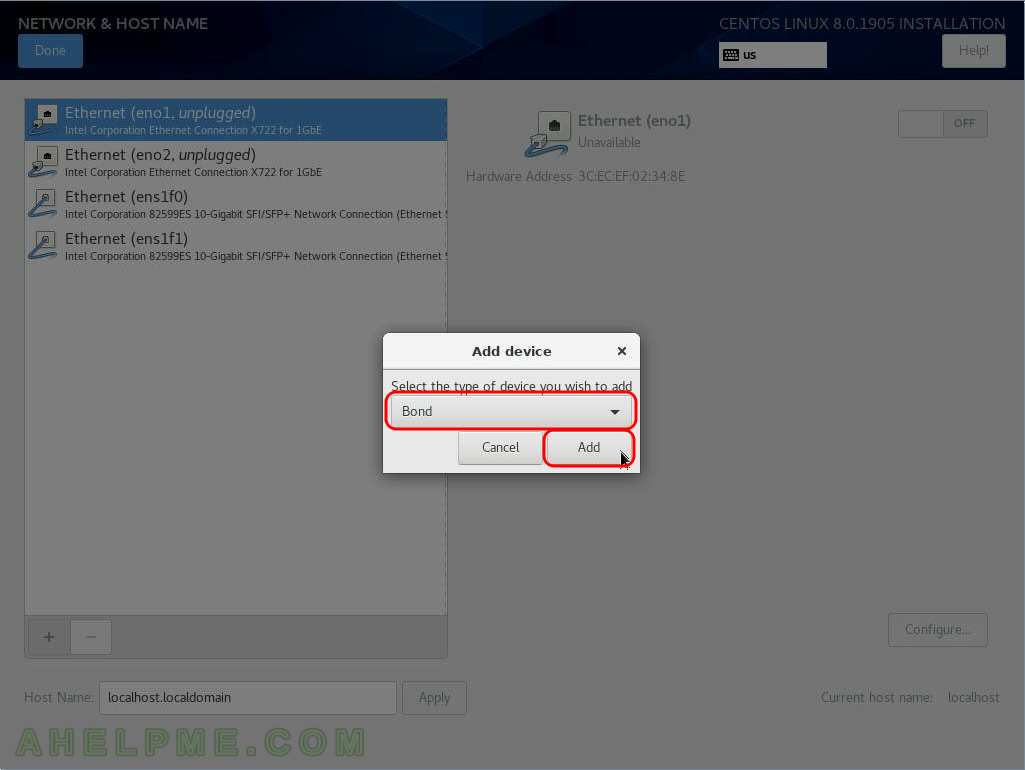
SCREENSHOT 3) Add “Bond” from the dropdown box and click on “Add”.
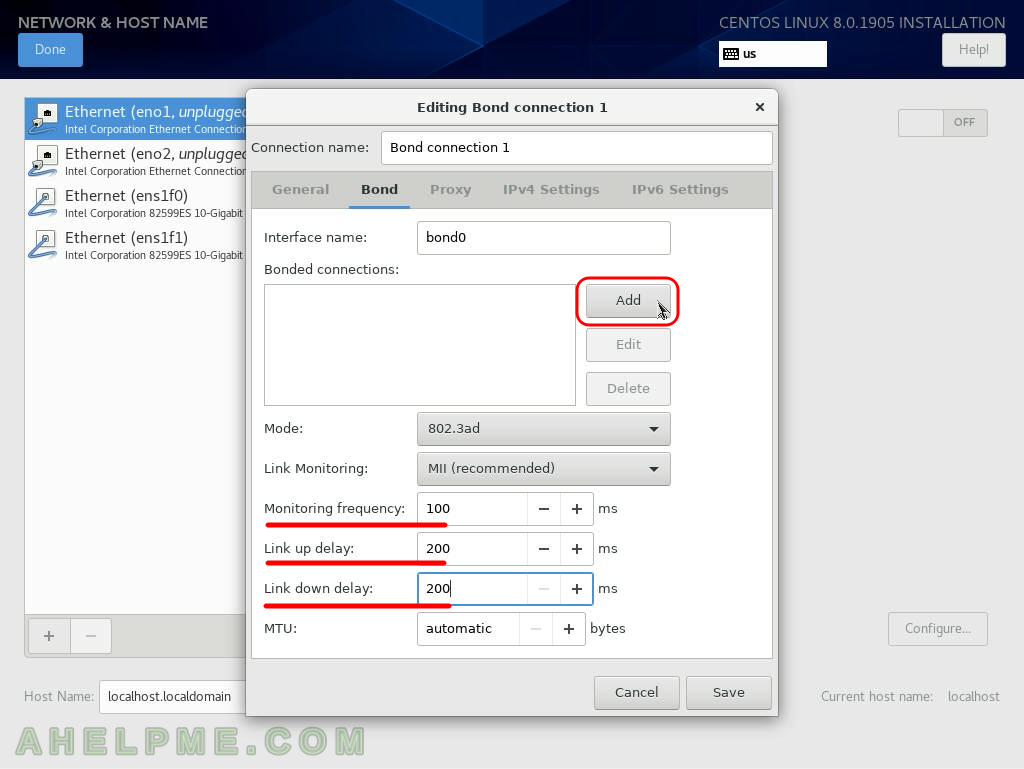
SCREENSHOT 4) Select the proper bonding mode. Here a link aggregation device is created therefore 802.3ad is selected.
802.3ad requires addition configuration in the switch the network cards are connected. Select the proper mode here for the your case. If no switch additional configuration was done the “Round-robin” mode should’ve be selected.

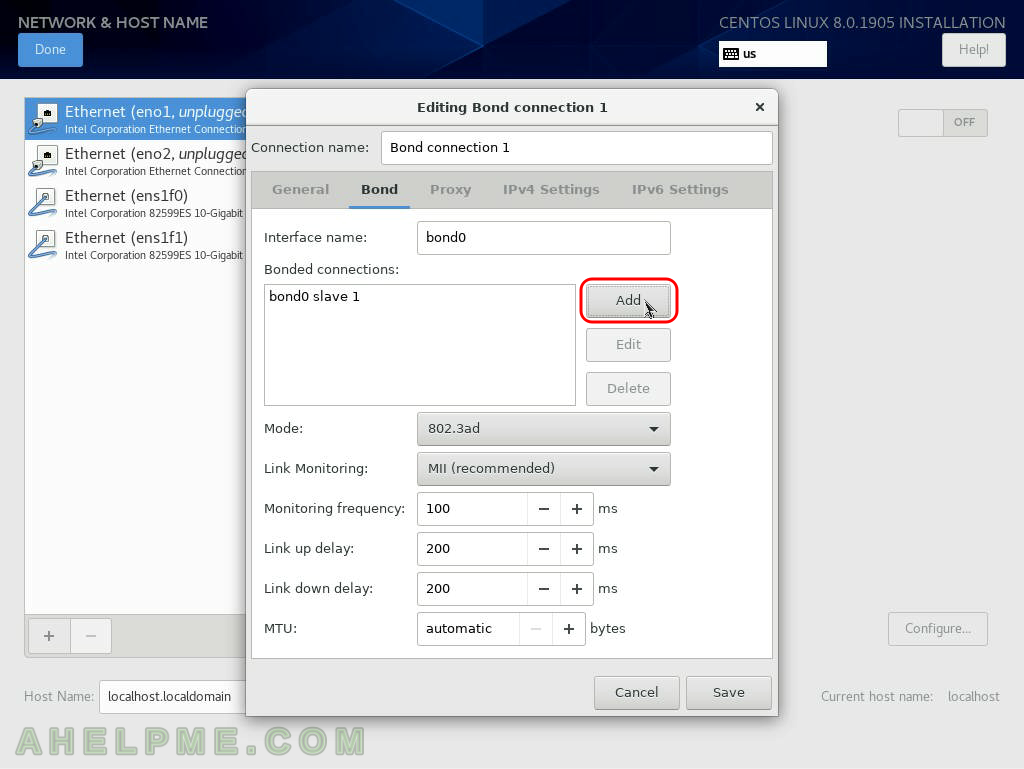
SCREENSHOT 5) Add the network interfaces, which are part of the bond device by clicking on the “Add” button.
Tune accordingly the Bond device options (Monitoring frequency, Link up delay, Link down delay and MTU), too.
SCREENSHOT 6) Click on the dropdown box to select the connection type of the bonding slave device.
It might be grey as if it is not enabled, but if you click on the dropdown box you could select the type. And the dialog will change it state from gray to normal aka active state.
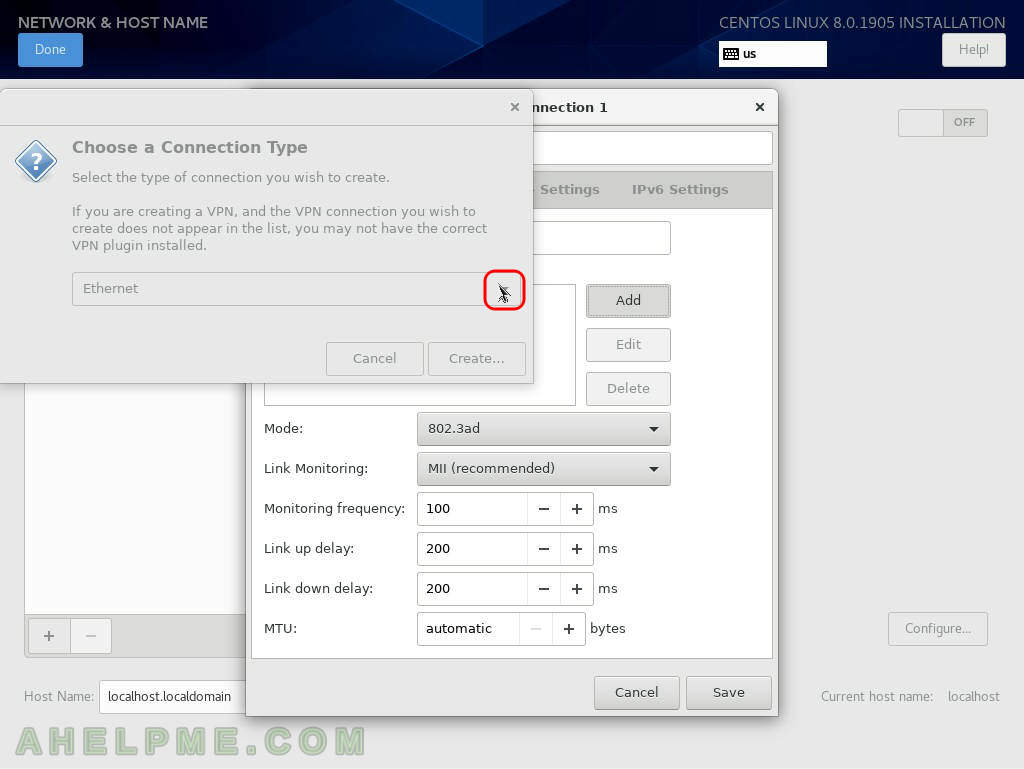
SCREENSHOT 7) Select the Ethernet from the dropdown box.

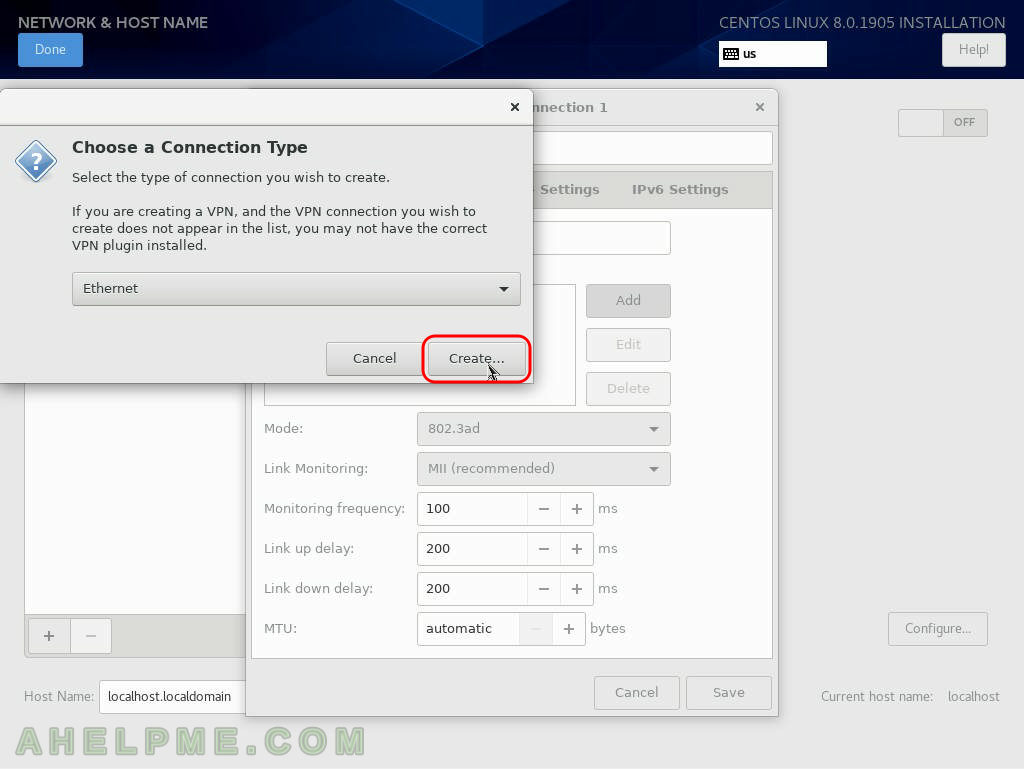
SCREENSHOT 8) Click on “Create…” button to add an ethernet device to the bonding device created above.
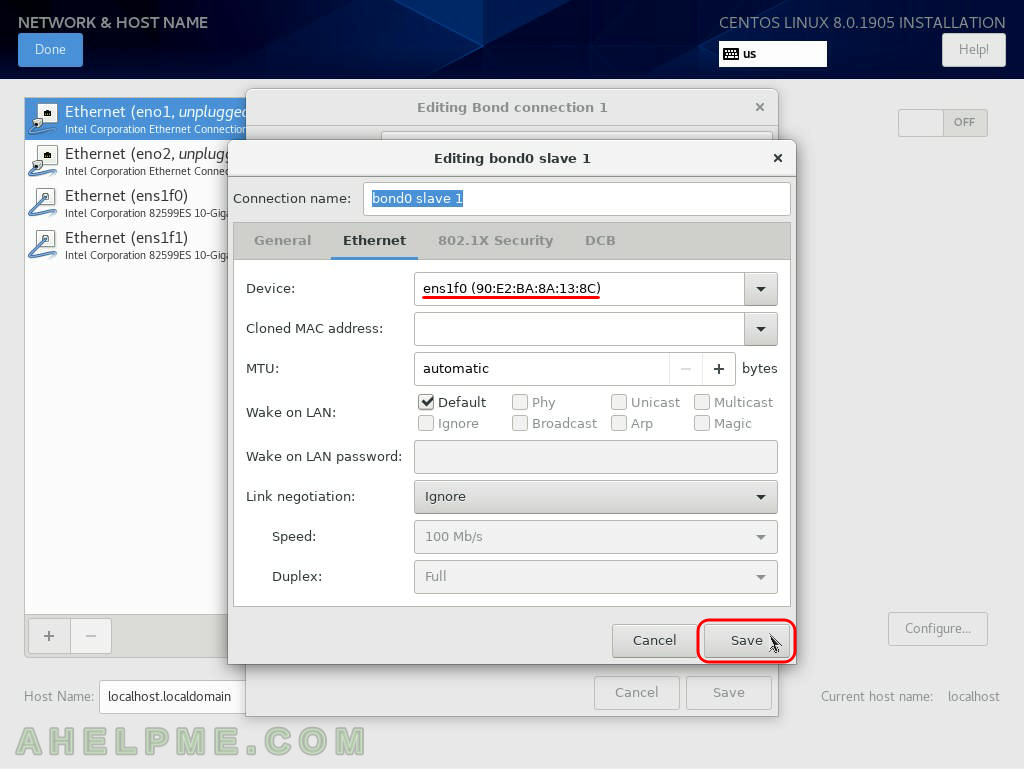
SCREENSHOT 9) Select the proper network interface (ens1f0) from the dropdown box and click on “Save”.
By clicking on “Save” the network device will be added to the bodning group.
SCREENSHOT 10) Click on “Add” to add a second device.