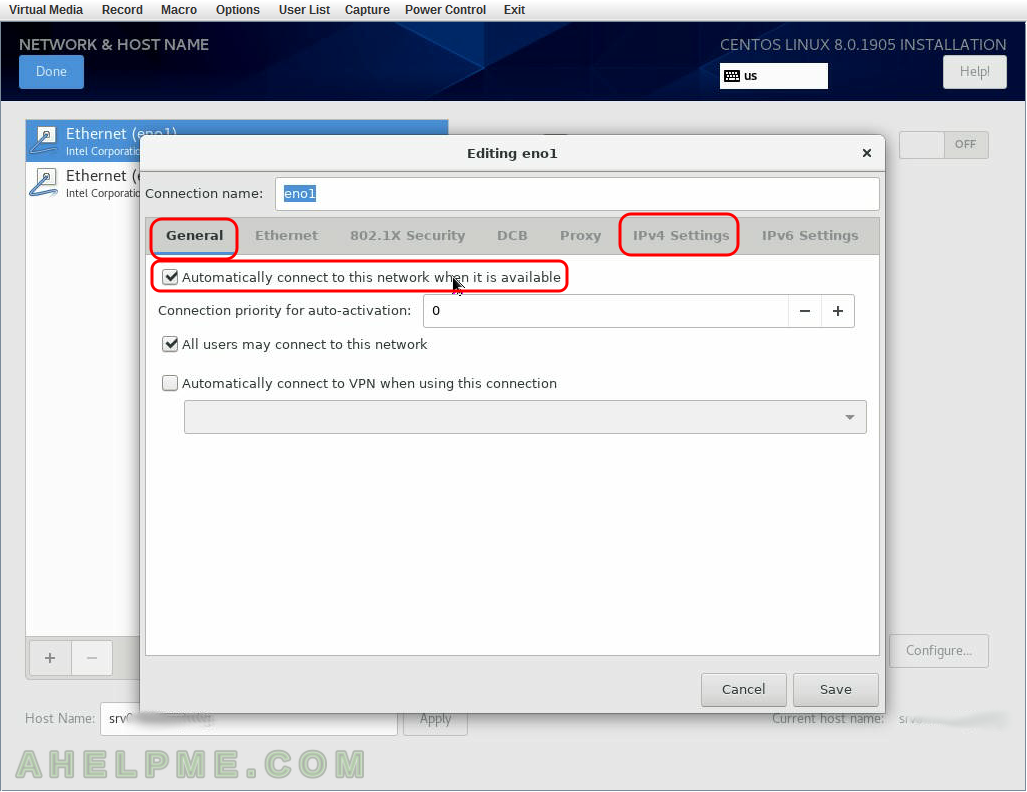
SCREENSHOT 11) Click on the tab “General” and check the “Automatically connect to this network when it is available” to ensure the adapter gets the right configuration on boot.
Then click on “IPv4 Settings” tab.
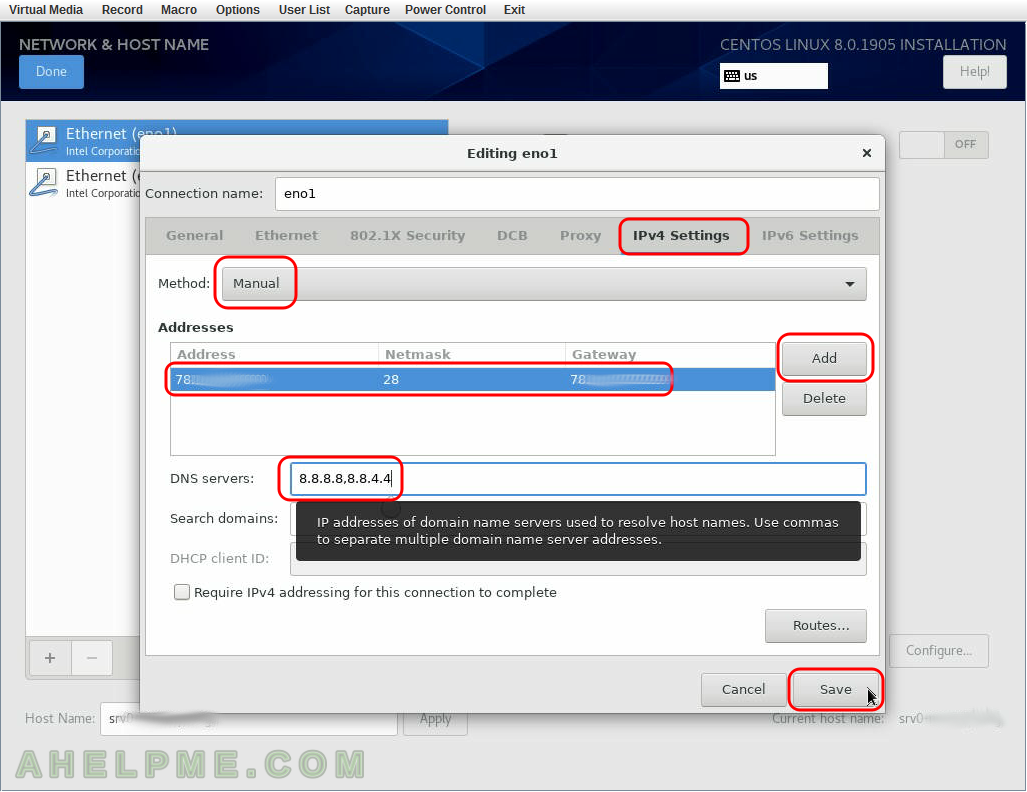
SCREENSHOT 12) Set the IP of the server
First, set to “Manual” from the dropdown menu “Method”, then click on “Add” and in each of the three text boxes fill the network settings of your choice. Add DNS servers separating them with comas. Then click “Save” to save the configuration and exit the network sub-menu.
SCREENSHOT 13) Click on “Done” if you are ready.
You can see our ethernet adapter eno1 is configured successfully it has IP and the link is up (connected to the 1000 Mb/s network).

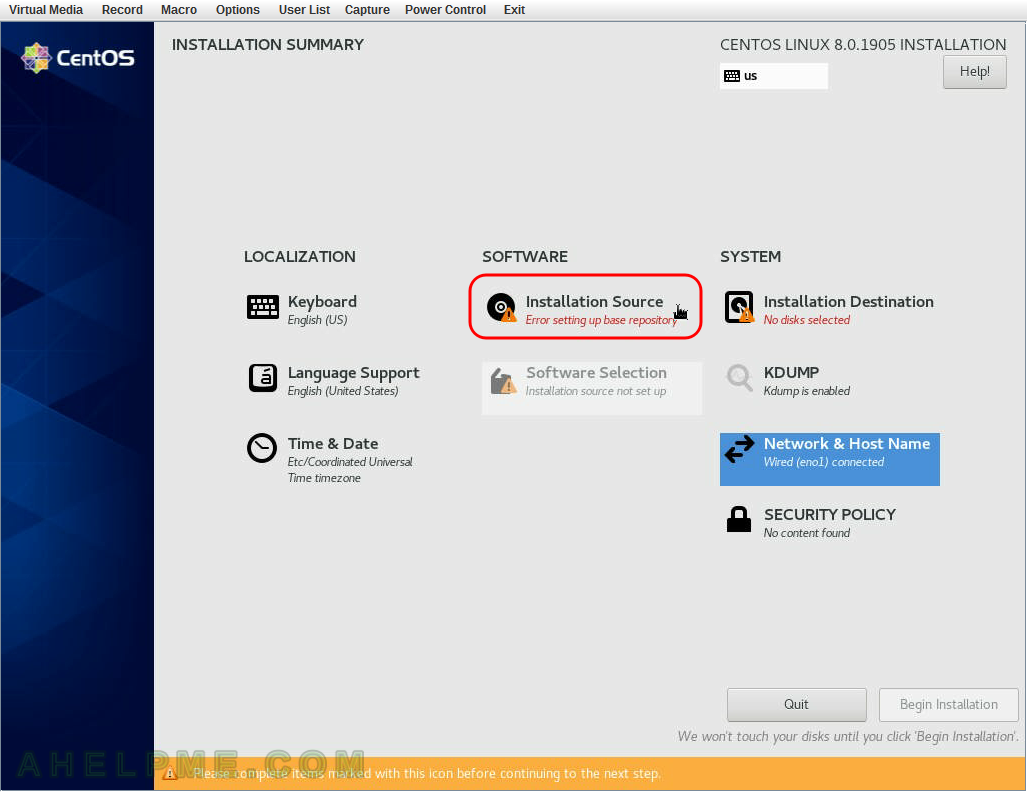
SCREENSHOT 14) Click on “Installation Source” to instruct the setup from where to download the packages.
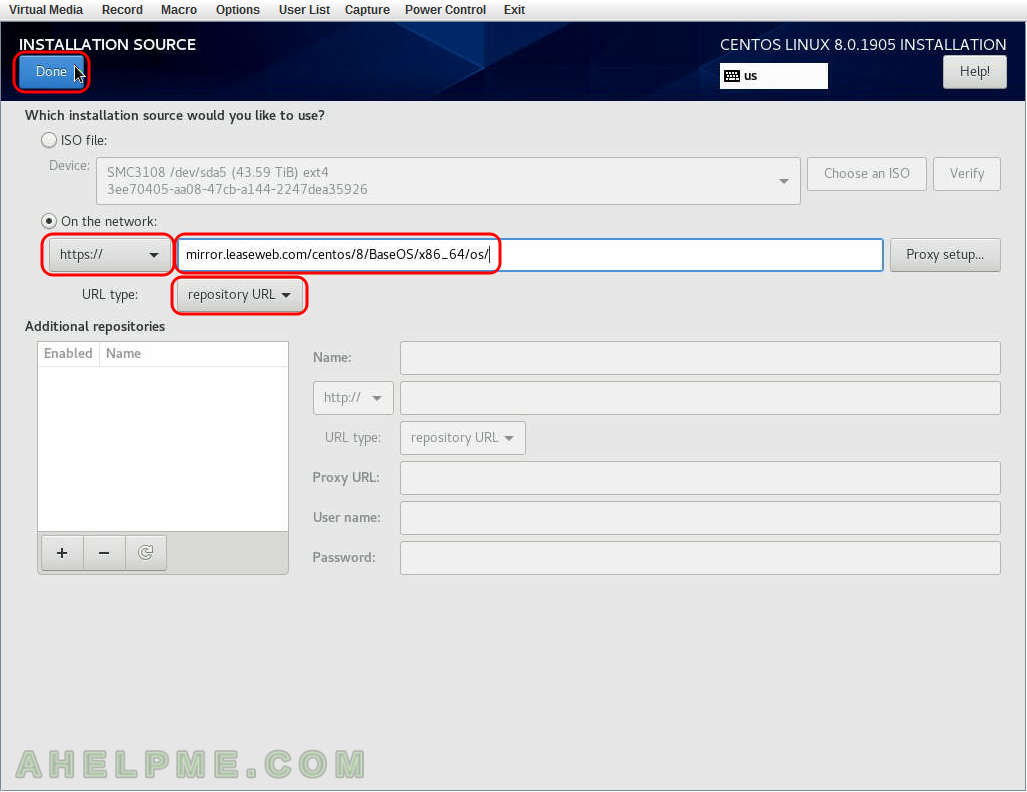
SCREENSHOT 15) We use https address for the packages, one of the officials mirrors – mirror.leaseweb.com.
Set the method to HTTPS://, write the URL where are the packages and in our case, this is mirror.leaseweb.com/centos/8/BaseOS/x86_64/os/ and set the type of the URL to “repository URL”. Then click on “Done”. If everyhing is OK the next window you are going to see no warning on the “Installation Source” menu.
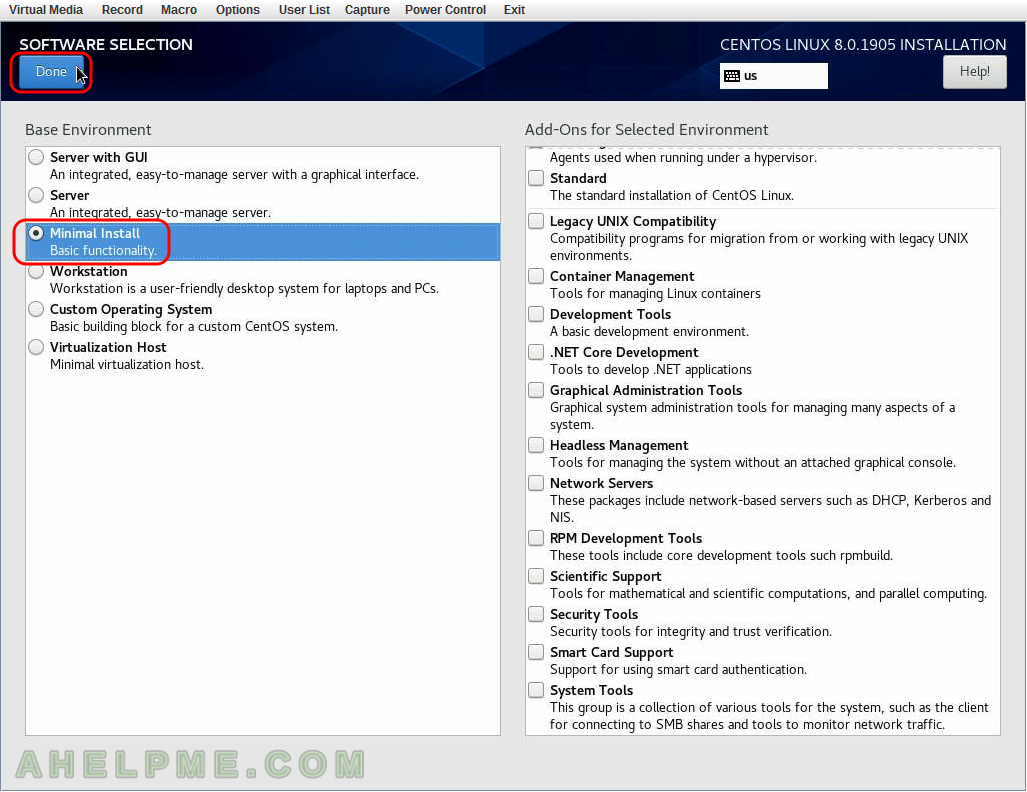
SCREENSHOT 16) Select what software you would like the setup to install at first.
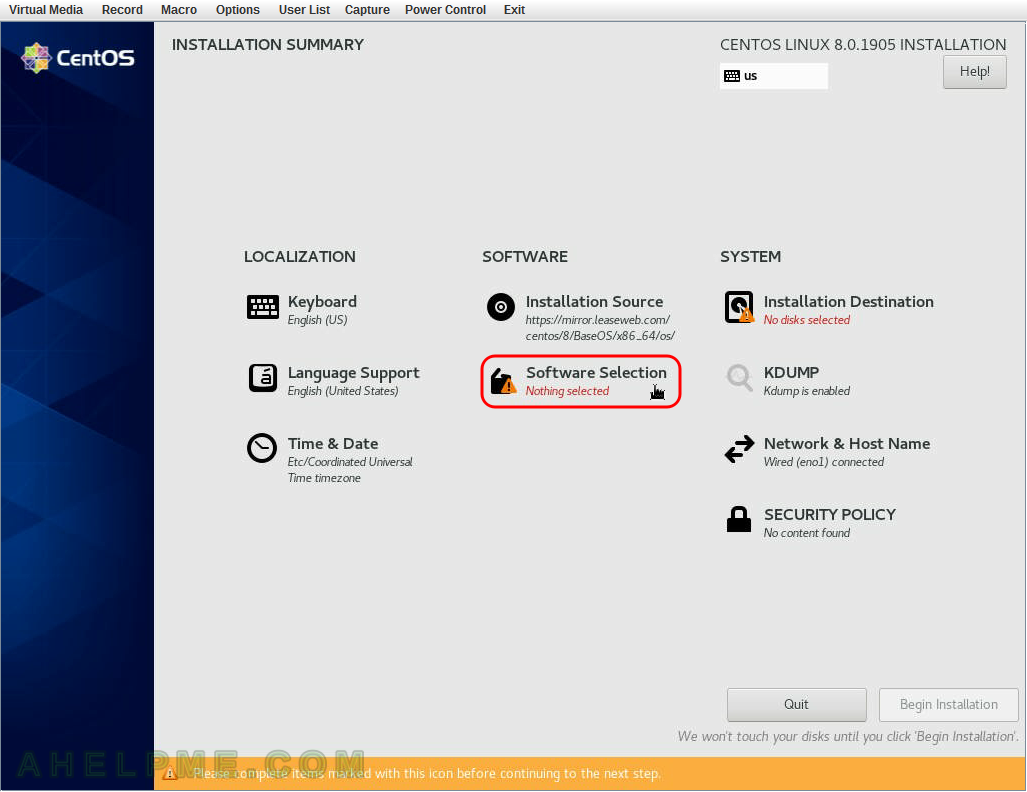
SCREENSHOT 17) This will install the minimum installation of CentOS 8.
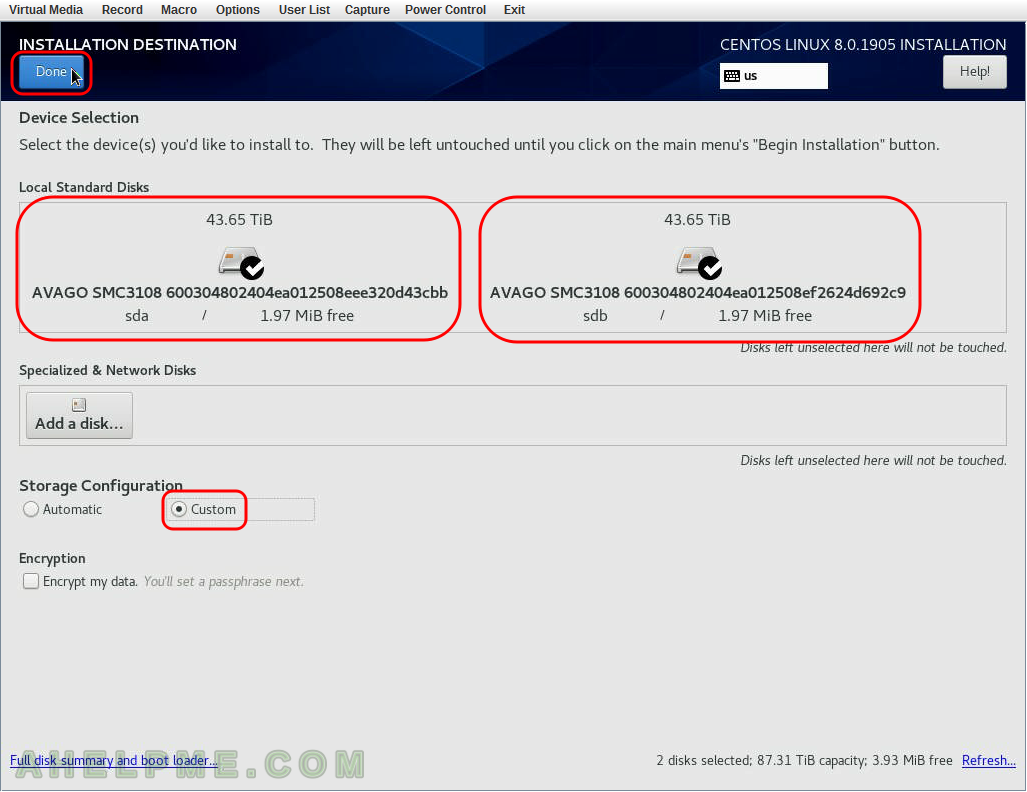
SCREENSHOT 18) Installation destination – on which device you want to install the CentOS 8.

SCREENSHOT 19) Installation destination – choose your disk to install CentOS 8.
Select the two disks (in fact, these are virtual drives on AVAGO hardware controller) and select under “Storage Configuration” – “Custom” or the setup will wipe out all your data!!! Press “Done” above to continue to “Manual partitioning”.
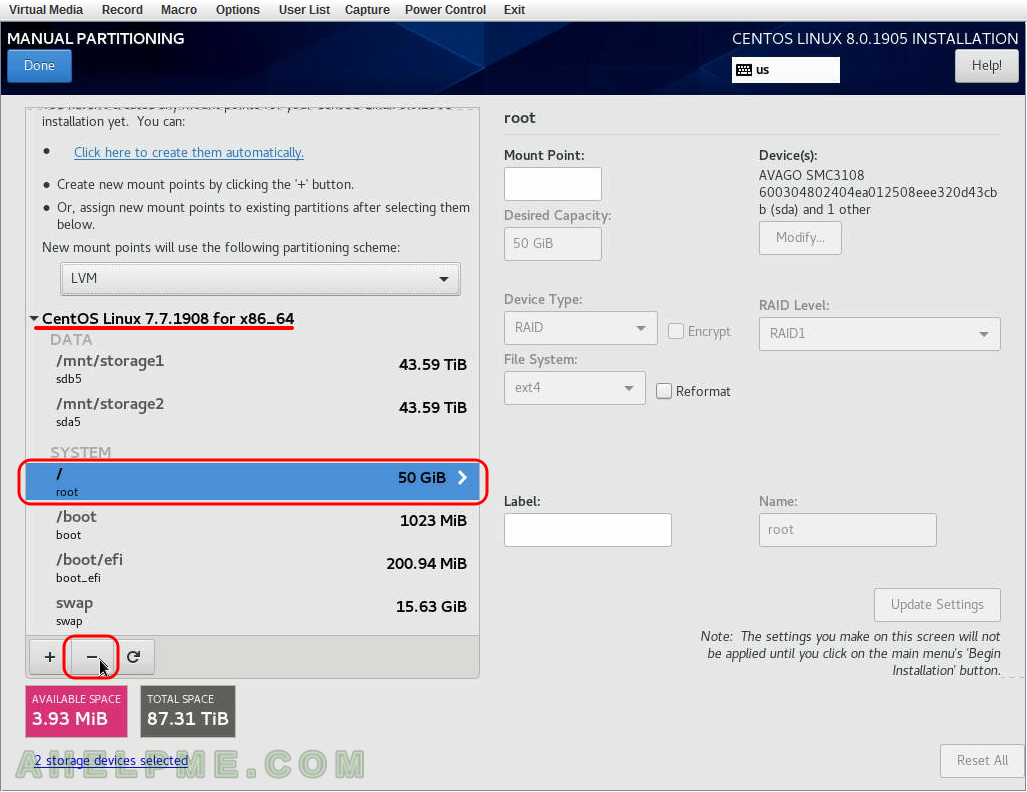
SCREENSHOT 20) Click on “CentOS Linux 7.7.1908 for x86_64” (or “Uknown” if the system is not recognized) to show what partition exists in our old installation.
Select the root paritition “/” and click on the minus “-” button below to remove the old root partition.
One thought on “Install CentOS 8 over the old OS and preserve the storage partitions”