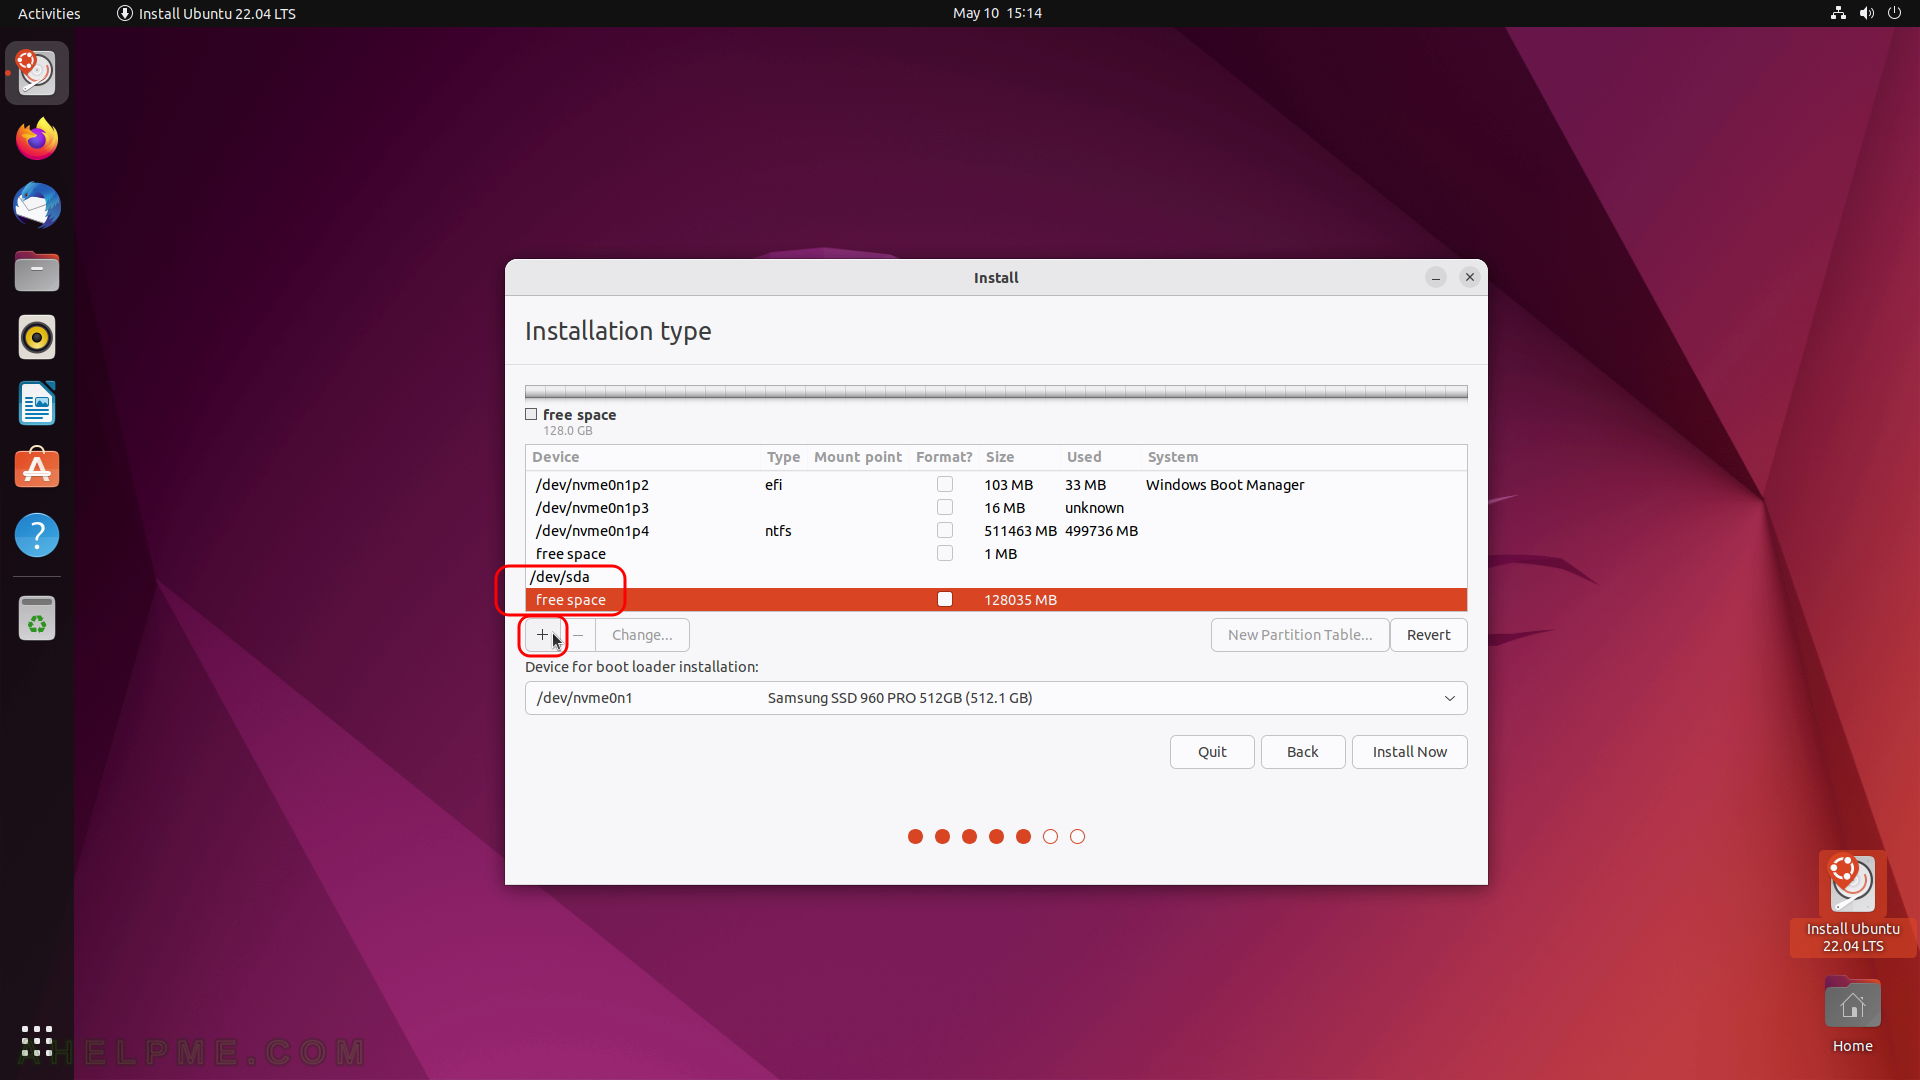
SCREENSHOT 11) Scroll to the device (hard disk) you want to use for this installation /dev/sda and click on “free space” then click on “+” to create a new partition.
SCREENSHOT 12) Set the size to 256 (which is in MB) and select the type of the disk: “EFI system paritition”
if you have UEFI BIOS (most common on new system in the last 5 years) or Grub boot partition if you do not have UEFI BIOS or use your system in BIOS legacy mode. Then click on “OK”.

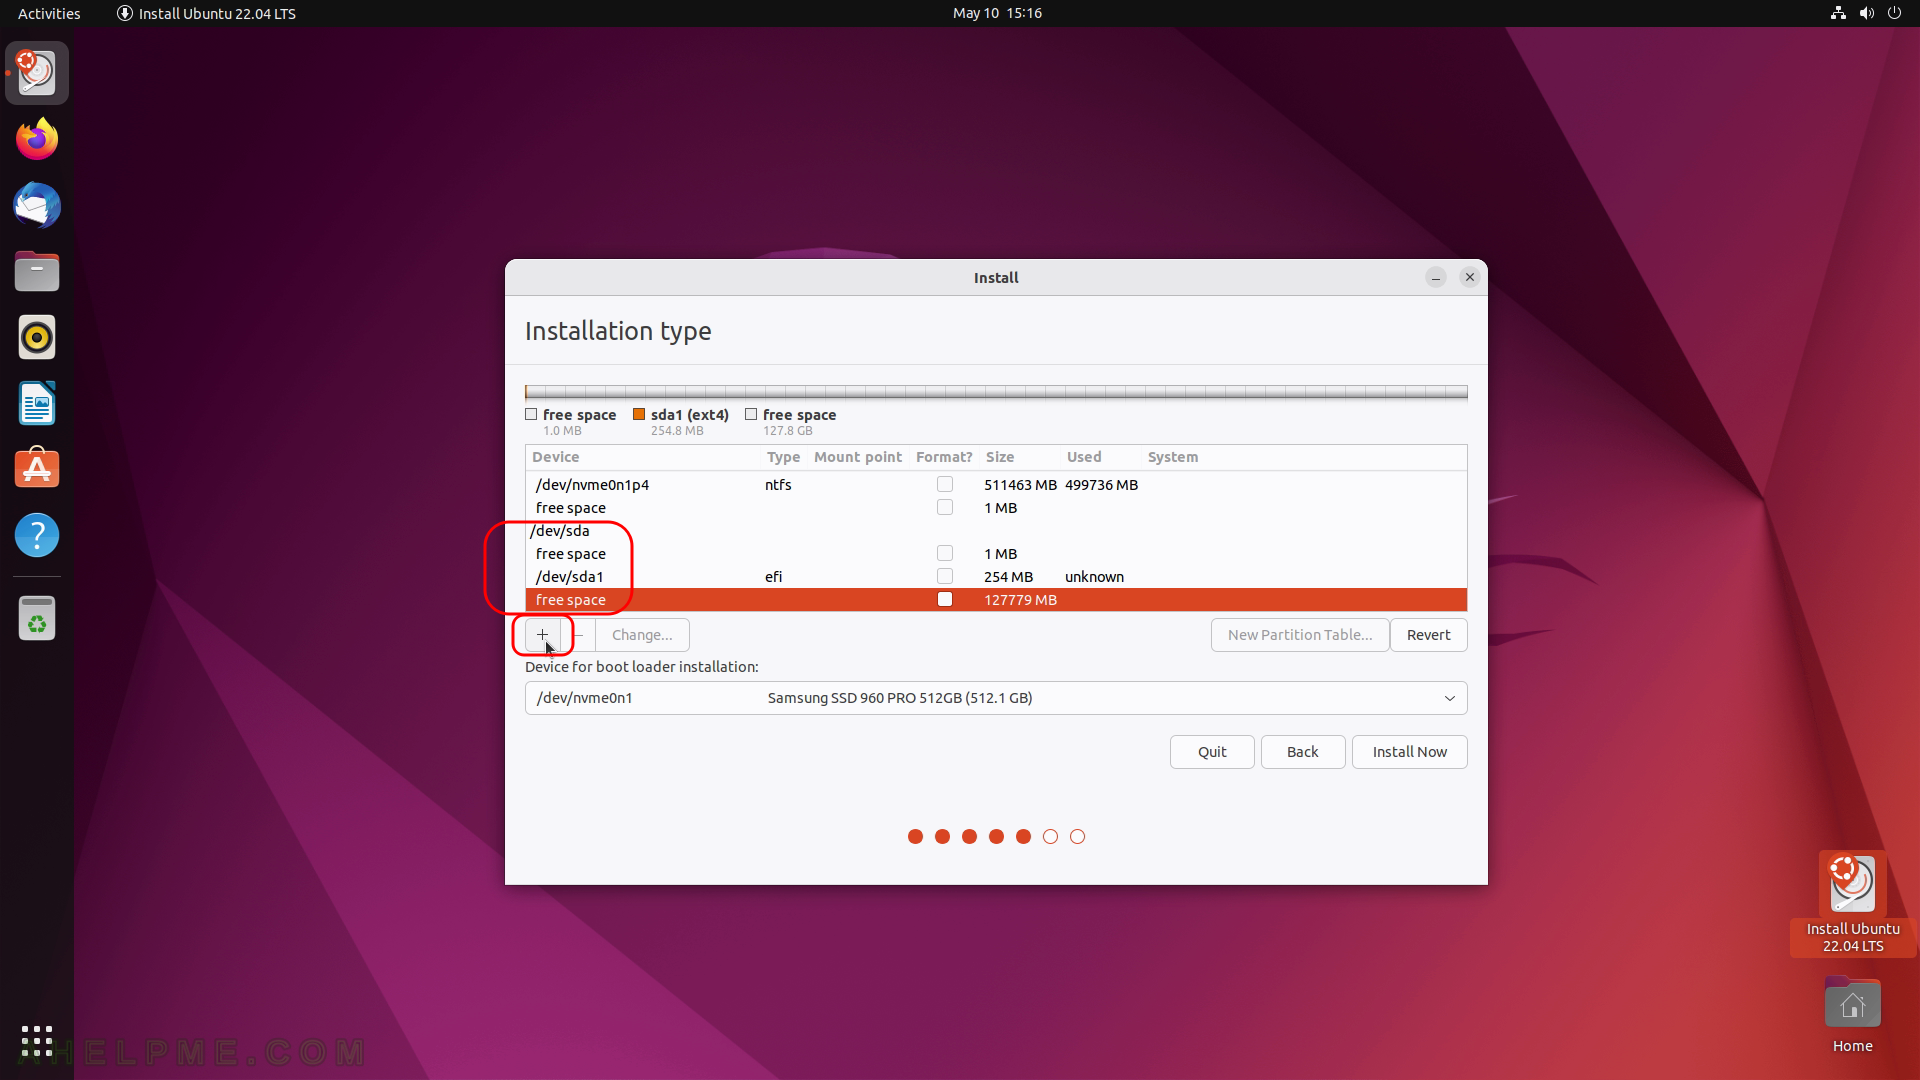
SCREENSHOT 13) Scroll to the device (hard disk) you want to use for this installation /dev/sda and click on “free space” then click on “+” to create a new partition.
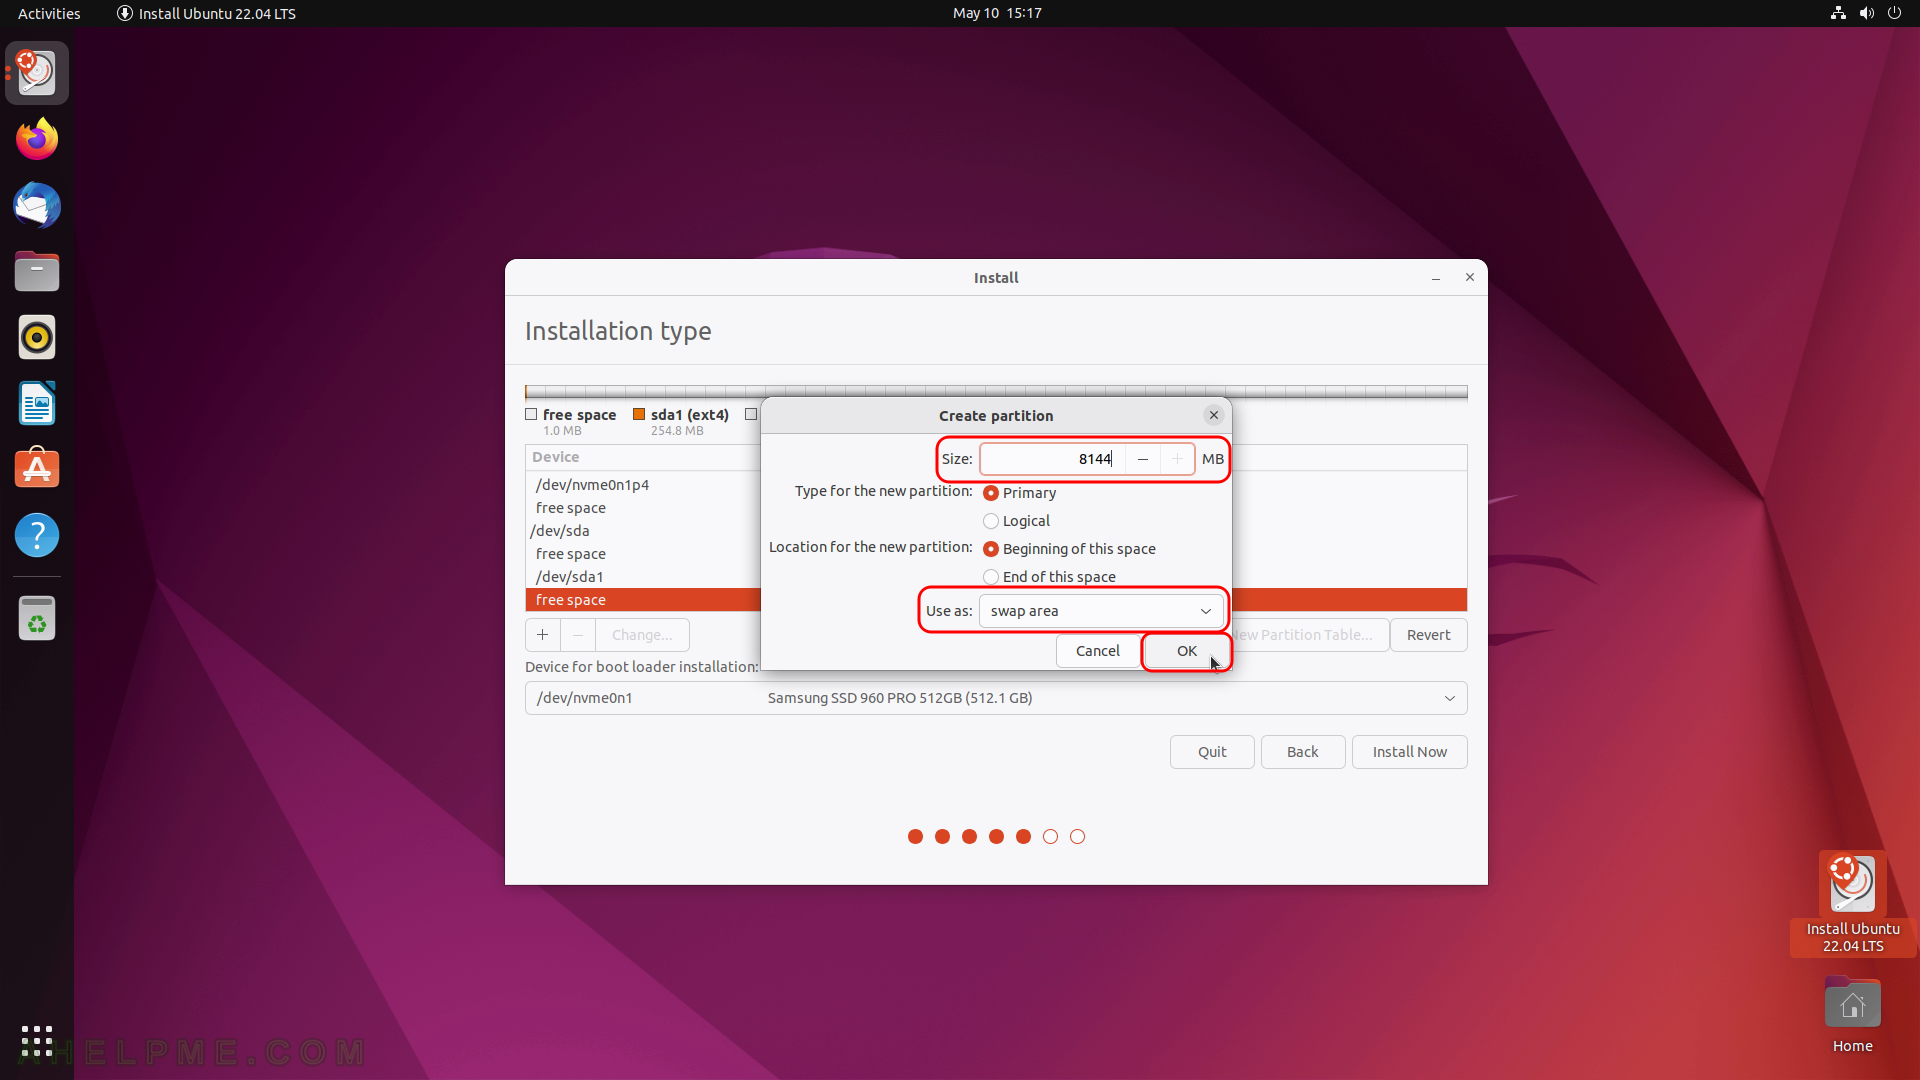
SCREENSHOT 14) Change the size to 8144 (which is in MB) and change the the type to “swap area”. Then click on “OK”.
SCREENSHOT 15) Scroll to the device (hard disk) you want to use for this installation /dev/sda and click on “free space” then click on “+” to create a new partition.

SCREENSHOT 16) Leave the size with the offered size number (which is the maxium available size after the creation of the two above partitions – 119 636 MB)
Ensure the file system type in “Use as” is “Ext4 journaling file system” (or any other supported file system in your favor). Set the “Mount point” to “/” – the root of the linux file system and click on “OK”.

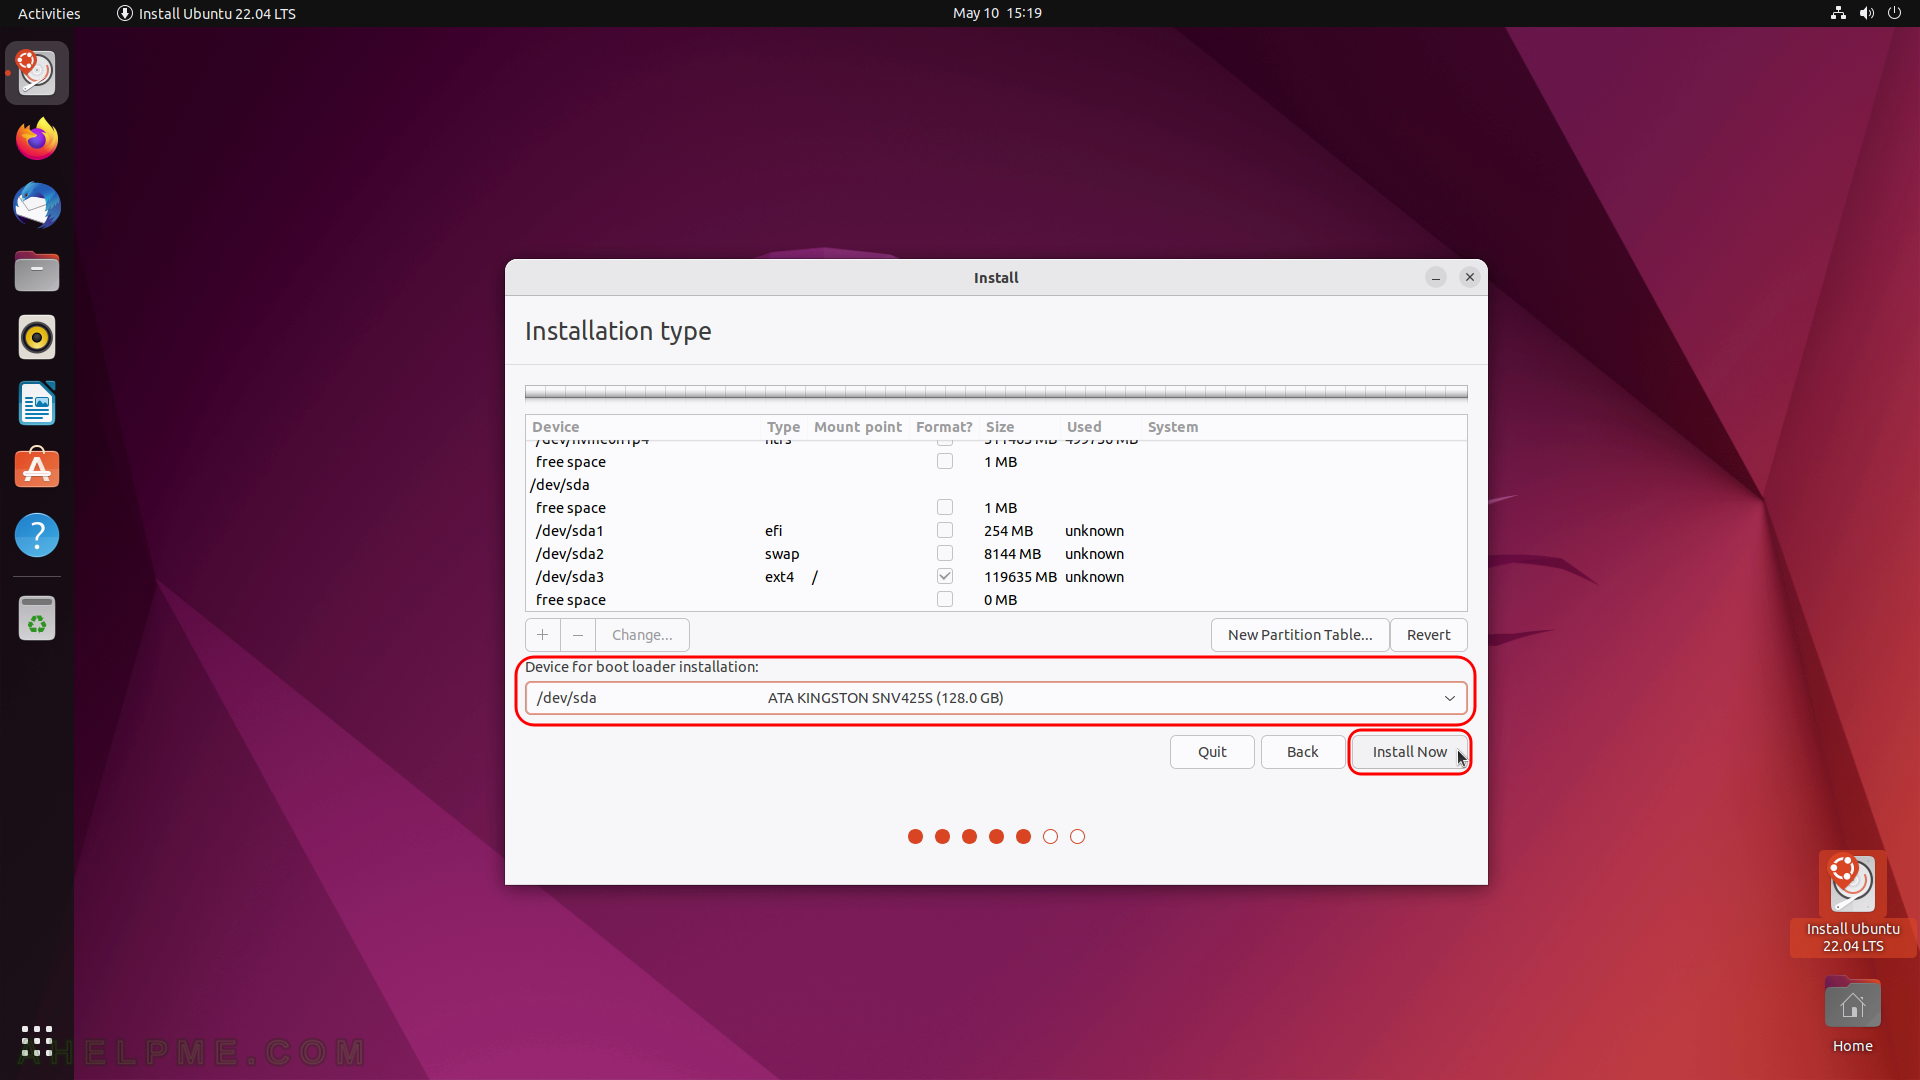
SCREENSHOT 17) Choose from the dropdown box the /dev/sda to install the boot loader program.
It is better to install the bootloader program on the same disk, in which the Ubuntu 22.04 LTS installation occurs. The installation wizard will leave untouch the current Windows (or other OS boot loader program) installed on other disks. Click “Install Now” to begin the actual installation process.
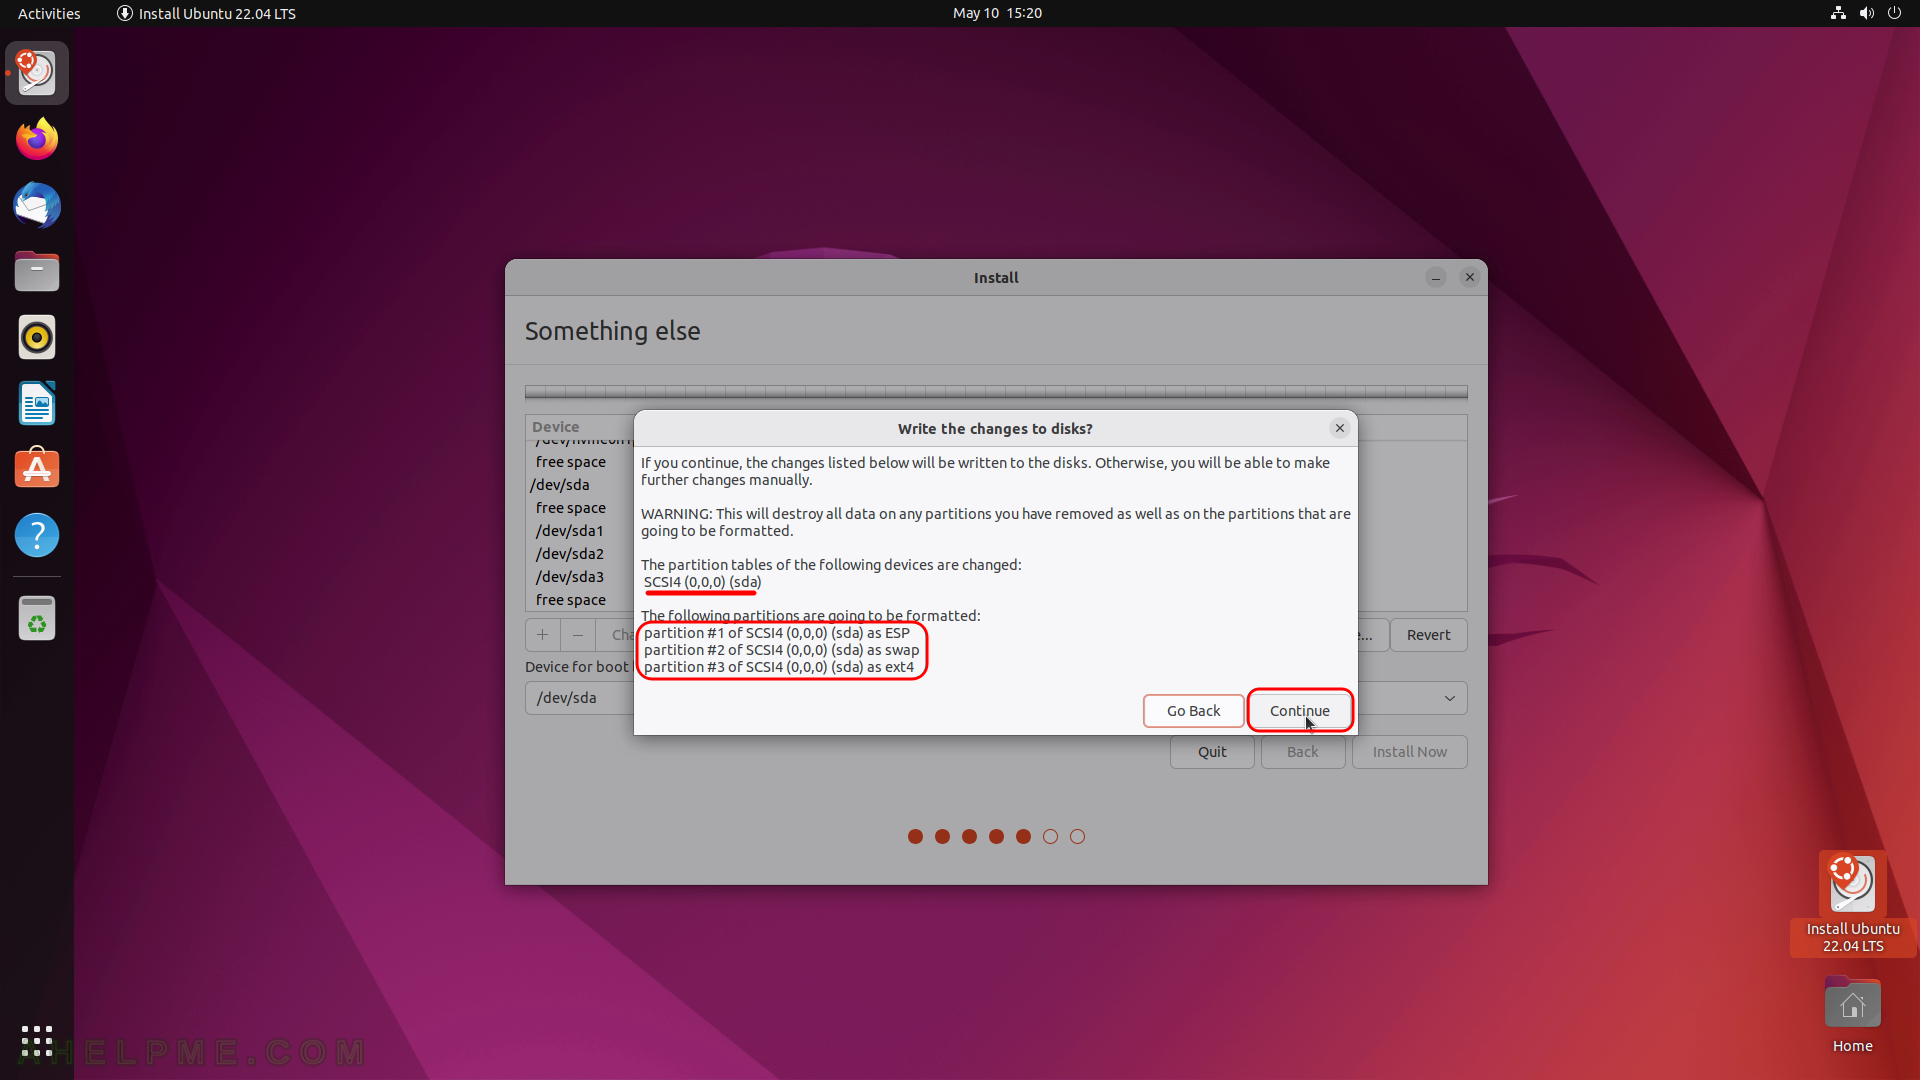
SCREENSHOT 18) A confirmation to write the disk layout changes made the several steps above.
The actions are shown – a new empty paritition table is to be created and then three partitions will be added. This operation is disructive and irreverable, so be absolutely sure the sda disk is the right device for a whole disk installation and there is no valuable infromation on it. Click on “Continue”.
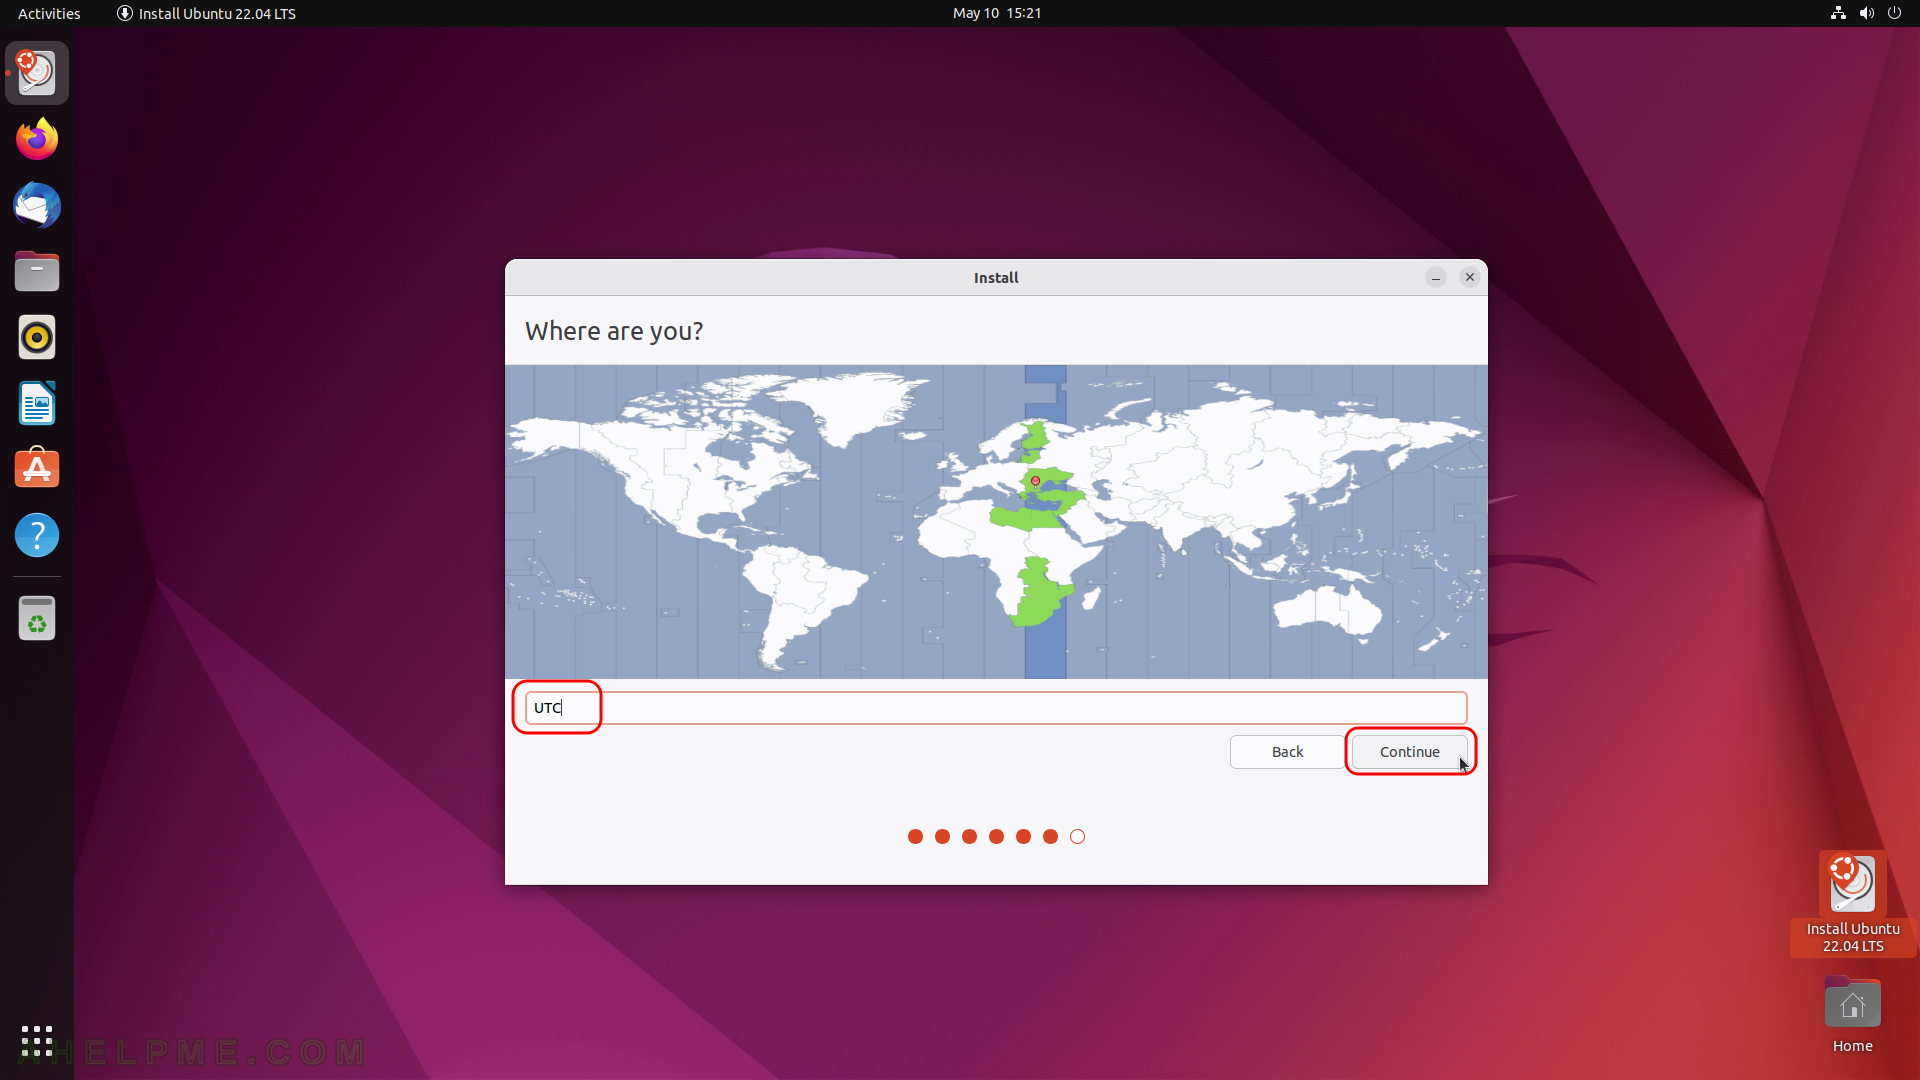
SCREENSHOT 19) Select your timezone to configure your clock.
Probably the default is ok, the setup tries to autodetect it. UTC (Universal Coordinated Time) might be typed manually. Click on “Continue”.
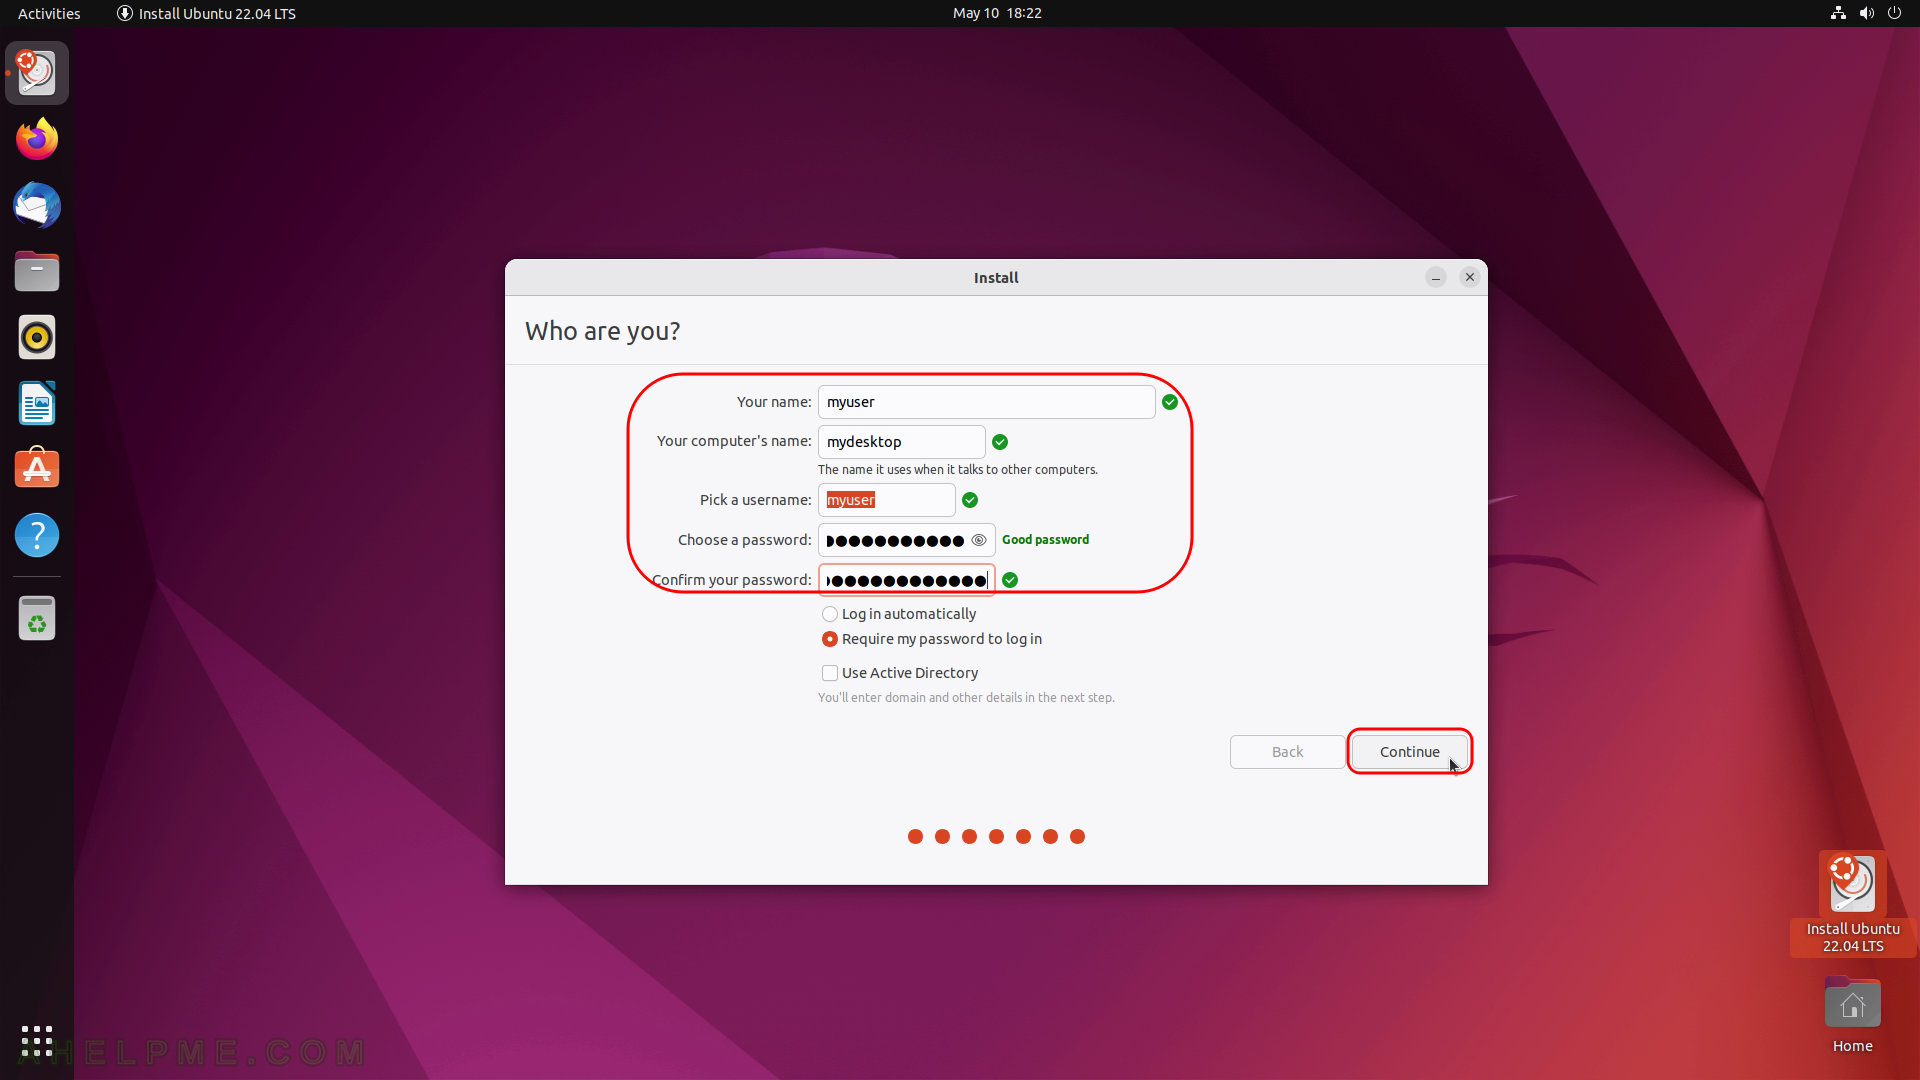
SCREENSHOT 20) Create the user to login in the system.
This user will have administrative privileges with sudo. The computer’s hostname is also set here. Press “Continue”.