This tutorial will show you the simple steps of installing a modern Linux Distribution Fedora 37 Server edition. Fedora line offers many bleeding-edge Linux technologies than the more enterprise CentOS of the same RPM Linux family.
In fact, if the user needs a server with the latest Linux stable software Fedora server is the right and easy choice for a server!
Here are some basic data from the default installation setup settings:
- Installed packages – ~678 occupying 1.7G of space.
- 3 partitions when using automatic partition layout – boot efi, boot and root.
- xfs used for the root partition.
The Fedora 37 Server comes and updates to the latest stable Linux:
- Linux kernel : 6.0.11.
- Python : 3.11
- GLibc : 2.36
- OpenSSL : 3.0.5
- systemd : 251.8
More detailed software overview here – Software and technical details of Fedora Server 37 including cockpit screenshots.
Of course, one can expect the latest version of GCC (12.2.1), PHP (8.1.13), GO (1.19.3), MySQL Server (8.0.31), PostgreSQL (14.3), Nginx (1.22.1), Apache (2.4.54) and so on. Almost all of them are the latest stable version on their Internet sites.
Just be careful, the Fedora life cycle is 13 months from the release to the EOL (End of Life)! Of course, a dist-upgrade is supported and indeed, it has been flawless for years!
We used the following ISO for the installation process from https://getfedora.org/en/server/download/:
https://download.fedoraproject.org/pub/fedora/linux/releases/37/Server/x86_64/iso/Fedora-Server-netinst-x86_64-37-1.7.iso
It is a LIVE image so you can try it before installing it. The easiest way is to download the image and burn it to a DVD or USB stick disk and then follow the installation below (a USB flash drive could be also created from this ISO). The netinstall installation is as simple as having a good Internet connection to download the packages, the installation wizard automatically detects the closest mirror, from which it will download the packages. Essentially, the network does not differ from the ordinary installation except it expects to download the packages from the Internet.
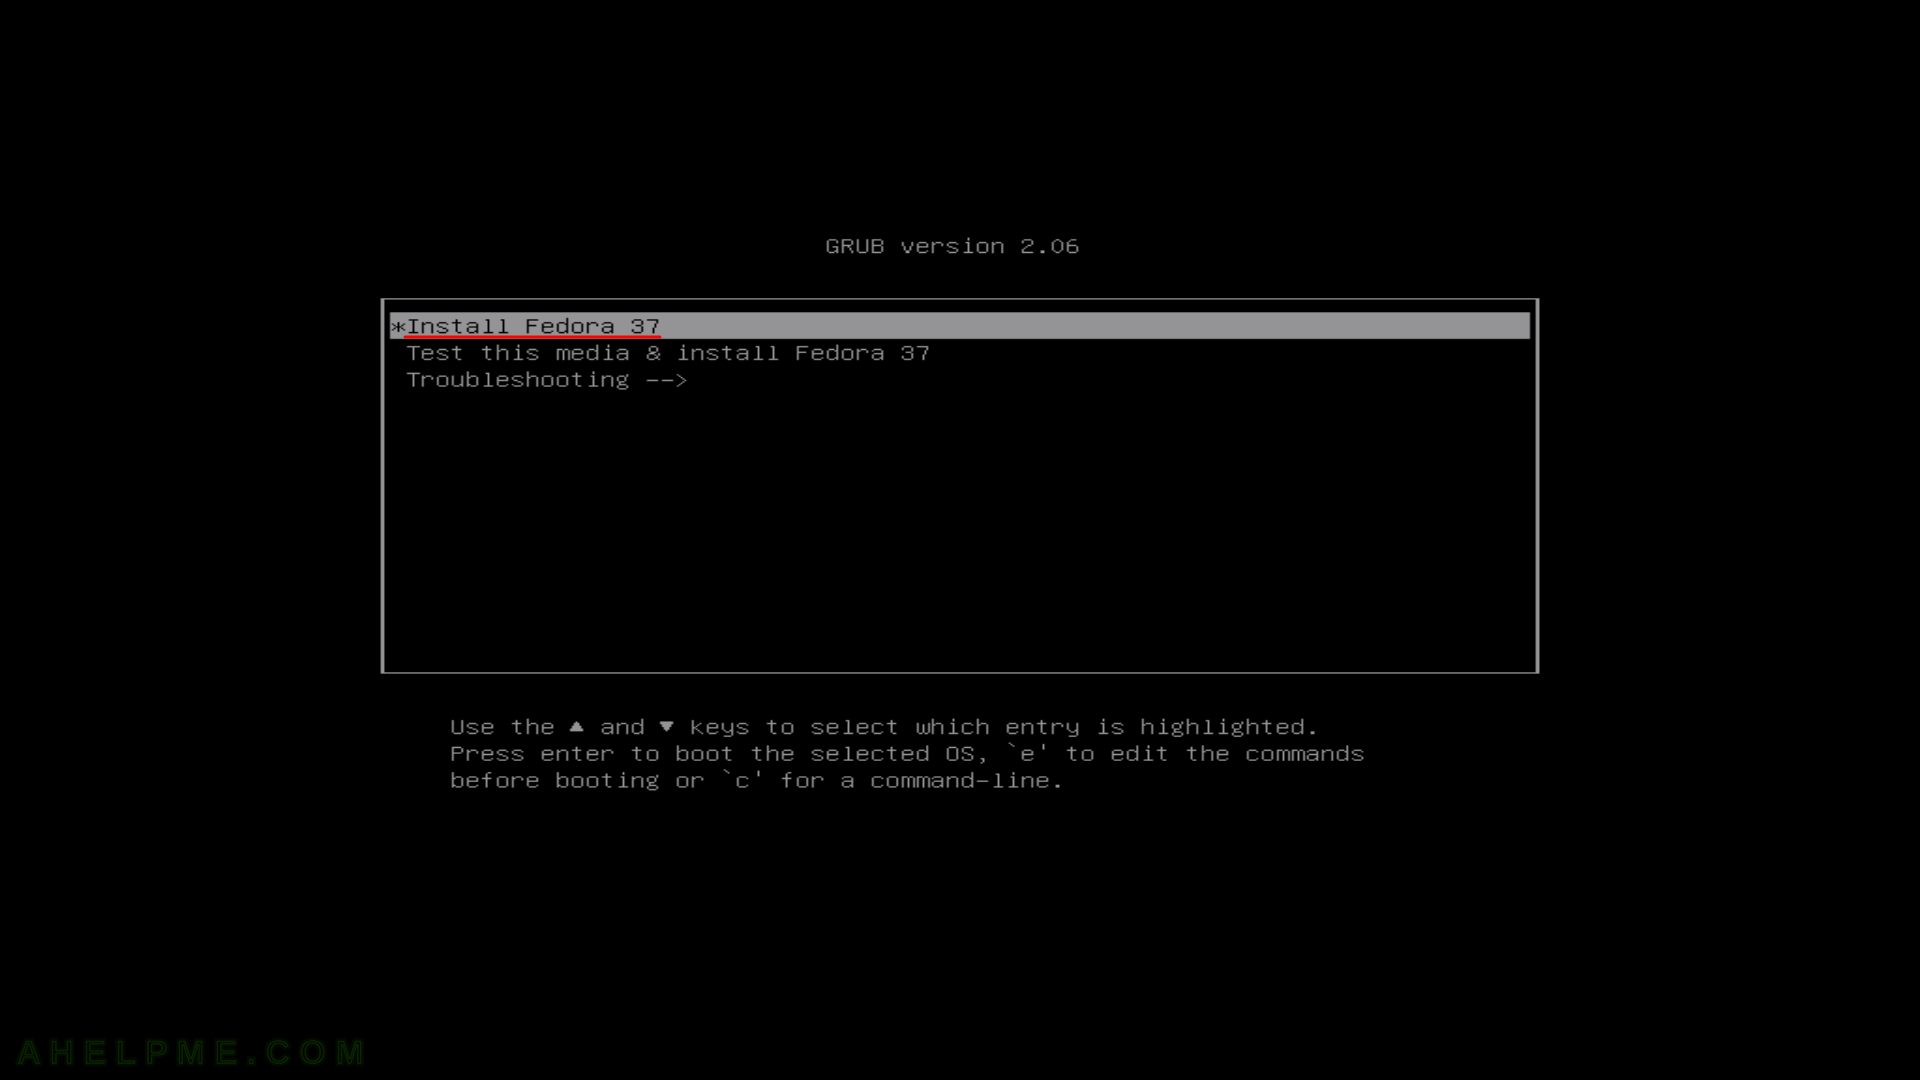
SCREENSHOT 1) If you booted from the DVD/USB you would get this first screen – select “Install Fedora 37” and hit Enter
SCREENSHOT 2) The kernel and the live system are loading…

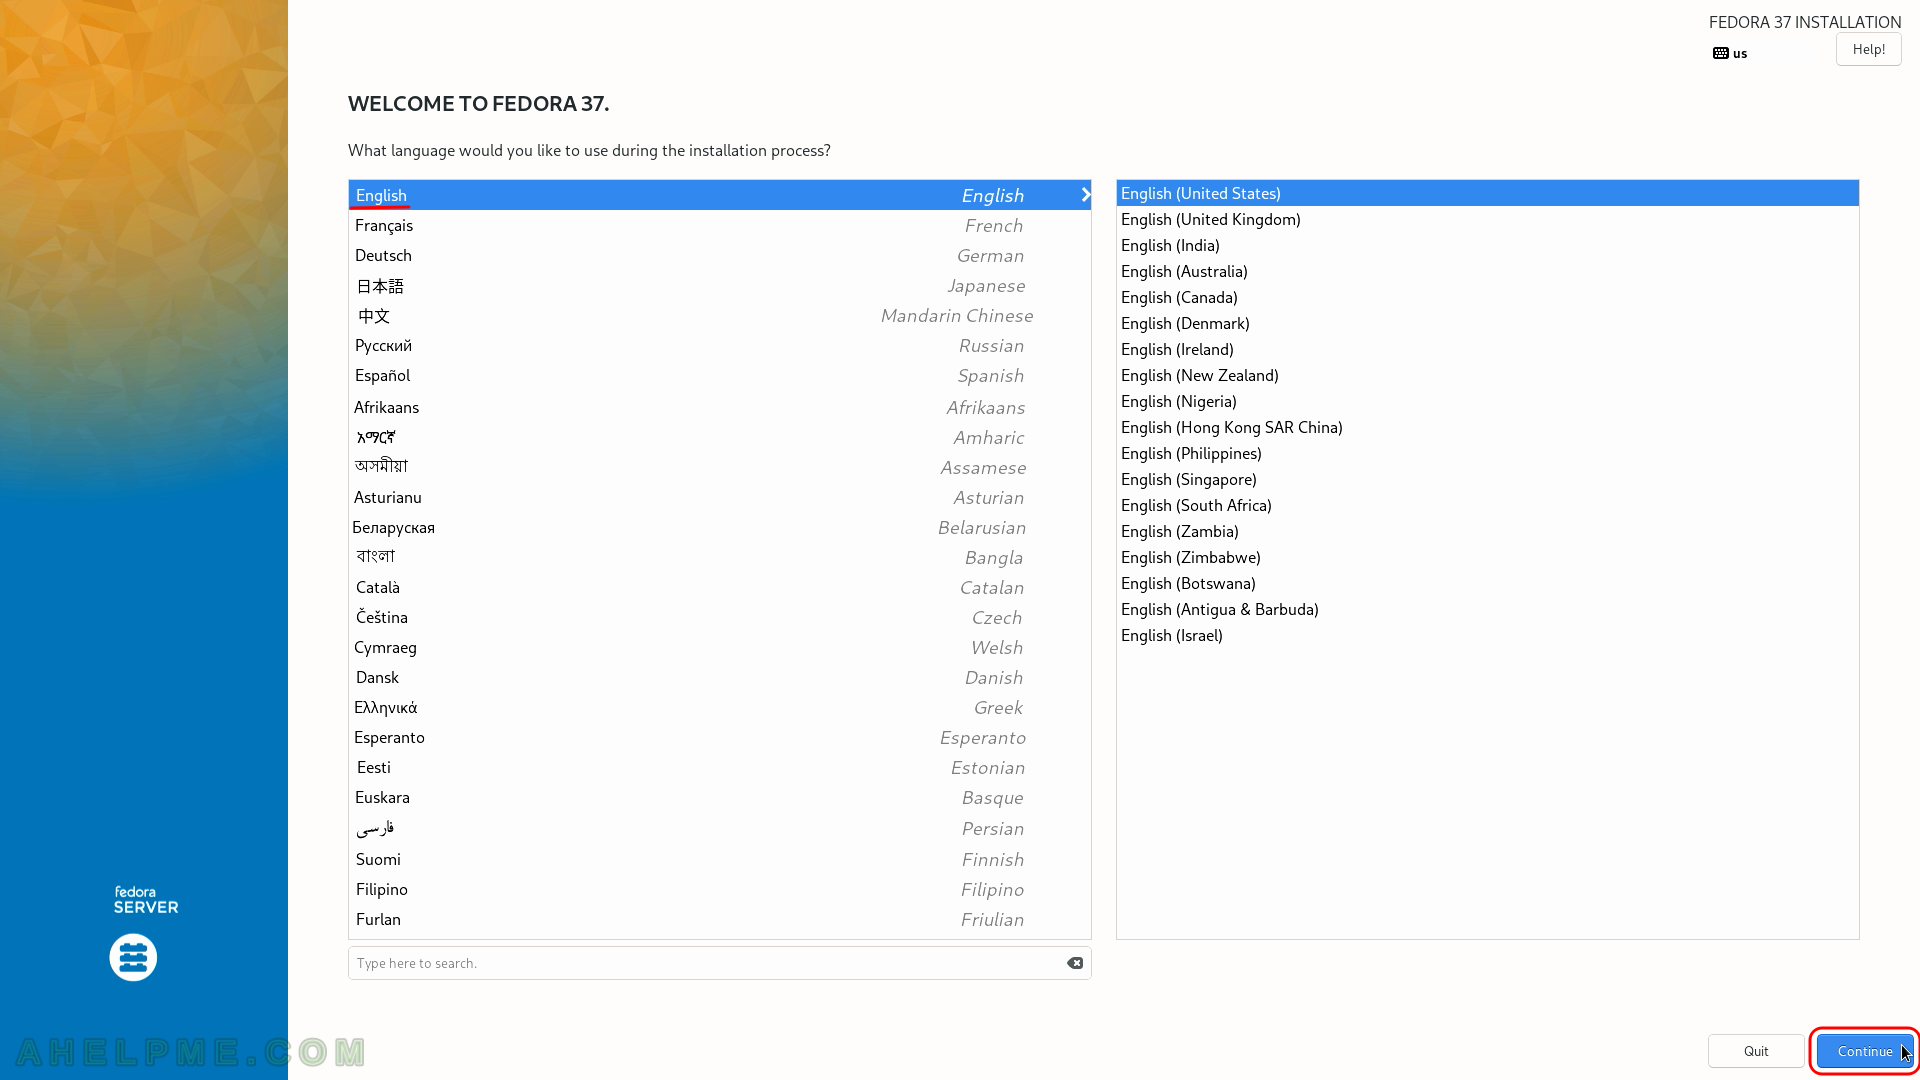
SCREENSHOT 3) Choose your system language. Here we selected English.
The setup will guide you through the steps in the language you select here and the installed system will use the selected language as default.
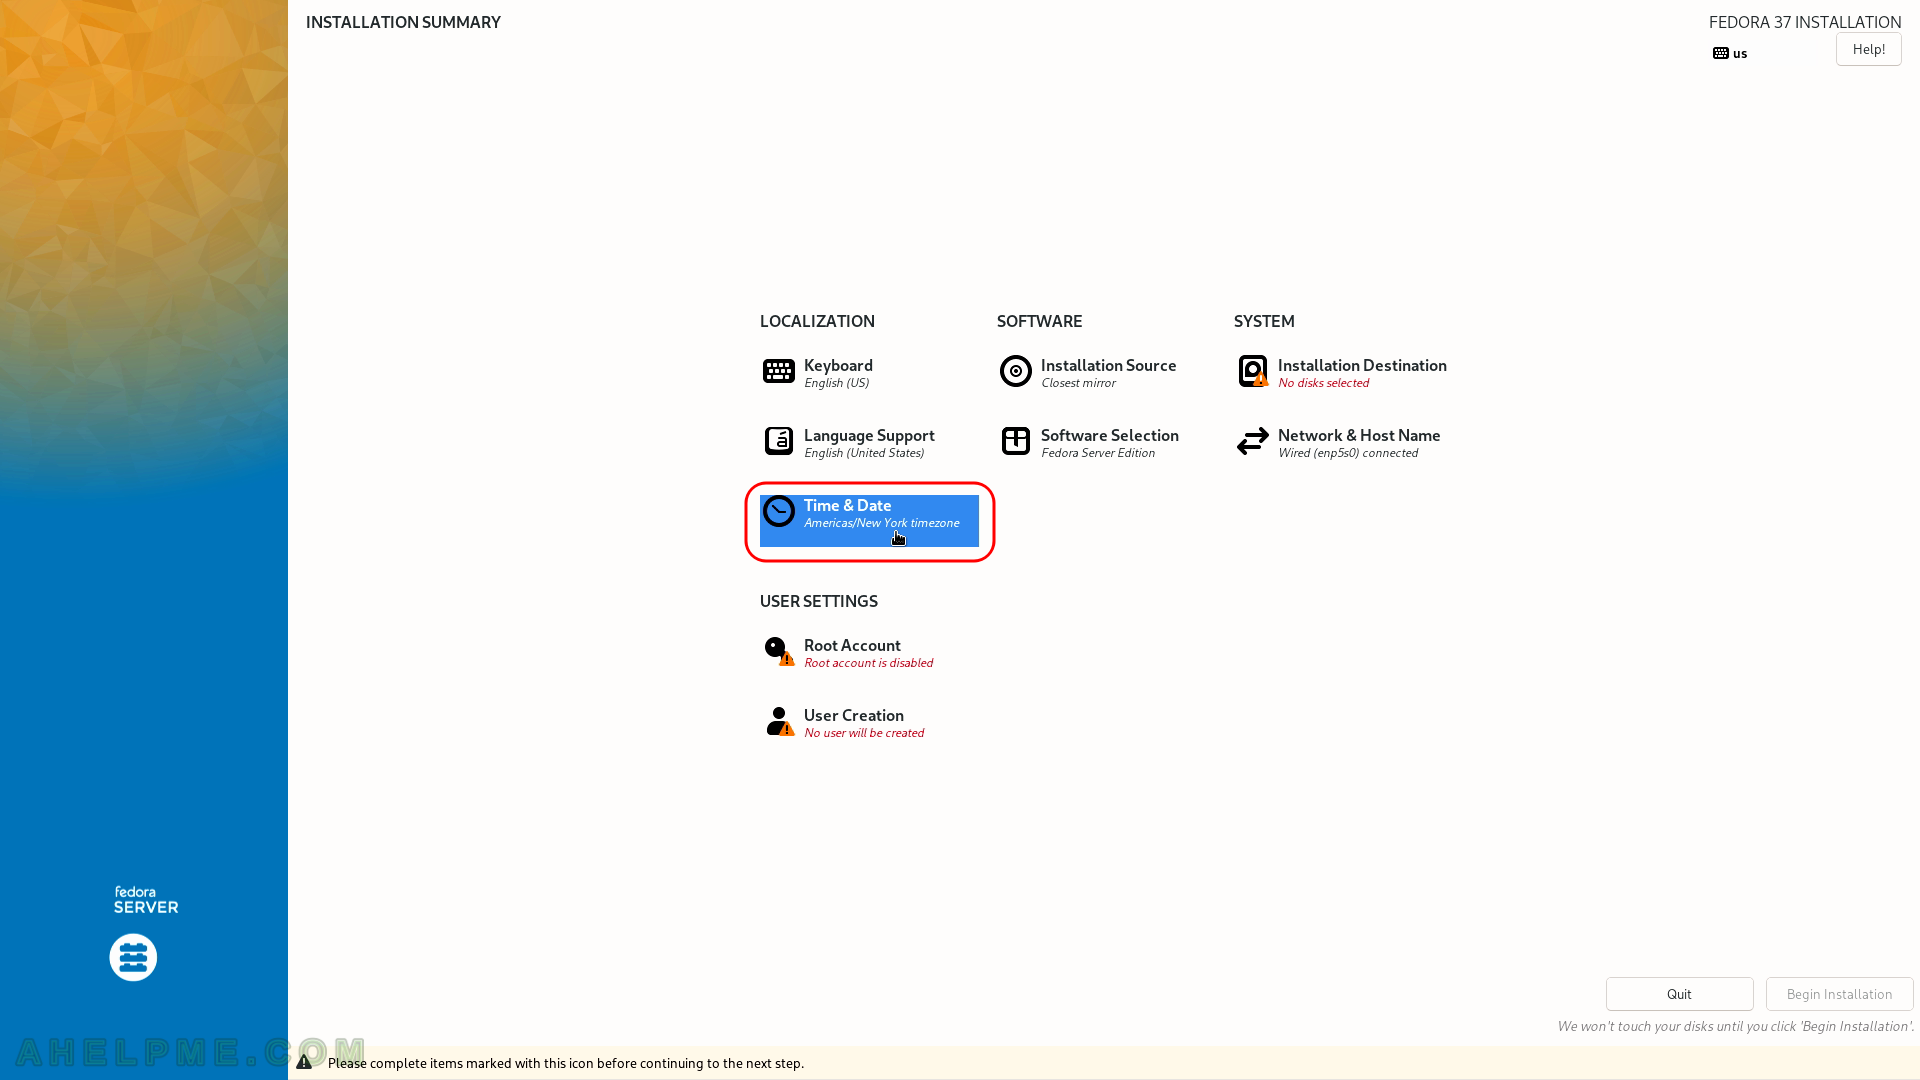
SCREENSHOT 4) Select the time and date menu to set the time and date and the time zone of the system, which is very important. Click on “Time & Date”.
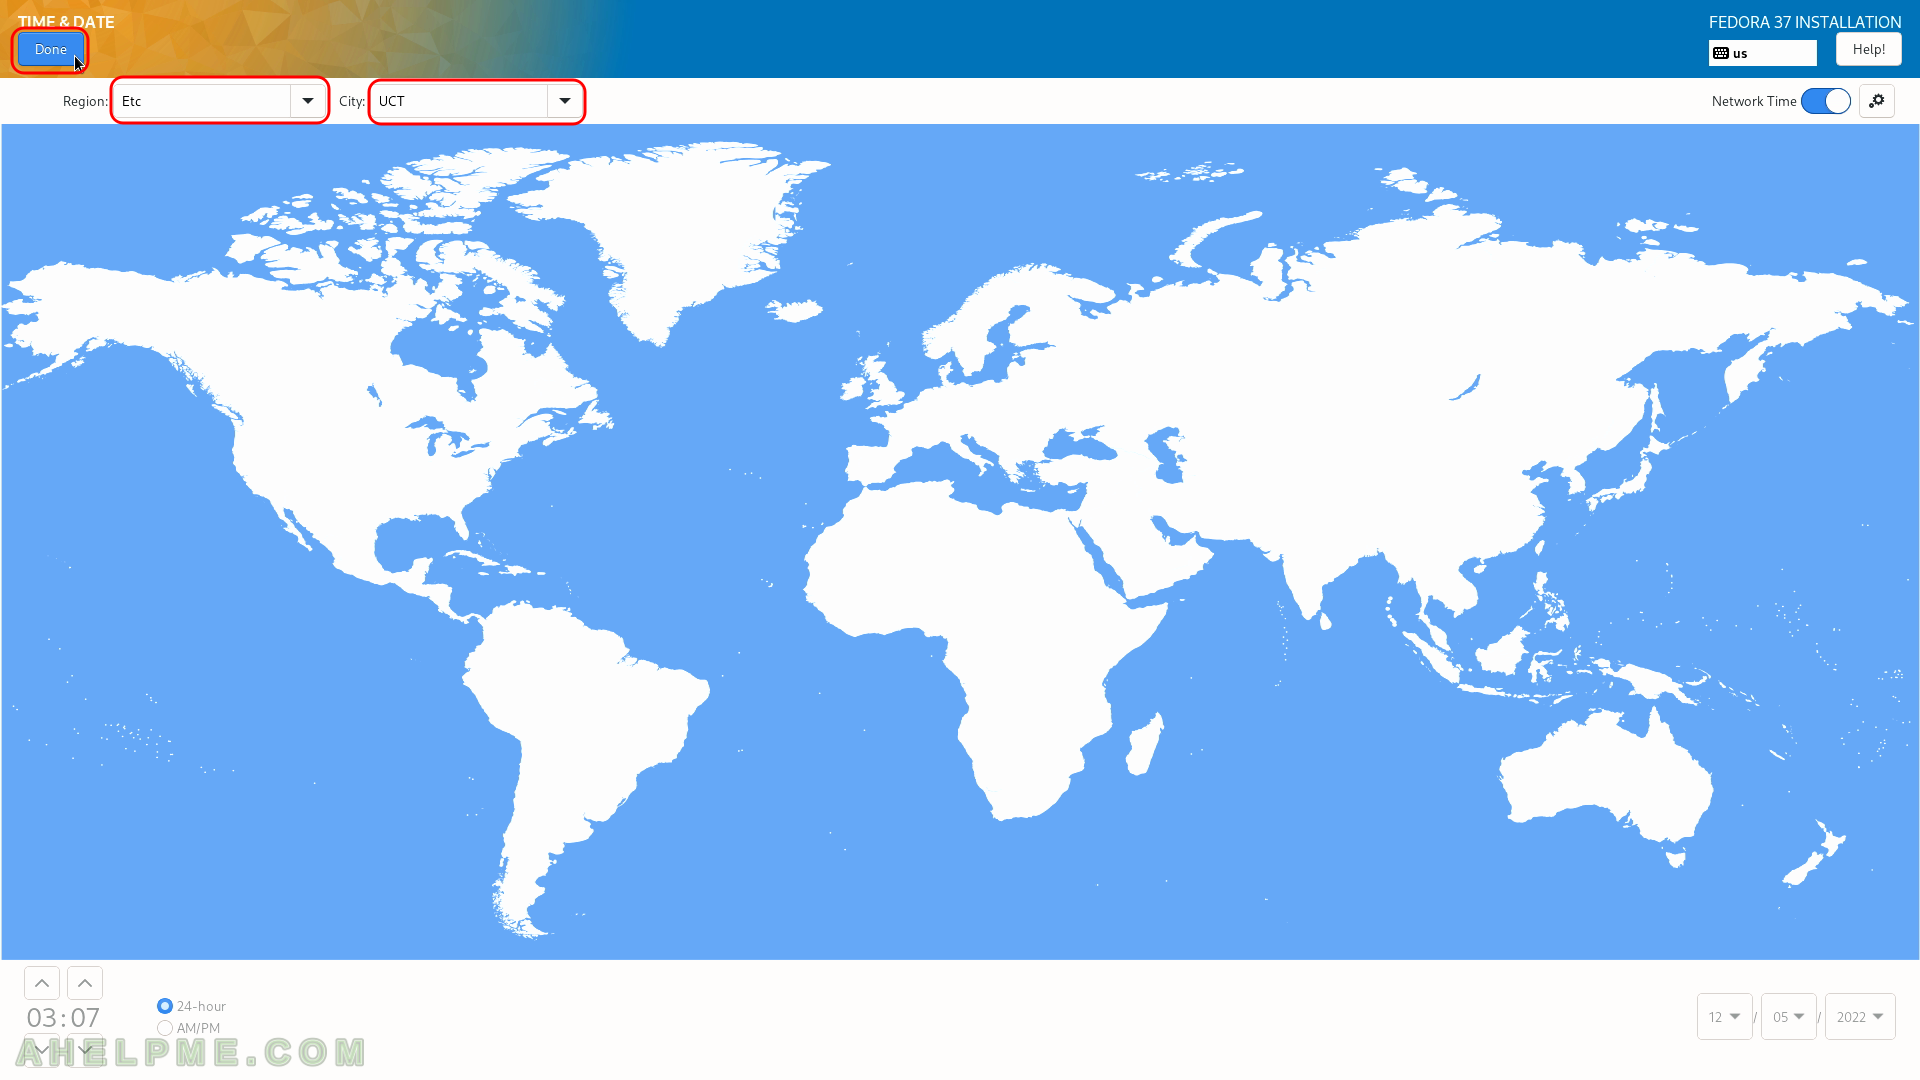
SCREENSHOT 5) Select your time zone – here we selected UTC (Universal Coordinated Time), but you can choose your time zone if it is not the right one by default.
You even may point with the mouse to your country on the map. Click on “Done” when you are ready.
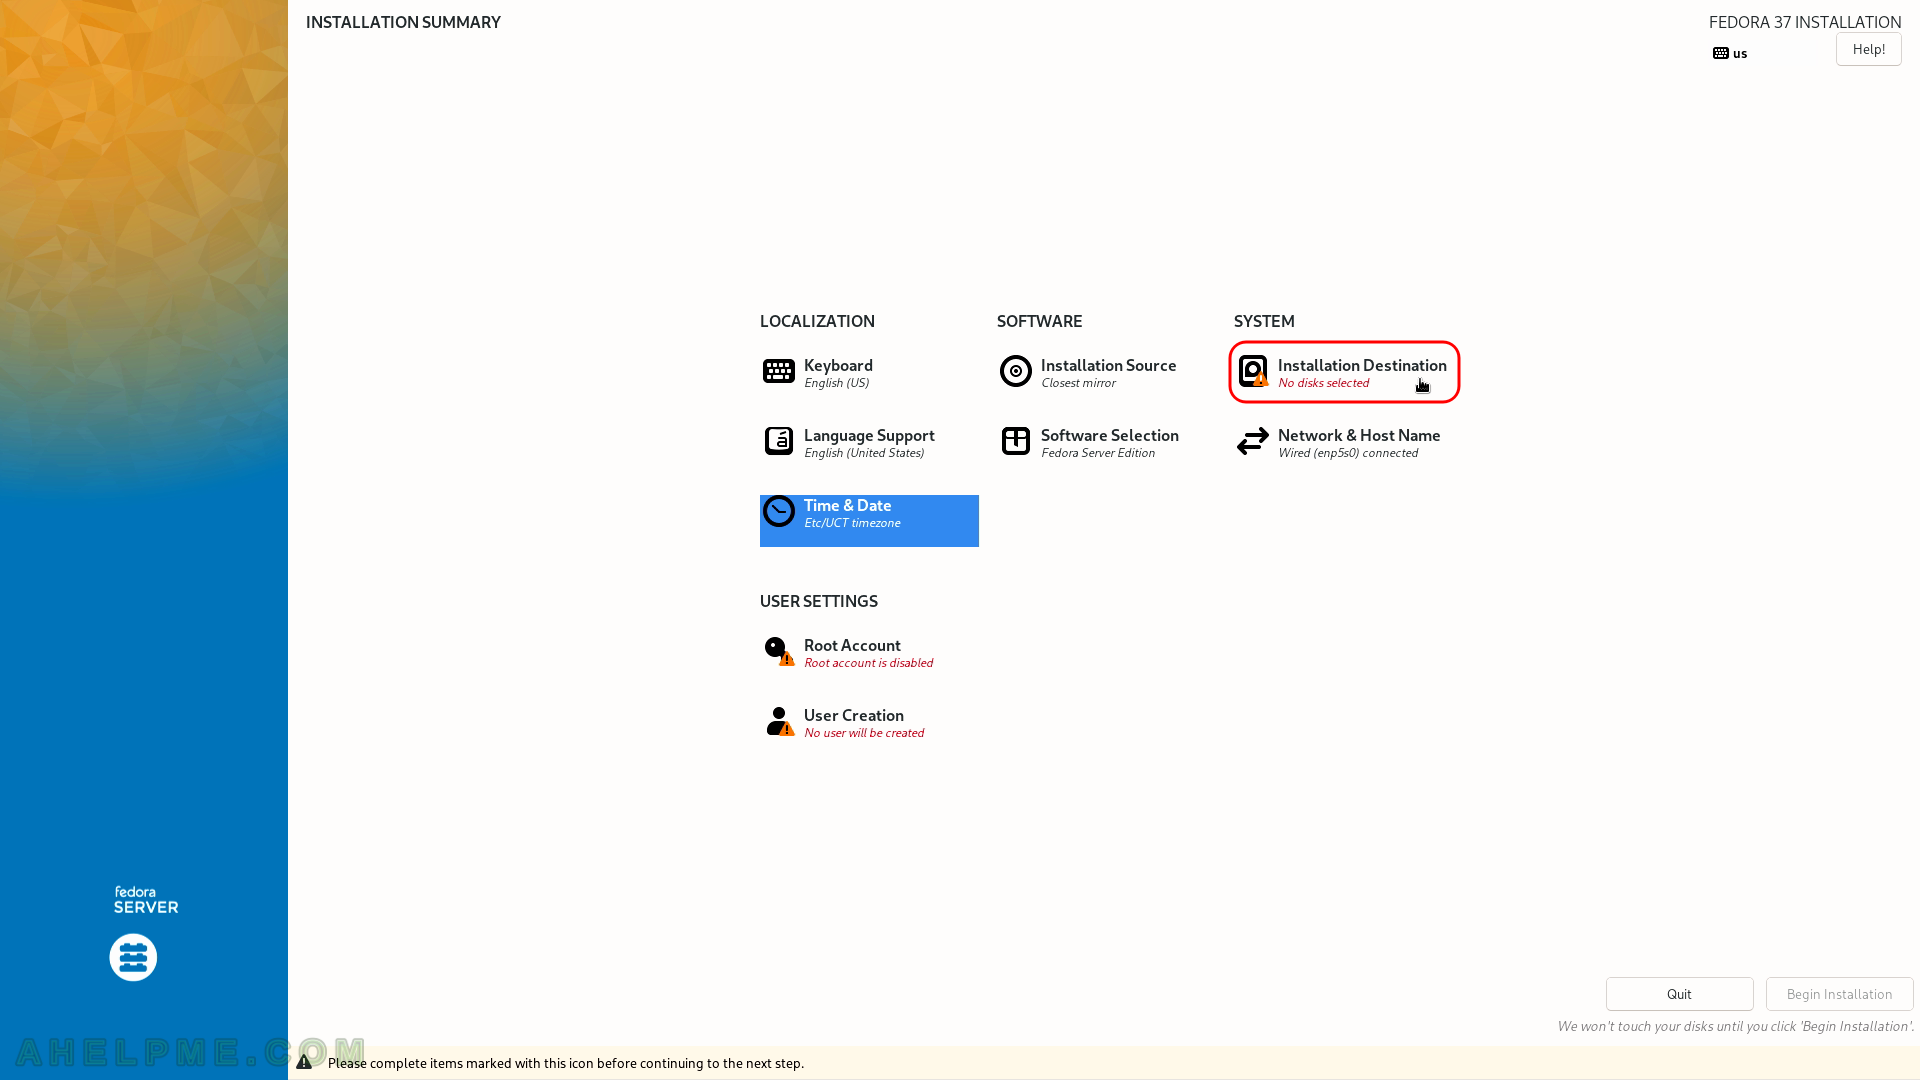
SCREENSHOT 6) Installation destination – on which device do you want to install the Fedora 37 Server.
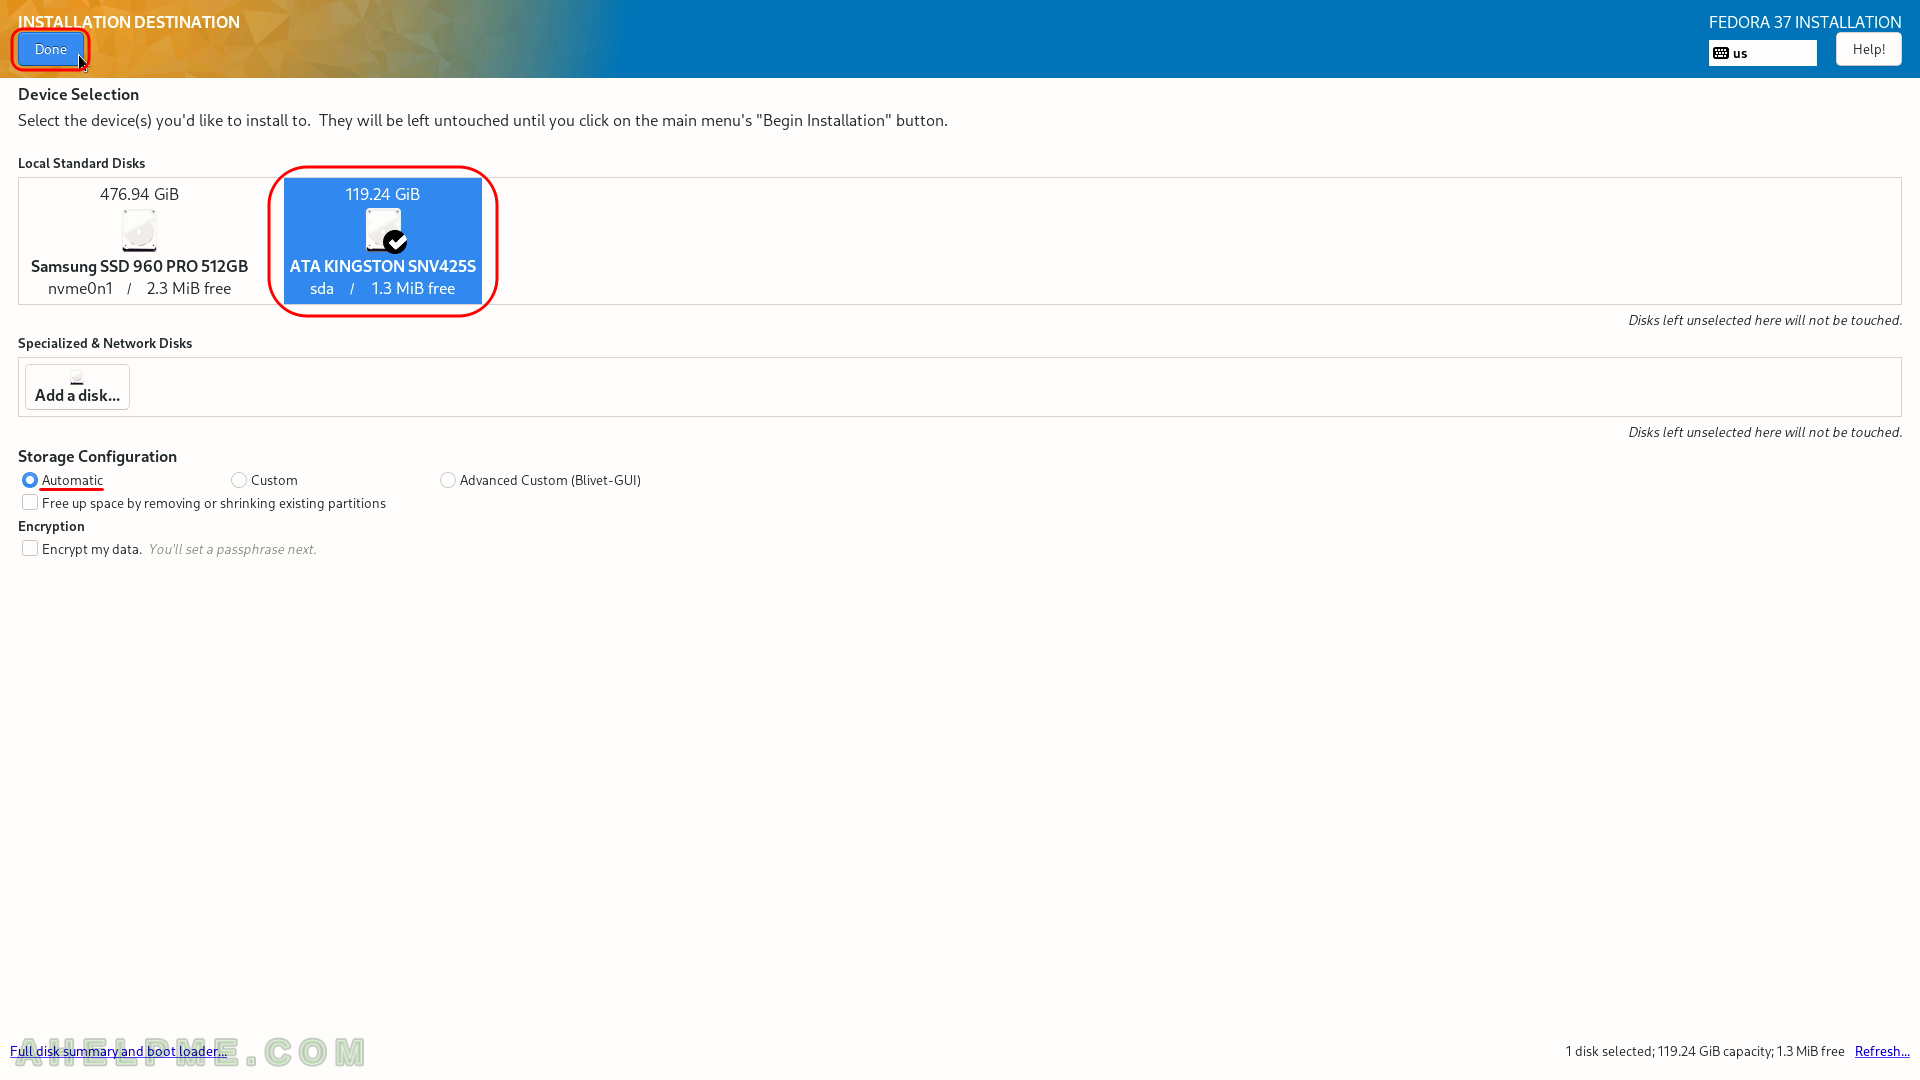
SCREENSHOT 7) Installation destination – choose your disk to install Fedora 37 Server.
Ensure the automatic storage configuration is selected. This will erase all of the data on the disk and will install a clean copy with the default disk layout. If you do not have enough space on the selected disk, the setup will ask you to erase the data on the disk. If the disk is blank it will not ask you anything. If you want a specific installation you should choose “Custom” or “Advanced Custom(Blivet-GUI)” (these options are beyond the scope of this article). Click on “Done”.
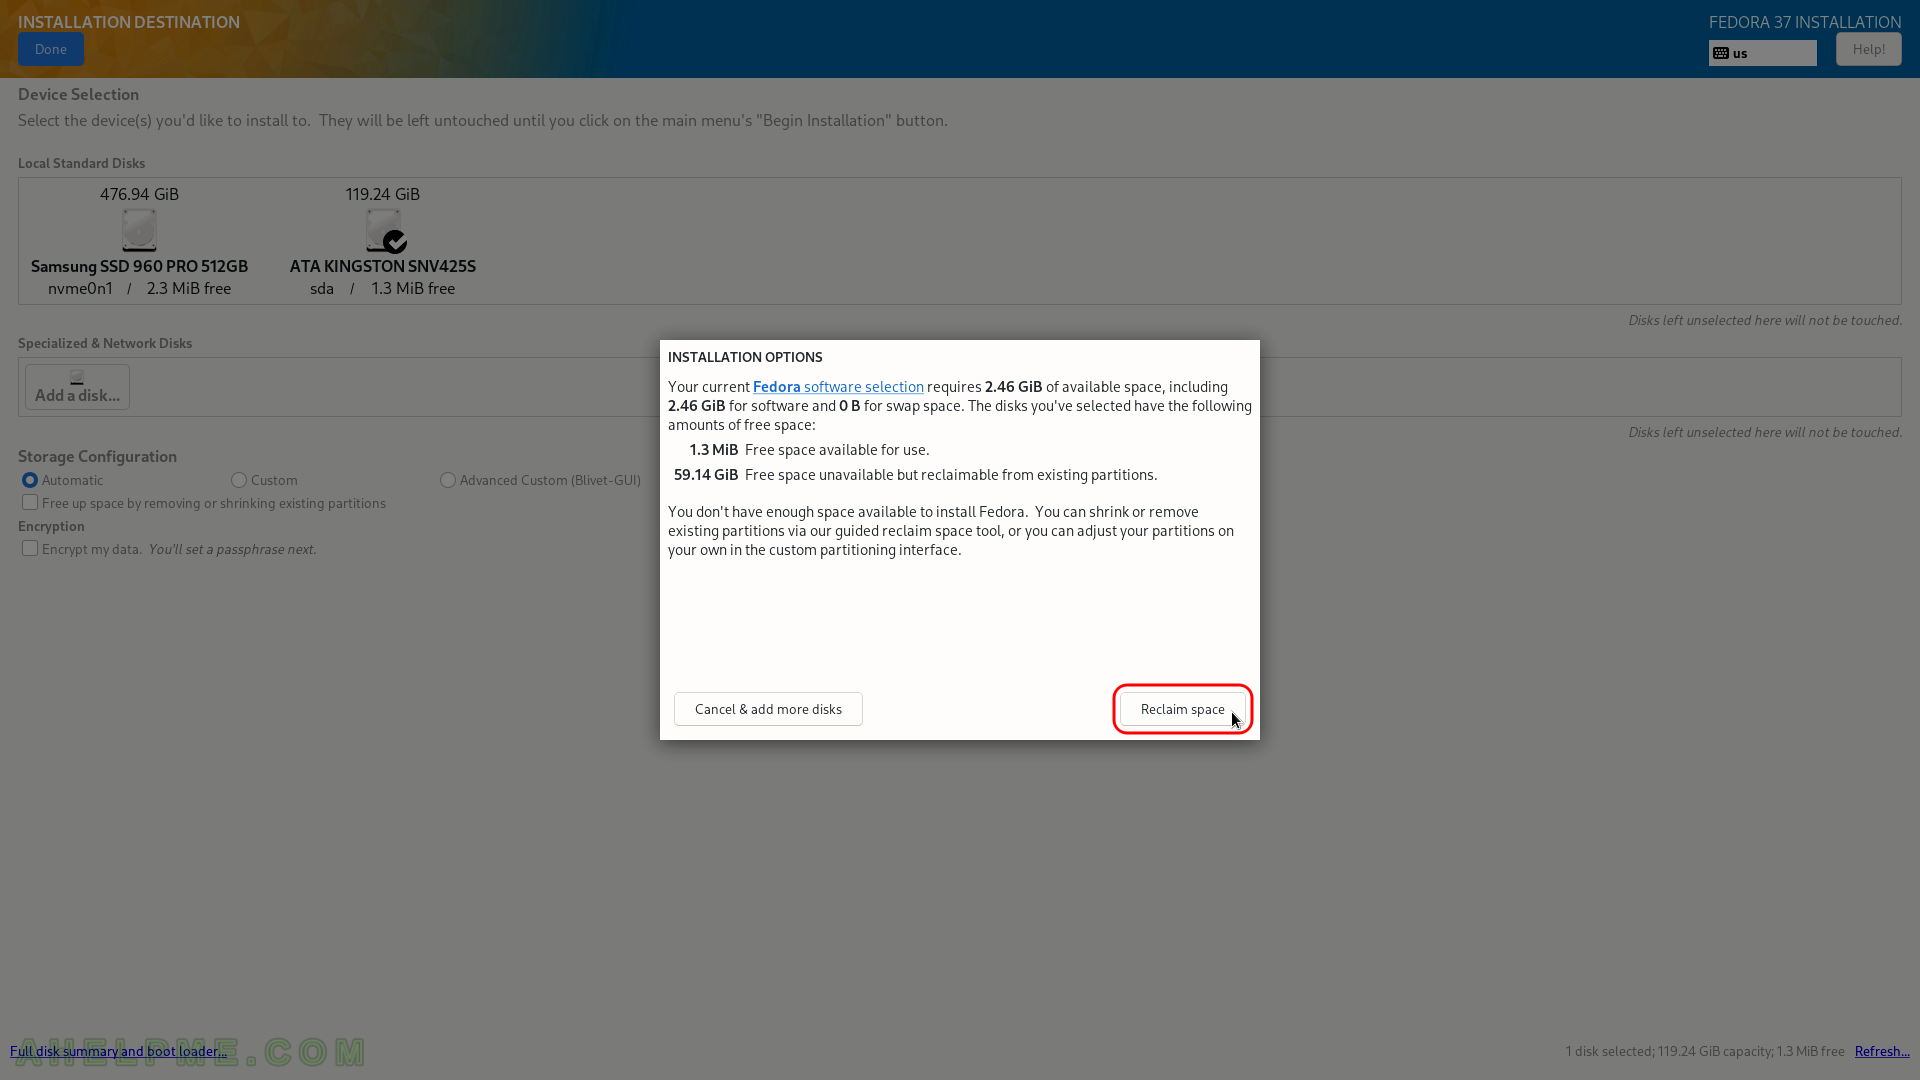
SCREENSHOT 8) Fedora 37 Server needs 3.08 GiB of available space on the selected disk at least (it is because 0 bytes are reversed for the swap space)!
If there is less than the requested size of free (available disk) space the setup will offer you to free some space by removing existing data (partitions). If the selected disk is with important data and you do not know what you are doing, stop and don’t continue! If this hard drive is with no important data you may proceed by clicking on “Reclaim space”.
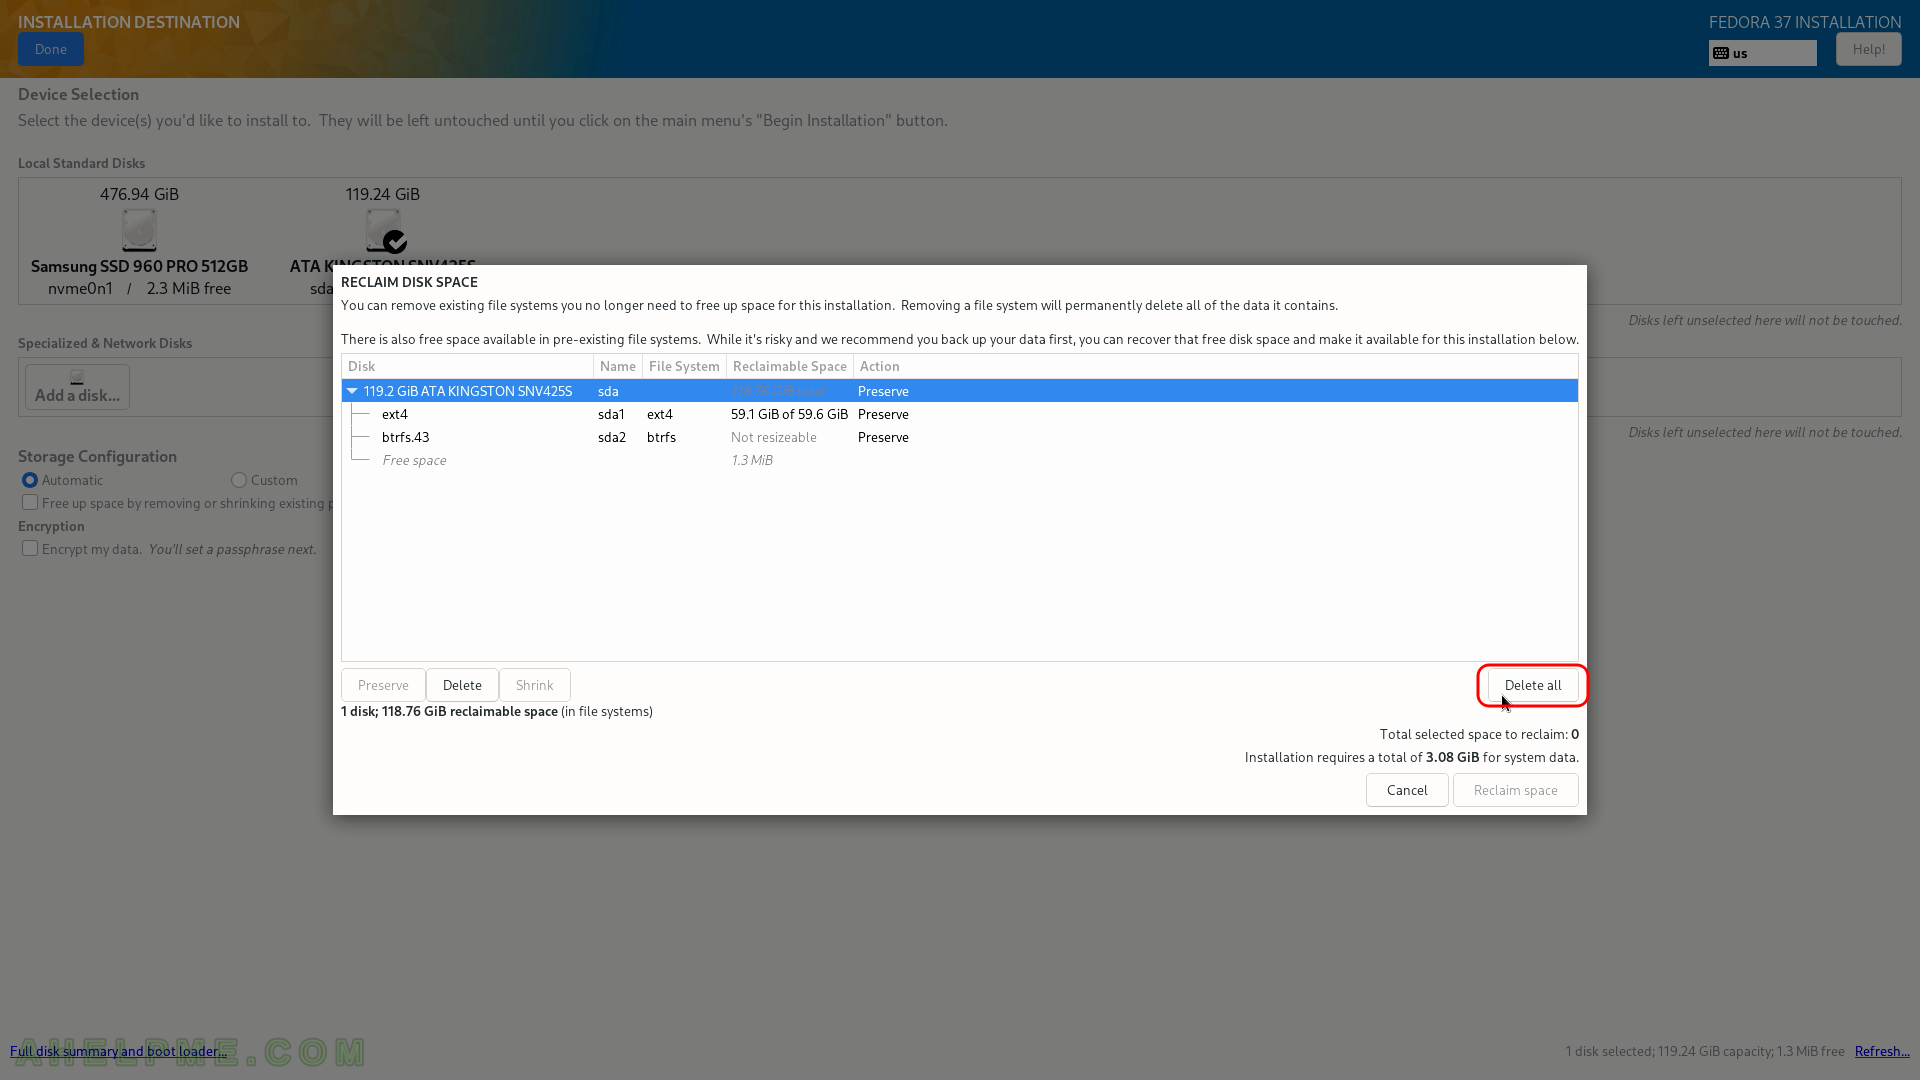
SCREENSHOT 9) Delete all of the data is the easiest way when you have unnecessary data in the disk and you decided to remove all the data from the disk.
Click on “Delete all” if this is the case. Be careful not to remove something you might need in the future! If you know what you are doing you can free some space (make it available i.e. enough unpartitioned space (~3.08 GiB at least), which is what the setup needs to proceed) by deleting or shrinking the existing partitions.
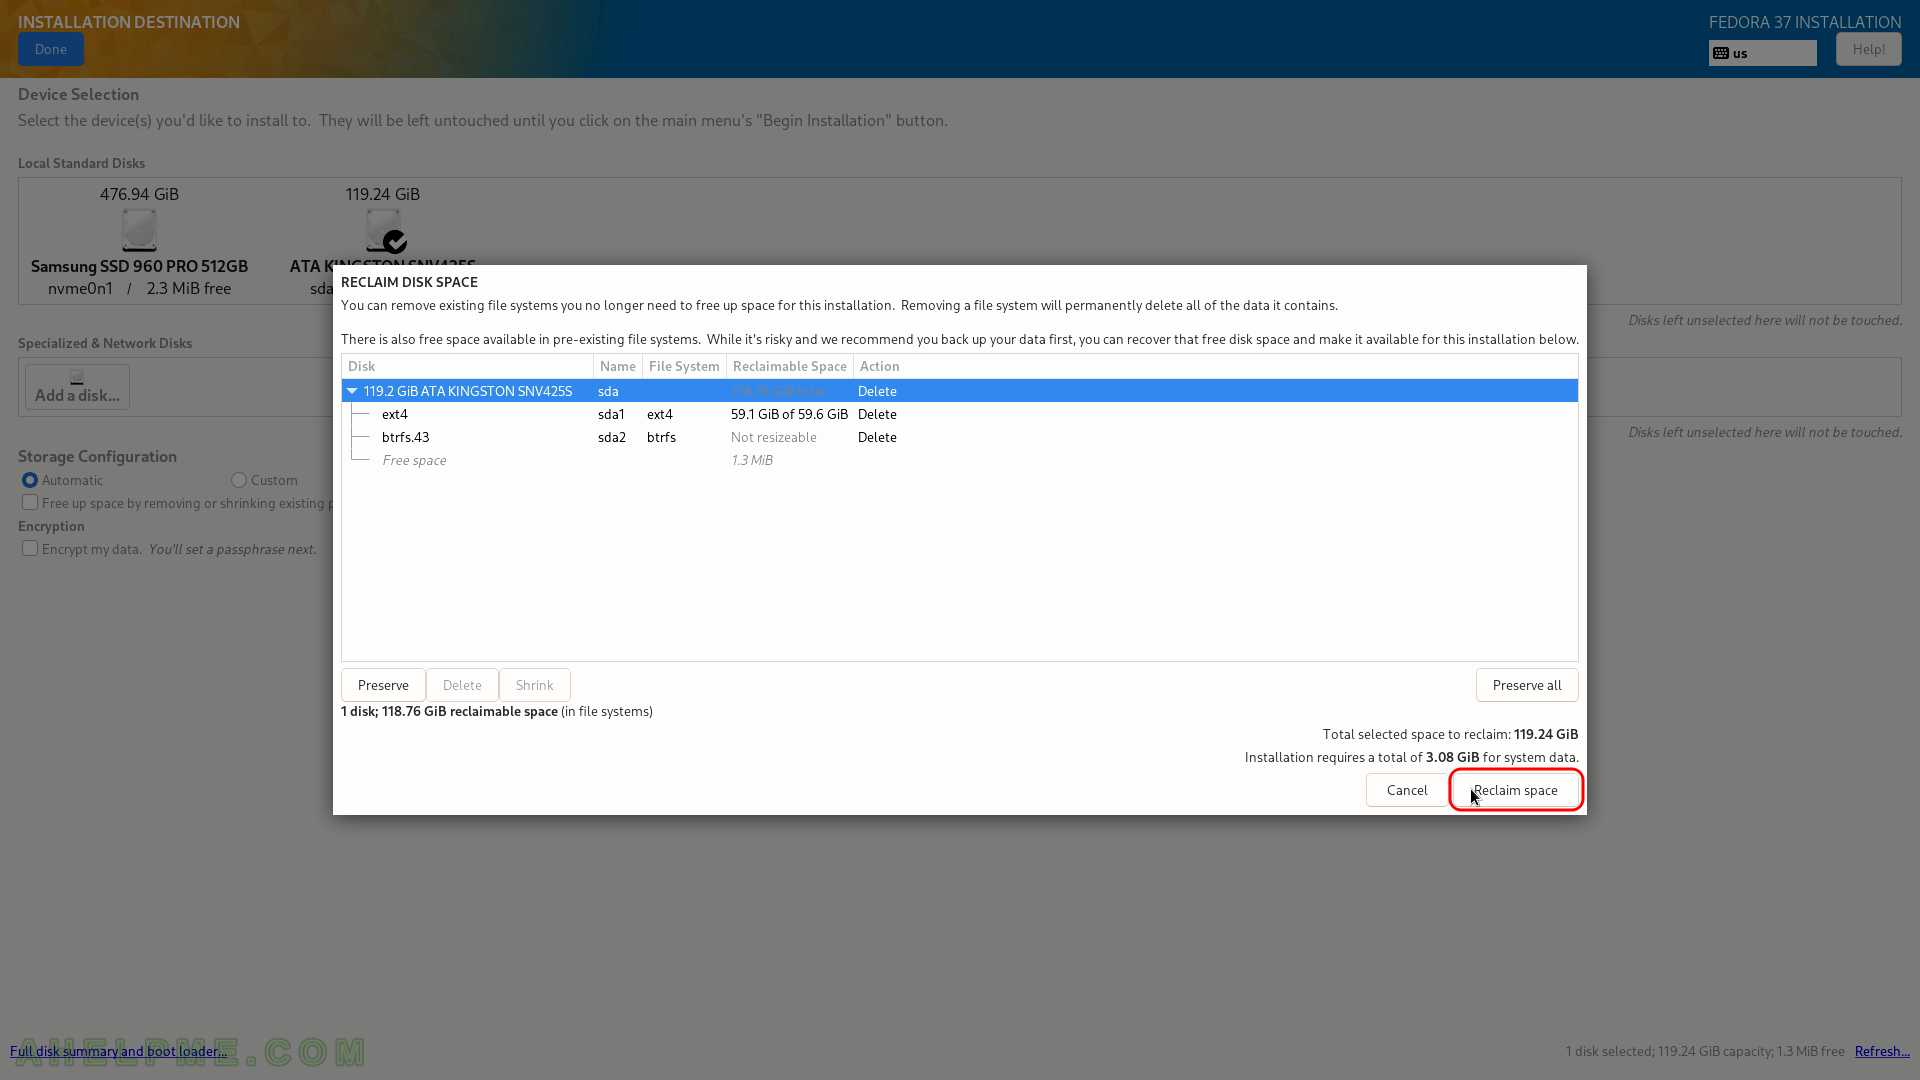
SCREENSHOT 10) Click on “Reclaim space” to confirm the operation in the previous step – deleting or shrinking partitions.
You can see the operations in the “Action” column, which will be performed on the selected disk after the installation setup begins its actual work. In our case, we wanted to delete all data on the disk, so there are four Delete actions pending…