This article is to show you what different type of RAID logical drives and what strip size could be created on one Array consisted of multiple physical devices like hard drives or SSDs.
The following logical drives could be created or modified on Smart Array P440 with Smart Storage Administrator:
- Multiple different RAID types with different strip sizes!!!
- All RAID types could be modified and you could change the strip size to any type offered by the controller
- Bigger RAID type logical drives could be change to smaller RAID type logical drives. Such as logical drives of RAID 5 type could be converted to RAID 0, RAID 1, RAID 6 with any strip size on-the-fly without losing your data. Read on to see all of the RAID type modifications you an make.
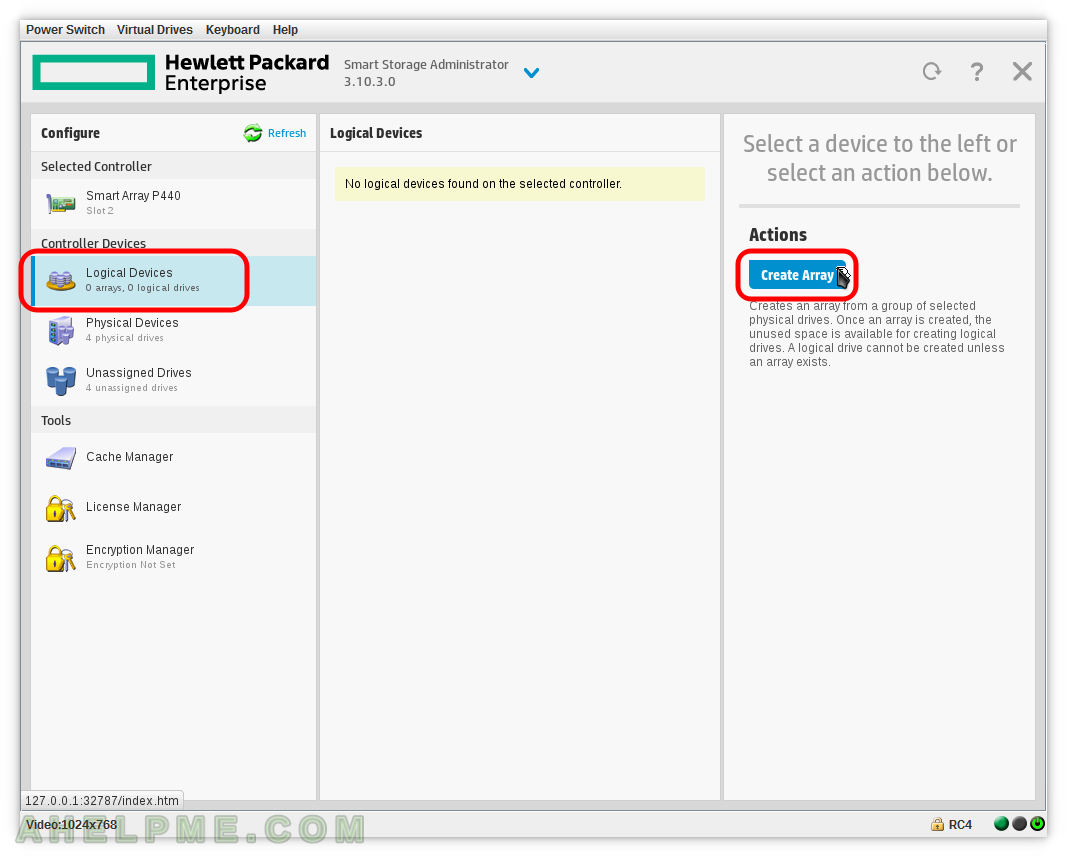
SCREENSHOT 1) Click on “Create Array” to create a new array.
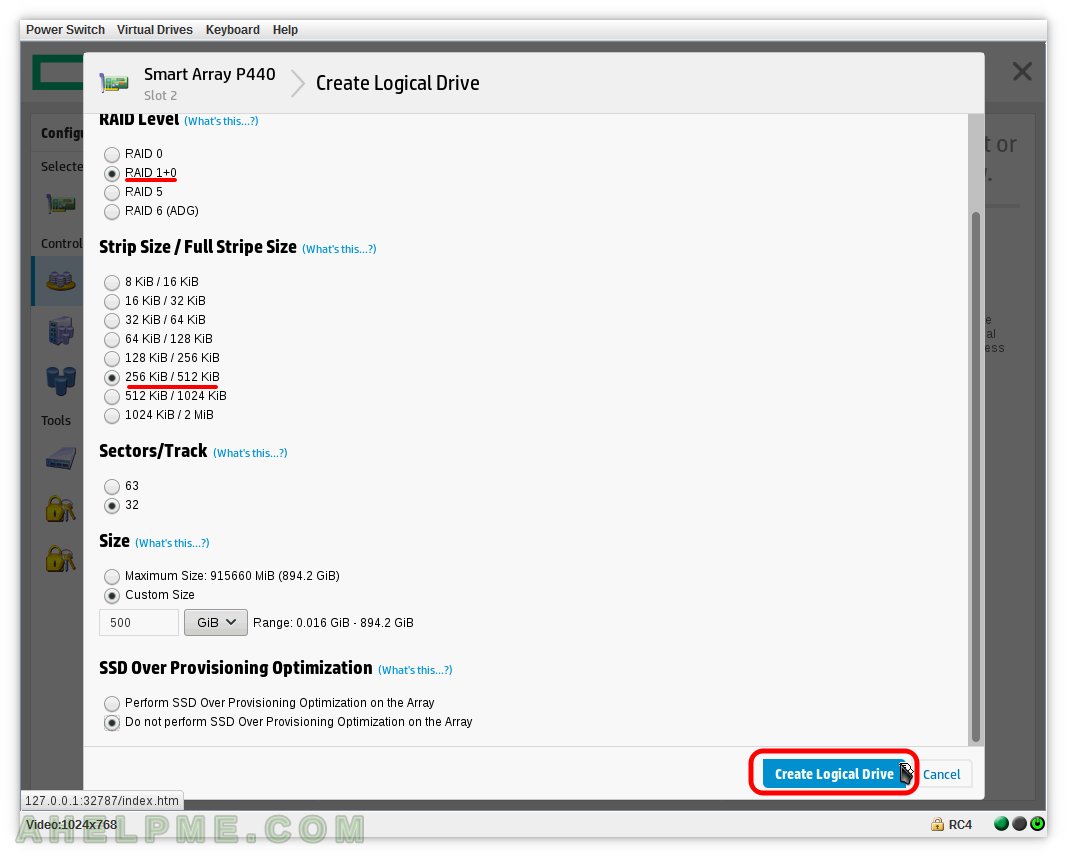
SCREENSHOT 2) Set various features of the array – RAID Level to RAID 1+0.
If this is the first array you would have additional step to select the disks, which will be included in the new array. You could use “Select All” to select all disks at once. Set “Size” in the field to be 500GiB, by the default it will use the entire available size of the selected RAID type, but we want to create multiple logical drives. Then click on “Create Logical Drive”.
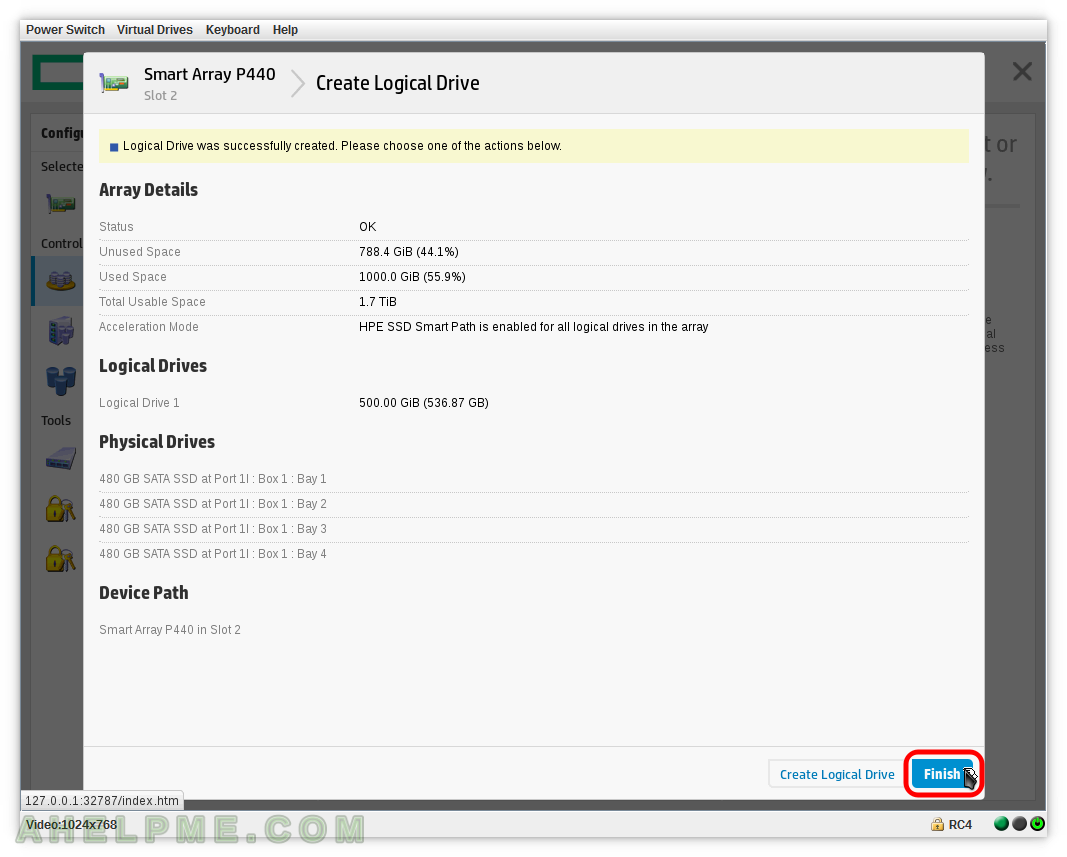
SCREENSHOT 3) Logical Drive on the new array was successfully created.
This is informative page to show you what was created. Click on “Finish” to exit the “Create Logical Drive” process.
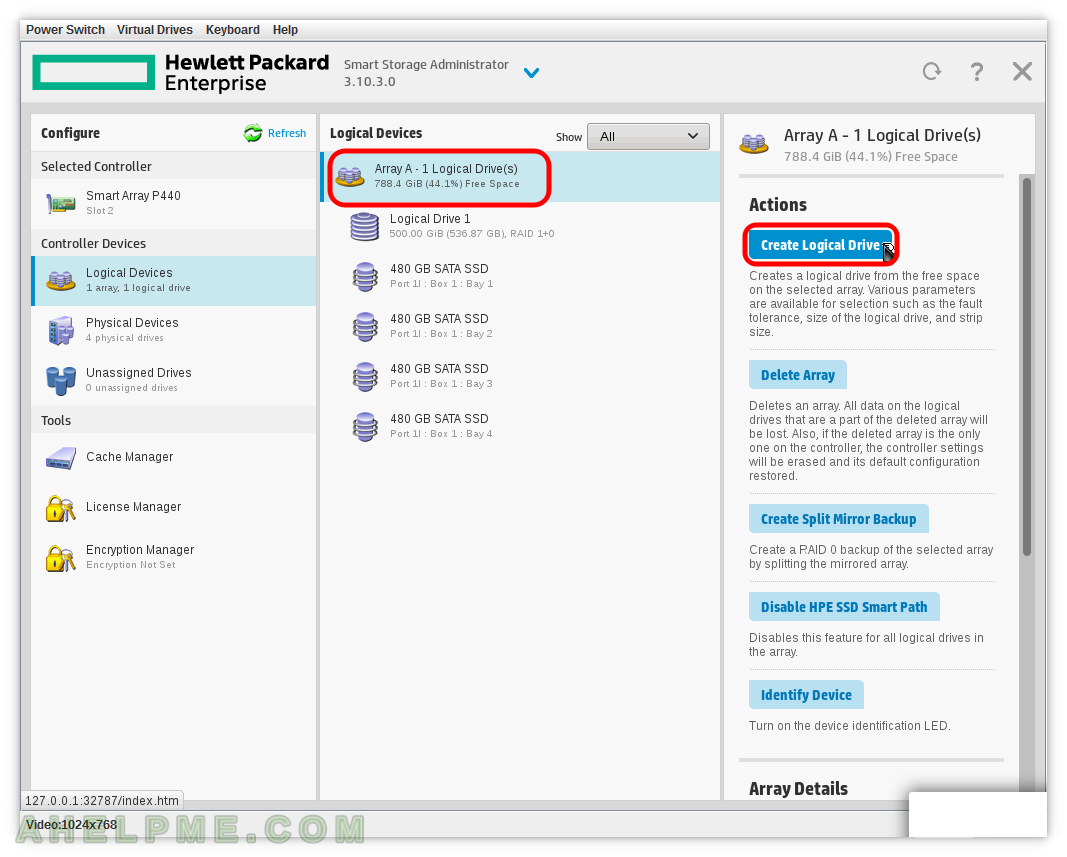
SCREENSHOT 4) Select “Array A – 1 Logical Drive(s)” and click on “Create Logical Drive” in the left to add more RAID logical drives.
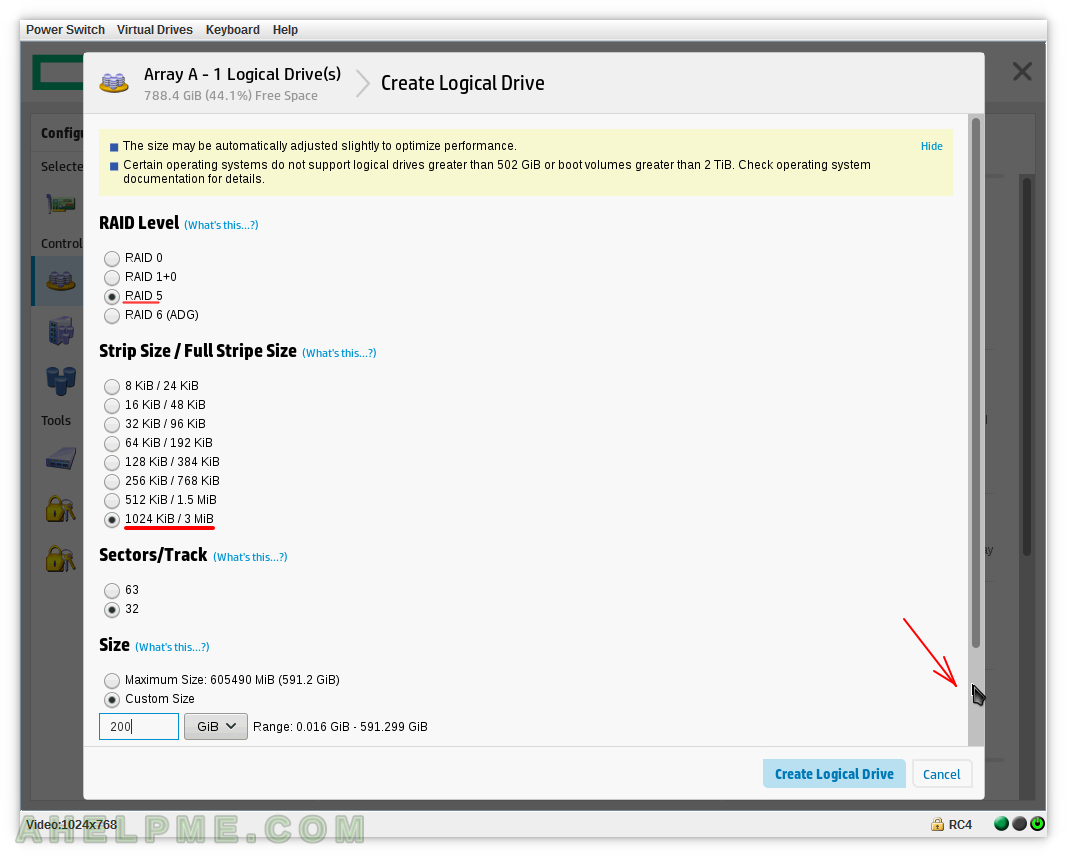
SCREENSHOT 5) Select the RAID 5 and set the stips size to 1024 KiB / 3M. Set custom size to 200 GiB (Scroll down to the buttom of the current page).
As you can see the current maximum available size with the current configuration is 591.2 GiB, but we want to add third and forth logical drives, so we set a custom size here. As you can see we have all the available stip sizes despite we have created already a virtual drive with different RAID type (RAID 1+0) and stip size (256 KiB) in the previous steps using THE SAME DISKS!
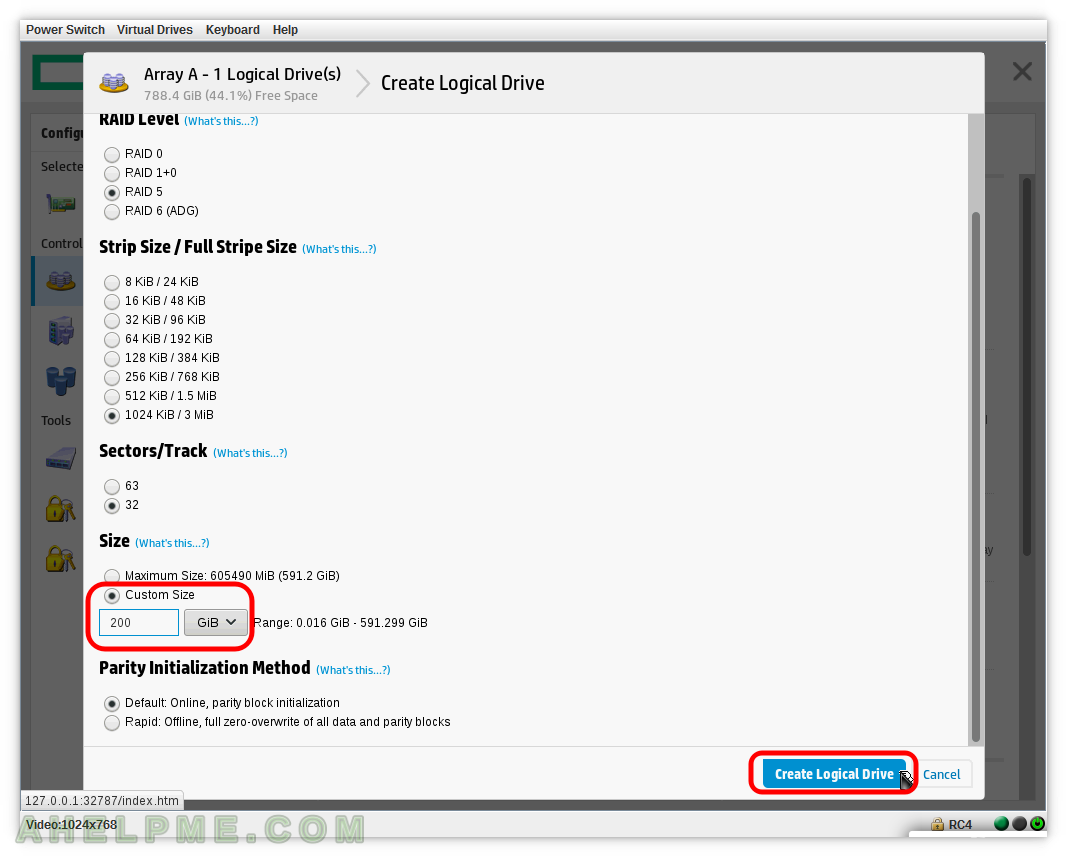
SCREENSHOT 6) Custom size set to 200 GiB and click on “Create Logical Drive” to continue.
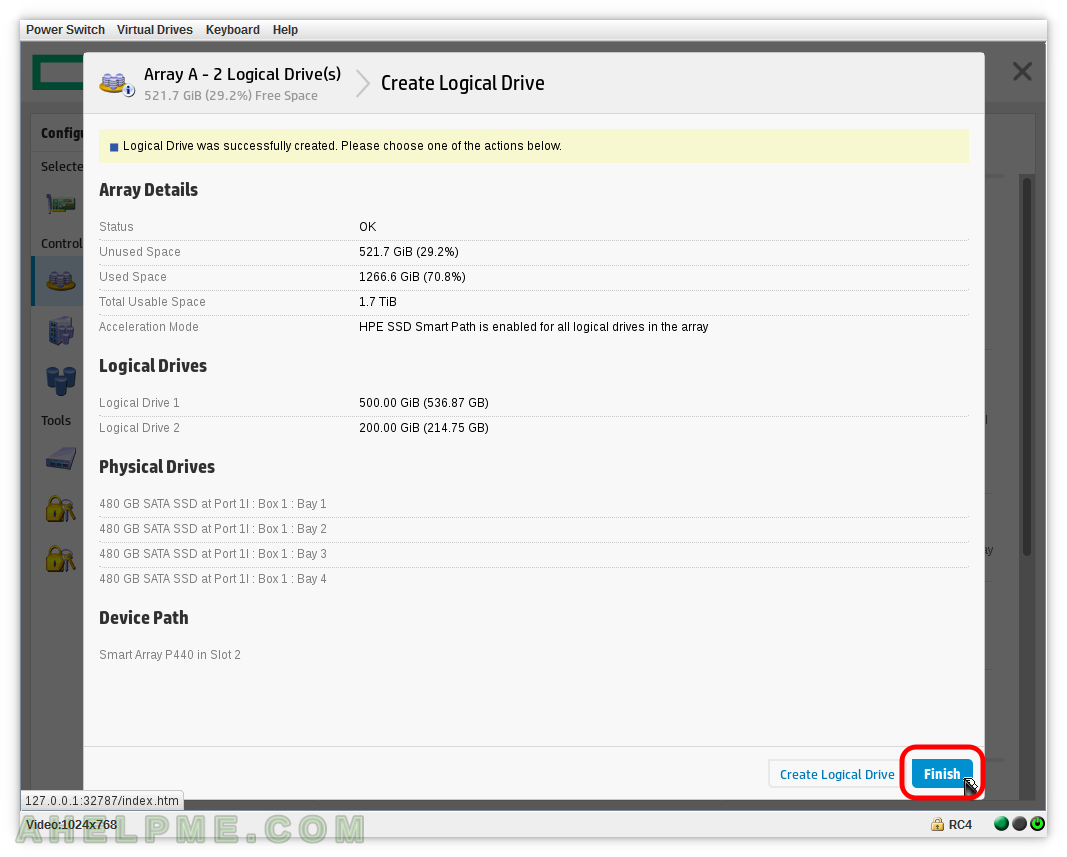
SCREENSHOT 7) Logical Drive on the new array was successfully created.
This is informative page to show you what was created. You can see the Logical Drives (1 and 2). Click on “Finish” to exit the “Create Logical Drive” process.
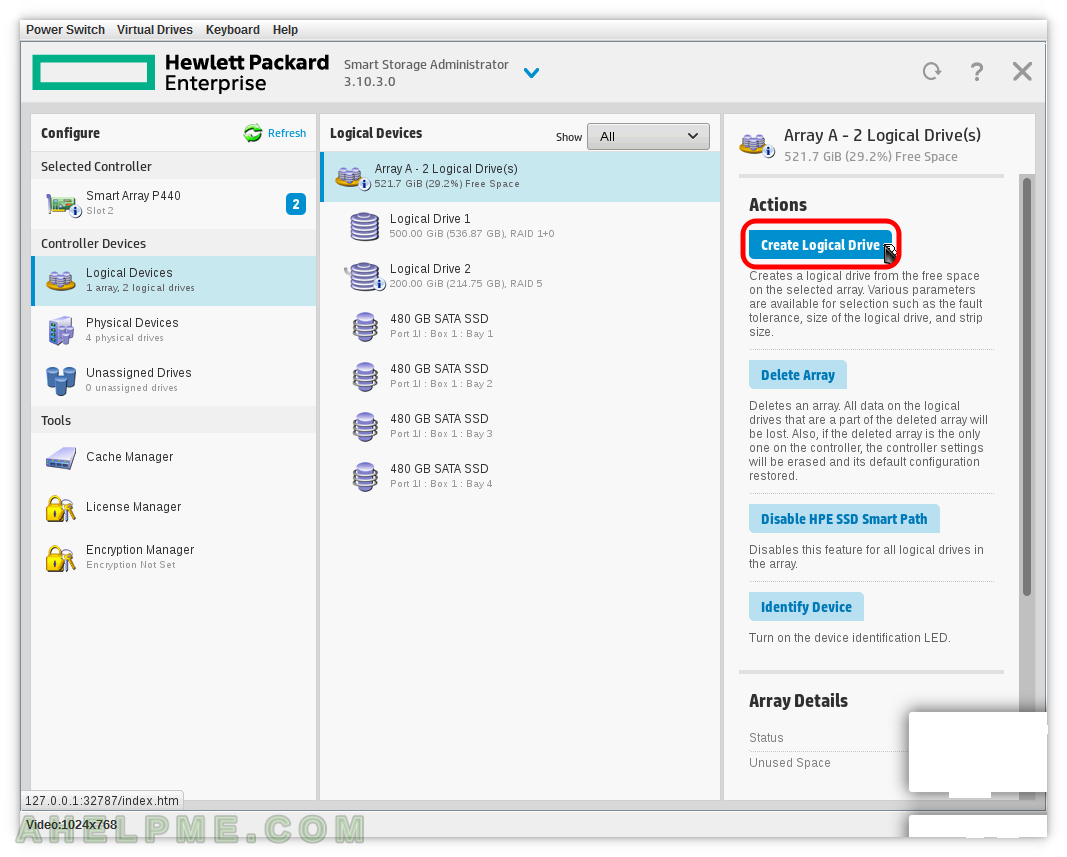
SCREENSHOT 8) Select “Array A – 2 Logical Drive(s)” and click on “Create Logical Drive” in the left to add more RAID logical drives.
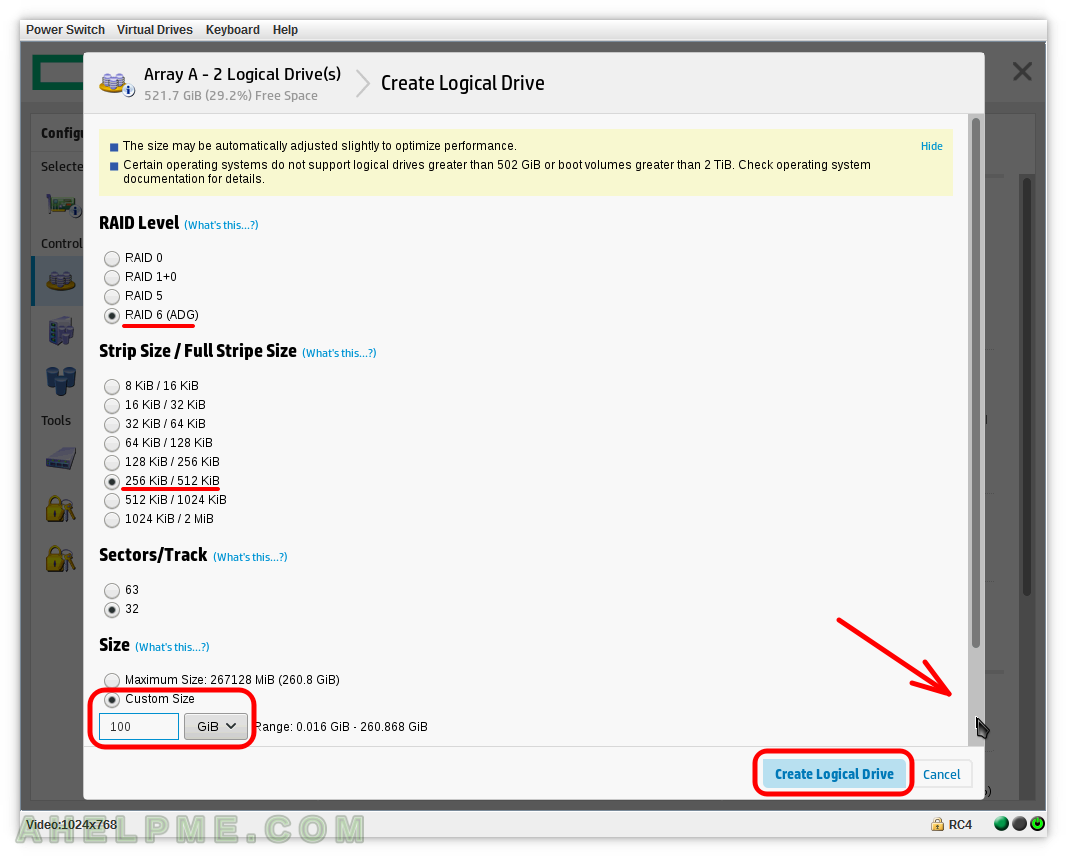
SCREENSHOT 9) Select the RAID 6 (ADG) and set the stips size to 256 KiB / 512 KiB.
Set custom size to 100 GiB (scroll down to the buttom of the current page if you do not see the Size section). As you can see the current maximum available size with the current configuration is 260.8 GiB, but we want to add a forth logical drive, so we set a custom size here. As you can see we have all the available stip sizes despite we have created already multiple logical drives with different RAID types (RAID 1+0, RAID 5) and stip sizes in the previous steps using THE SAME DISKS! Click on “Create Logical Drive” to to create the drive.
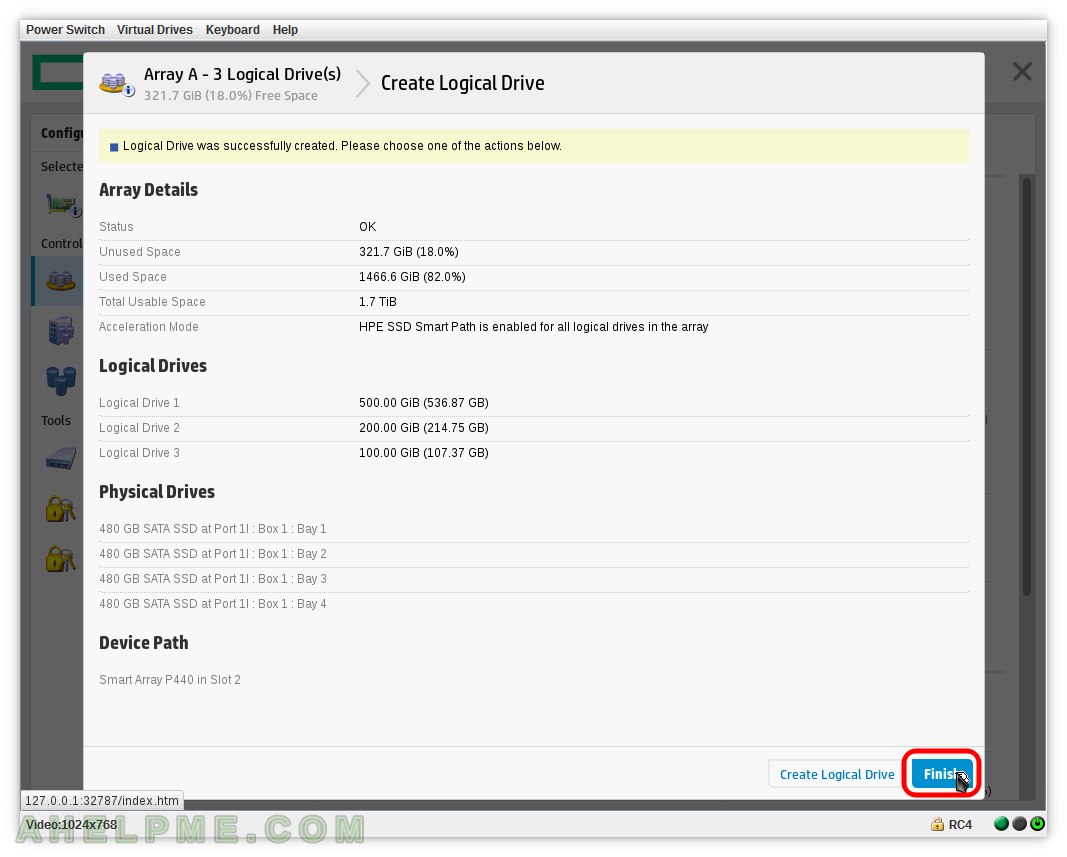
SCREENSHOT 10) Logical Drive on the new array was successfully created.
This is informative page to show you what was created. You can see the Logical Drives (1, 2 and 3 with their space available). Click on “Finish” to exit the “Create Logical Drive” process.
Thansk for this useful information. You are hero for me and you saved my time. I searched a lot on the internet but couldn’t find it. I didn’t have a server to try and that was good. I ordered server and will try it as soon as possible. Long live.