STEP 11) Select /dev/sda for boot loader installation.
No need to mess with other disks, the setup will detect all other system and there will be entries in grub 2 menu and it will install grub2 on the current installation disk /dev/sda (without altering anything on the other disks) and then will instruct UEFI BIOS to use this boot device by default.

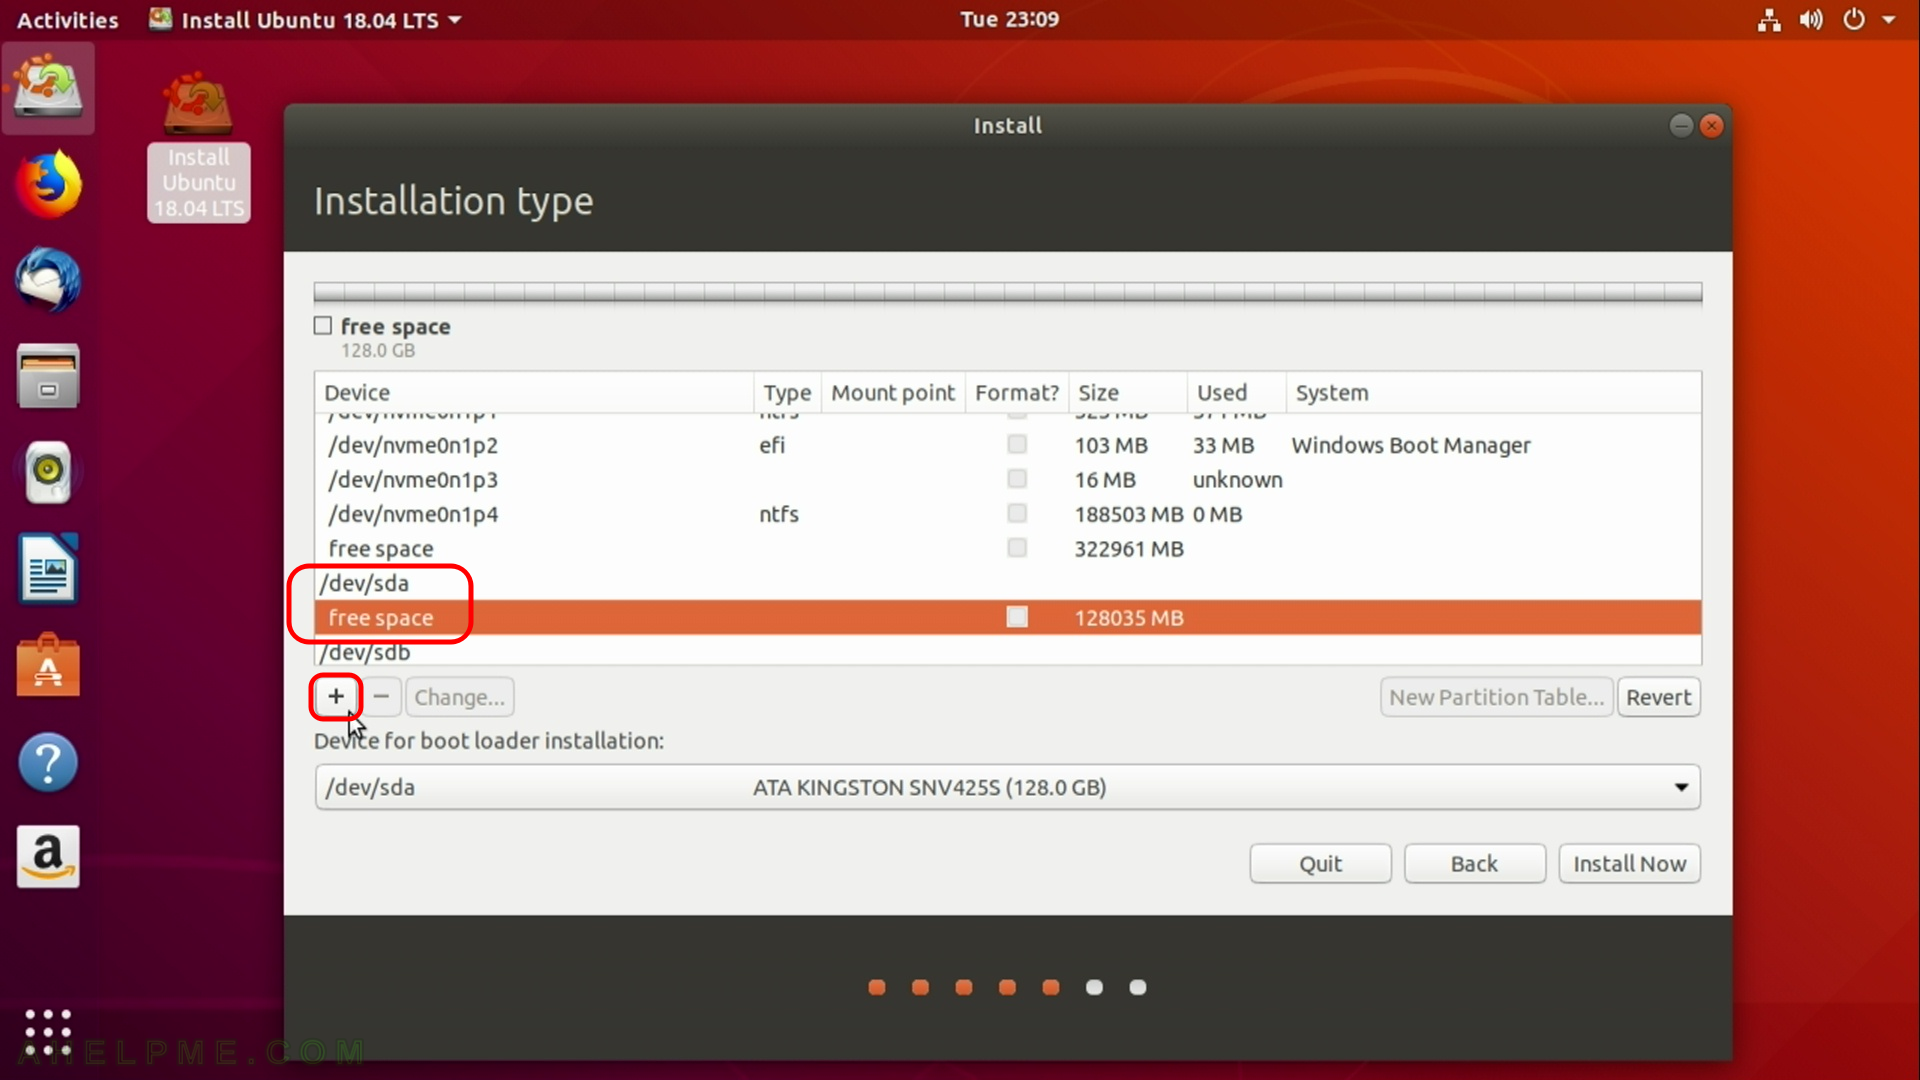
STEP 12) Scroll to the device (hard disk) you want to use for this installation /dev/sda and click on “free space” then click on “+” to create a new partition.
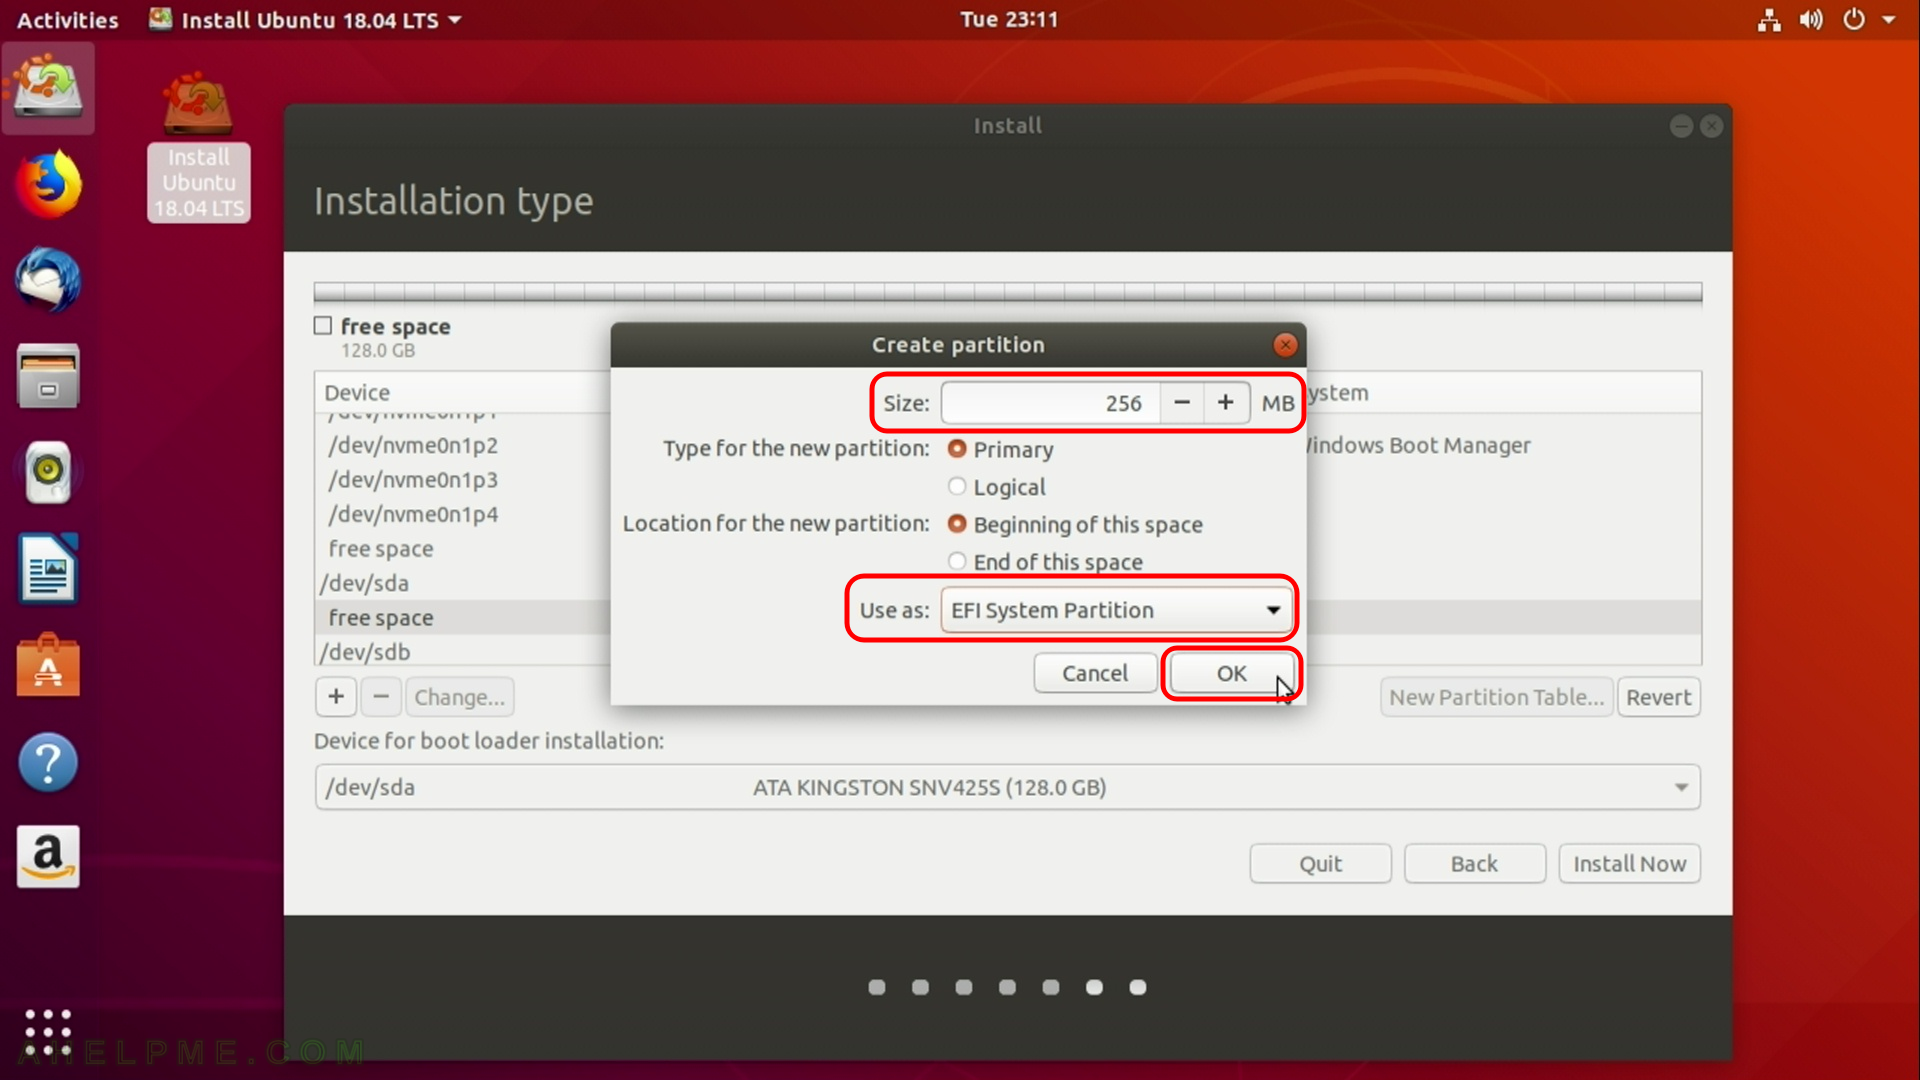
STEP 13) Set the size to 256 (which is in MB as you can see) and select the type of the disk: “EFI system partition”
if you have UEFI BIOS (most common on new system in the last 5 years) or Grub boot partition if you do not have UEFI BIOS or use your system in BIOS legacy mode. Then click on “OK”.
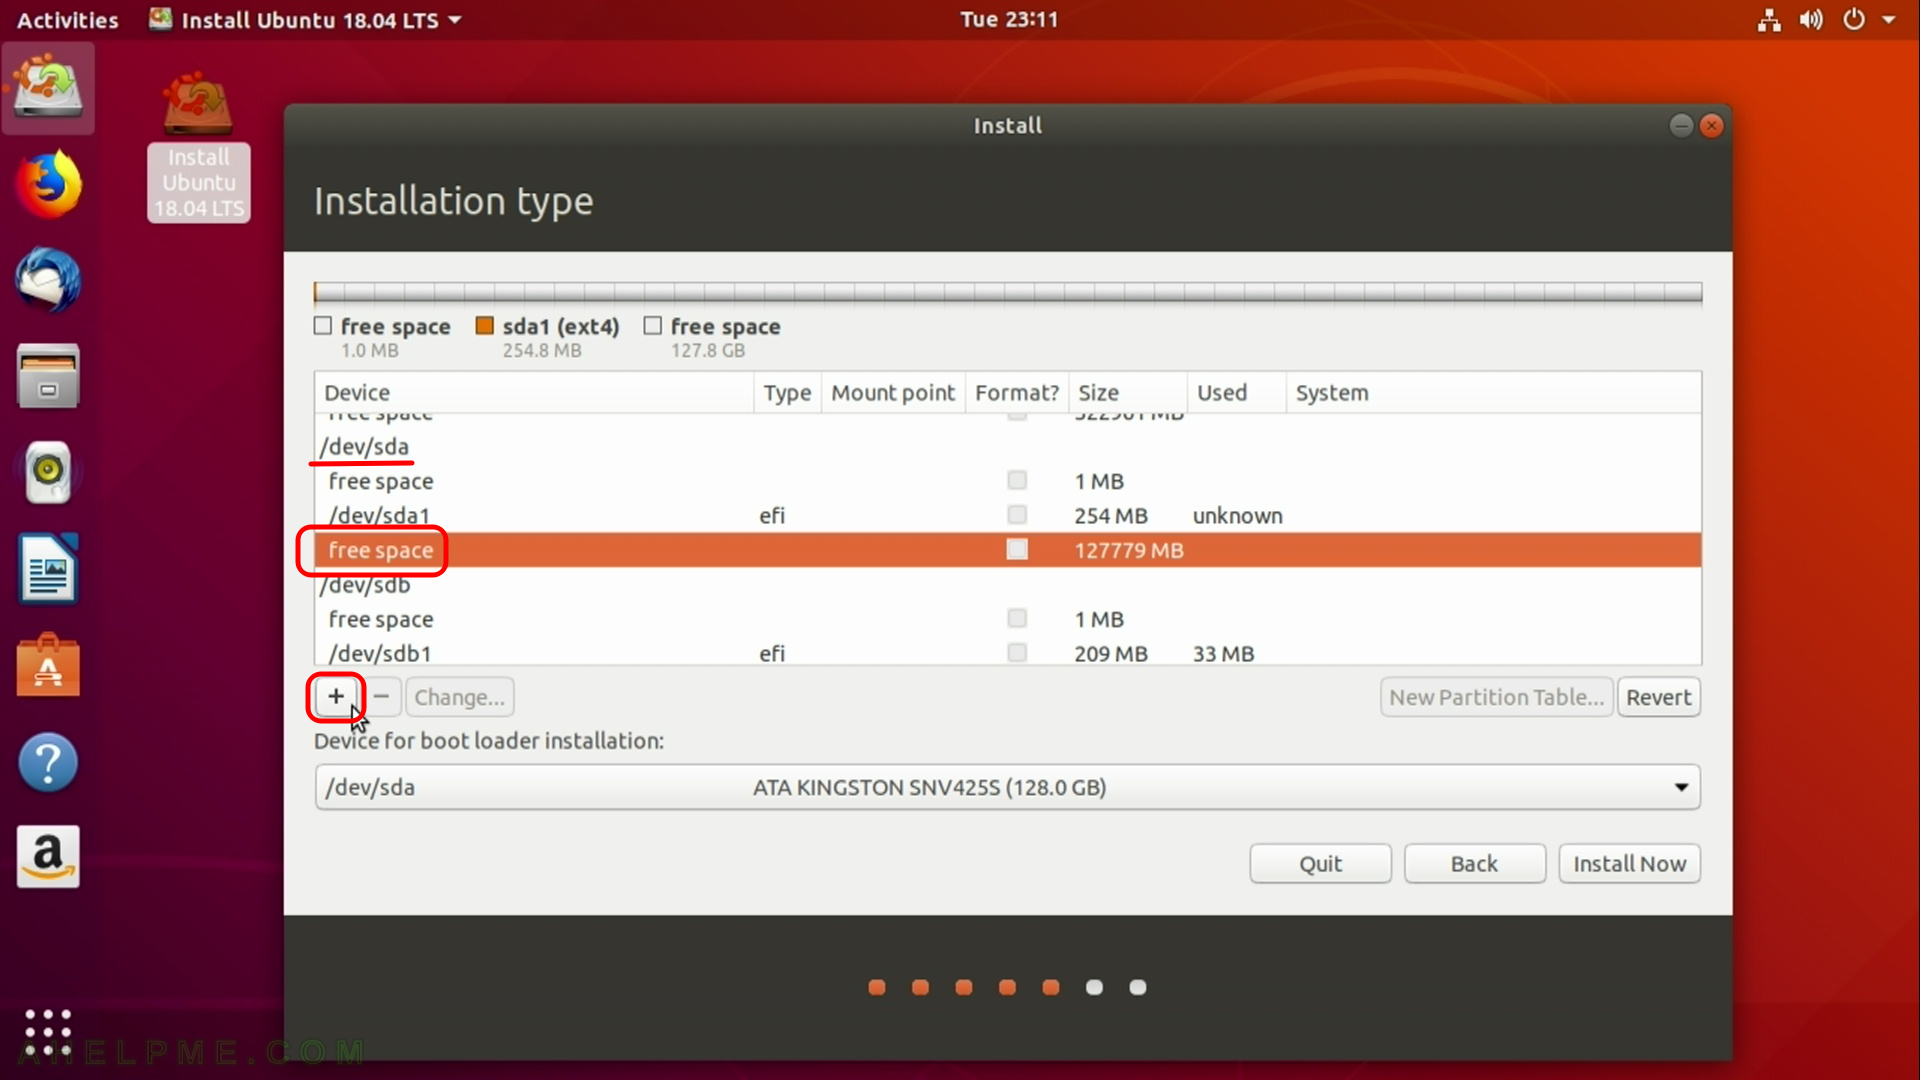
STEP 14) Scroll to the device (hard disk) you want to use for this installation /dev/sda and click on “free space” then click on “+” to create a new partition.
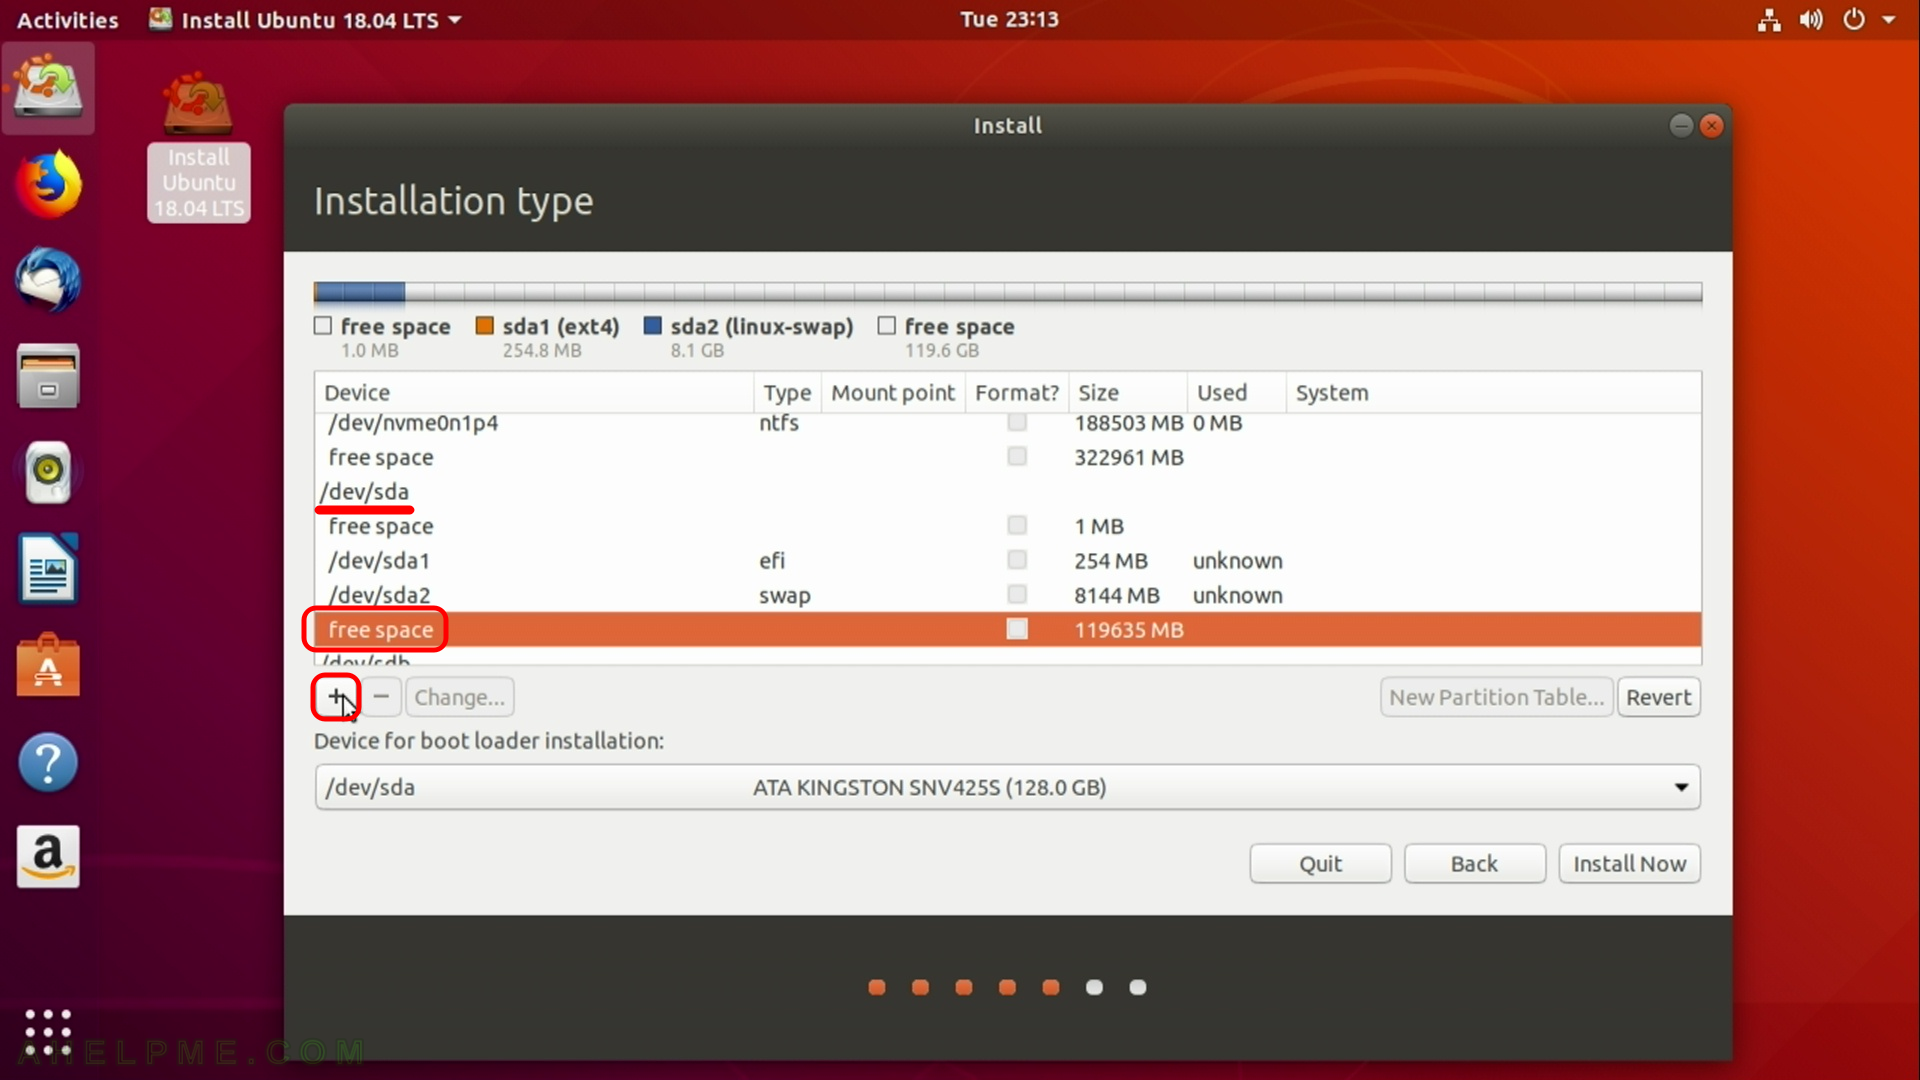
STEP 15) Change the size to 8144 (which is in MB) and change the the type to “swap area”. Then click on “OK”.

STEP 16) Scroll to the device (hard disk) you want to use for this installation /dev/sda and click on “free space” then click on “+” to create a new partition.
STEP 17) Leave the size with the offered size number (which is the maxium available size at present after the creation of the two above partitions – 119 636 MB)
Ensure the file system type in “Use as” is “Ext4 journaling file system” (or any other supported file system in your favor). Set the “Mount point” to “/” – the root of the linux file system and click on “OK”.

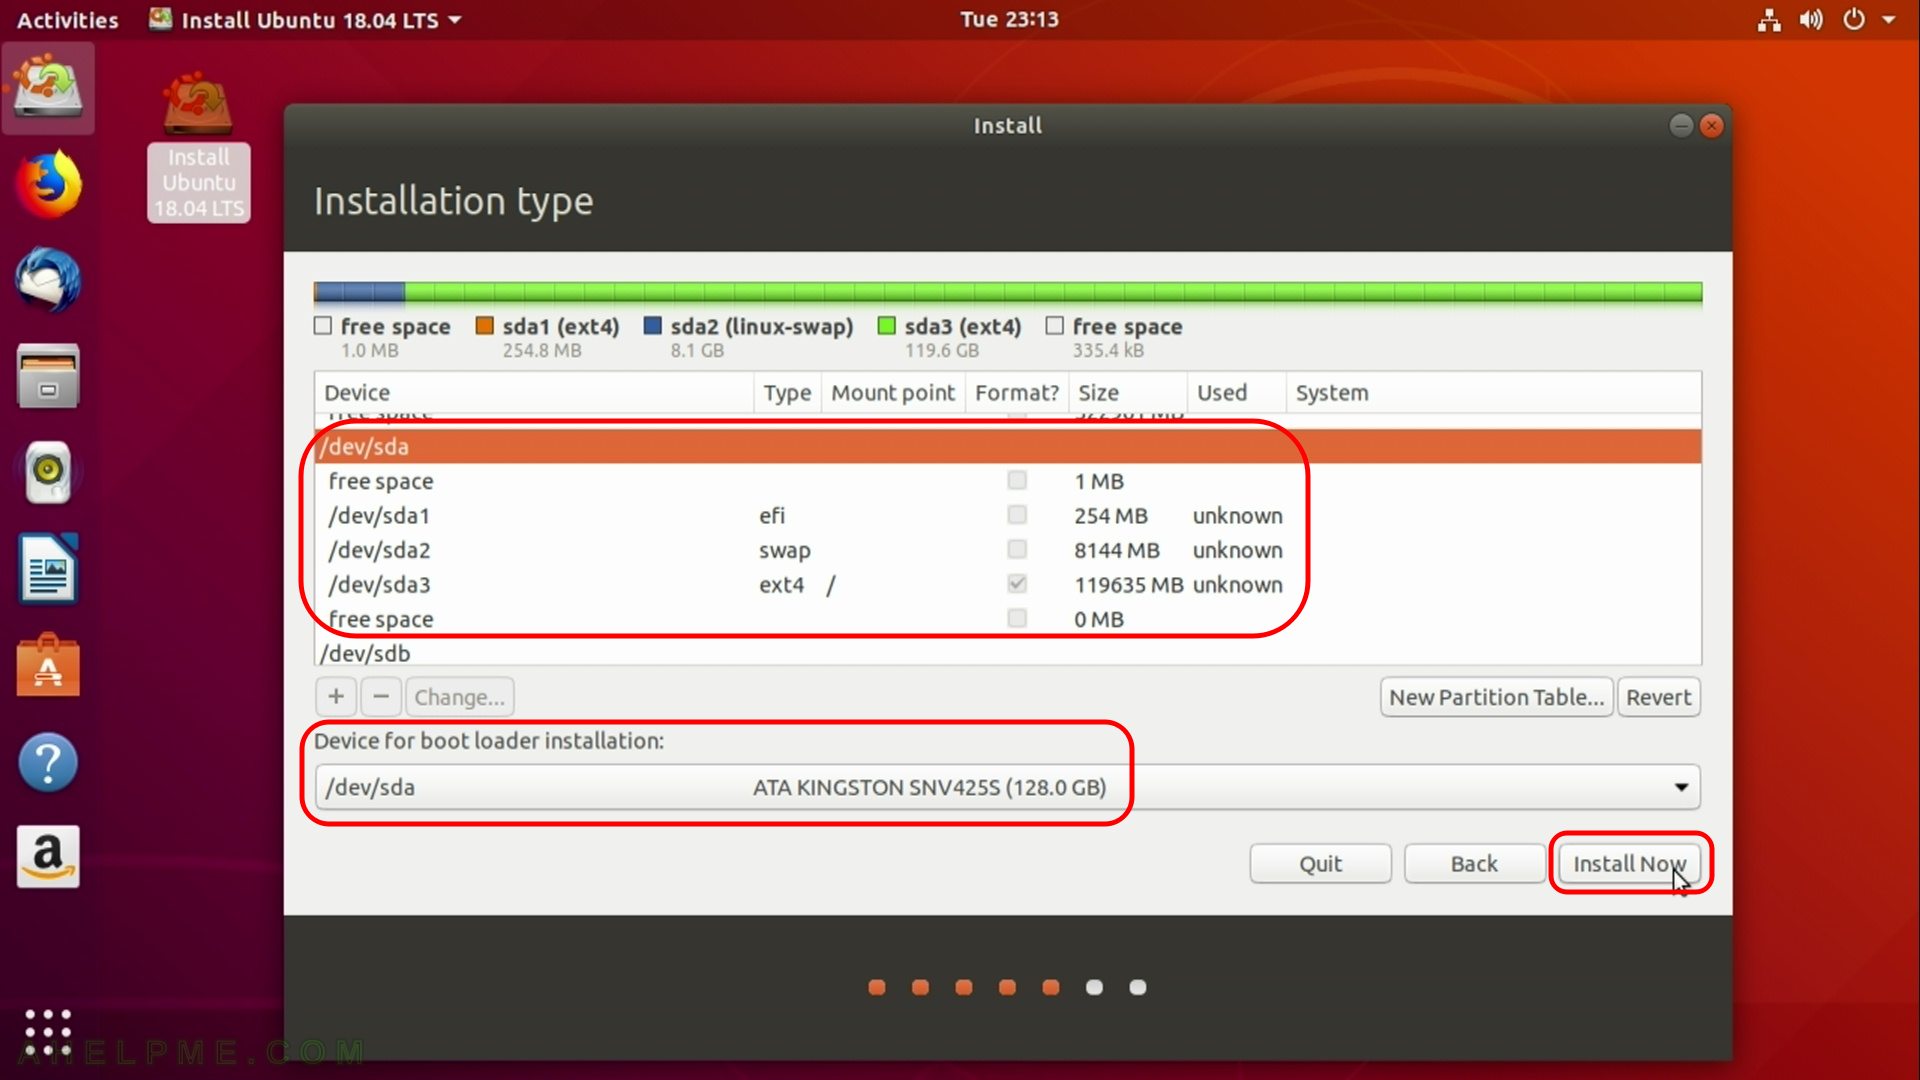
STEP 18) Scroll to the device (hard disk) you want to use for this installation /dev/sda and click on it.
You see the new hard disk layout of the /dev/sda – the place where we want to install Ubuntu Desktop 18.04 LTS. 3 partitions – efi, swap, ext4 / and click on “Install Now”.
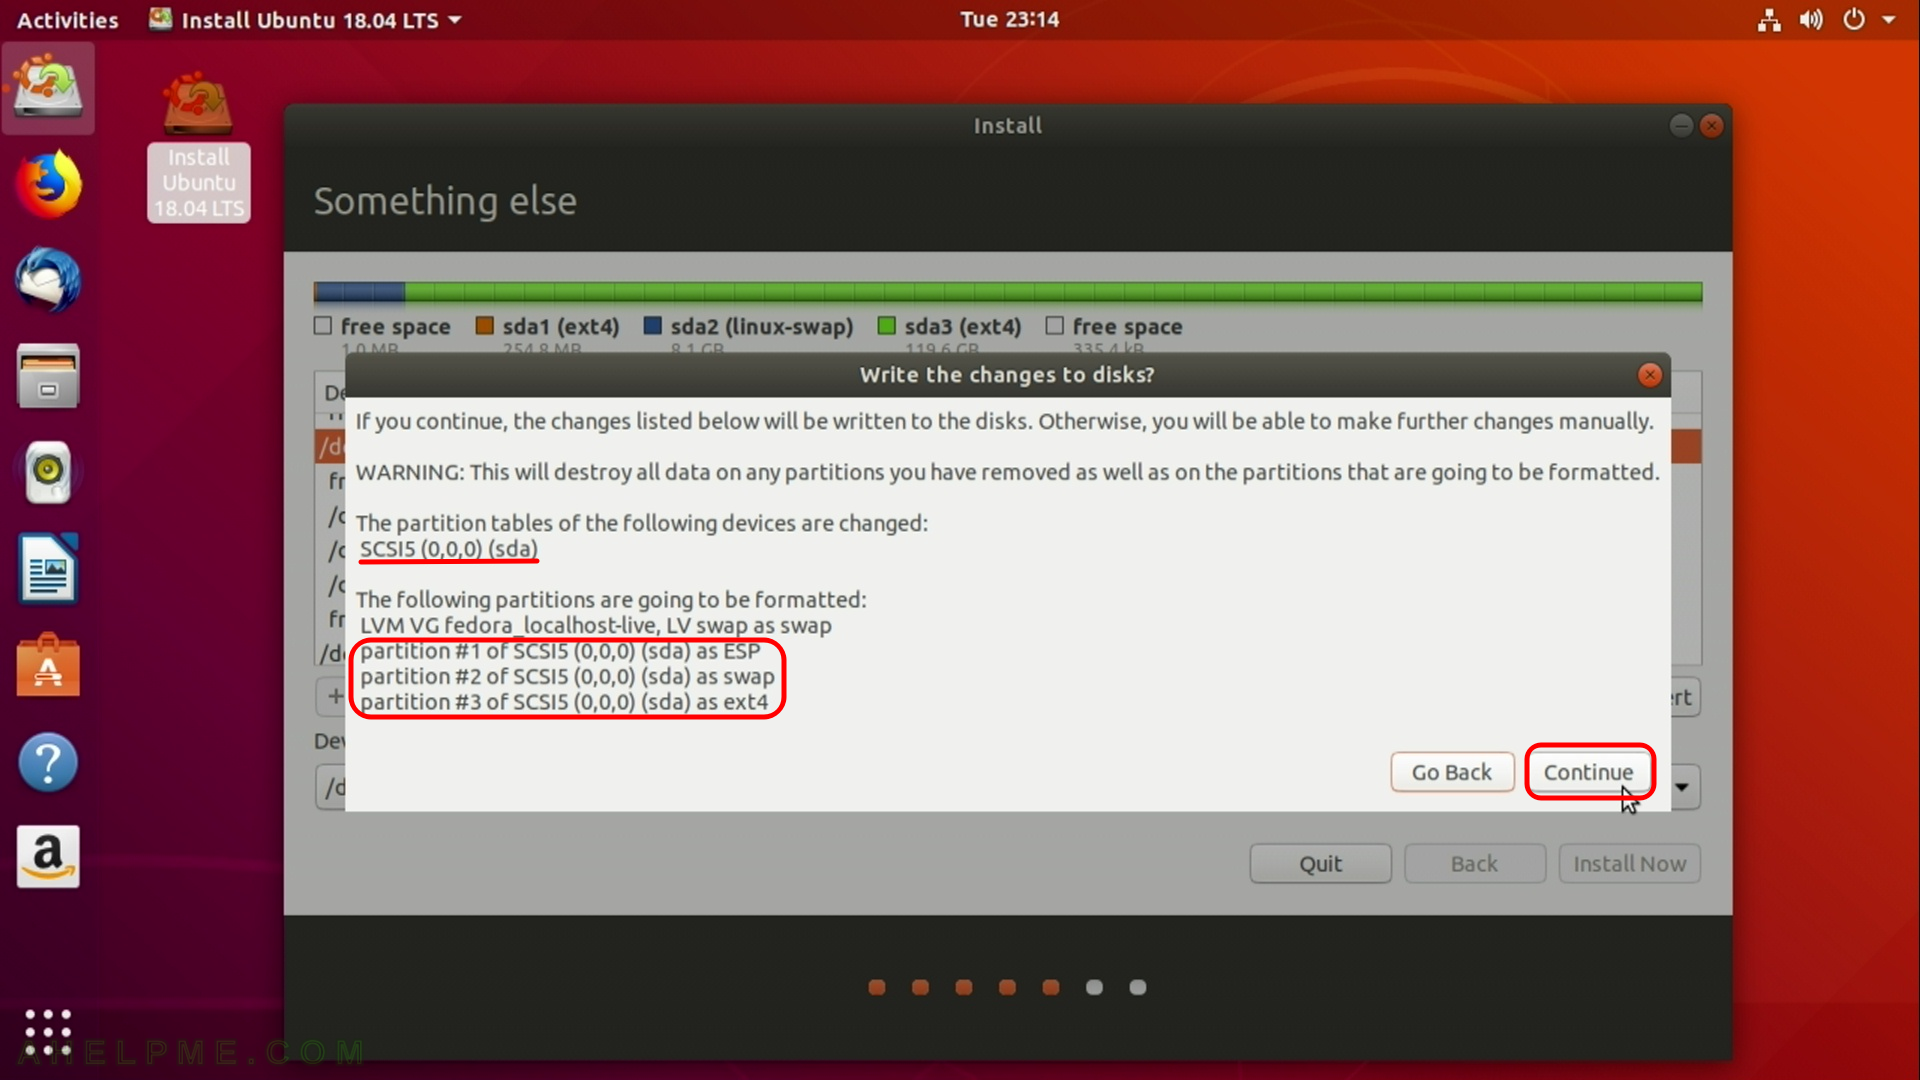
STEP 19) The setup needs a confirmation of what you’ve done with the disk layout (disk partitions).
Nothing till this step changed in your hard disks, by clicking “Continue” you are going to accept the shown changes. Be careful see all of the changes this step is irreversible and if you missed something you could lose your data!
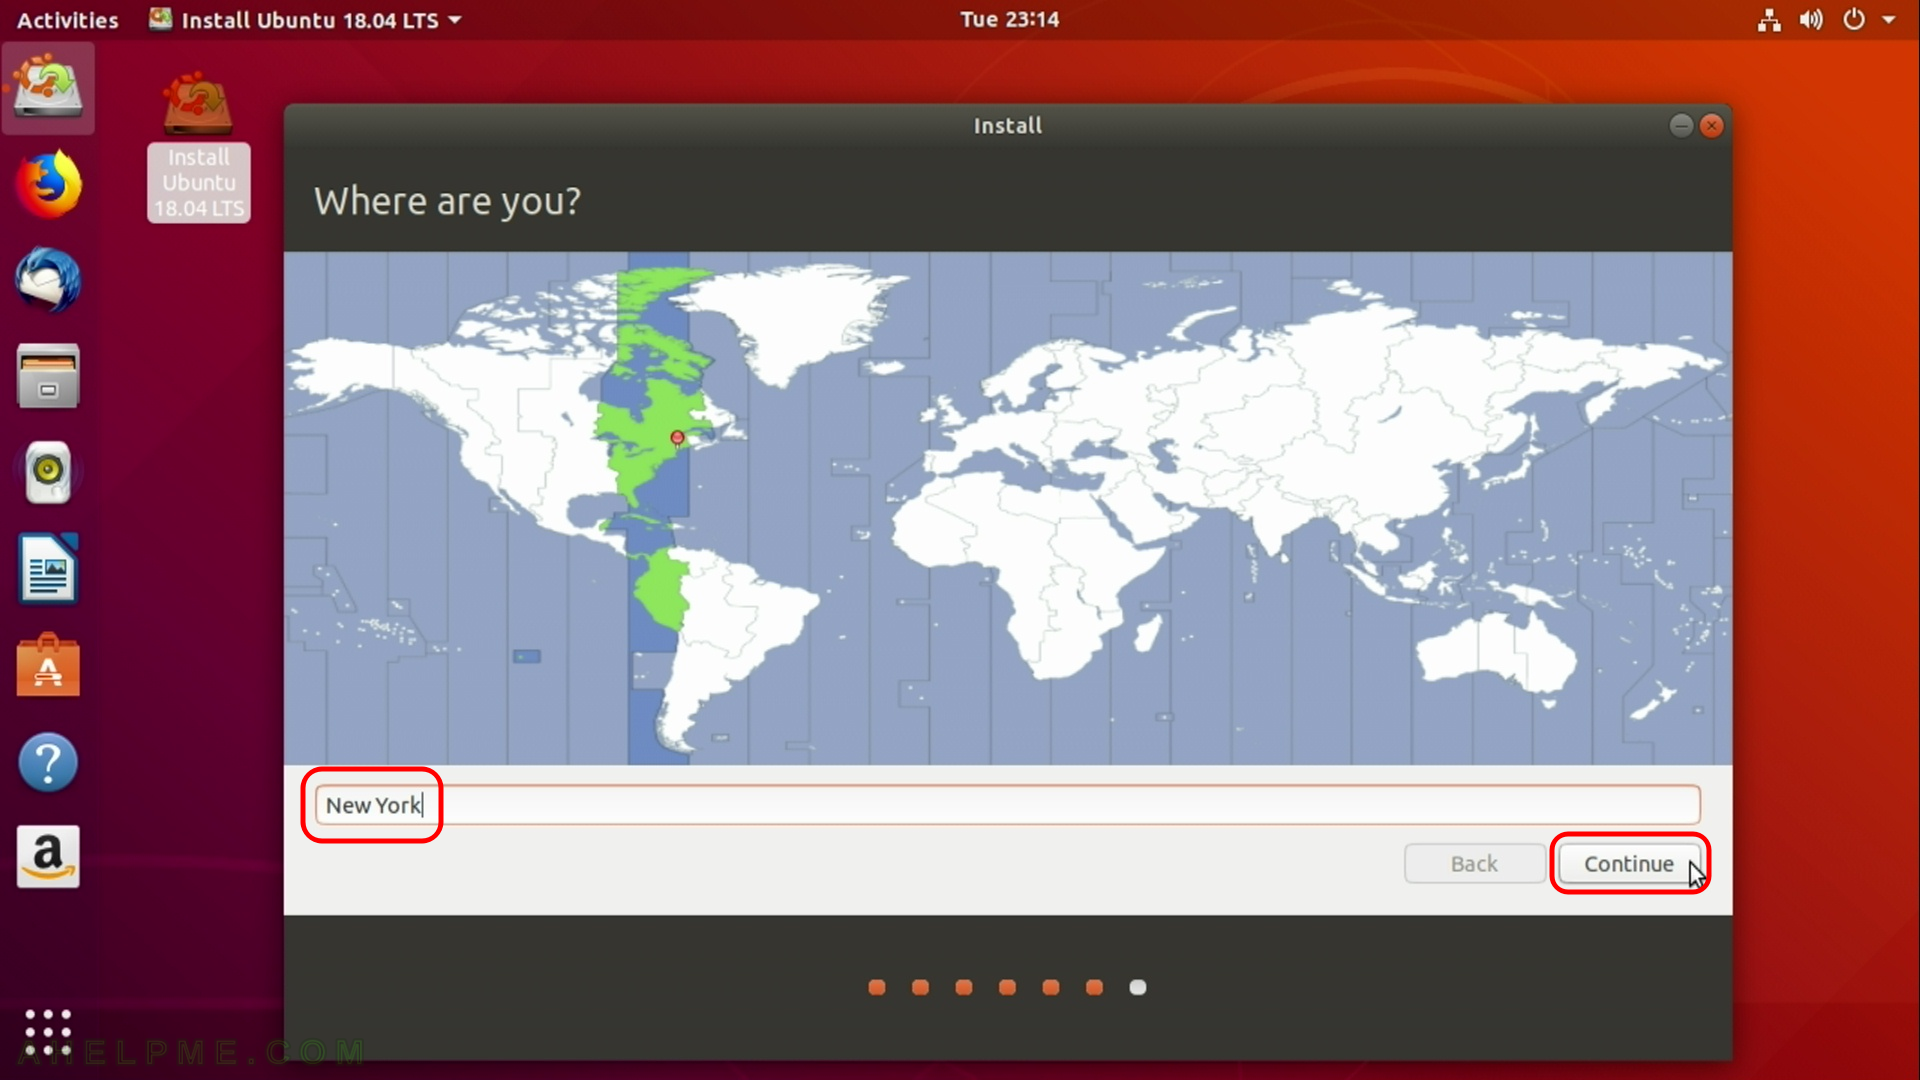
STEP 20) Select your timezone to configure your clock.
Probably the default is ok, the setup tries to autodetect it.
One thought on “Install Ubuntu Desktop 18.04 LTS on a PC with existing windows 10 and linux”