This tutorial will show you the simple steps of installing a modern Linux Distribution – Ubuntu Desktop 16.04 LTS (in fact the version presented here is 16.04.4 Desktop LTS). Here we present the more advanced setup installation, when you have already had installed operating systems, so this installation will add Ubuntu 16.04 LTS to our two existing ones – Microsoft Windows 10 Professional and Ubuntu 17.10. So we have 4 disks – one is NVME, the other three are SSDs and we want to install our Ubuntu 16.04 to the third disk – “sdc” in this case. Our third SSD do not have partitions or any data, so we can use the whole device.
Ubuntu Desktop 16.04 LTS comes with the following software:
- Xorg X server – 1.19.5
- unity (the GUI) – 7.4.5
- linux kernel – 4.13.0
- linux-firmware – 1.157.17
- QT – 5.5.1
- libc – 2.23
- gnu gcc – 5.4.0
- coreutils – 8.25
- python2.7 (default) – 2.7.12
- python3 – 3.5.1
- perl – 5.22.1
- compiz – 0.9.12.3
- apt – 1.2.25
- cups – 2.1.3
We used the following ISO for the installation process – Ubuntu 16.04.4 LTS (Xenial Xerus):
http://releases.ubuntu.com/16.04/ubuntu-16.04.4-desktop-amd64.iso
It is a LIVE image so you can try it before installing. The easiest way is just to download the image and burn it to a DVD disk and then follow the installation below:
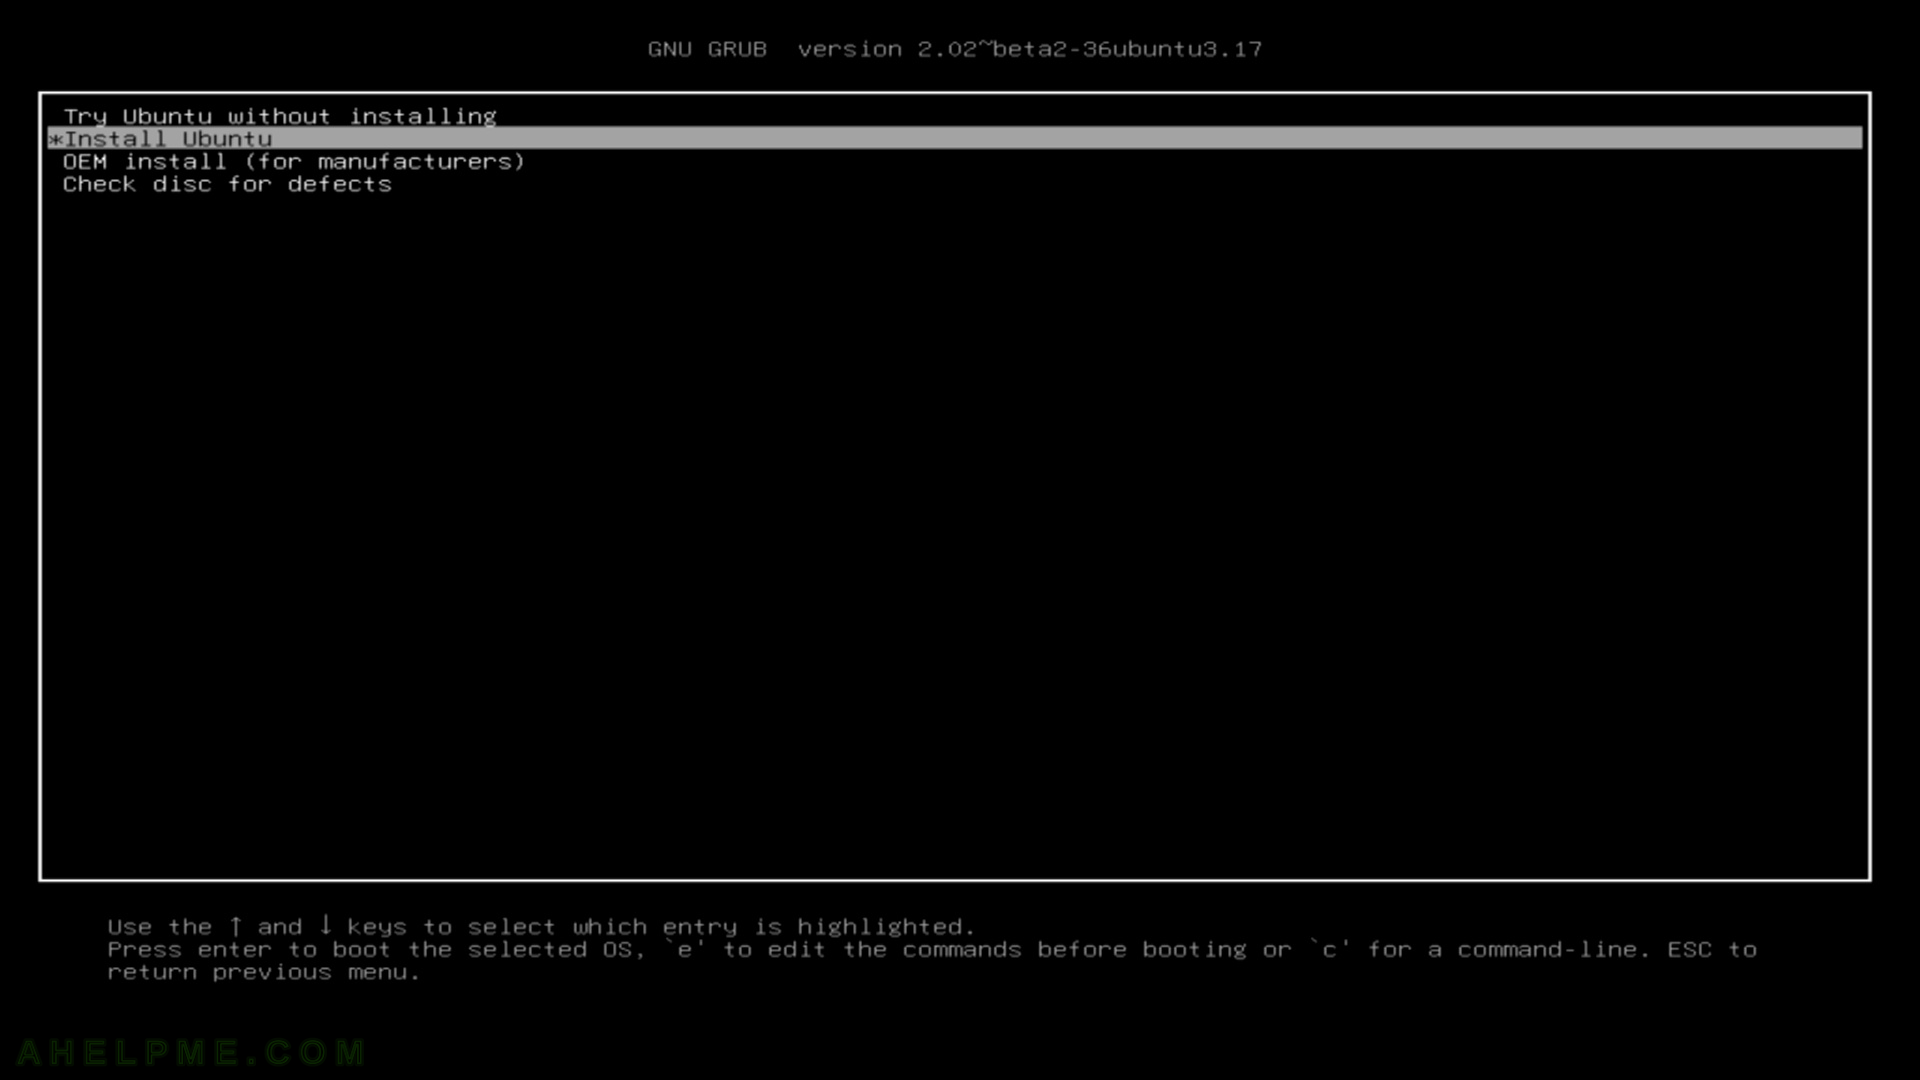
STEP 1) Change to “Install Ubuntu” and hit enter.
To install Ubuntu from your DVD or USB you must boot from it, so change your BIOS accordingly – first boot devide should be the DVD or USB drive with Ubunto installation. If you do it successfully you would see the screenshot below.
STEP 2) Ubuntu installation is staring…
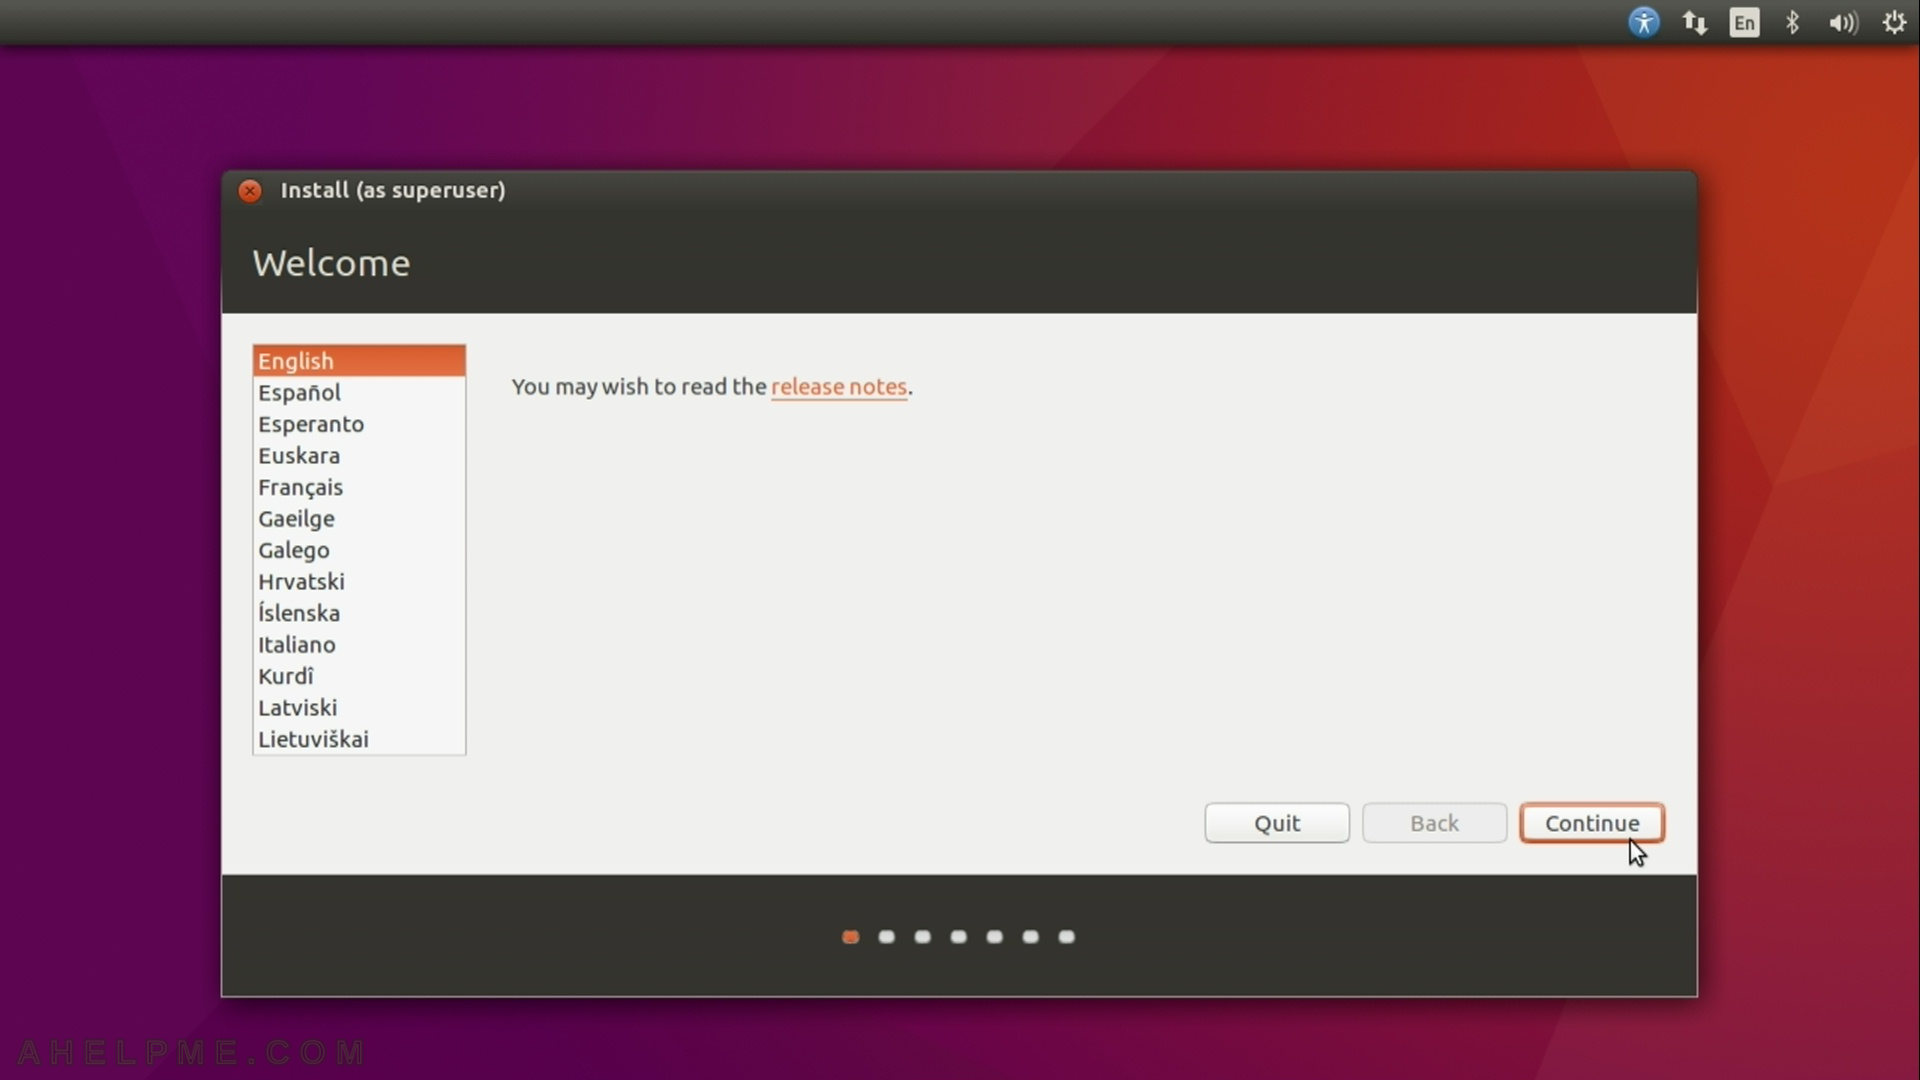
STEP 3) Choose your language for the installation and your system.
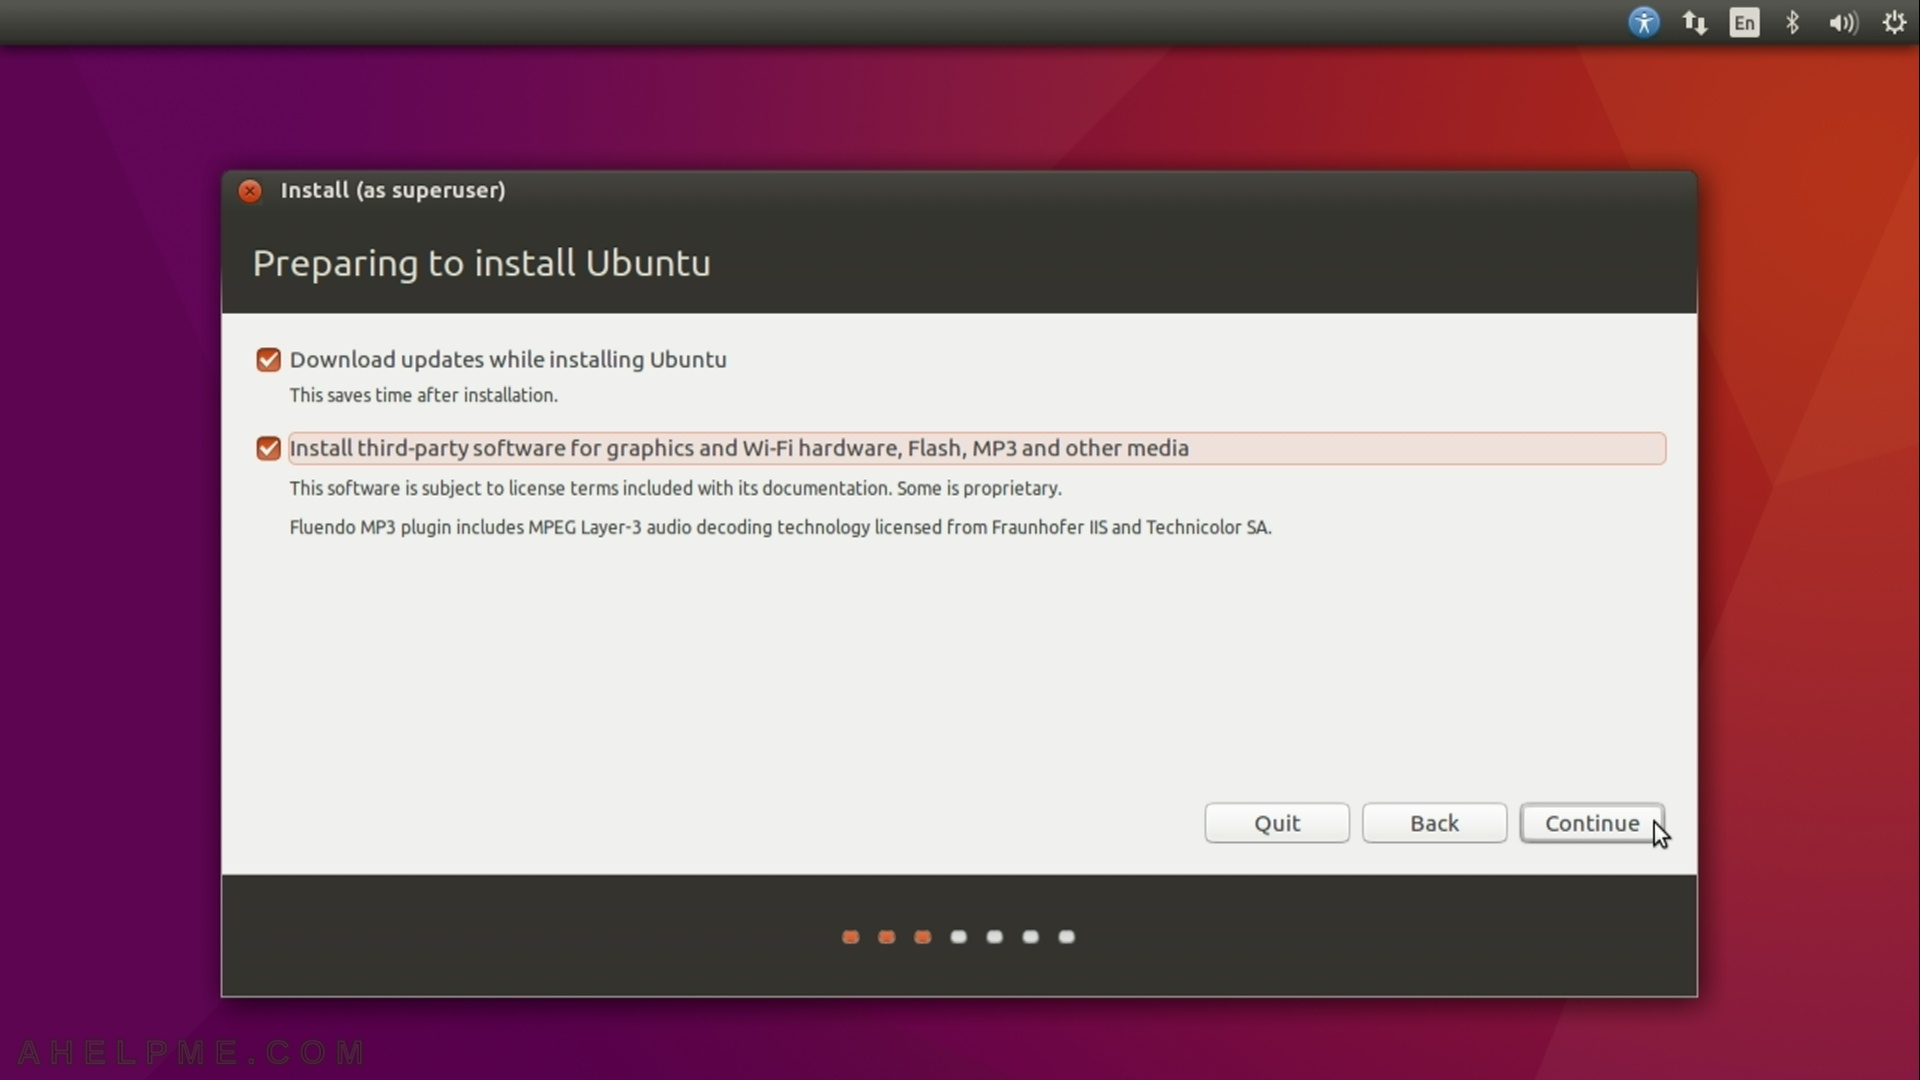
STEP 4) Check the two checkboxes (they are unchecked by default).
Updates are very important and it advisable to have them before the installation finishes. The third-party software will install some proprietary software and you’ll have a better experience with the system.
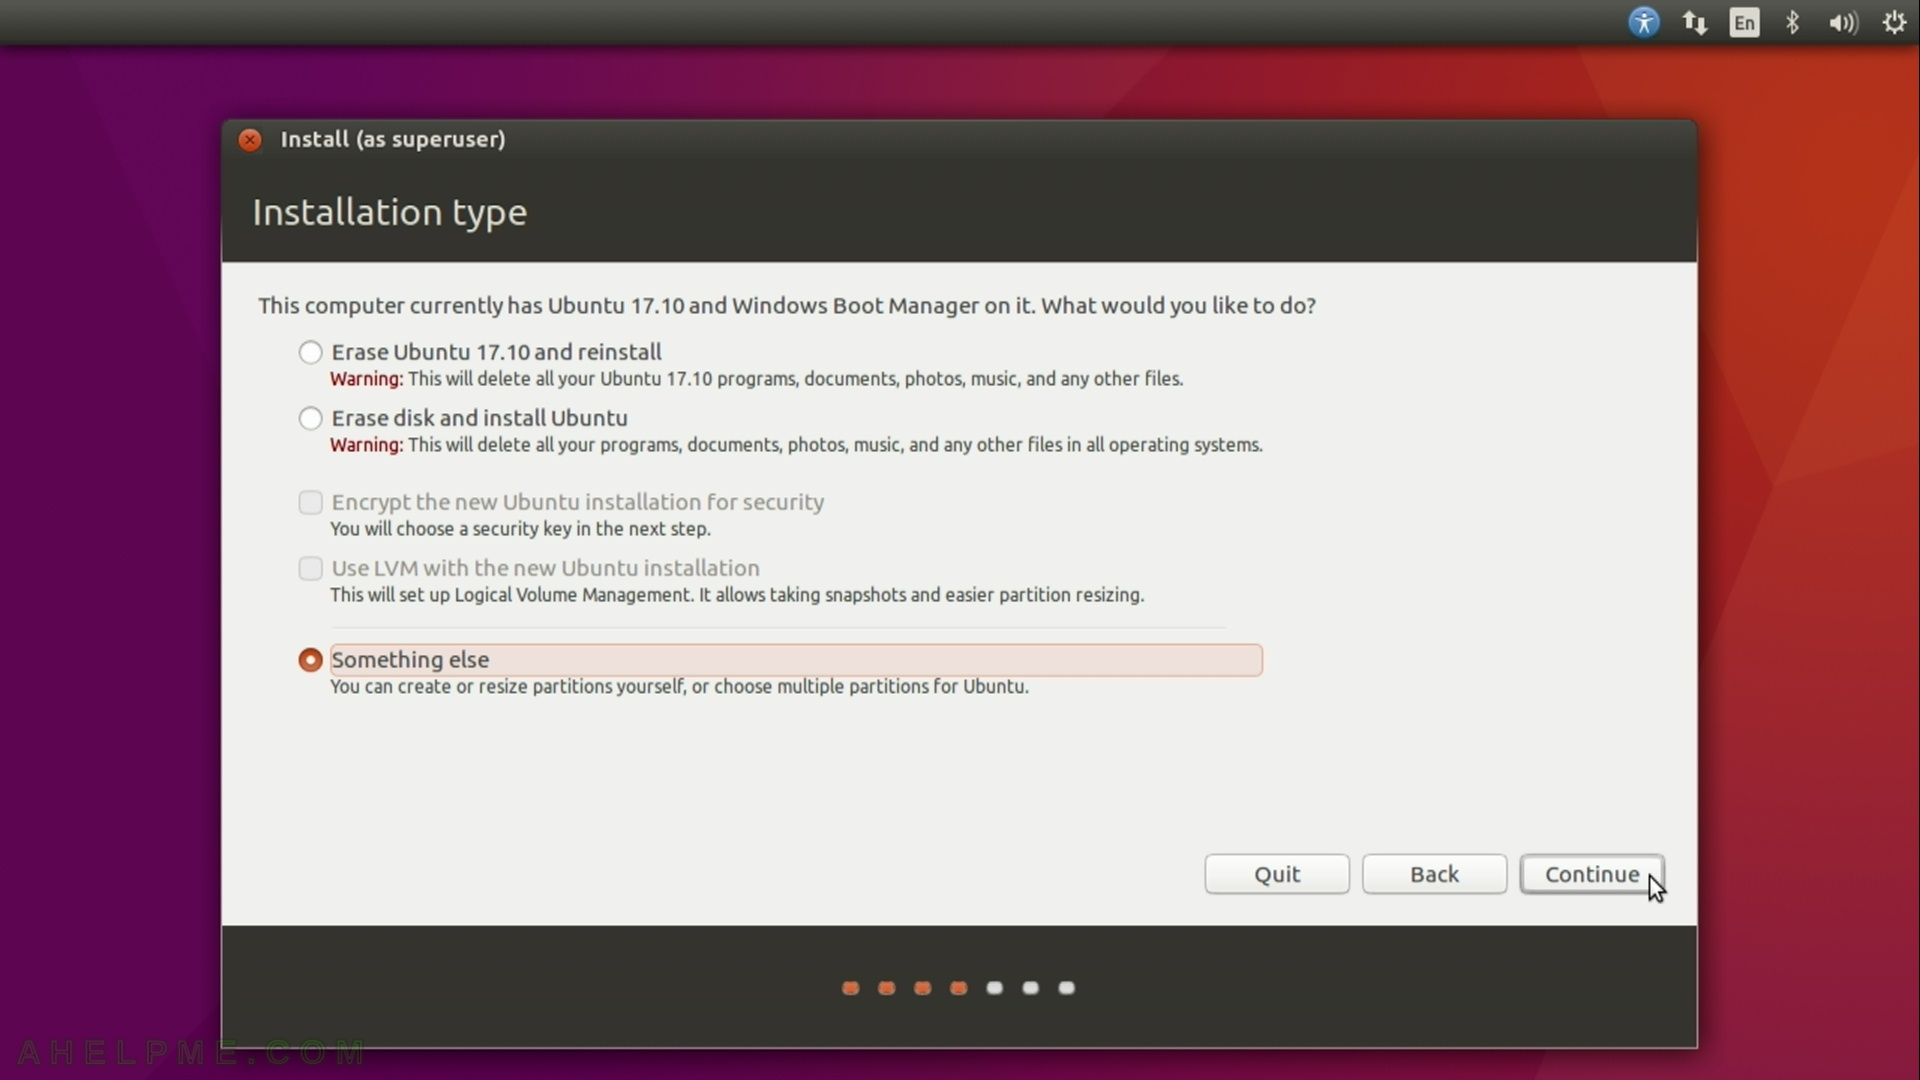
STEP 5) Choose Something else and “Continue”.
As we mentioned earlier we want to add this Ubuntu to our two already installed systems, so we do not want to erase any data we have on our computer!
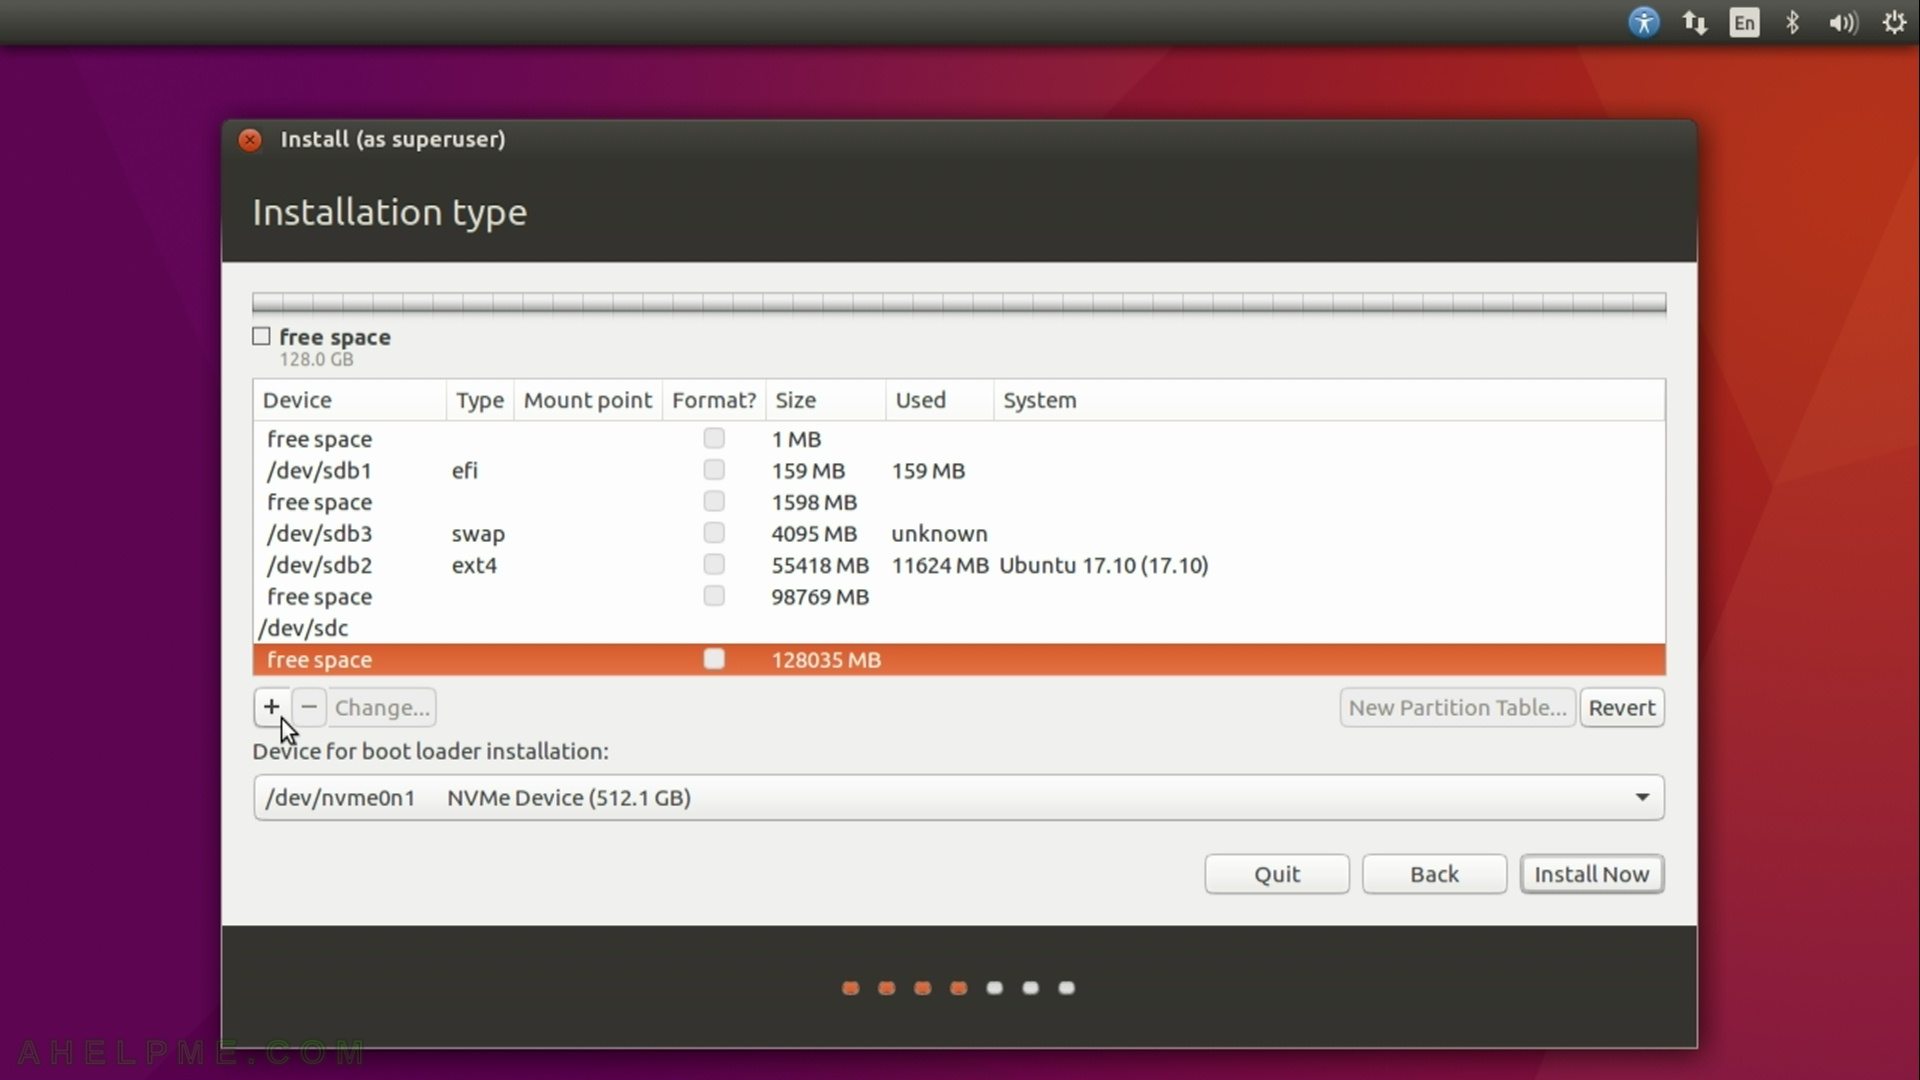
STEP 6) Here we must create at least two partitions – one for swap and one for the root filesystem (if you do not understand it, just follow the tutorial).
Scroll to the device (hard disk) you want to use for this installation and click on “free space” below it. Here we want to use our “sdc” device, which is our third SSD, so we click on “free space” (as you can see this device has only “free space”, it may contain partitions and if you want to erase them just click on them and then on the “-” button. Be careful here the operation is irreversable and you could lose your data if you remove a partition you need!). Then click on the plus (+) button.
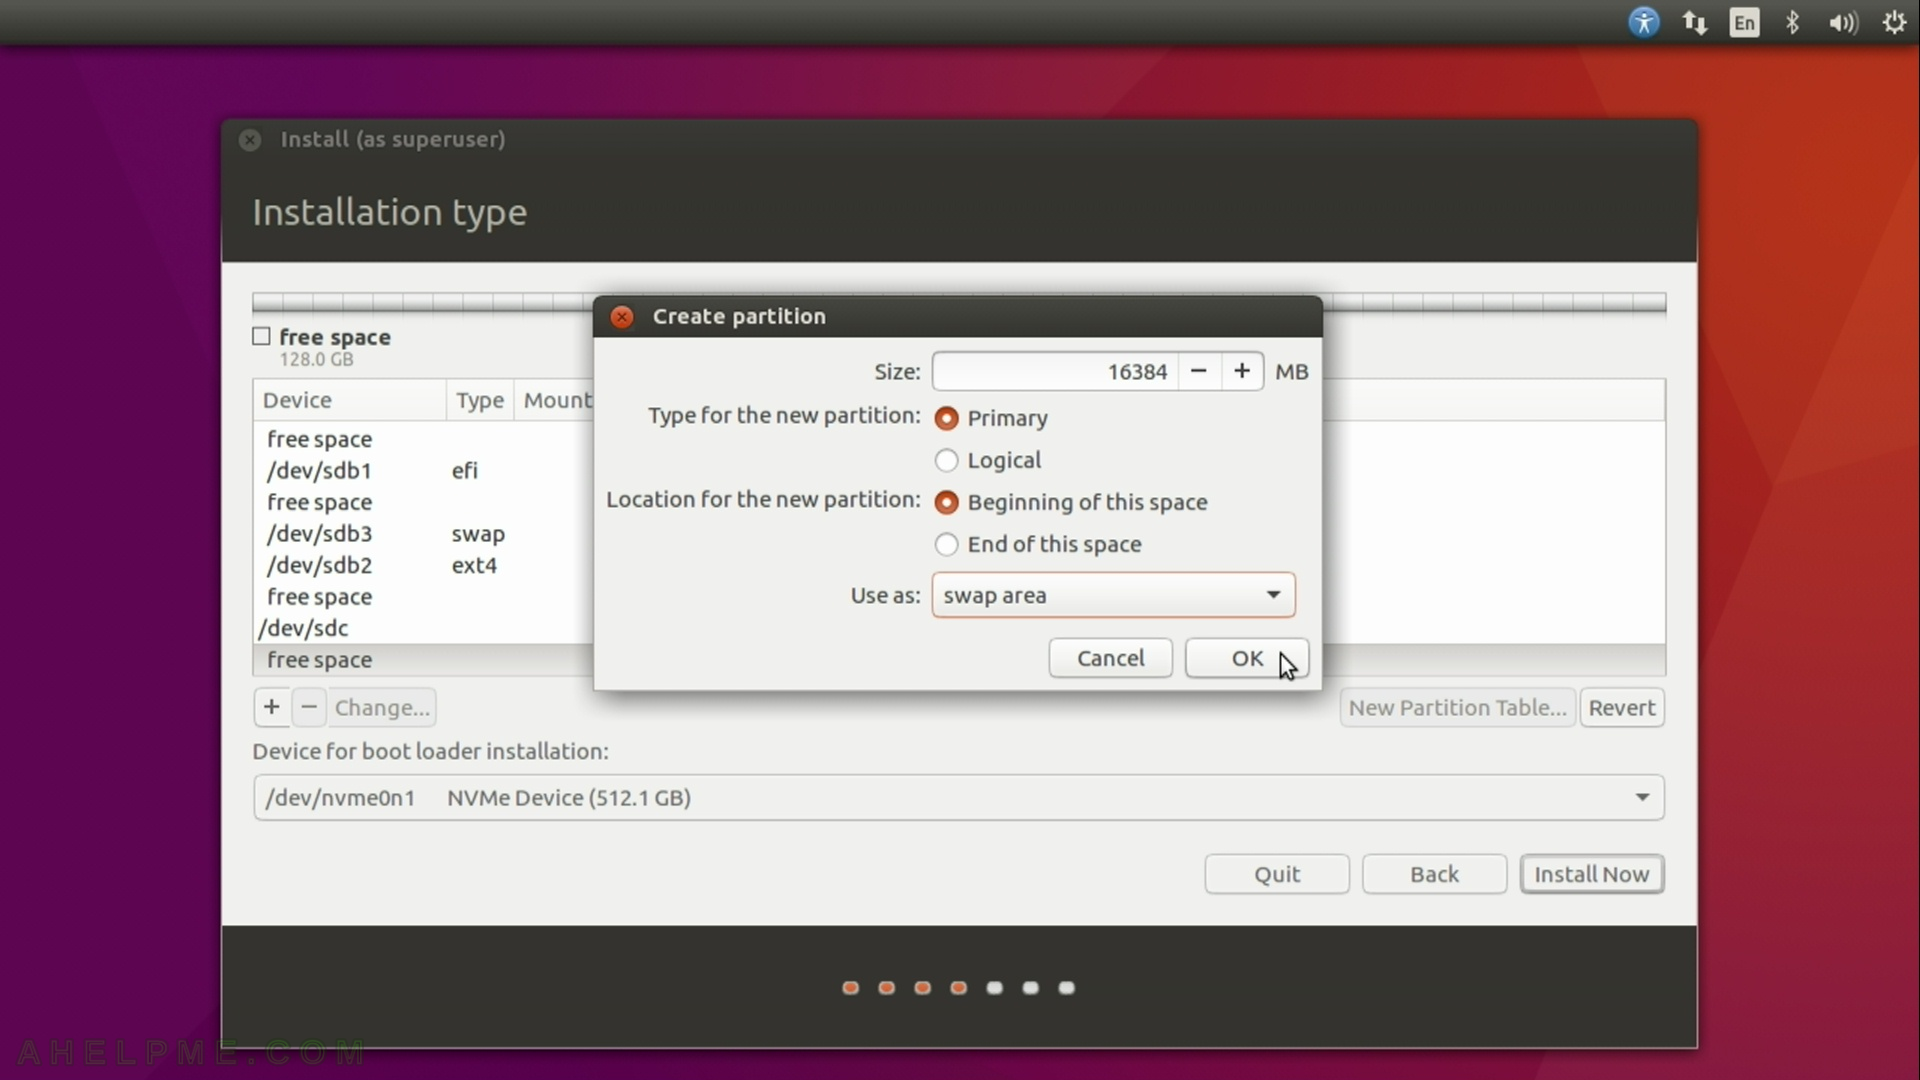
STEP 7) Set the size 16384, which is exactly 16G and change to “swap area” from the dropdown “Use as”. Click “OK”.
Here you create a partition for the swap.
STEP 8) Click on the “free space” under “sdc” (your device for this installation) again and then click the plus (+) button again to create the second partition.
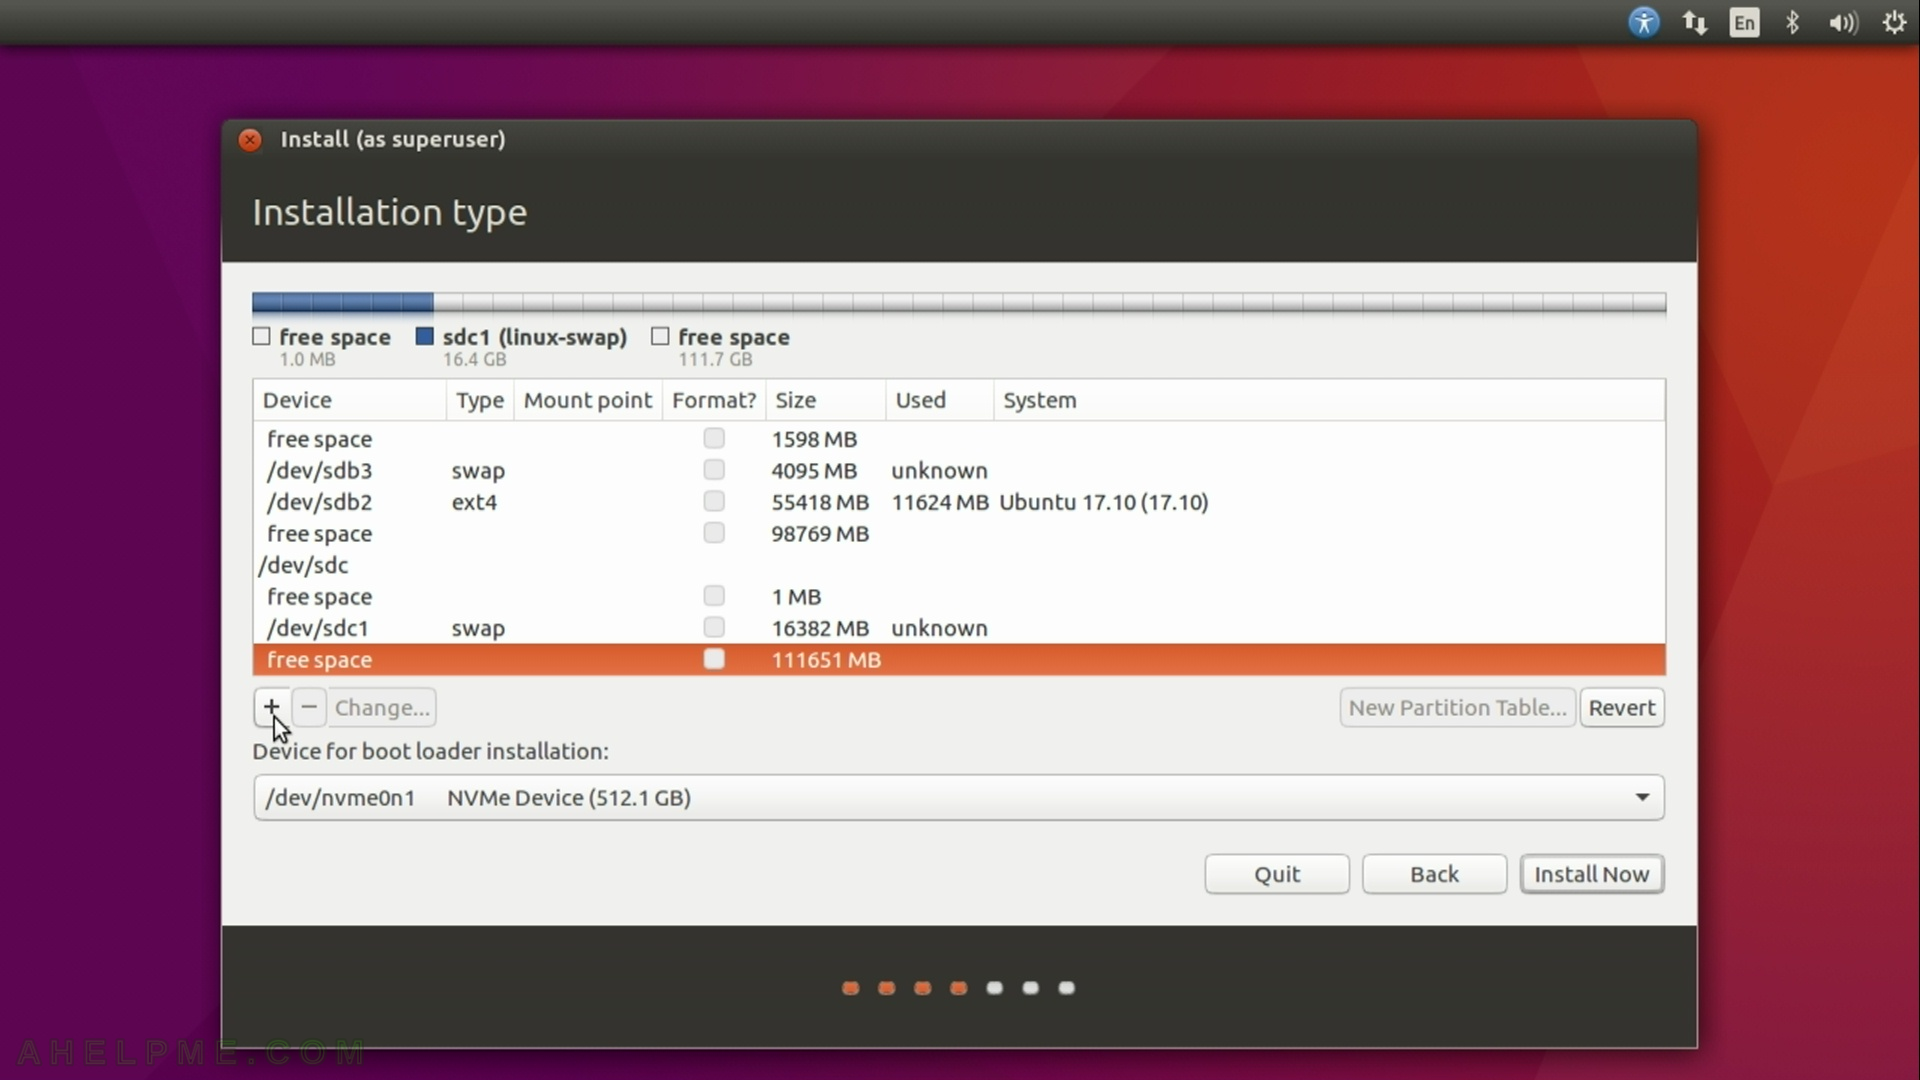
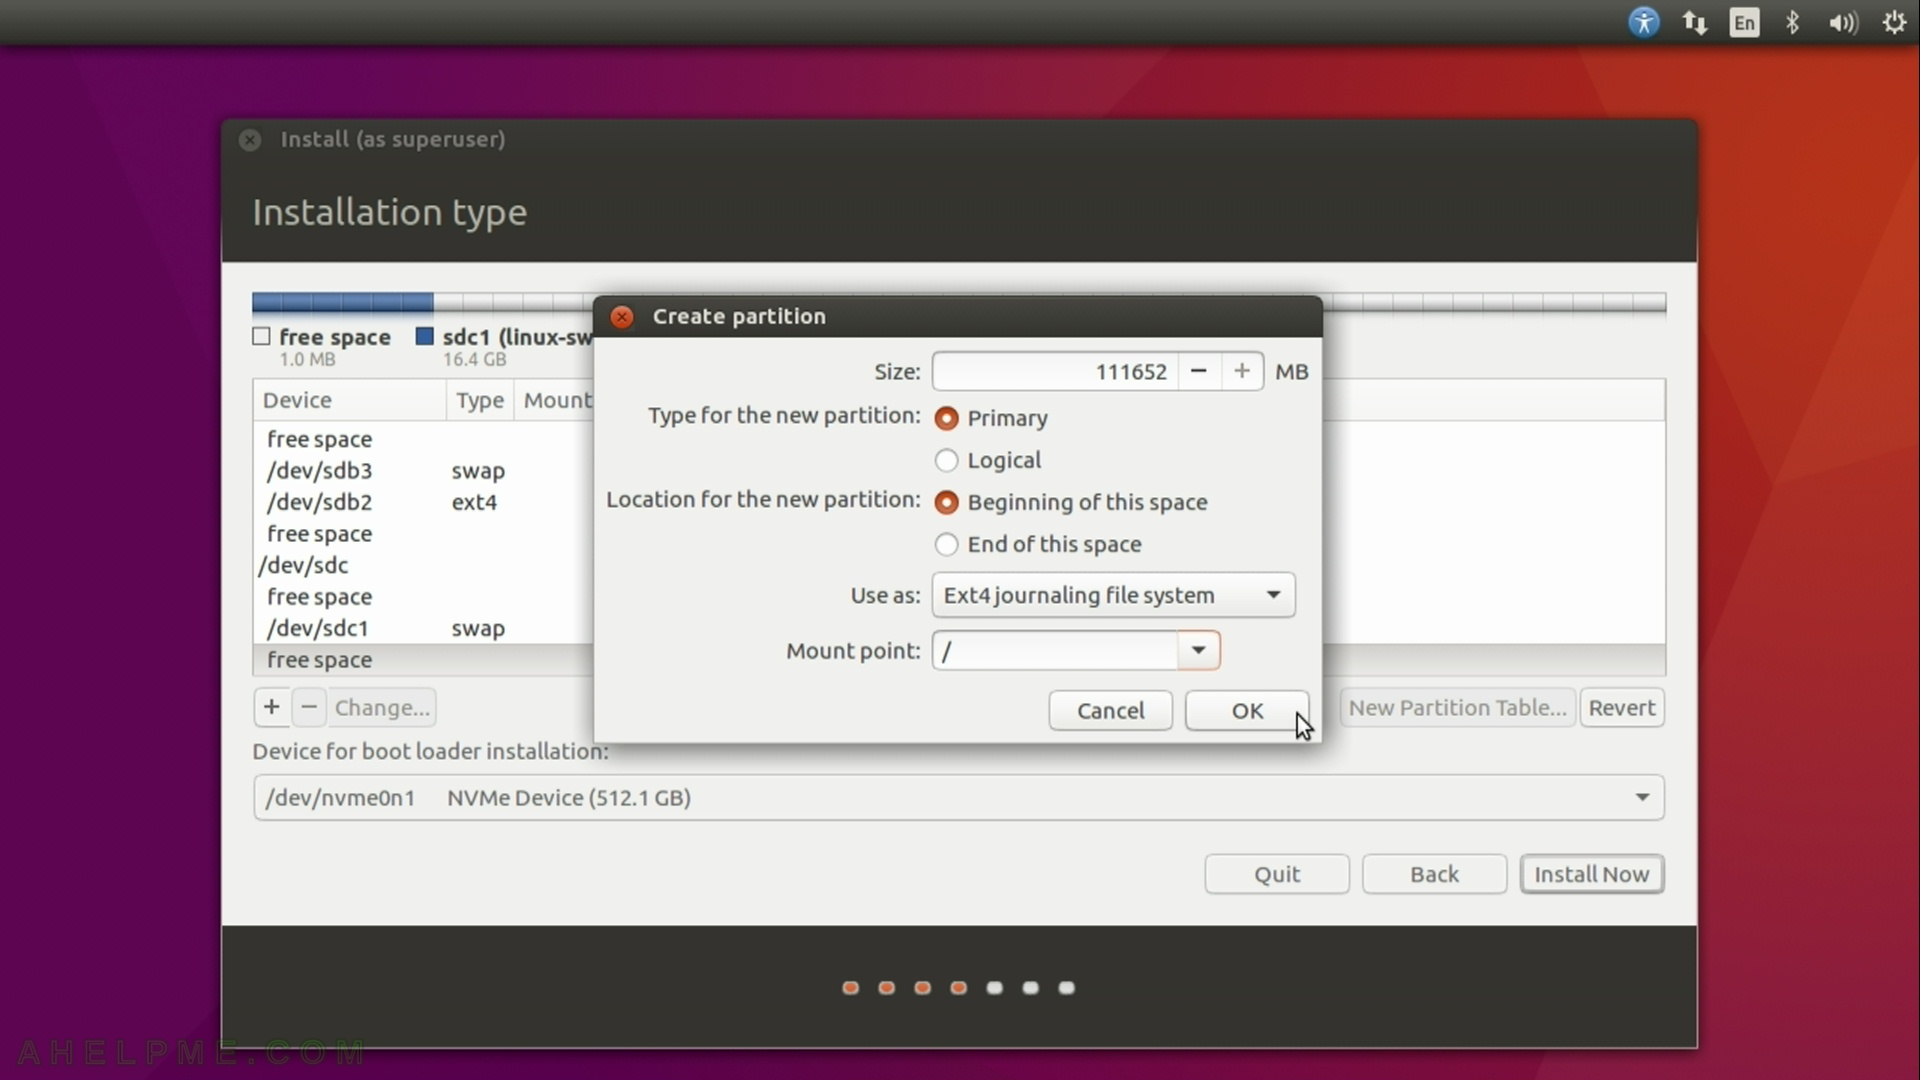
STEP 9) Leave the size as it was offered by default, which is the maximum remaining size you can use and set “/” to the “Mount point” dropdown. Then press “OK”.
This partition instructs the installation setup to copy all the system files there (“/”). In Linux everything starts from “/”, so the all files of the system will be copied there.
STEP 10) Click “Install Now”.
When you are ready with the partitions you could continue with the installation. The setup will copy everything needed and configure the system.
