Minimal net install is useful when a dedicated server is installed from a IPMI KVM or Dell iDRAC, HP iLO, IBM IMM or where the initial client side download of files need to be minimal.
For amd64 CentOS 7 the net install bootable media is located here (now the current latest release is 7.4.1708, but you can check the last directory with 7.
http://mirror.leaseweb.com/centos/7.4.1708/isos/x86_64/CentOS-7-x86_64-NetInstall-1708.iso
Now this version is deprecated and you could have problems downloading it, so you could try the CentOS vault – http://vault.centos.org/7.4.1708/isos/x86_64/ Just follow the instructions for downloading.
Download it and put it on a cd or usb, the boot from it and follow the steps bellow:
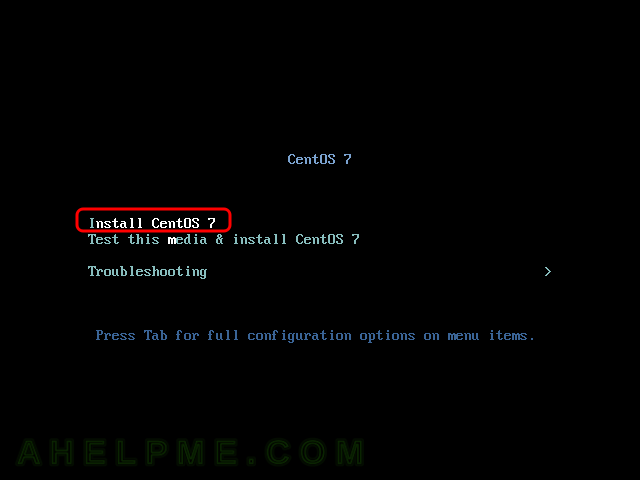
STEP 1) Select “Install CentOS 7” and press “Enter”
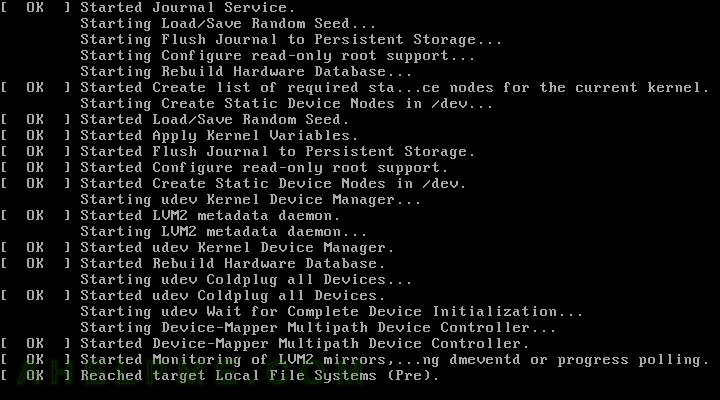
STEP 2) Wait for the installation to boot
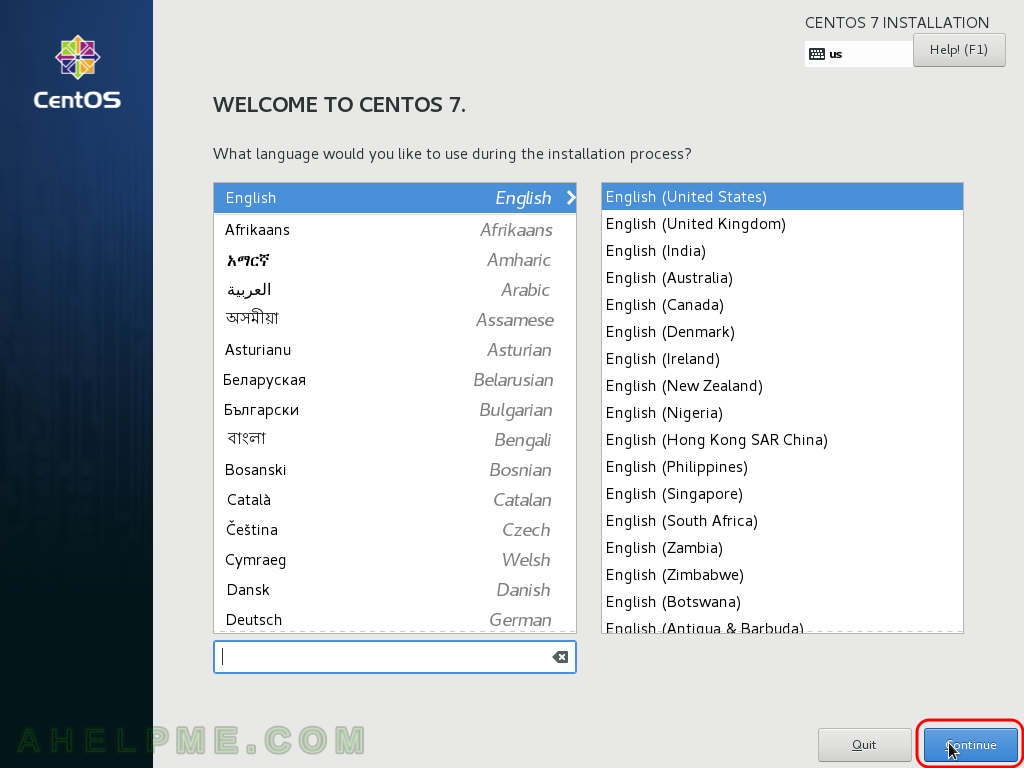
STEP 3) This is the first step, you could choose your Country and language, English is the default.
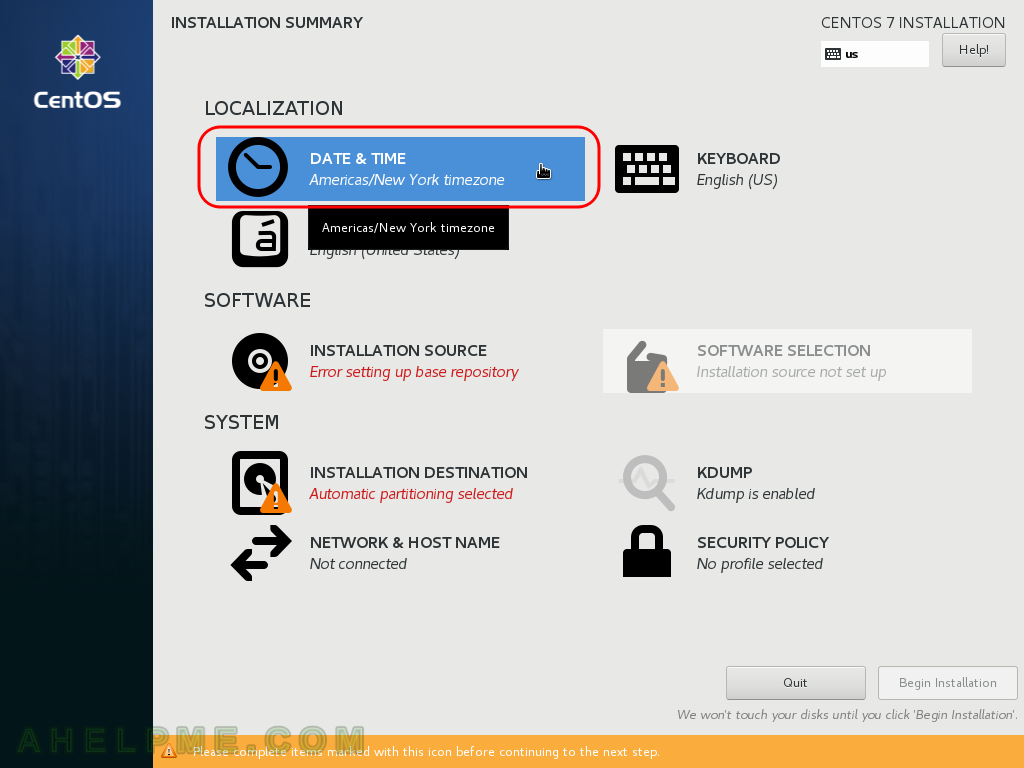
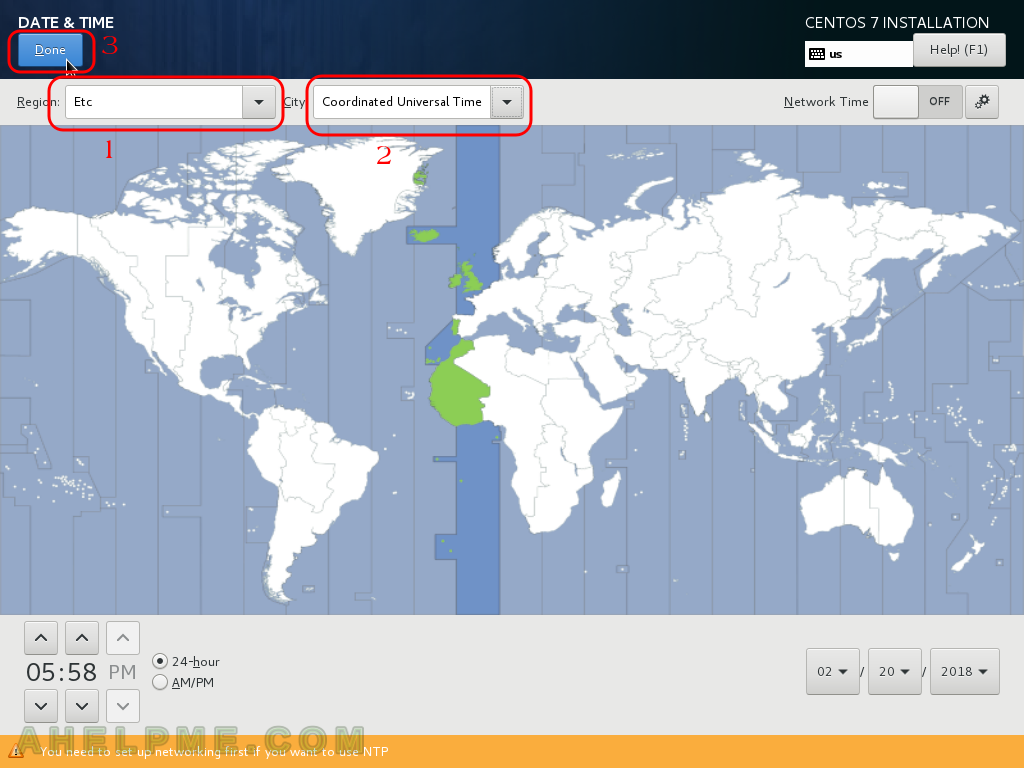
STEP 4) Setup the right time and time zone of your server, this step is important, the clock of the server is really important for your software to work properly!
STEP 5) Often servers are set with UTC time, which is never changed (no summer saving time!). UTC is Coordinated Universal Time and first you must select “Etc” from the first dropdown menu.
STEP 6) Next let’s configure the network, because we are doing a network installation you need Internet connection to install the CentOS 7.
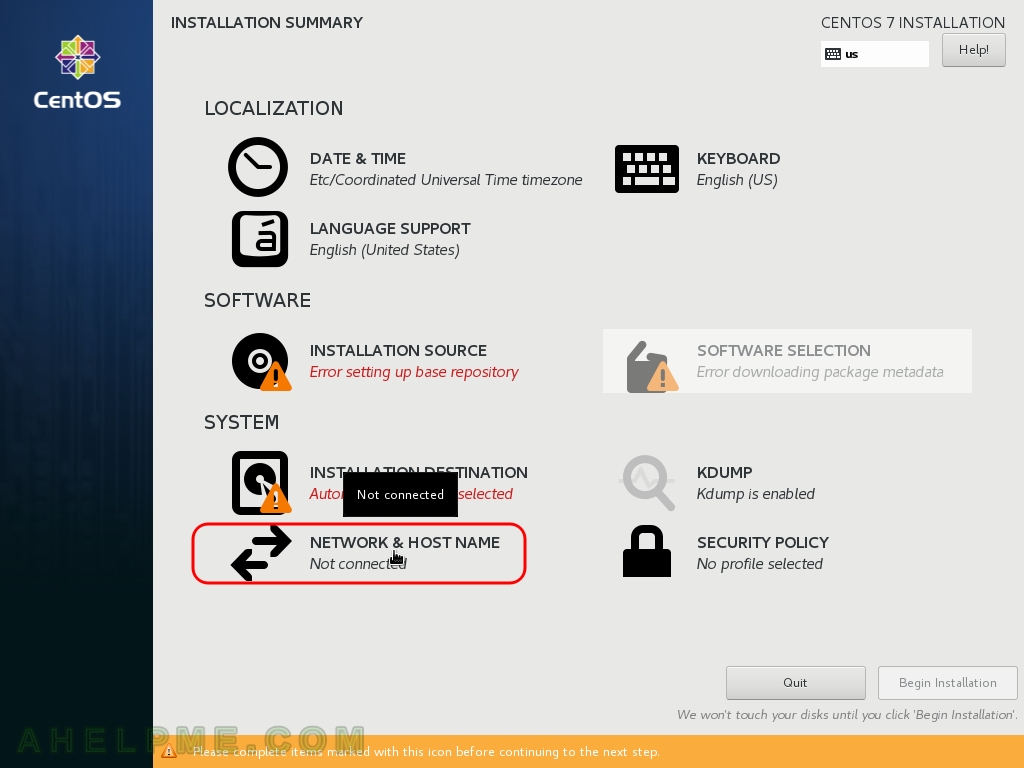
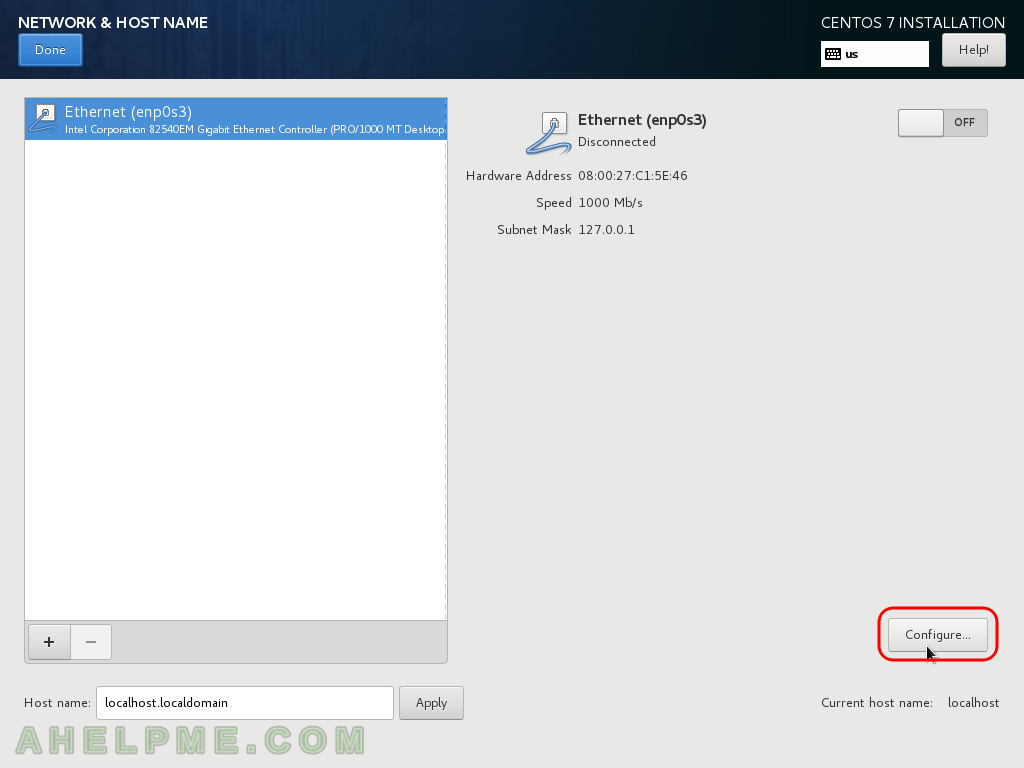
STEP 7) Click to configure the selected network adapter on the right.
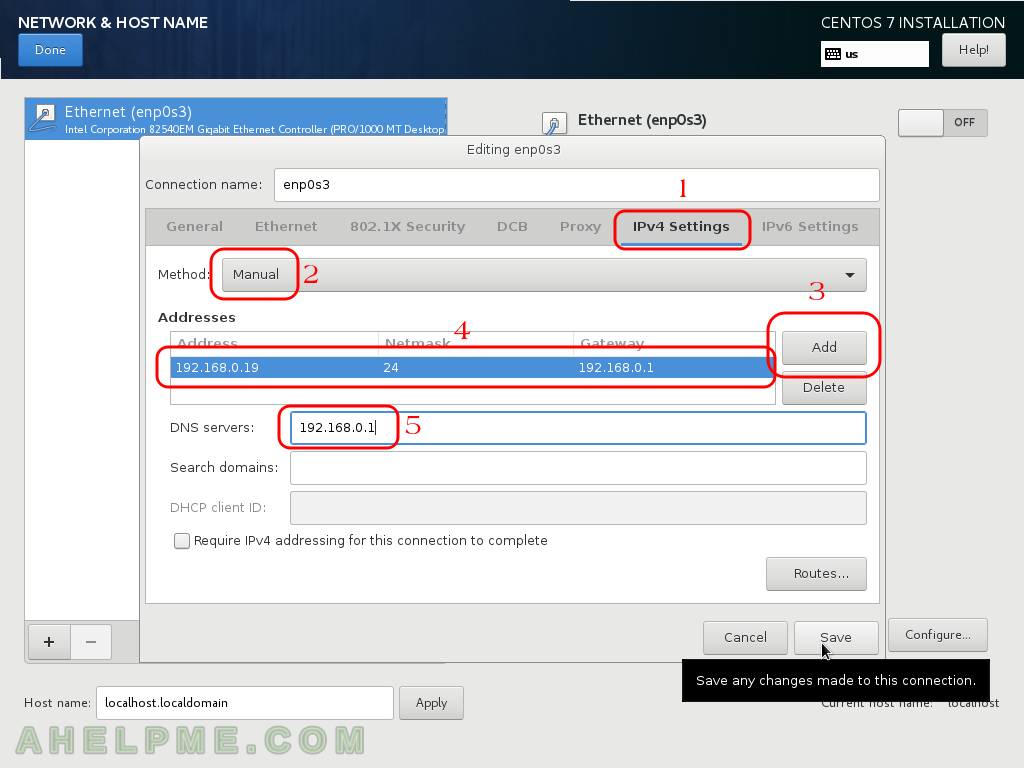
STEP 8) Click on the menu “IPv4 Settings”, then choose from the dropdown menu “Manual” (technically you can leave it Automattically as the default is, but this is a server howto it is not very clever your IP to be assigned by a DHCP server, but your setup could vary). Then click on “Add” and write your IP address, network mask and gateway, then in the DNS Servers write your local (and fast!) DNS server, if you have more than one separate them with comas.
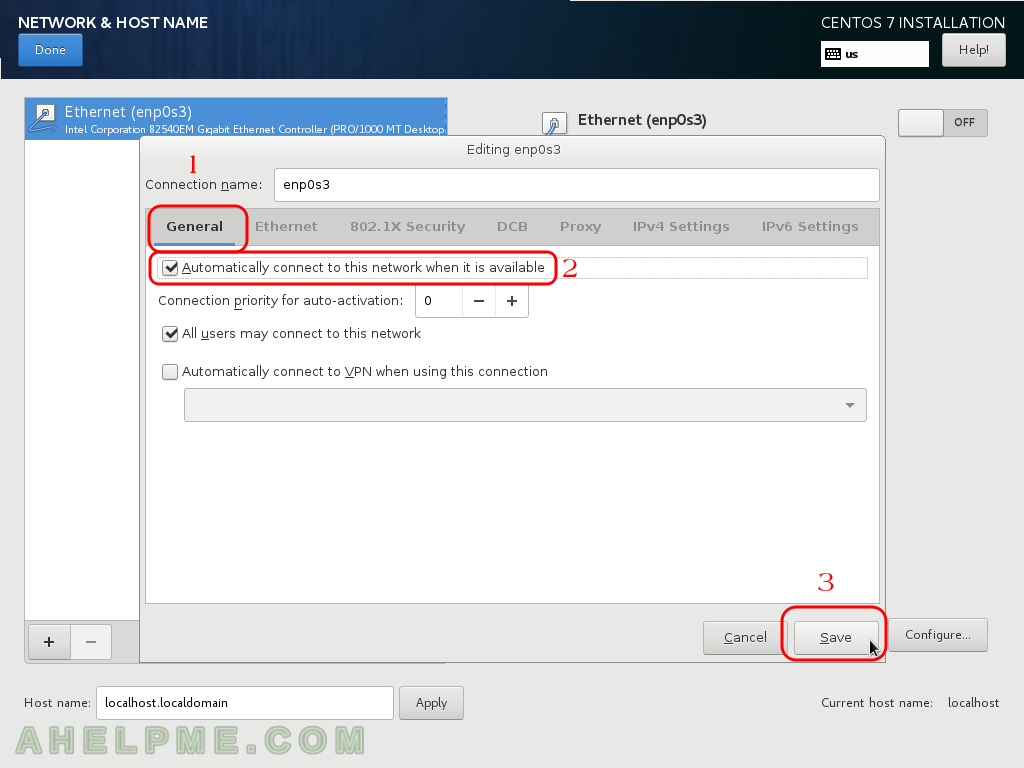
STEP 9) Click “General” menu and then check the “Automatically connect to this network when it is available” – this is very important, because if you do not check, when you reboot the server, it won’t start the network! Click Save.
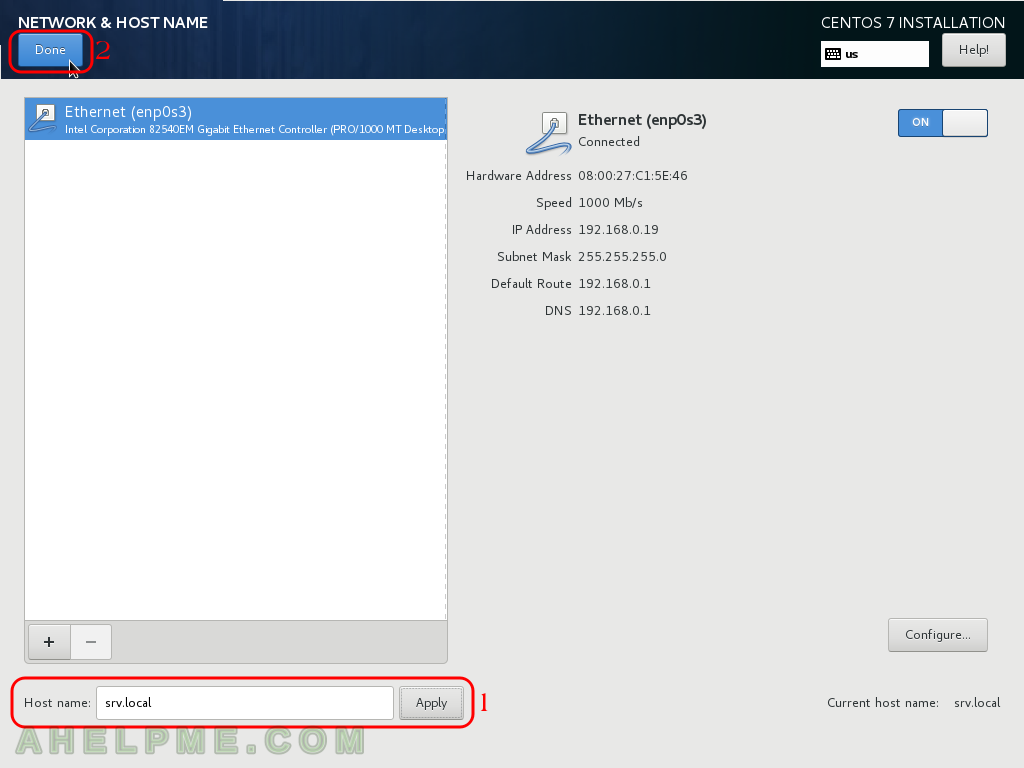
STEP 10) You can see the network is up and connected. Set a host name to your server and click on “Apply” and that’s all for the network configuration, click on “Done”.
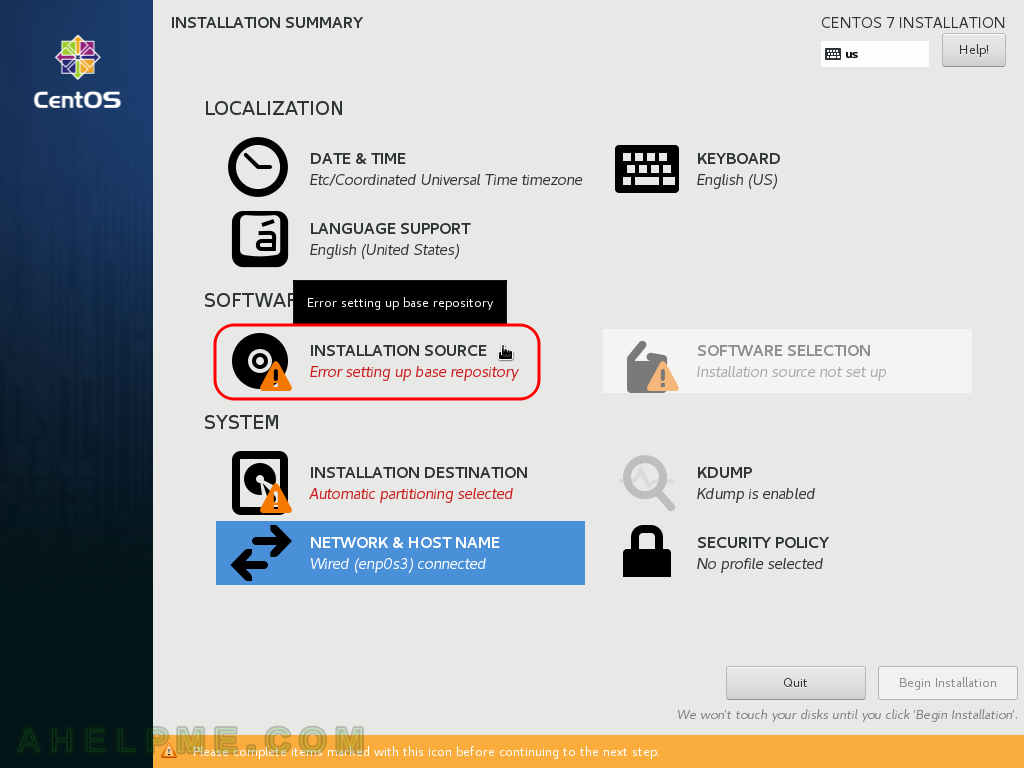
STEP 11) Click on “Installation Source” to setup the source of your installation files, because this is network installation this step is mandatory.
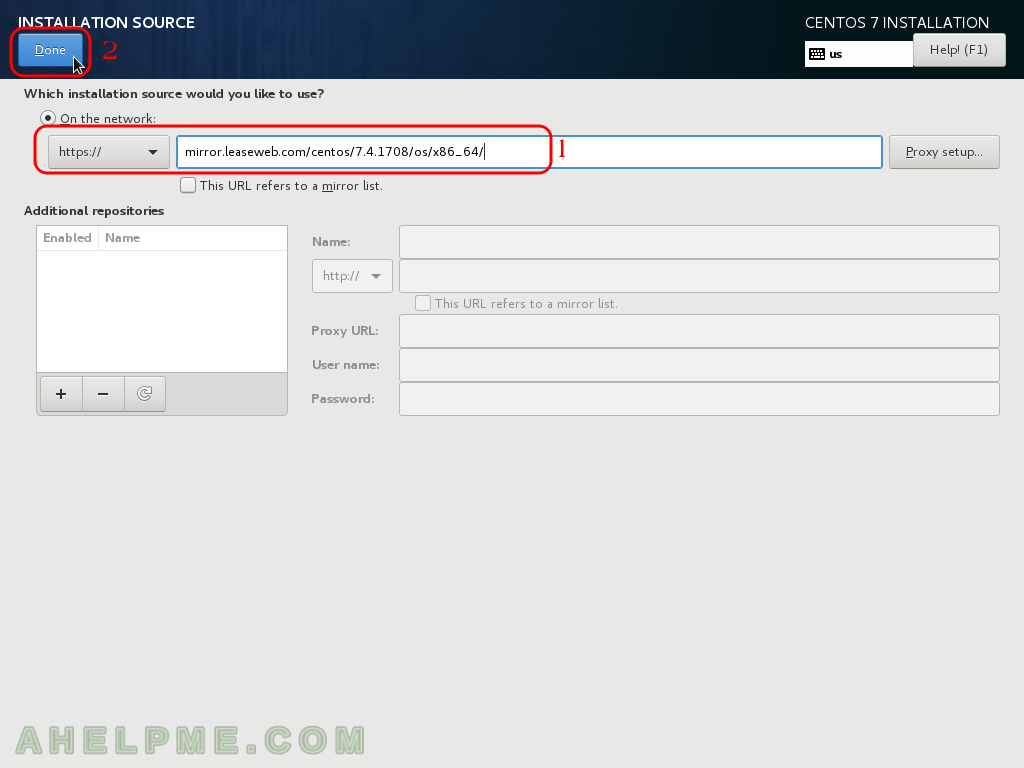
STEP 12) Set the URL from where the setup will download packages and installation files. Set the nearest source to your server, you can check mirrors here:
https://www.centos.org/download/mirrors/
At present the latest version of CentOS 7 is 7.4.1708, but after a while it could be other, so browse the latest version directory, then you must choose directory “/os/” (there are probably many others, but we need especially “os”) and then “/x86_64/”. And then click on “Done”. That’s all you’ve configured the installation source, so now the setup knows where to look for packages and metadata for the installation process.
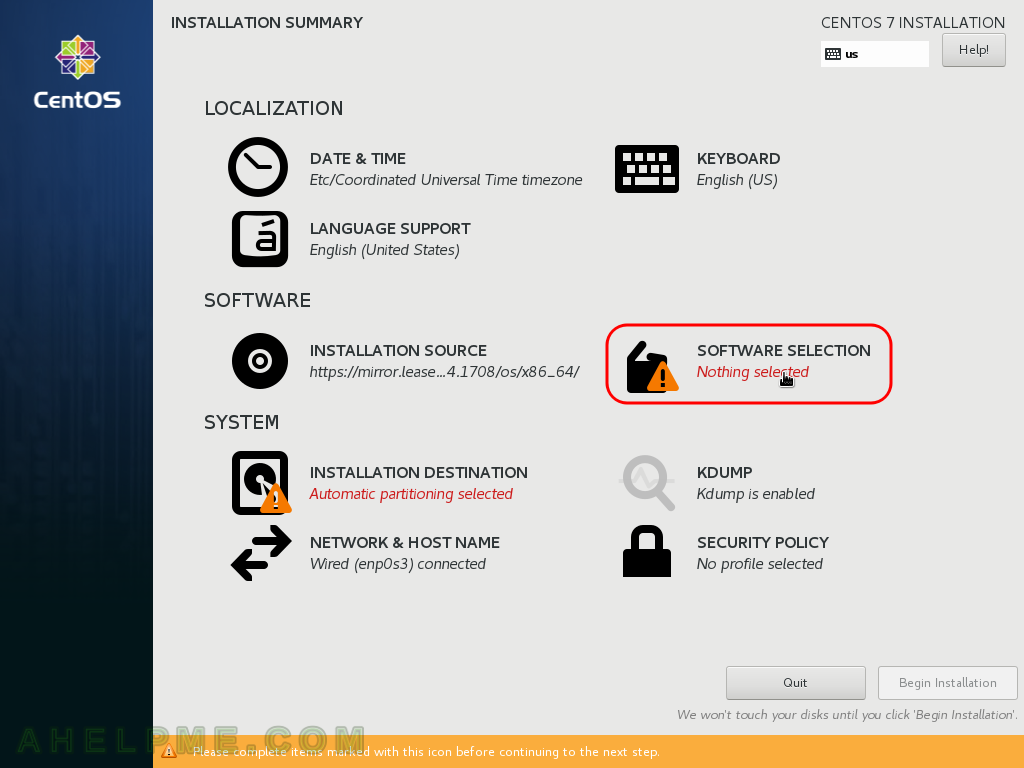
STEP 13) Choose your software to install. Click on “Software Selection”.
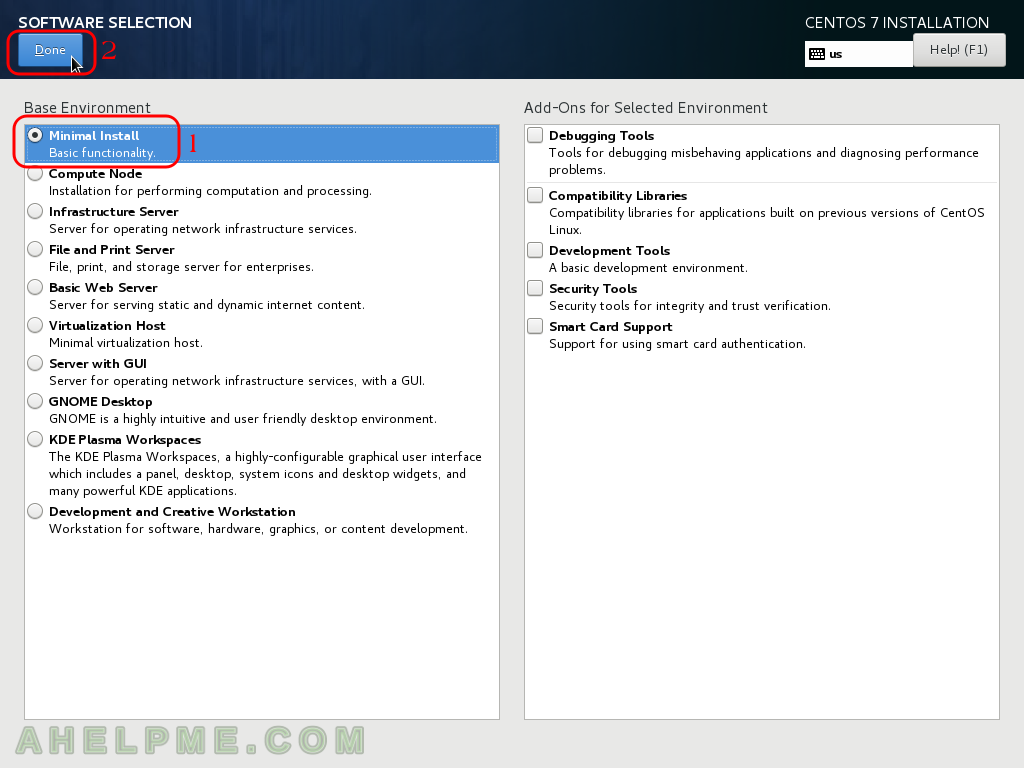
STEP 14) Because this howto is a minimal installation you should check “Minimal Install” , but you could choose another option below, the one suited best for your future server. And then click on “Done” to save the configuration.
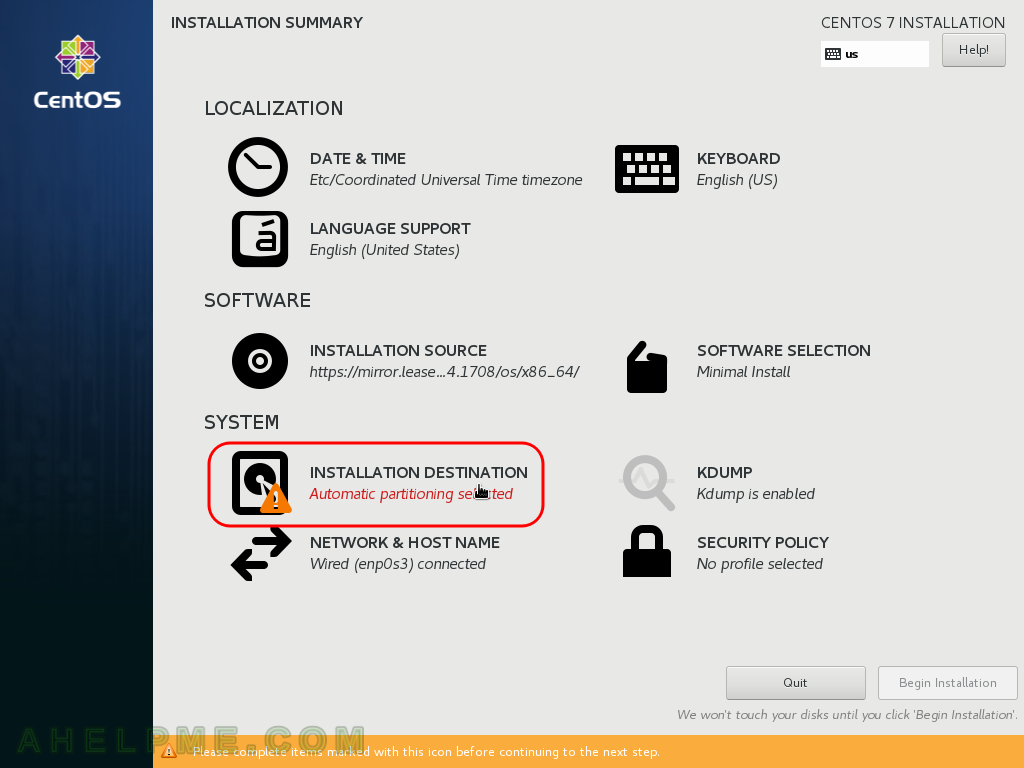
STEP 15) Click on “Installation Destination” to set the hard drive and partitions layout configuration for your server.
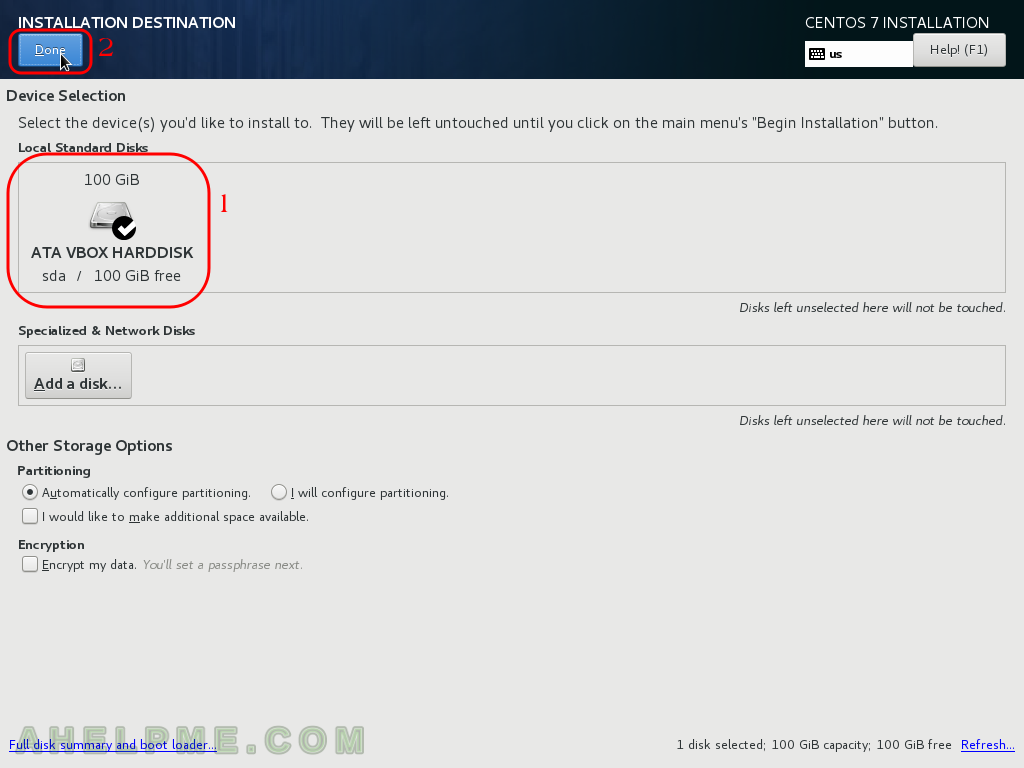
STEP 16) The default is to leave the how disk to the setup to manage (make sure the “Automatically configure partitioning.” is checked), it will use the how hard drive checked from the Local Standard Disks. Check all the local disks you want to use in your server if more than one. If your disk has partitions you may be prompted to acquire free space by deleting existing partitions – be careful with this option, think twice before deleting partitions! Click on “Done” to save configuration.
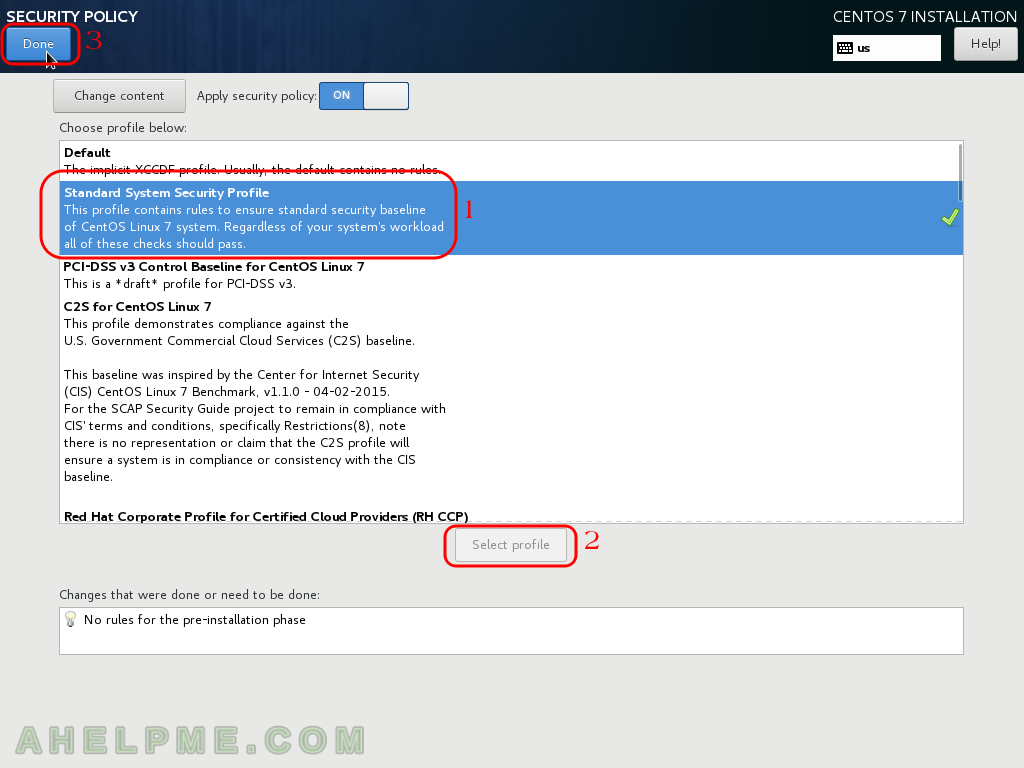
STEP 17) Click on “Security policy” to setup a default security policy as selinux – use it whenever it is available!

STEP 18) Click on the “Standard System Security Porfile”, which will enable SELINUX security in your installation and then click “Select Profile”, after clicking the button will become grayed and the selection will have a green check in the right. Then click on “Done”.
STEP 19) We are all done and it is time to start the real installation of the system. Till now we’ve just configured the installation process. So click on “Begin Installation”.

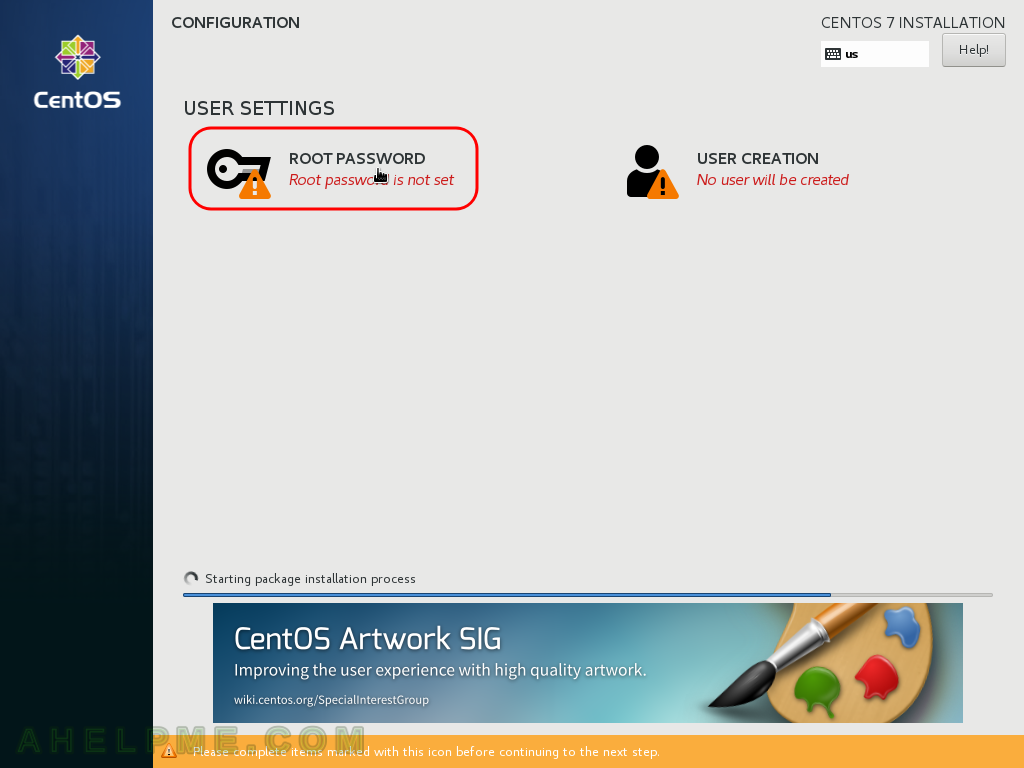
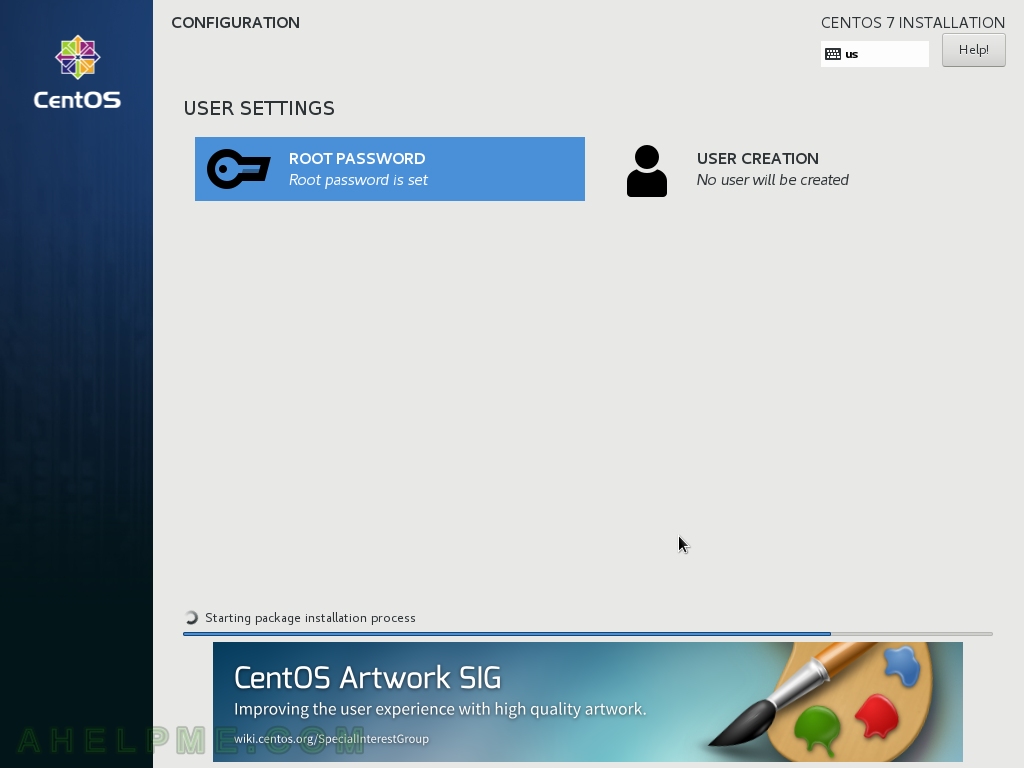
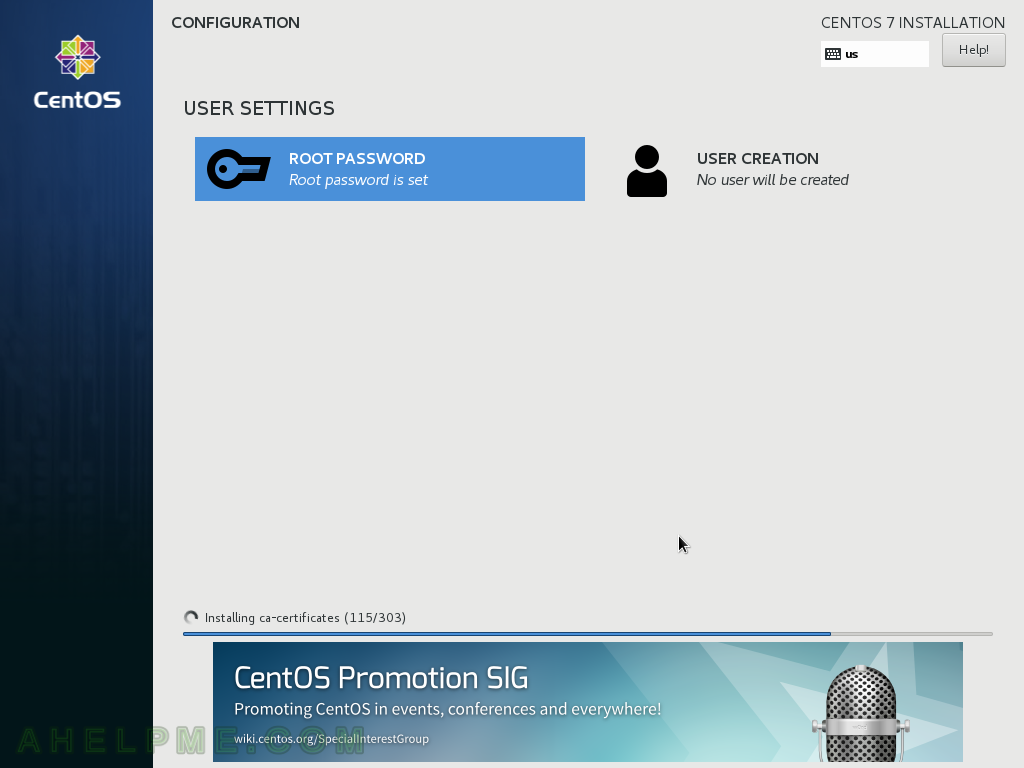
STEP 20) When the installation process is running you are prompt to set the root password and to add users. For clarity we set only the root password.
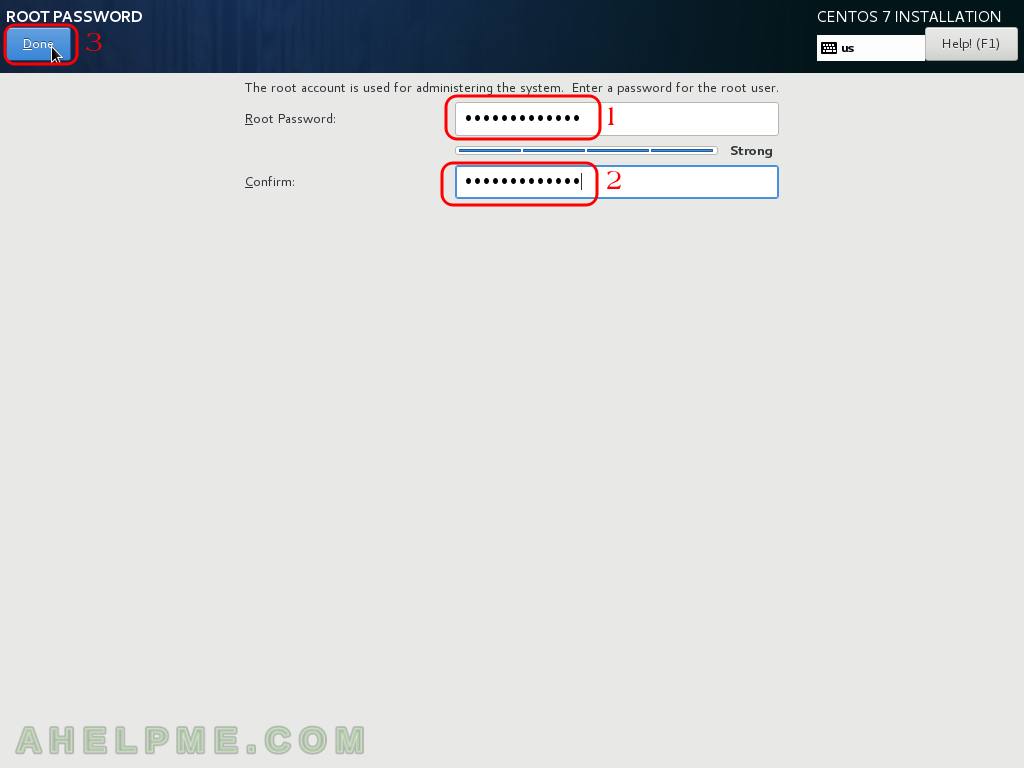
STEP 21) Set two times your password for the root user and then click “Done”.
STEP 22) The installation process is still running, just wait to finish.
STEP 23) You can see how many packets are install and the current installing packet and number.
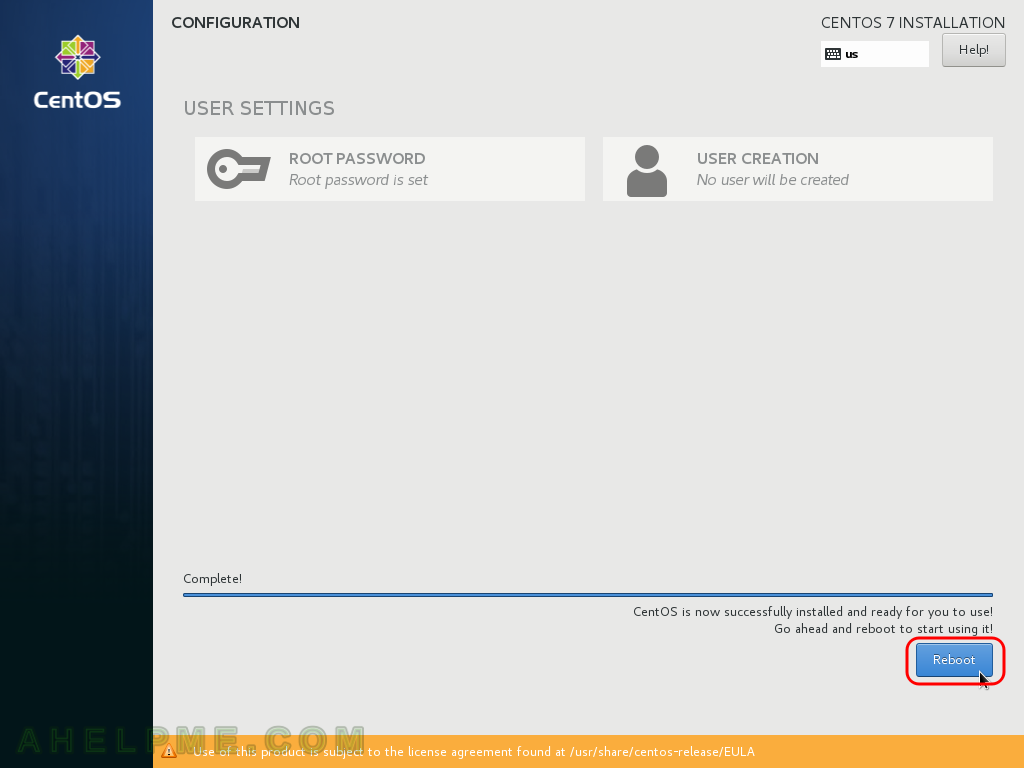
STEP 24) If everything goes with no errors and probably it will be with no errors you must click on “Reboot” to reboot the server in the newly installed OS.
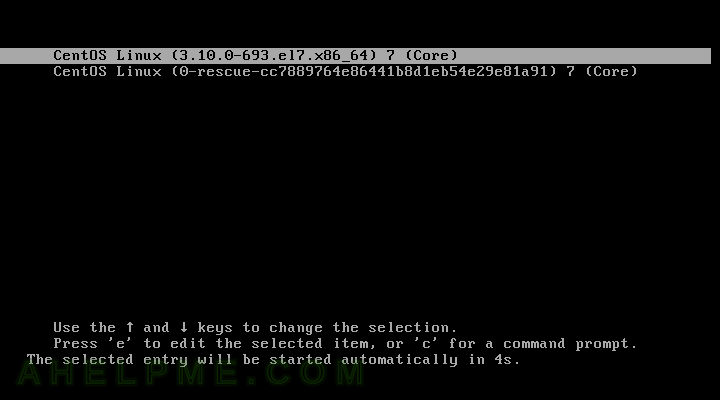
STEP 25) Grub2 and two options to select, the default is the latest kernel installed.
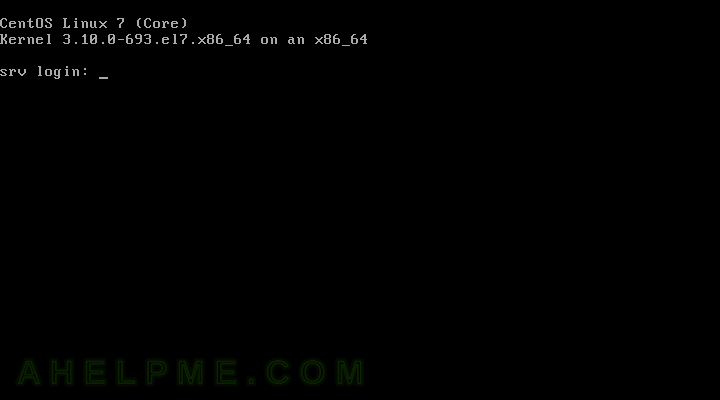
STEP 26) And the server is at login. The ssh server is also installed and you can access the server via ssh on the default port 22 and root login is permitted.
One thought on “Howto do a netinstall of CentOS 7 (7.4.1708) – minimal server installation”