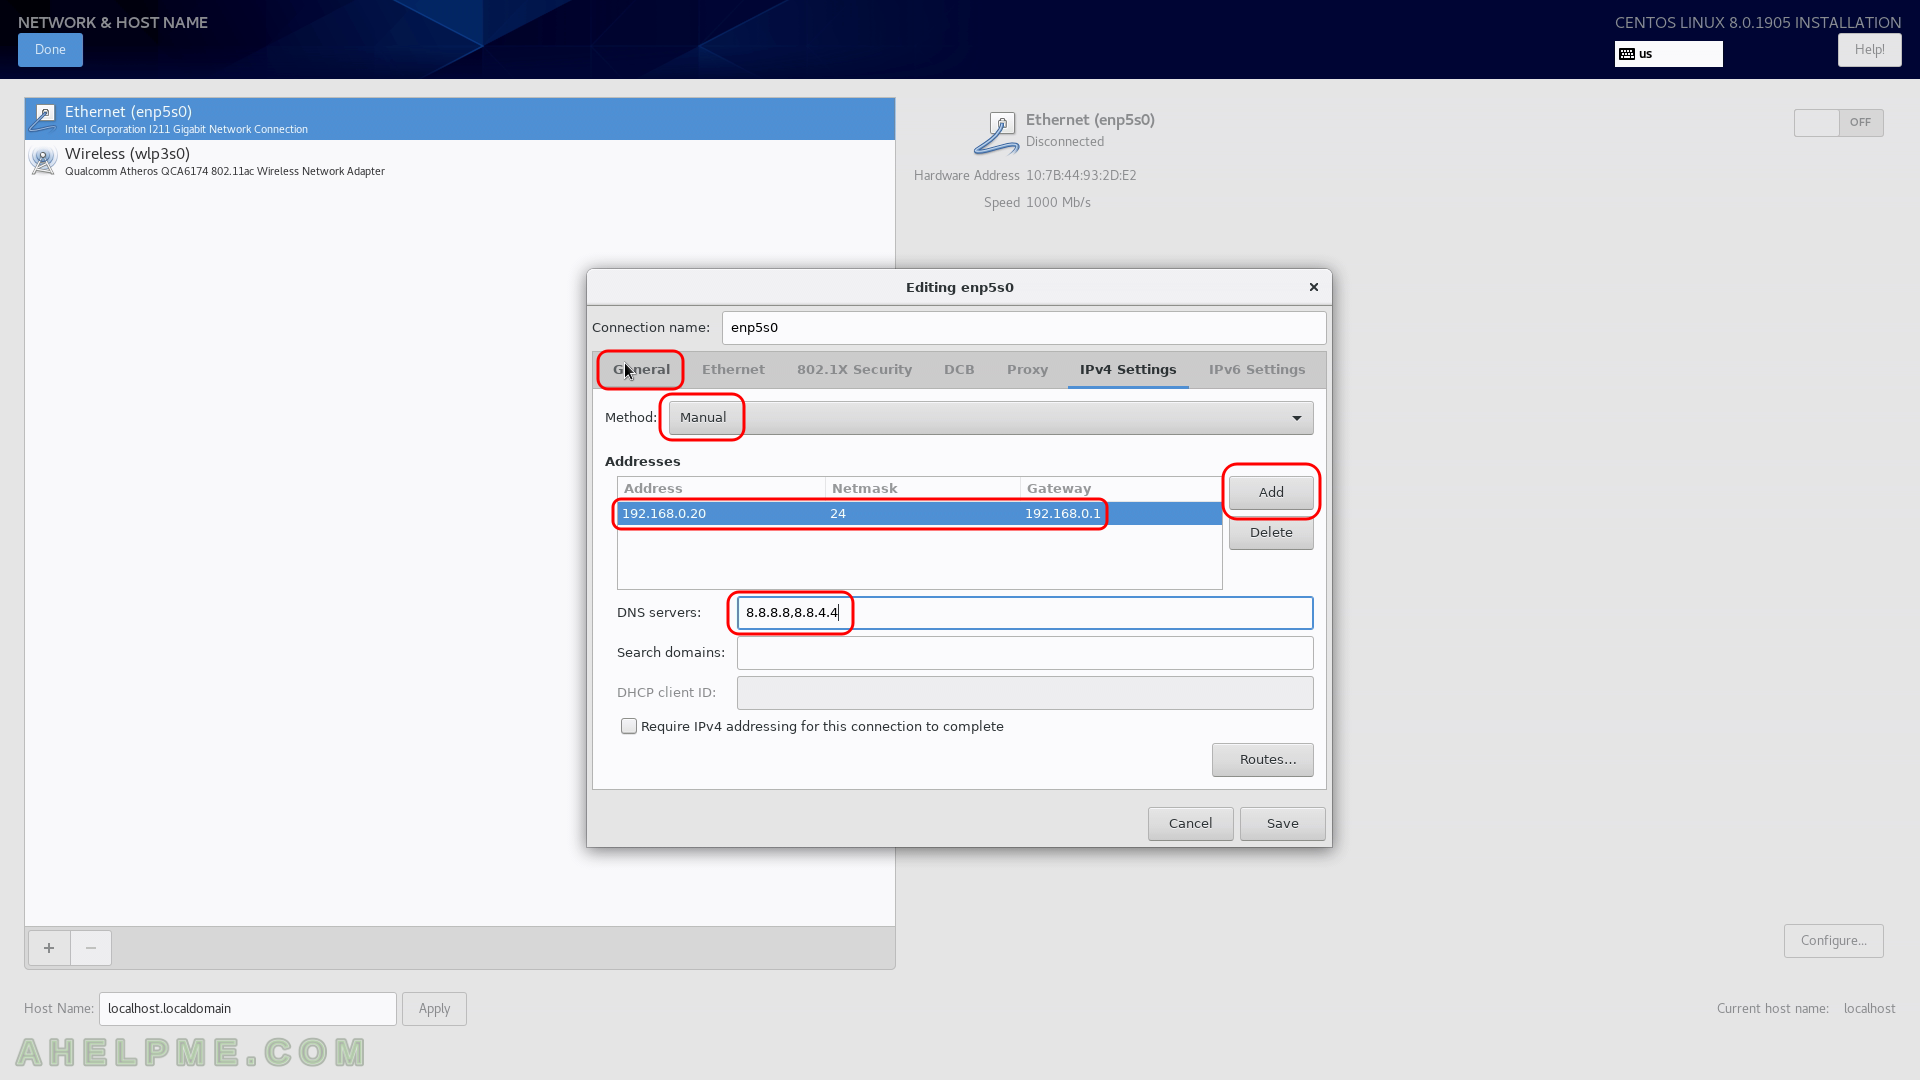
STEP 11) Set the IP of the server
First, set to “Manual” from the dropdown menu “Method”, then click on “Add” and in each of the three text boxes fill the network settings of your choice. We have filled the text fields with local IP and settings. Add DNS servers separating them with comas and click on “General” tab.
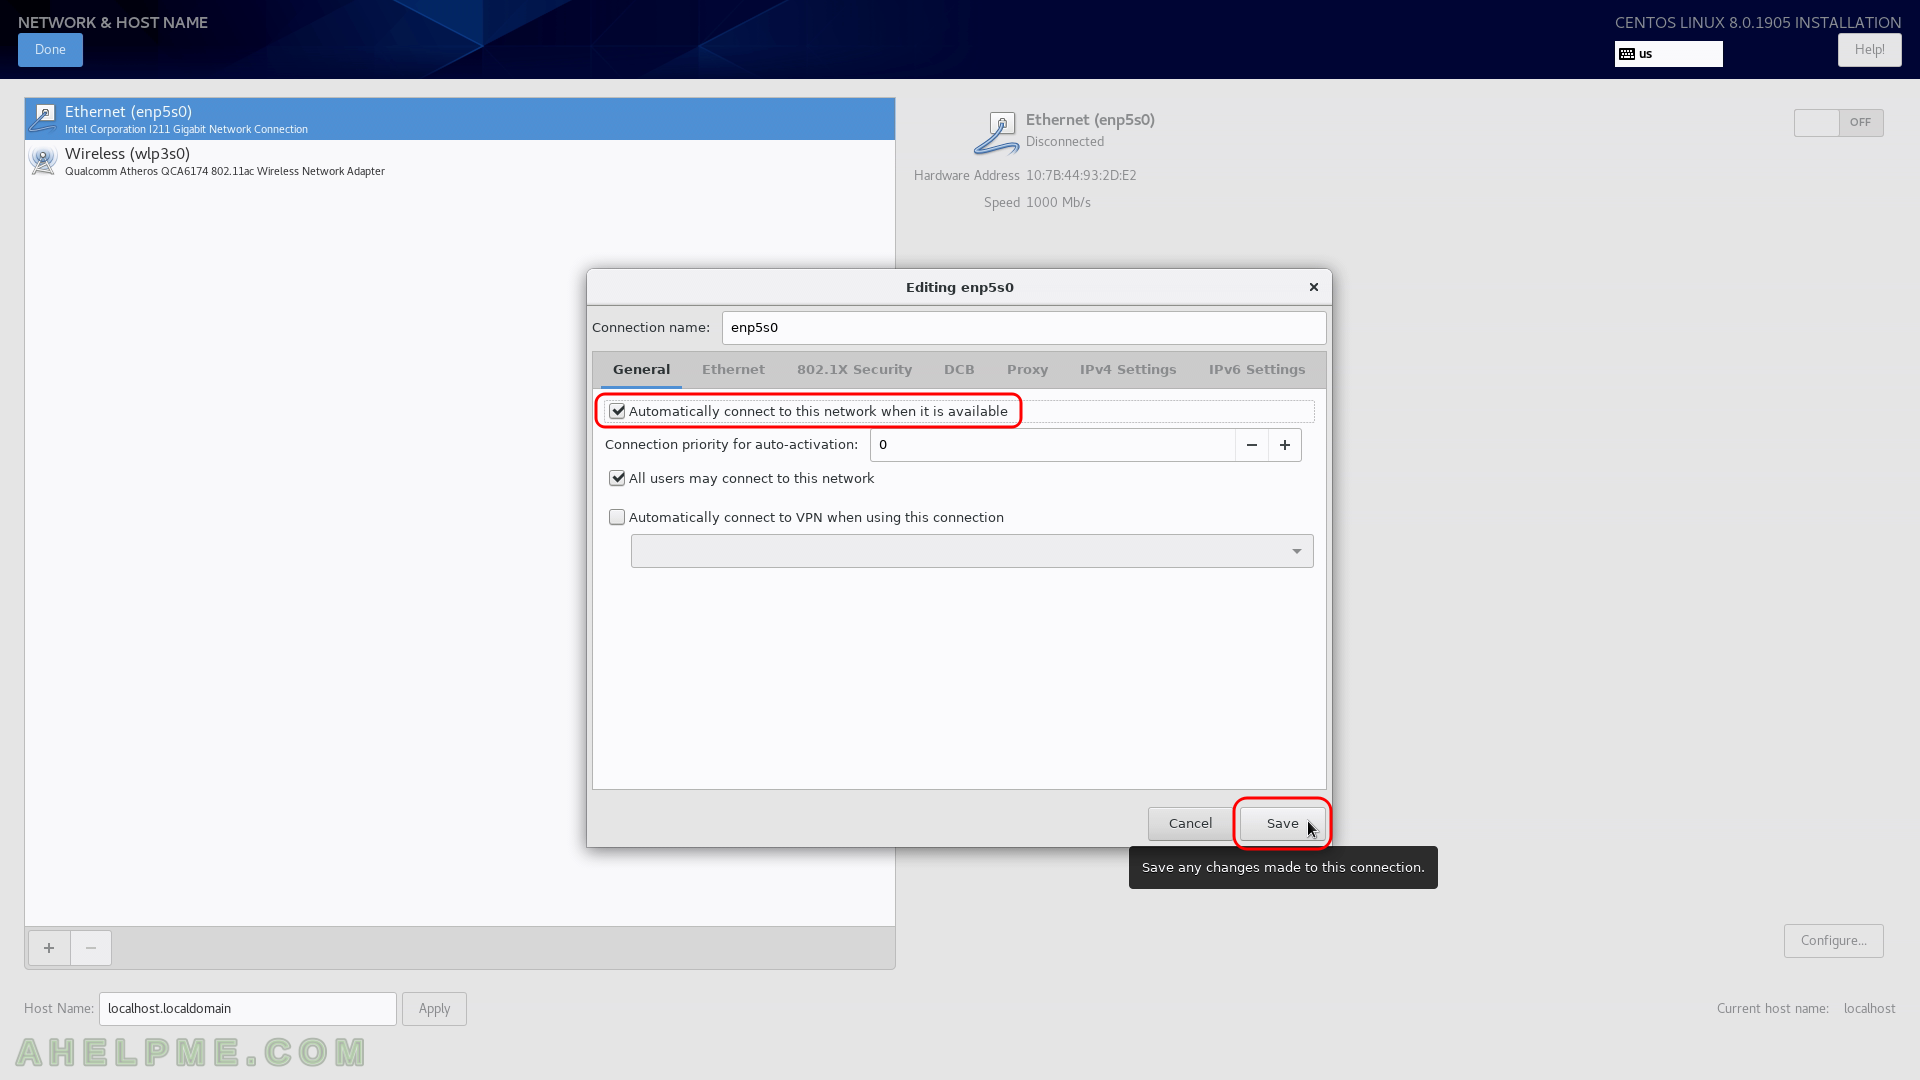
STEP 12) Check the “Automatically connect to this network when it is available” to ensure the adapter gets the right configuration on boot.
And click on “Save”.
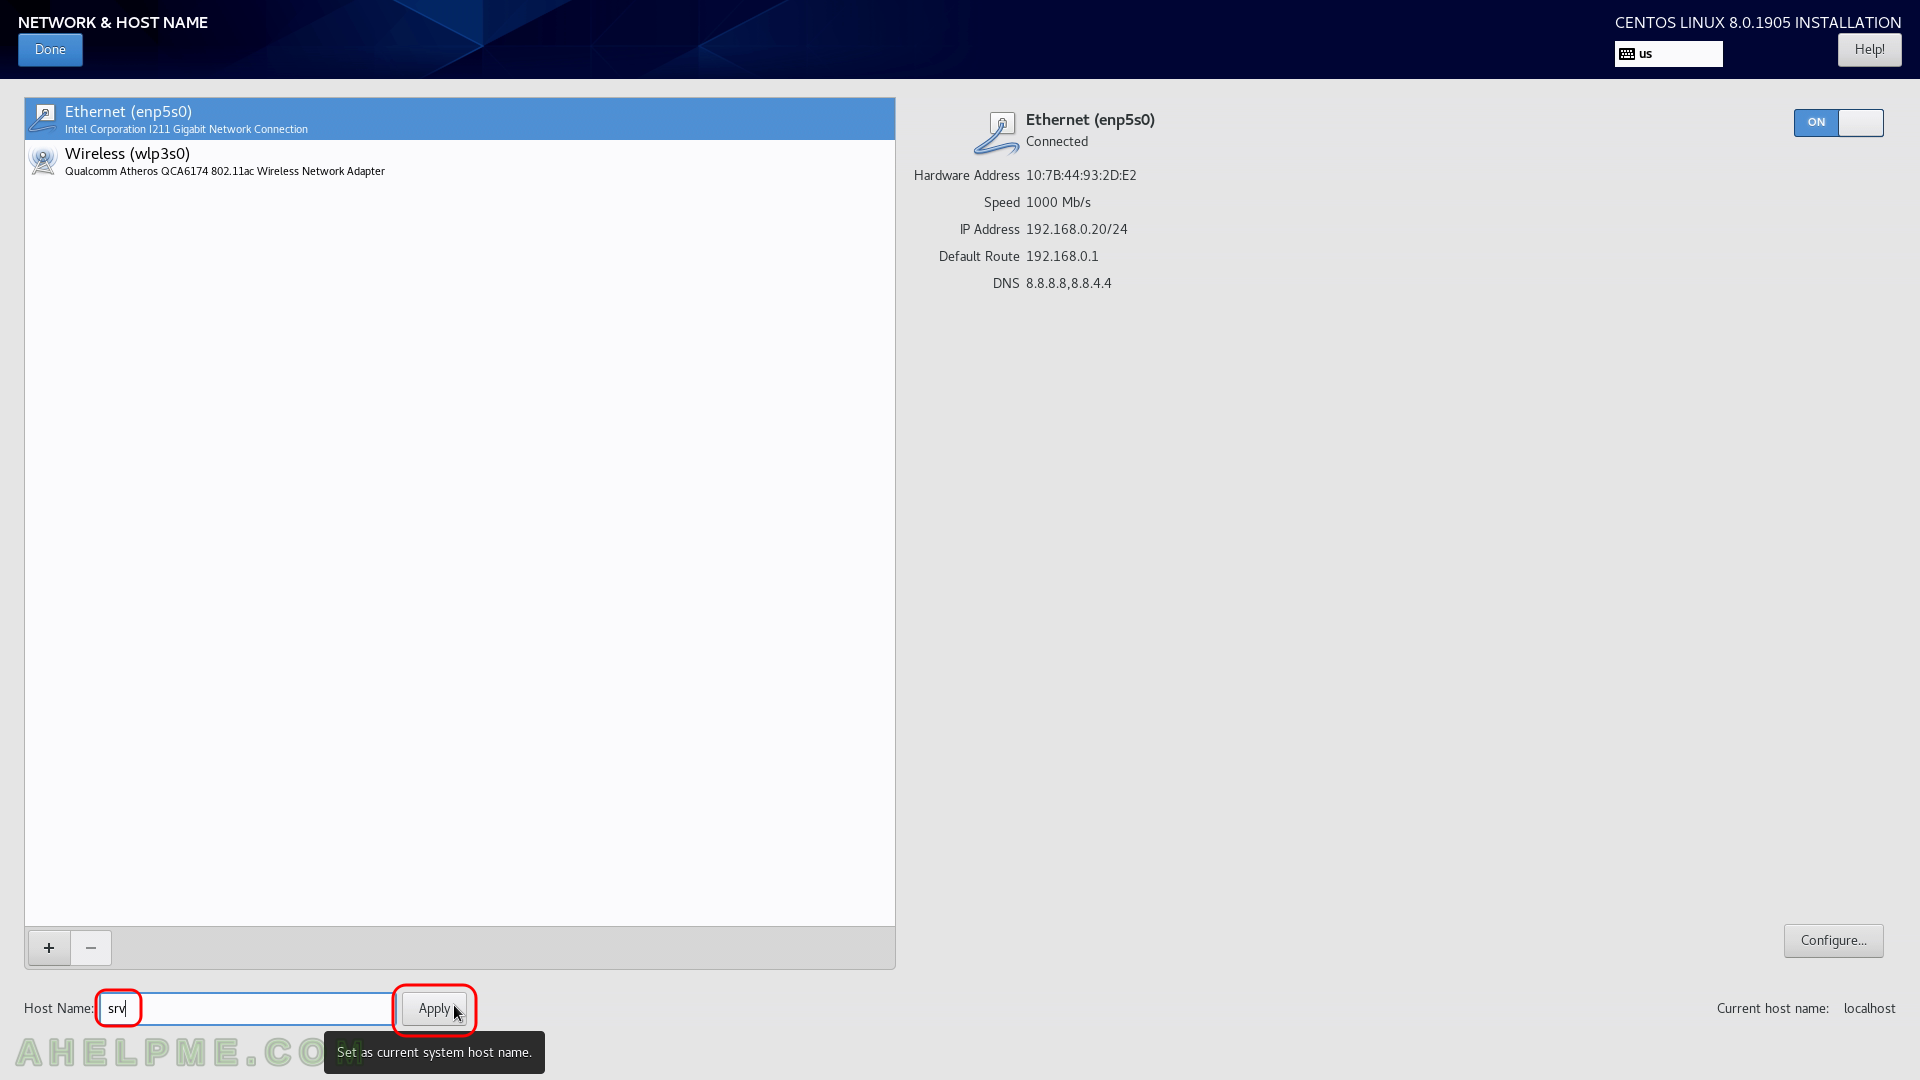
STEP 13) Set the host name of your machine in the left bottom text box and click on “Apply”.
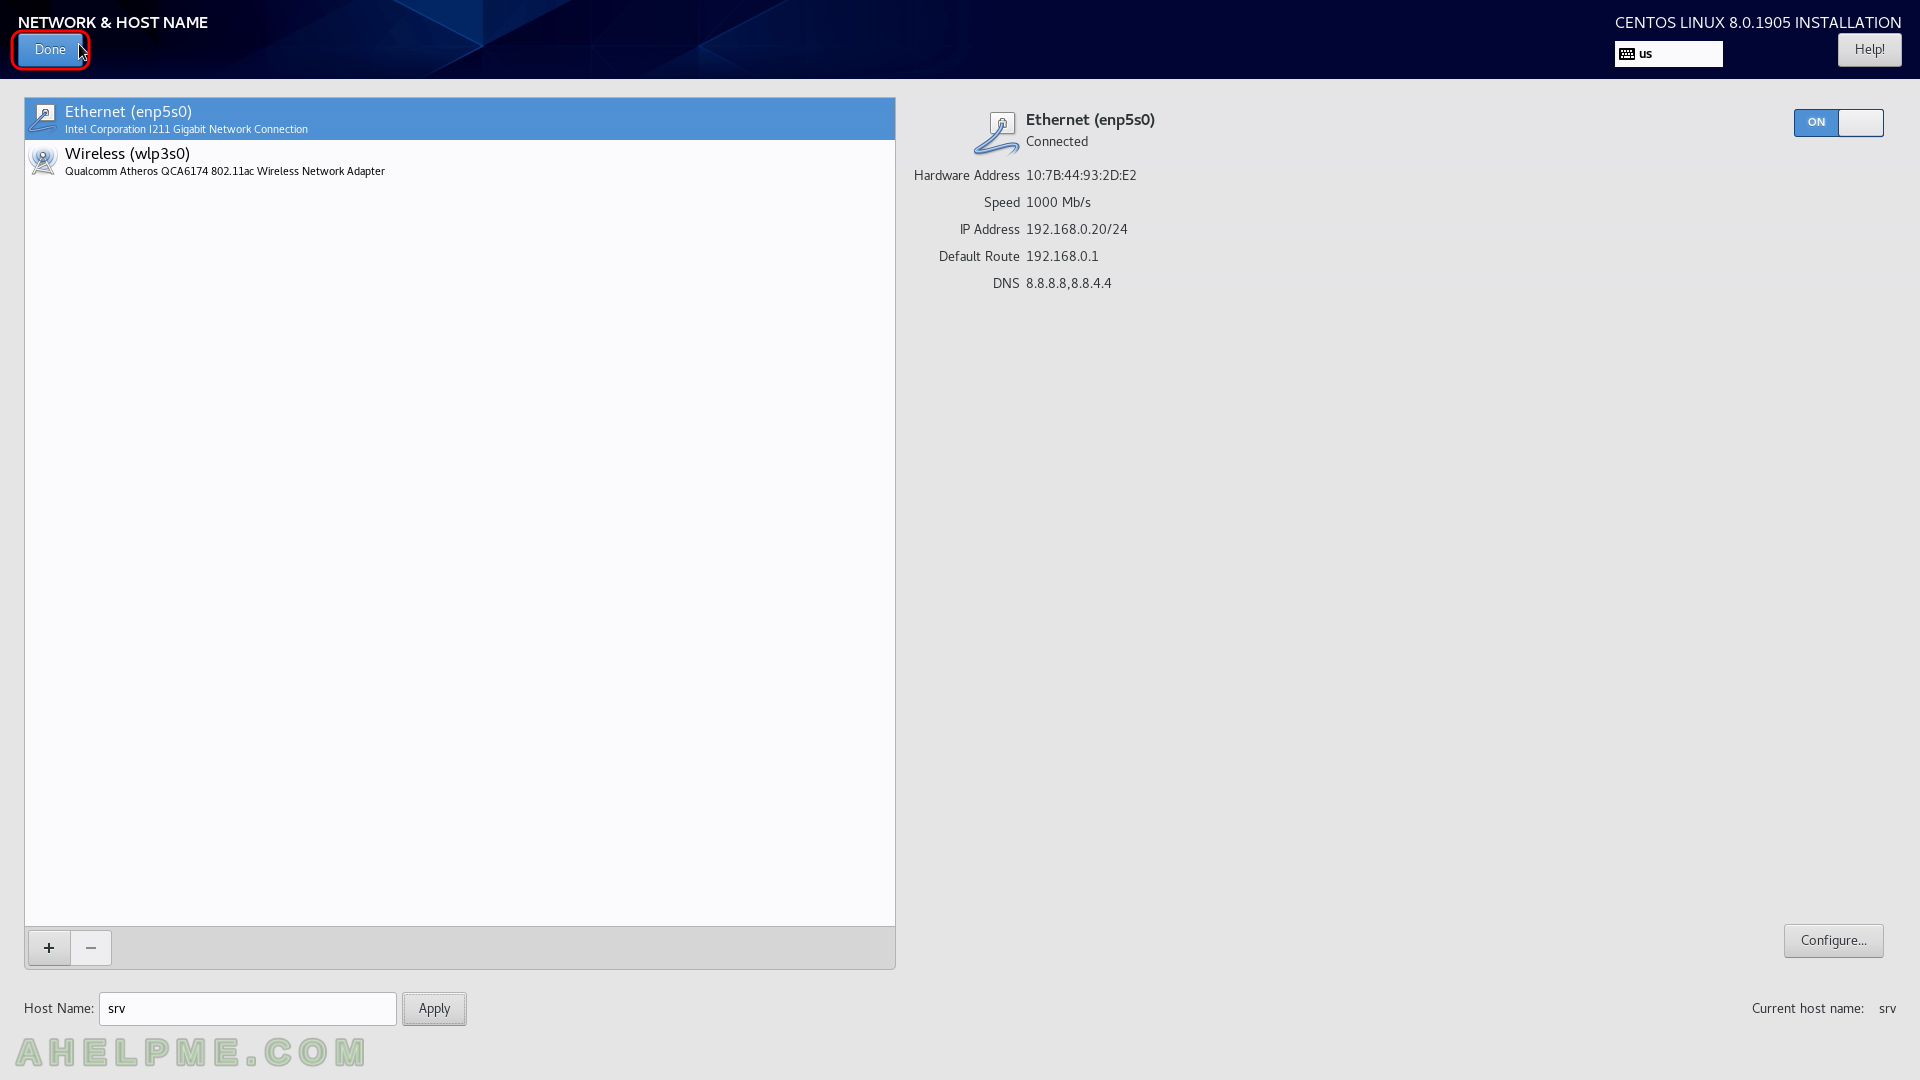
STEP 14) Click on “Done” if you are ready.
You can see our ethernet adapter enp5s0 is configured successfully it has IP and the link is up (connected to the 1000 Mb/s network).
STEP 15) Click on “Installation Source” to instruct the setup from where to download the packages.
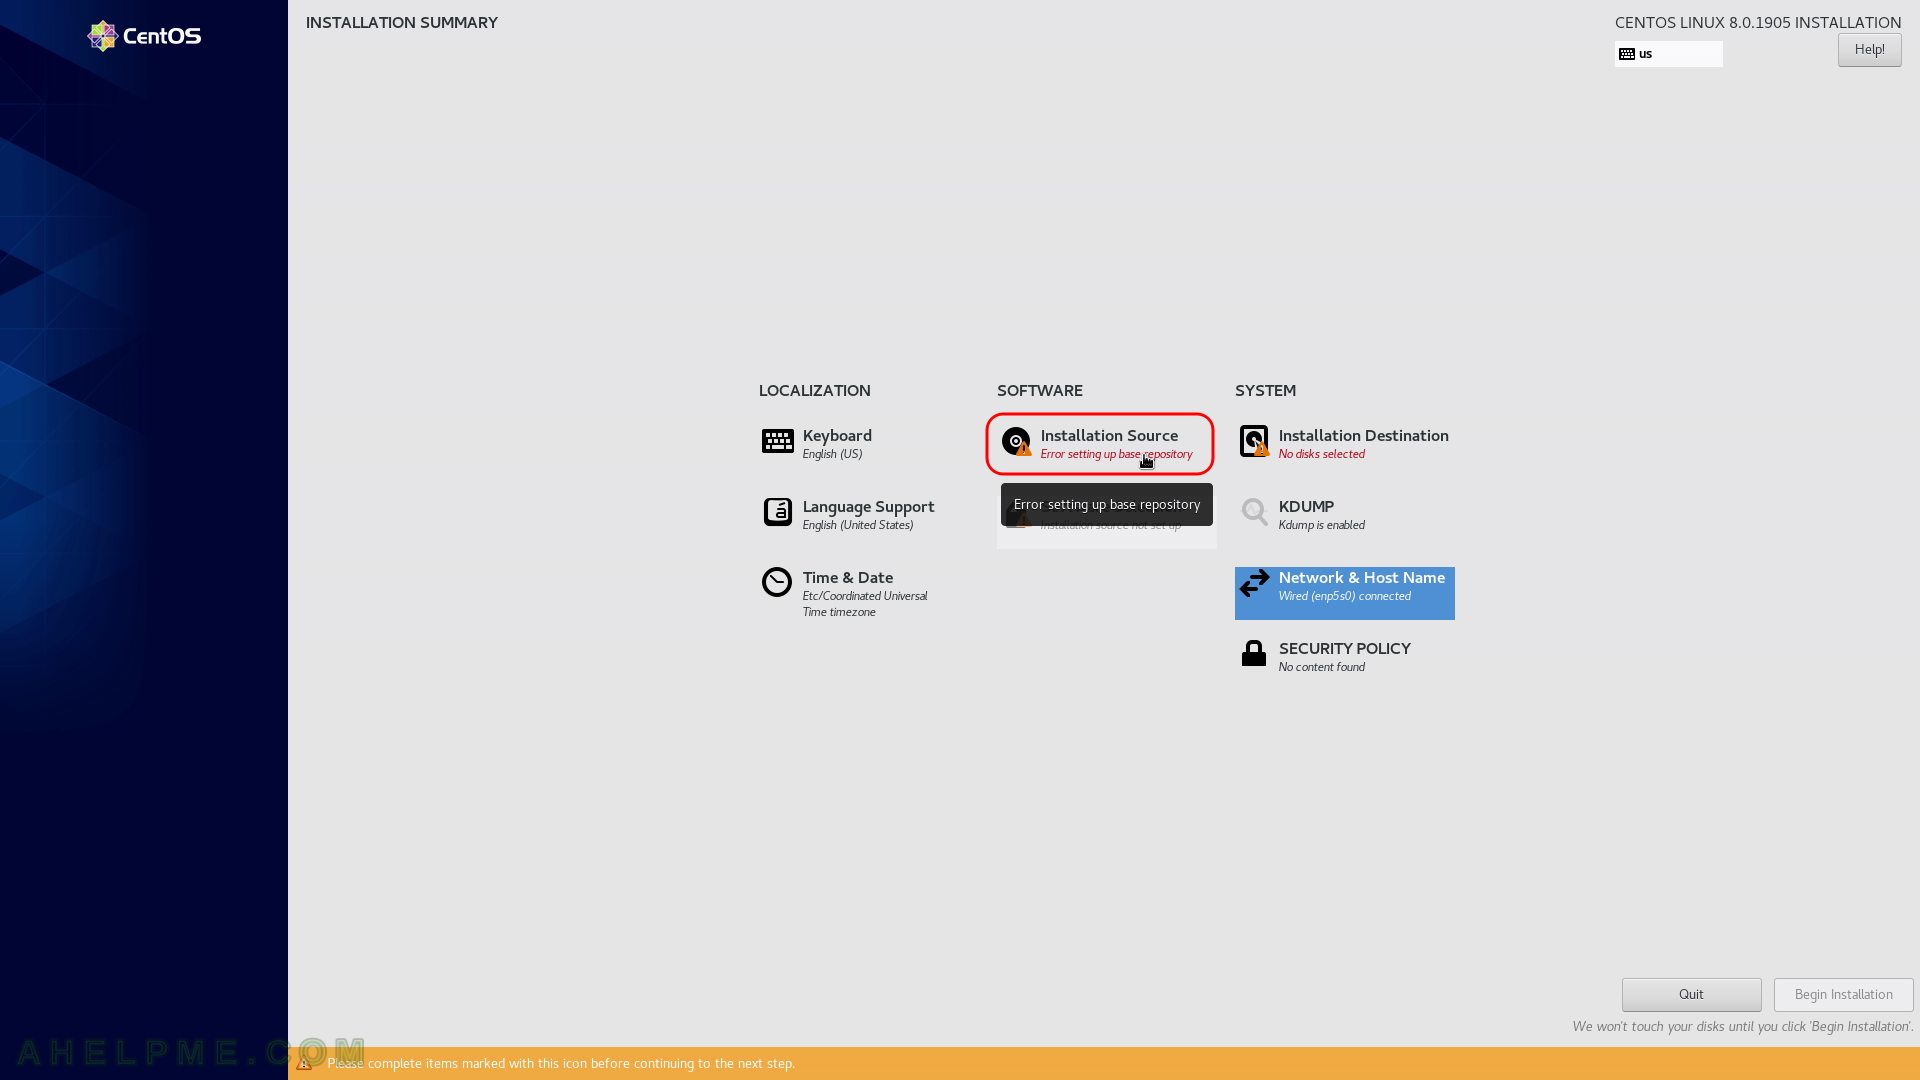
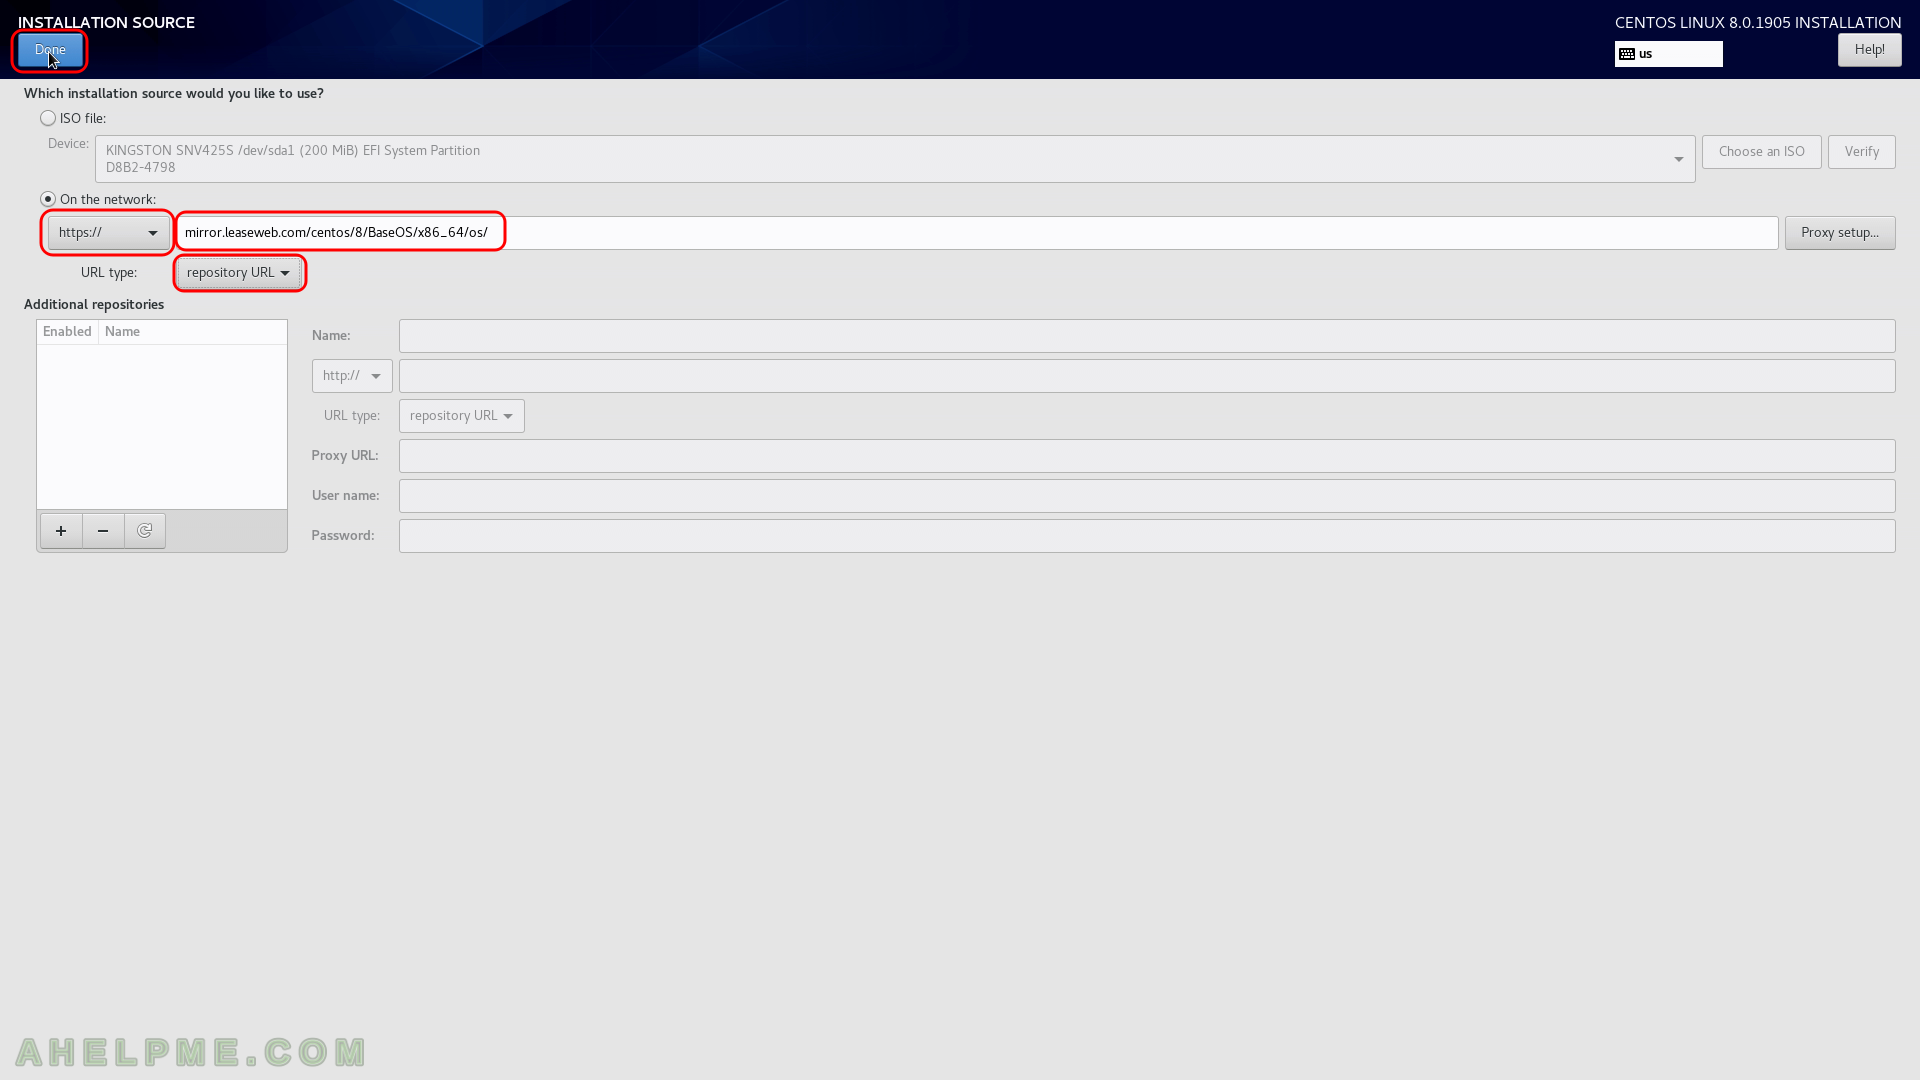
STEP 16) We use https address for the packages, one of the officials mirrors – mirror.leaseweb.com.
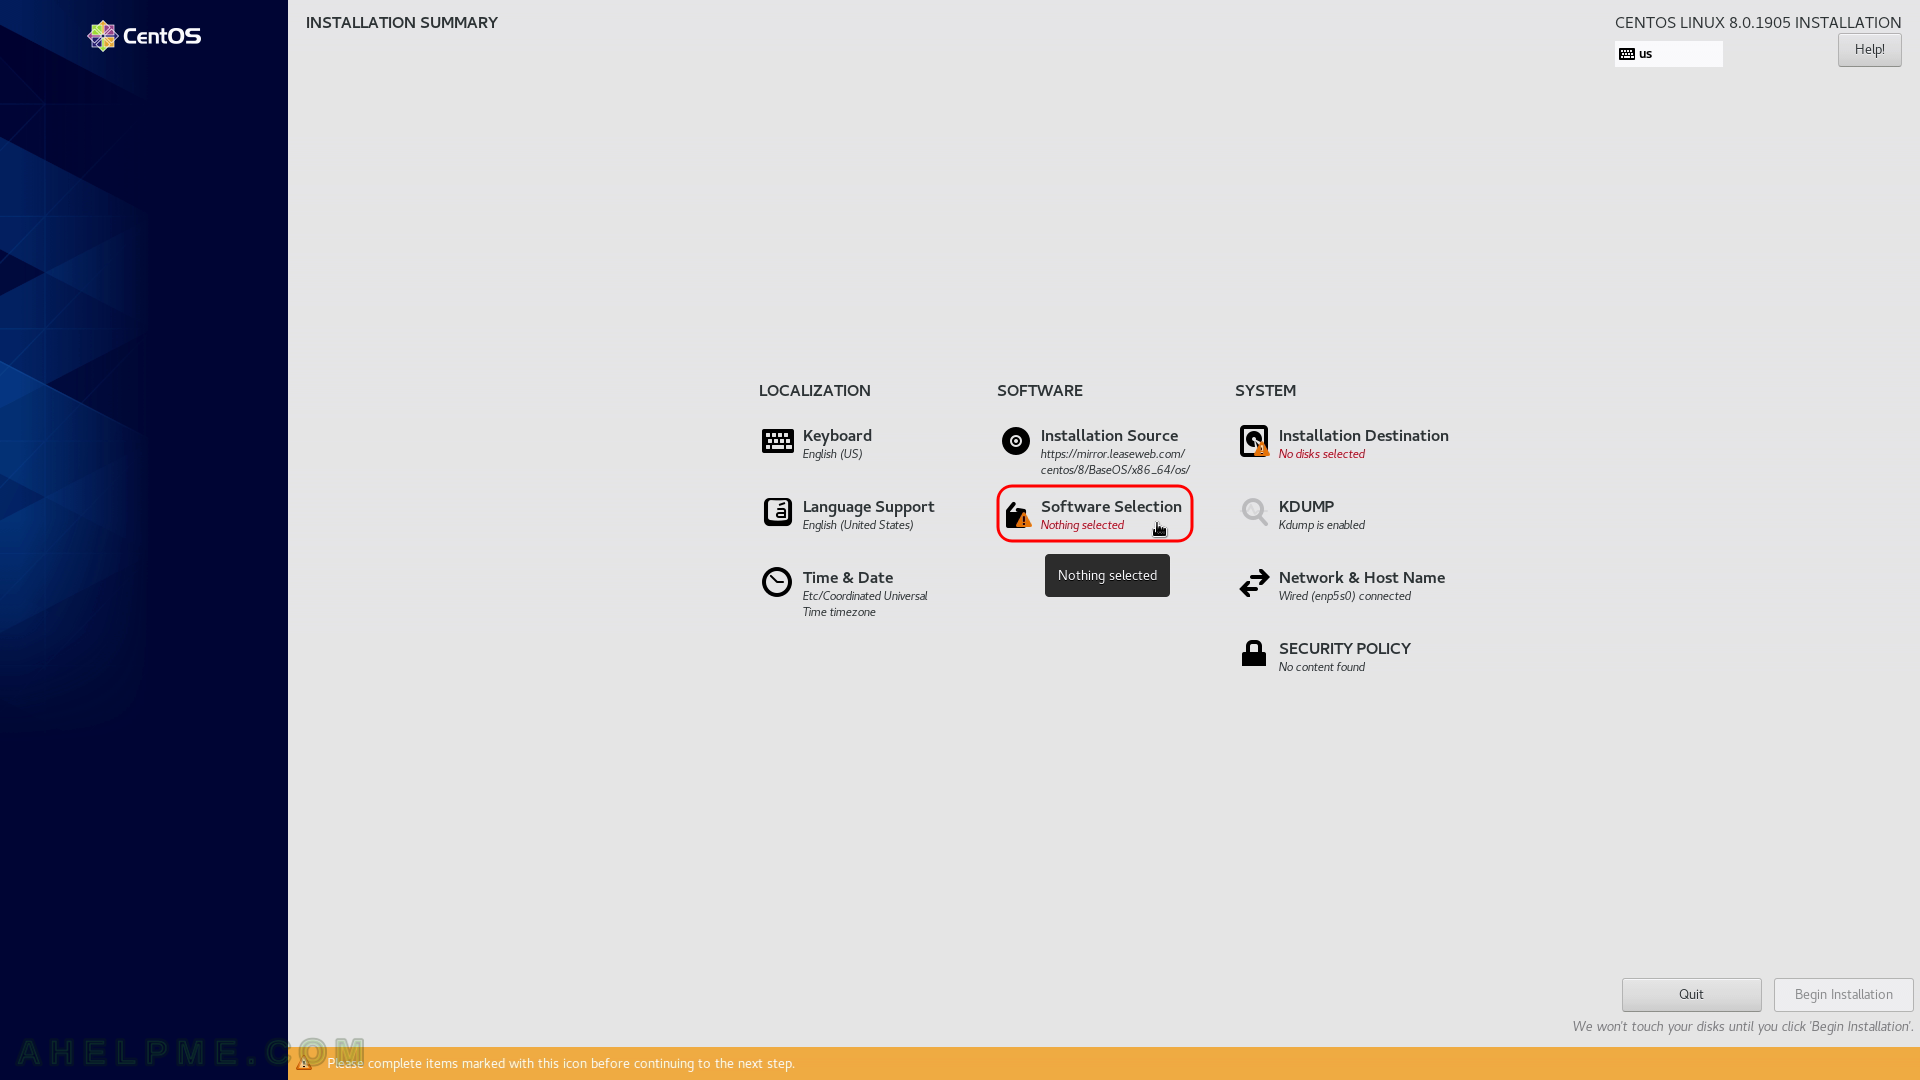
Set the method to HTTPS://, write the URL where are the packages and in our case, this is mirror.leaseweb.com/centos/8/BaseOS/x86_64/os/ and set the type of the URL to “repository URL”. Then click on “Done”. If everyhing is OK the next window you are going to see no warning on the “Installation Source” menu.
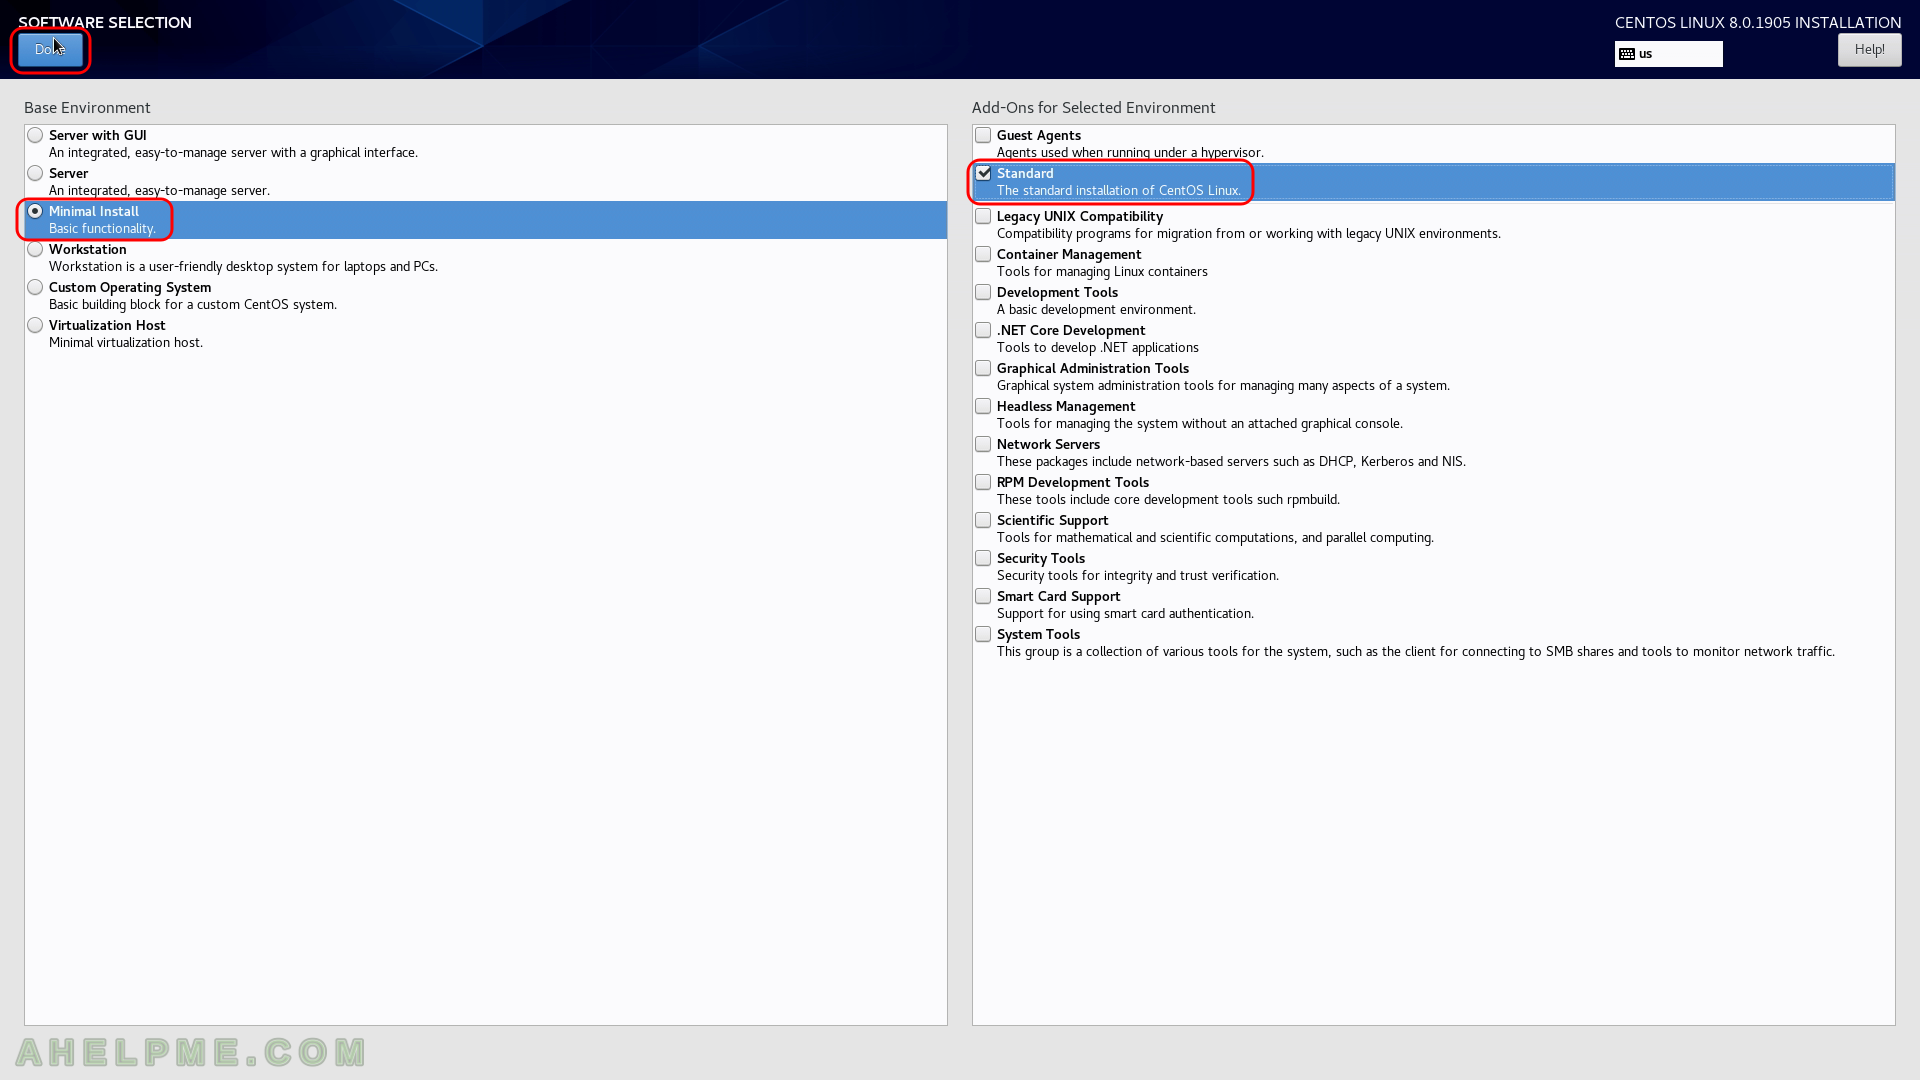
STEP 17) Select what software you would like the setup to install at first.
STEP 18) Select “Standard” form the left window and click on “Done”. This will install the minimum installation of CentOS 8.
STEP 19) Installation destination – on which device you want to install the CentOS 8.
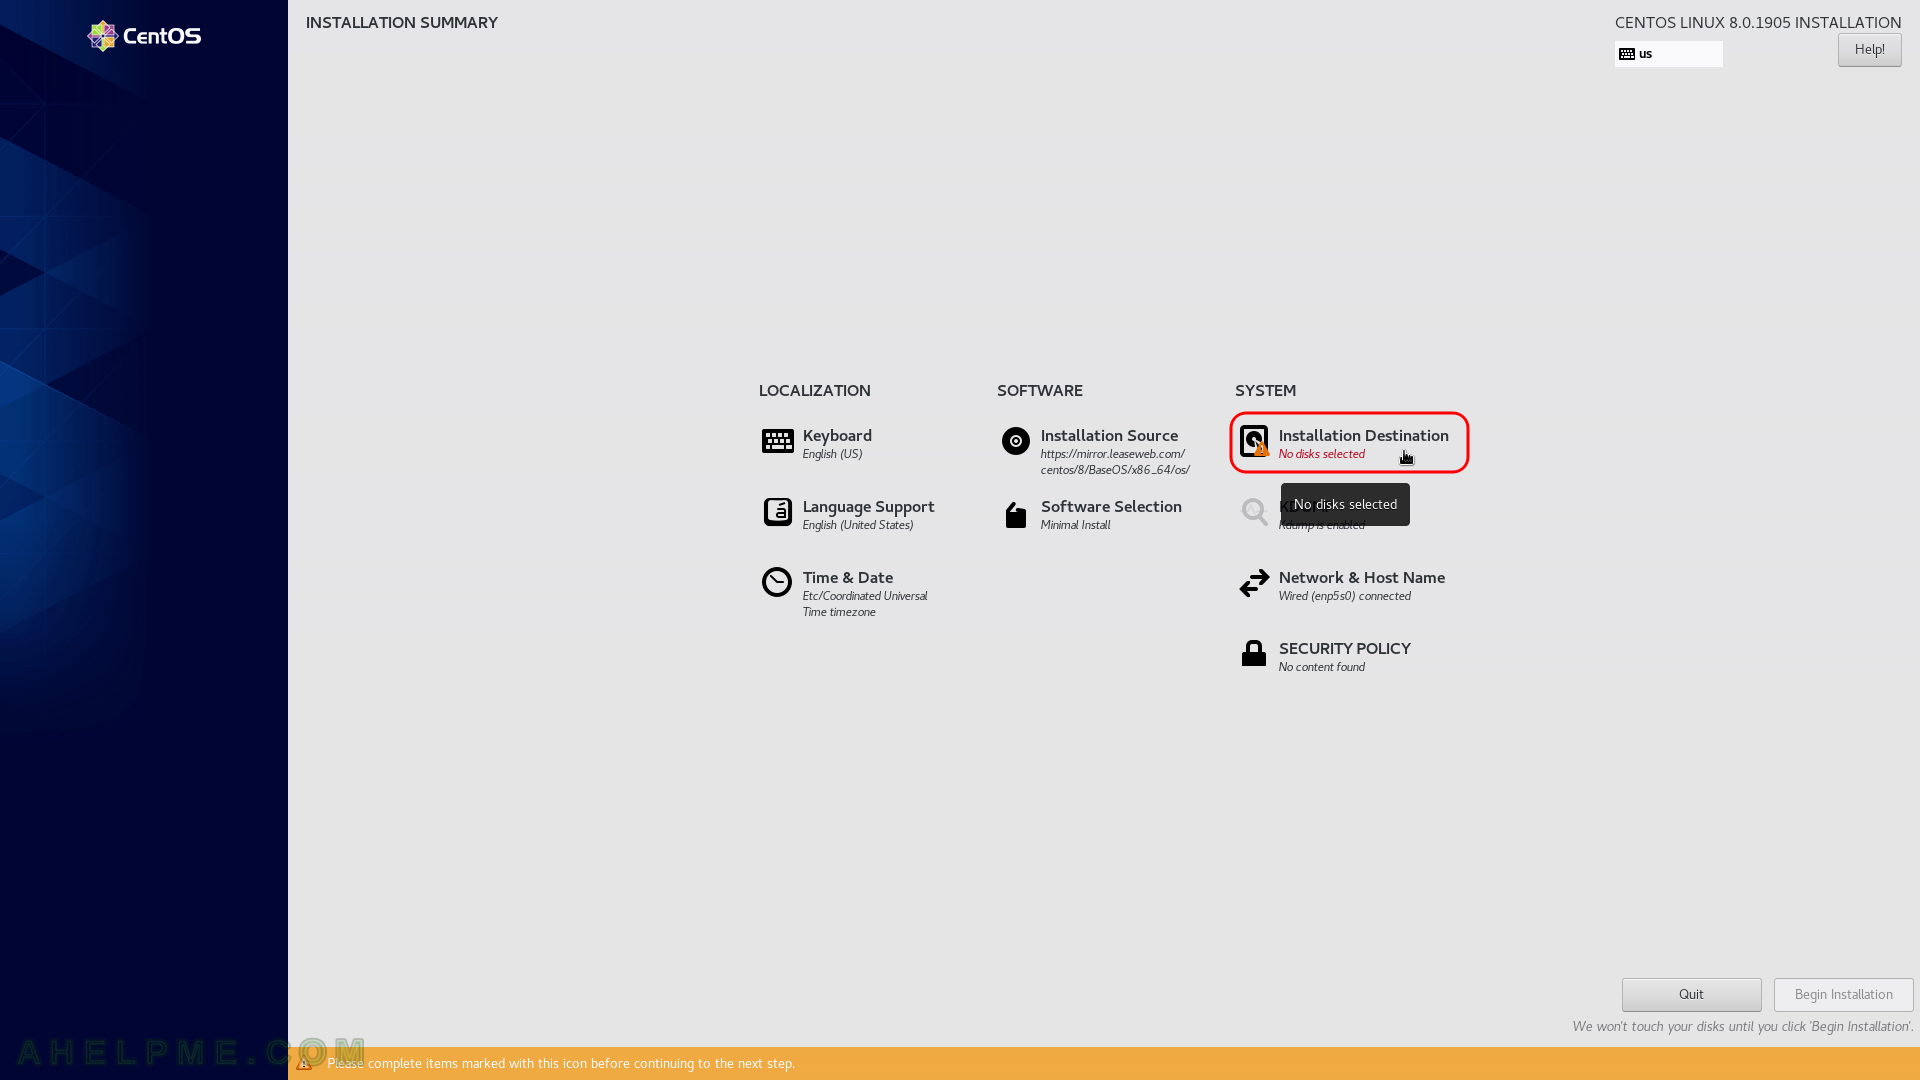
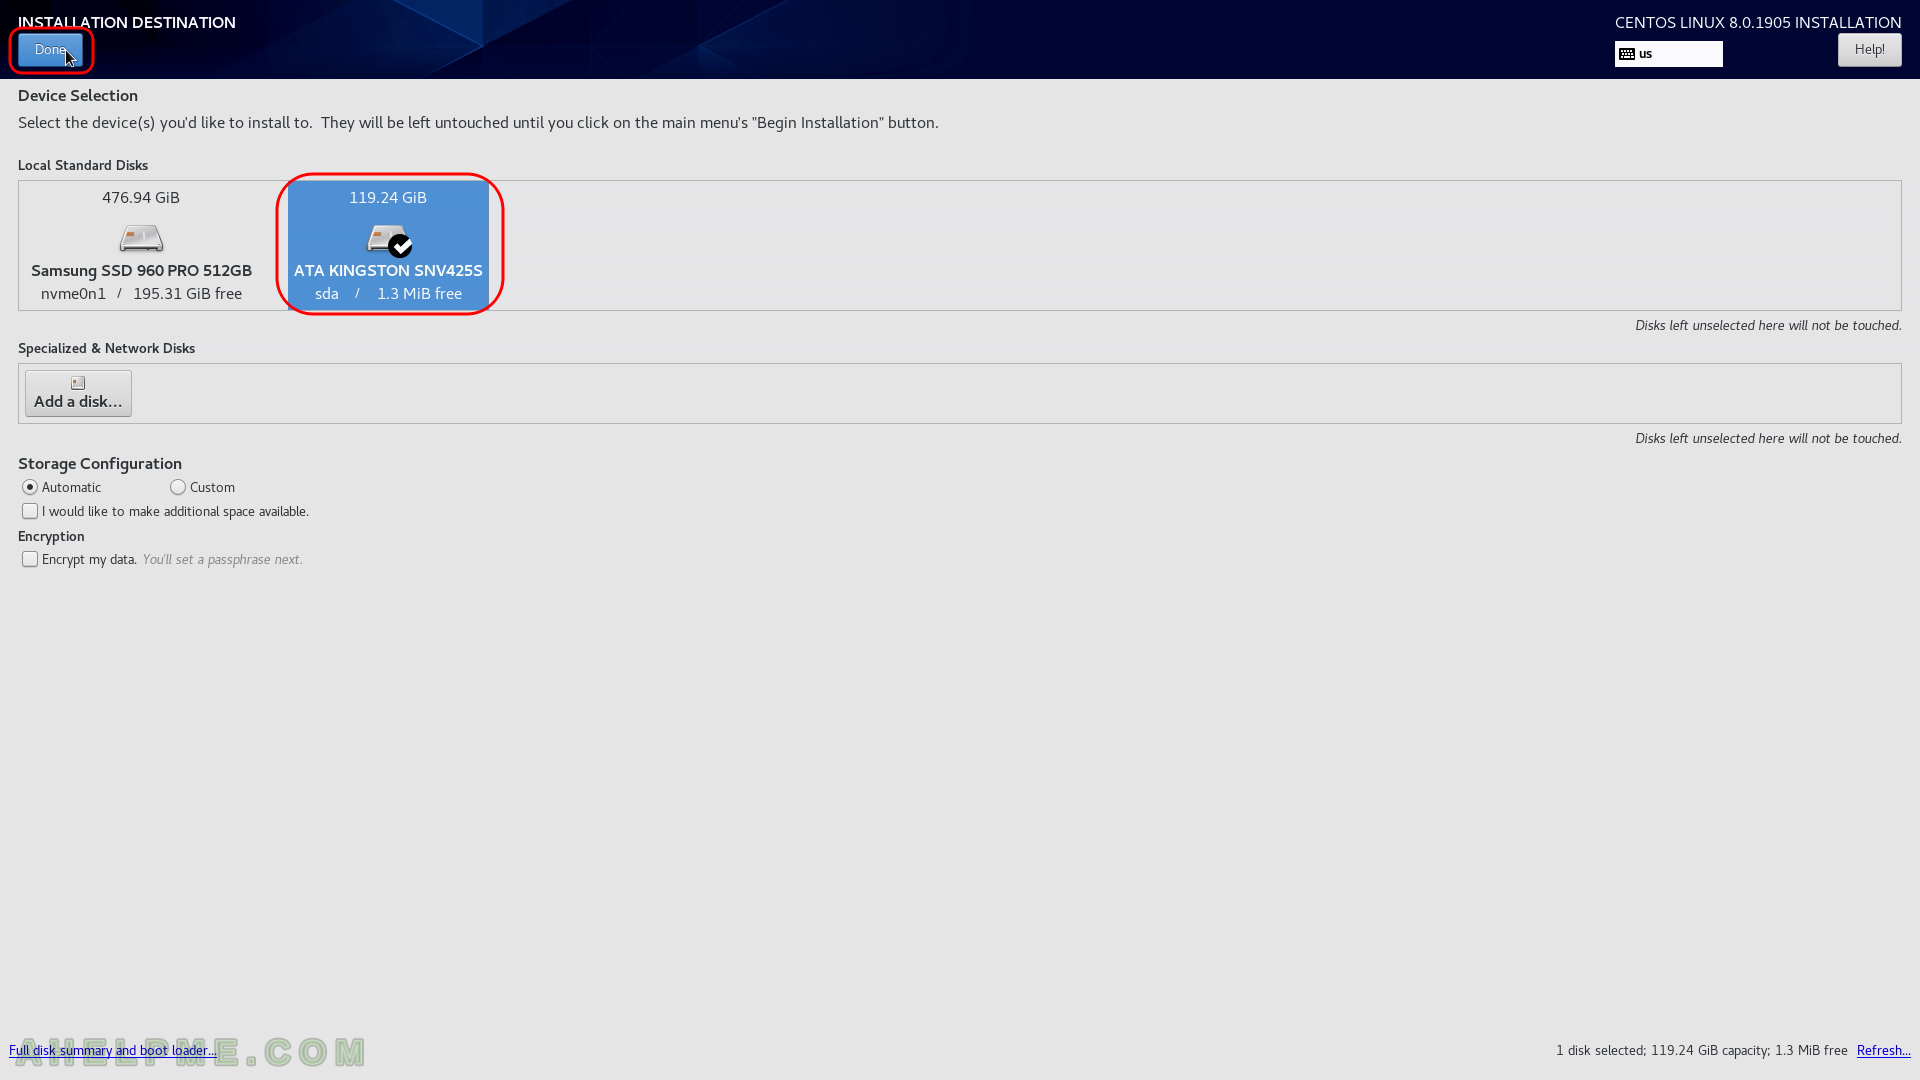
STEP 20) Installation destination – choose your disk to install CentOS 8.
Ensure the automatic storage configuration is selected. This might erase all of the data on the disk and will install a clean copy with default disk layout. If you do not have enough space on the selected disk, the setup will ask you to erase the data on the disk (next few steps will show the setup). If the disk is blank it will not ask you anything. If you want a specific installation you should choose “Custom” or “Advanced Custom(Blivet-GUI)” (these options are beoynd the scope of this article). Click on “Done”.
I am so much happy for coming across this solution. I could not figure it out passing the installation stage that has to do with software and luckily this helps a lot