Install Fedora 31 KDE Plasma Desktop (KDE GUI)

This tutorial will show you the simple steps of installing a modern Linux Distribution Fedora 31 KDE Plasma Desktop with KDE for the user graphical interface. First, we present the basic steps for installing the Operating system in addition to your present operating systems (here we have two: Windows 10) and then you can see some screenshots of the installed system and the look and feel of it. We have another tutorial showing more screenshots of the installed and working Fedora 31 (Gnome and KDE plasma) – so you can decide which of them to try first – coming soon.

The Fedora 31 KDE Plasma Desktop comes with

  • Xorg X server – 1.20.5 XWayland is used by default
  • linux kernel – 5.3.7
  • KDE Plasma version: 5.16.5
  • KDE Frameworks version: 5.61.0
  • QT version: 5.12.5

The installation process is very similar to the old Install Fedora 27 KDE Plasma Desktop and Install Fedora 29 KDE Plasma Desktop (KDE GUI). Our system is relatively new – Asus X399 with AMD Ryzen Threadripper 1950X and NVIDIA 1080 TI and the setup loaded successfully and there were no problems till the end.

We used the following ISO for the installation process:

https://download.fedoraproject.org/pub/fedora/linux/releases/31/Spins/x86_64/iso/Fedora-KDE-Live-x86_64-31-1.9.iso

It is a LIVE image so you can try it before installing it. The easiest way is just to download the image and burn it to a DVD disk and then follow the installation below:

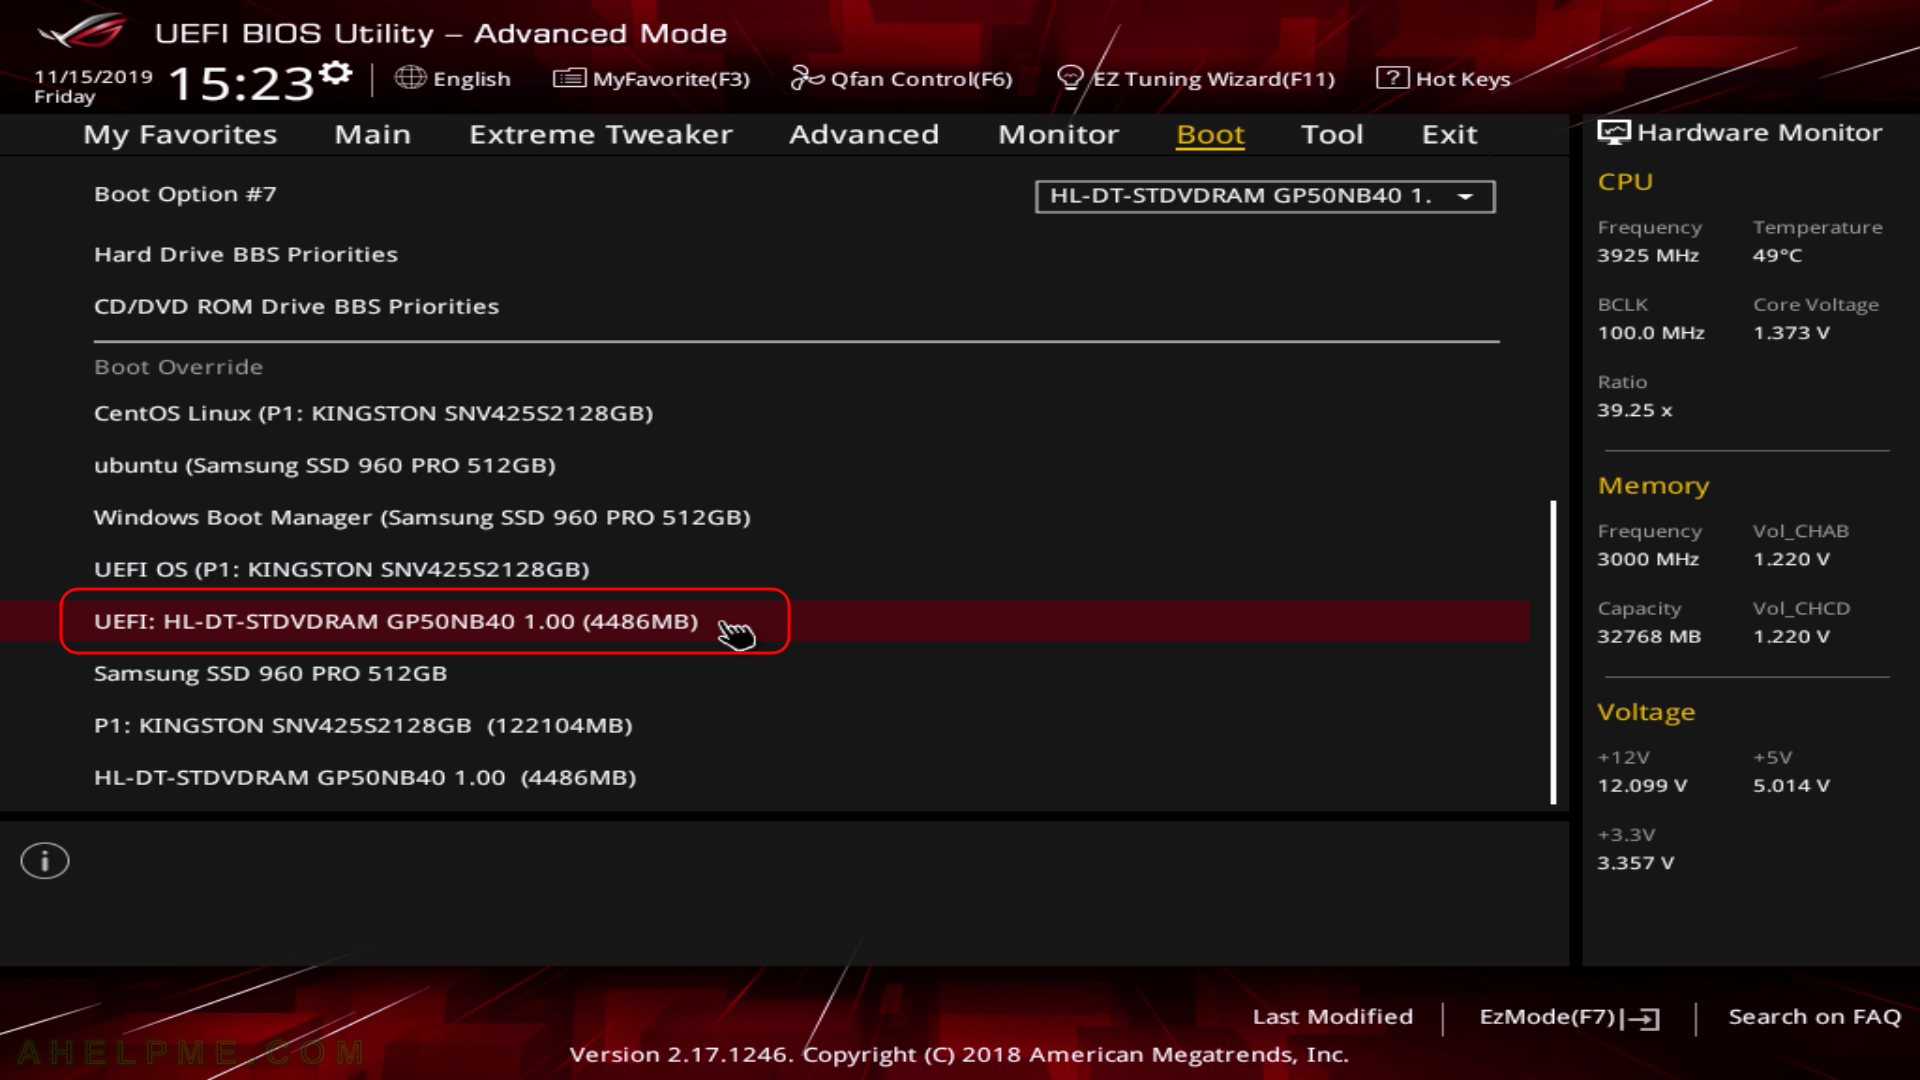
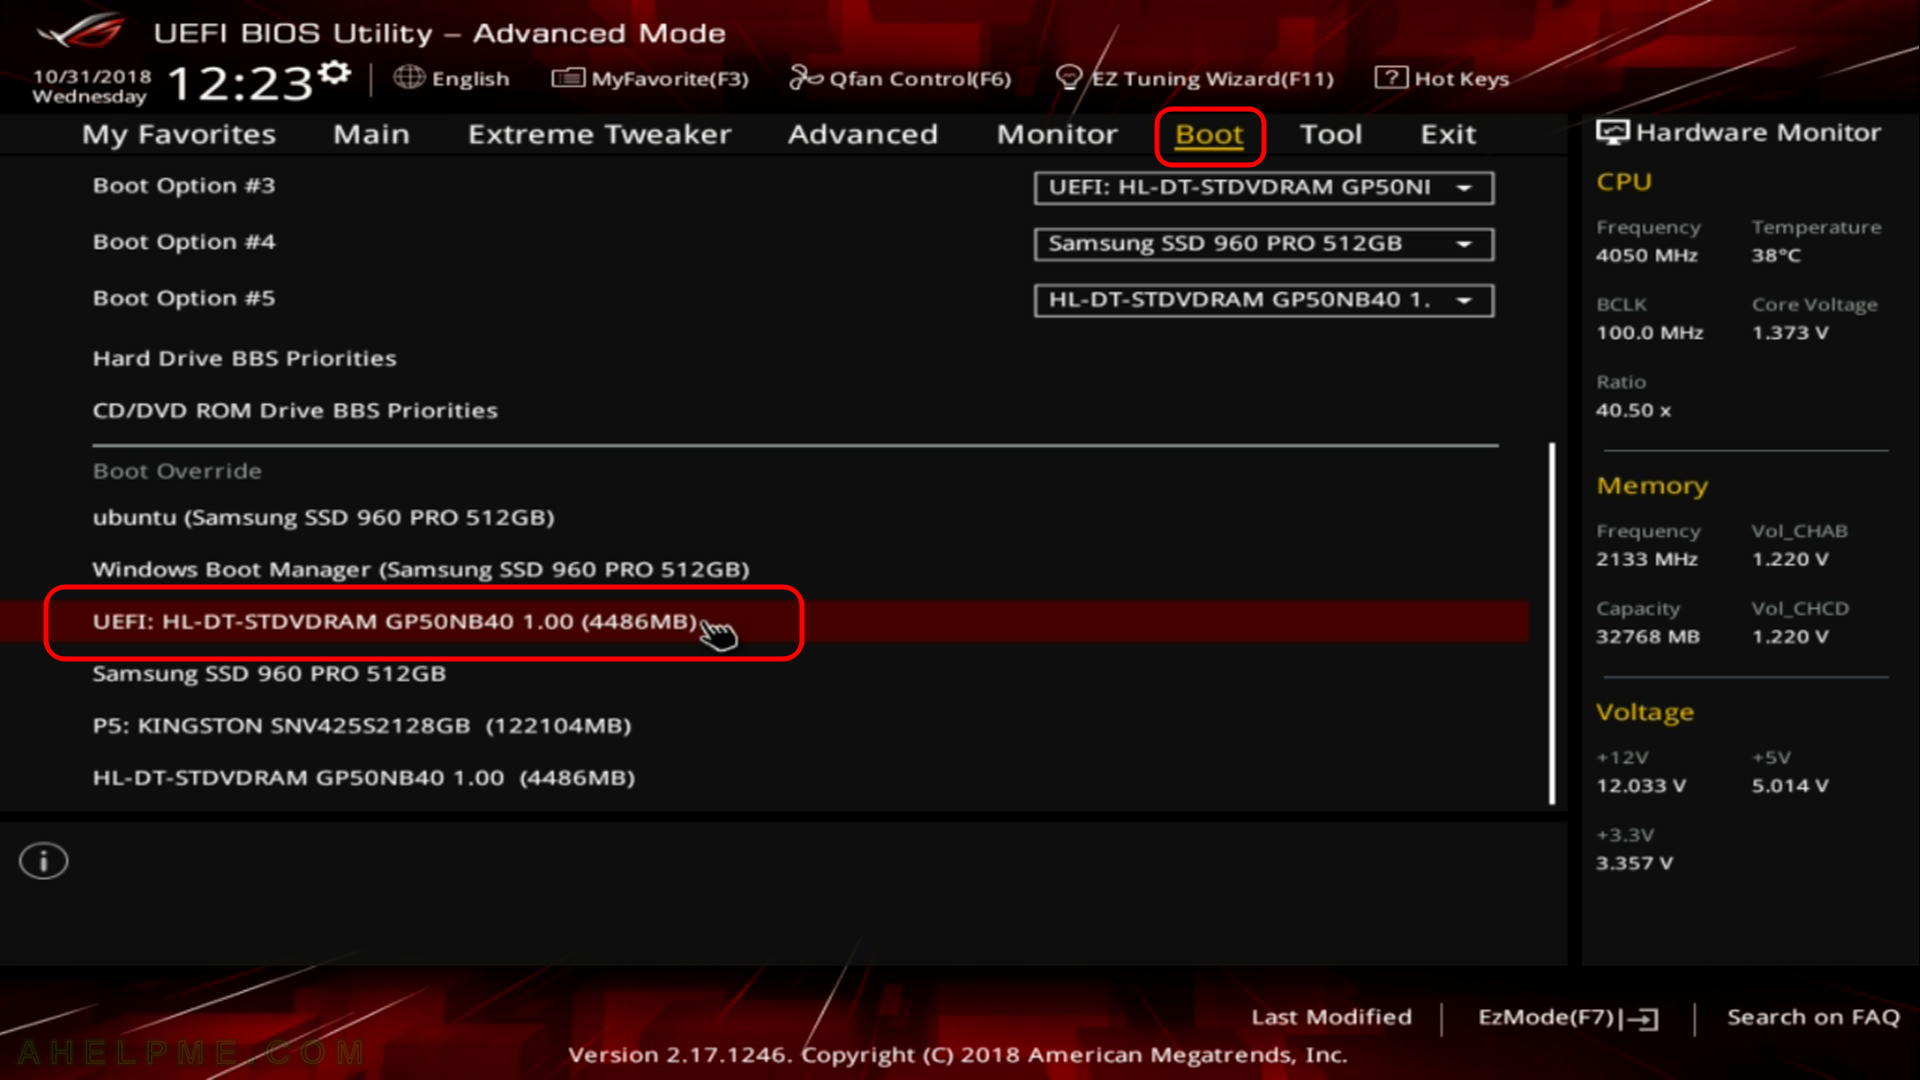
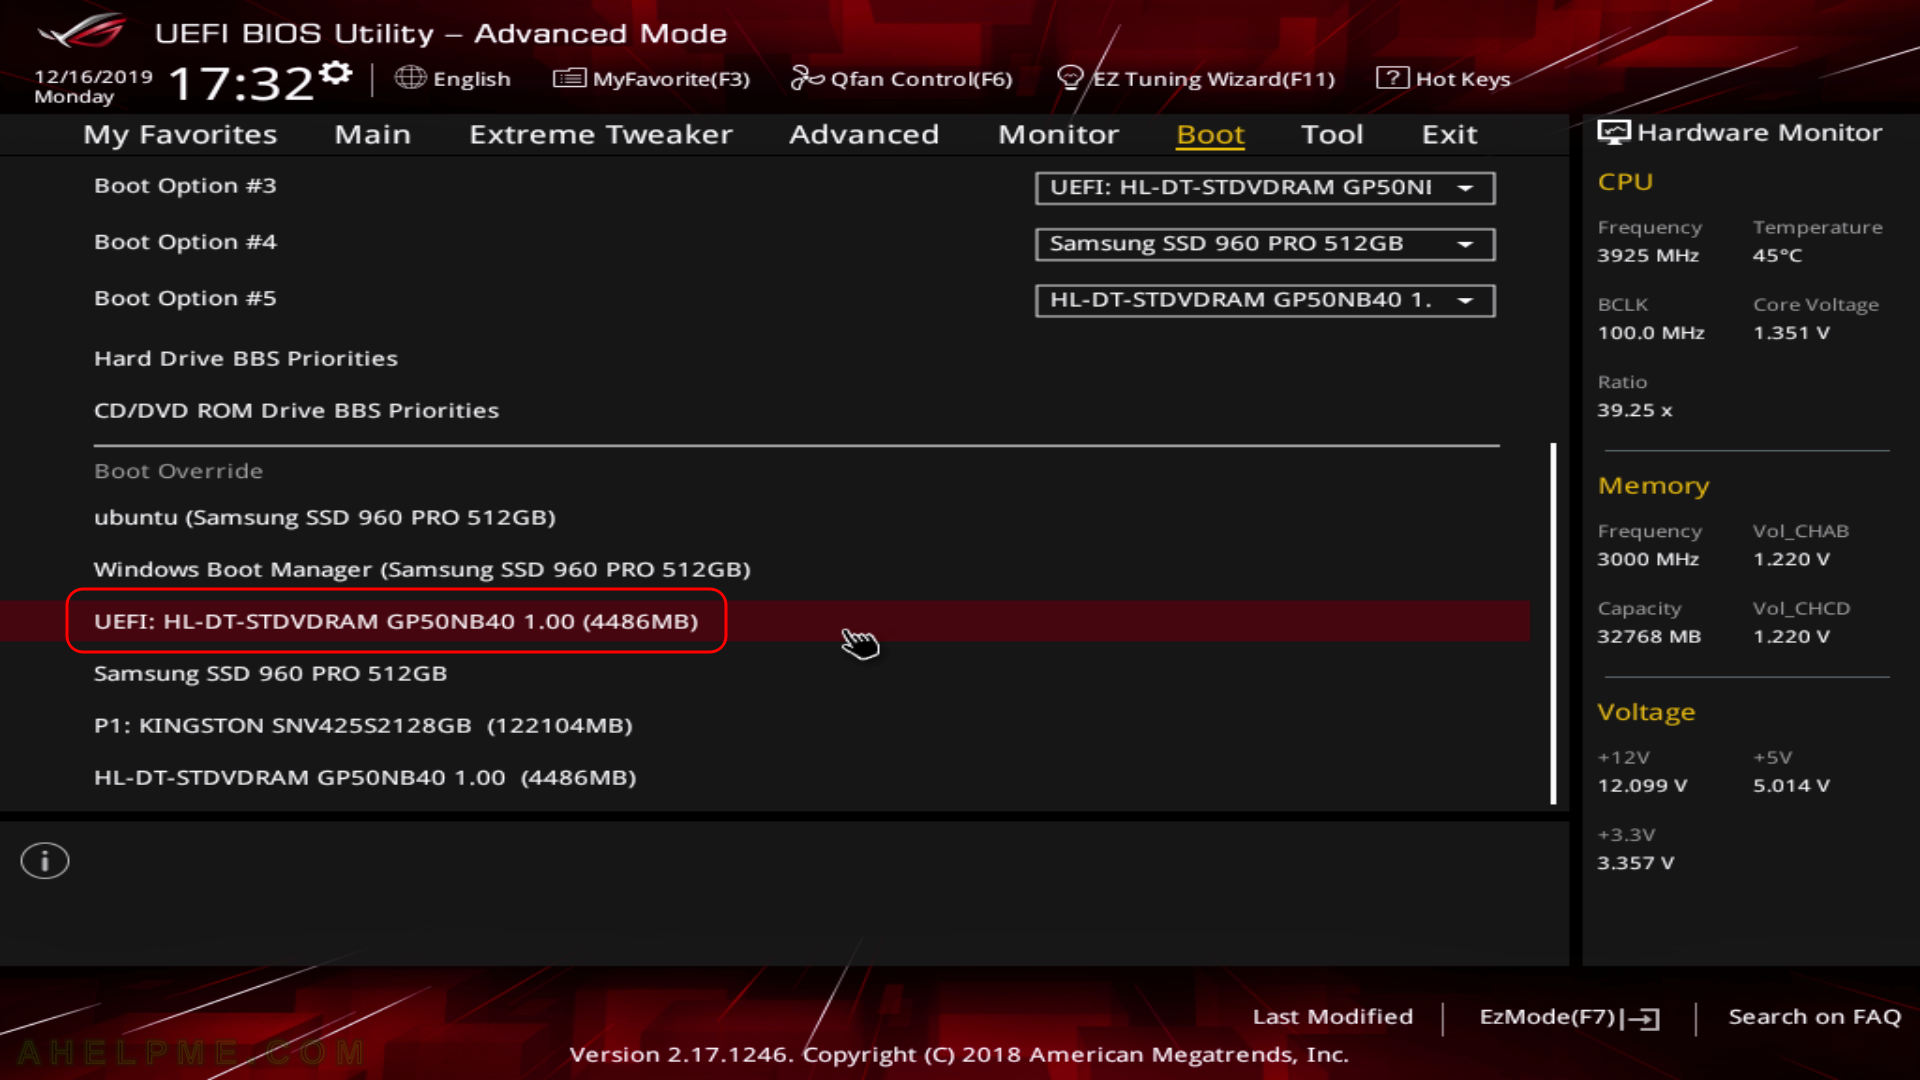
SCREENSHOT 1) Here is our “UEFI BIOS->Boot->Boot Override” and in most modern motherboard you can choose to override the default boot devices.

Choose the “UEFI: HL-DT-STDVDRAM…” to boot and install Fedora KDE Plasma Desktop 31 with UEFI support. You should do this, because most of the new hardware like video cards would not work properly without beeing in UEFI mode.
main menu
Boot from DVD/USB Installation

Keep on reading!

Gentoo – UnicodeEncodeError: ‘ascii’ codec can’t encode character ‘\xc4’ in position 83: ordinal not in range(128)

Recently emerging package =dev-lang/go-1.13.4 under Gentoo failed on one of our virtual servers with:

--- /usr/lib/go/test/fixedbugs/issue27836.dir/
Traceback (most recent call last):
  File "/usr/lib64/python3.6/site-packages/portage/dbapi/_MergeProcess.py", line 234, in _spawn
    prev_mtimes=self.prev_mtimes, counter=counter)
  File "/usr/lib64/python3.6/site-packages/portage/dbapi/vartree.py", line 1788, in wrapper
    return f(self, *args, **kwargs)
  File "/usr/lib64/python3.6/site-packages/portage/dbapi/vartree.py", line 5385, in merge
    counter=counter)
  File "/usr/lib64/python3.6/site-packages/portage/dbapi/vartree.py", line 4548, in treewalk
    rval = self._merge_contents(srcroot, destroot, cfgfiledict)
  File "/usr/lib64/python3.6/site-packages/portage/dbapi/vartree.py", line 4828, in _merge_contents
    self.settings["EPREFIX"].lstrip(os.sep), cfgfiledict, mymtime):
  File "/usr/lib64/python3.6/site-packages/portage/dbapi/vartree.py", line 5225, in mergeme
    encoding=_encodings['merge'])
  File "/usr/lib64/python3.6/site-packages/portage/util/movefile.py", line 256, in movefile
    selinux.rename(src, dest)
  File "/usr/lib64/python3.6/site-packages/portage/__init__.py", line 246, in __call__
    rval = self._func(*wrapped_args, **wrapped_kwargs)
  File "/usr/lib64/python3.6/site-packages/portage/_selinux.py", line 71, in rename
    os.rename(src, dest)
UnicodeEncodeError: 'ascii' codec can't encode character '\xc4' in position 83: ordinal not in range(128)

>>> Failed to install dev-lang/go-1.13.4, Log file:

>>>  '/var/tmp/portage/dev-lang/go-1.13.4/temp/build.log'

The above log shows that the emerge fails in the installation phase when moving the files to the proper path in the system. The problem there is a non-ASCII character in the file name or path, but the environment is set to use ASCII as language.

The solution is to check if the environment LANG is set and what it contains. In this case, we should set the LANG environment to utf8.

export LANG=en_US.UTF-8

Most of the cases this kind of error could occur with virtual servers, docker (or the other kind of containers like lxc, podman and so on) containers and chroot jails or screens with changed user with su or sudo! In our case, the LANG just got missed because of a switch user procedure in a container and the emerge failed with the above error. When the LANG is missing probably the default value is “C”. In fact, check not only LANG but also the “LC_ALL” environment variable (it may have different value, which is wrong!), which also should be “en_US.UTF-8”:

export LC_ALL=en_US.UTF-8

Or try removing it at all with

unset LC_ALL

Keep on reading!

Install Fedora Workstation 31 (Gnome GUI)

This tutorial will show you the simple steps of installing a modern Linux Distribution like Fedora 31 Workstation with Gnome for the user graphical interface. First, we present the basic steps for installing the Operating system in addition to your present operating systems (here we also have Windows 10) and then you can see some screenshots of the installed system and the look and feel of it. We have other tutorials showing more screenshots of the installed and working Fedora 31 (Gnome and KDE plasma) – so you can decide which of them to try first – coming soon.

The Fedora 31 Workstation comes with

  • Xorg X server – 1.20.5 XWayland is used by default
  • GNOME (the GUI) – 3.34.1
  • linux kernel – 5.3.7

Check out our article about what software is included in comming soon.

The installation process is very similar to the old Fedora Workstation 27, Fedora Workstation 28, Fedora Workstation 29, Install Fedora Workstation 30 (Gnome GUI) , in fact the main difference is the creation of an user, which the setup is not responsible anymore, the creation of an user is done by the first boot after installation. Our system was pretty good – Asus X399 with AMD Ryzen Threadripper 1950X and NVIDIA 1080 Ti and the setup loaded successfully and there were no problems till the end.

We used the following ISO for the installation process:

https://download.fedoraproject.org/pub/fedora/linux/releases/31/Workstation/x86_64/iso/Fedora-Workstation-Live-x86_64-31-1.9.iso

It is a LIVE image so you can try it before installing. The easiest way is just to download the image and burn it to a DVD disk and then follow the installation below:

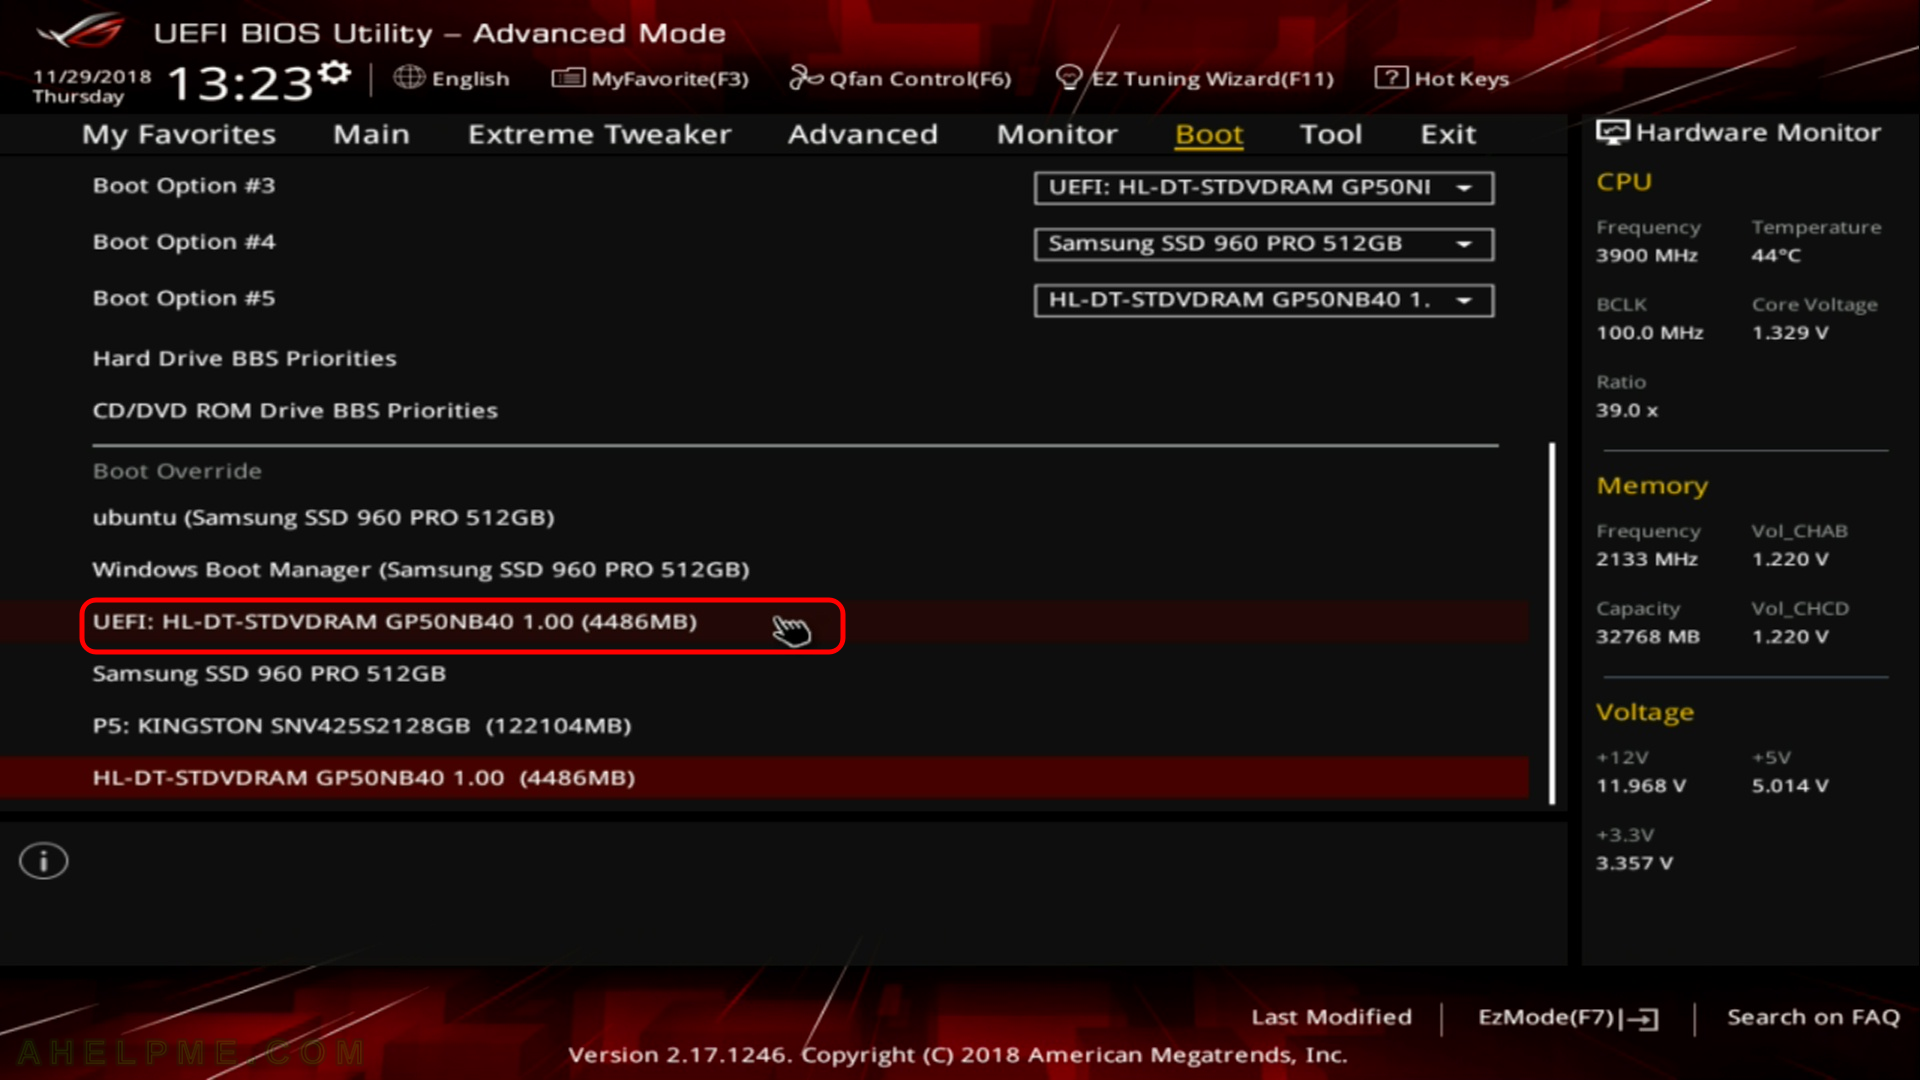
SCREENSHOT 1) Here is our “UEFI BIOS->Boot->Boot Override” and in most modern motherboard you can choose to override the default boot devices.

Choose the “UEFI: HL-DT-STDVDRAM…” to boot and install Fedora Workstation 31 with UEFI support. You should do this, because most of the new hardware like video cards would not work properly without beeing in UEFI mode.

main menu
Boot from DVD/USB Installation

Keep on reading!

Install CentOS 8 over the old OS and preserve the storage partitions

Always put your root partition separate from the storage (aka data) partitions. root partition should be only for system files and nothing more! Keeping this simple rule you may easily change your operating system (or clean install or clean upgrade) without deleting the user’s data thus preserving the old storage partitions.
Our storage has 2 storage partitions, which means they hosts only data and no system files and there are separate partitions for Linux booting (grub2) and system files (root partition). Here is the partitions layout:

[root@srv0 ~]# parted /dev/sda --script print
Model: AVAGO SMC3108 (scsi)
Disk /dev/sda: 48.0TB
Sector size (logical/physical): 512B/4096B
Partition Table: gpt
Disk Flags: 

Number  Start   End     Size    File system  Name  Flags
 1      1049kB  53.7GB  53.7GB                     raid
 2      53.7GB  54.8GB  1075MB                     raid
 3      54.8GB  55.0GB  211MB   fat16              raid
 4      55.0GB  69.4GB  14.4GB                     raid
 5      71.8GB  48.0TB  47.9TB  ext4

[root@srv0 ~]# parted /dev/sdb --script print
Model: AVAGO SMC3108 (scsi)
Disk /dev/sdb: 48.0TB
Sector size (logical/physical): 512B/4096B
Partition Table: gpt
Disk Flags: 

Number  Start   End     Size    File system  Name  Flags
 1      1049kB  53.7GB  53.7GB                     raid
 2      53.7GB  54.8GB  1075MB                     raid
 3      54.8GB  55.0GB  211MB   fat16              raid
 4      55.0GB  69.4GB  14.4GB                     raid
 5      71.8GB  48.0TB  47.9TB  ext4
[root@srv0 ~]# df -h
Filesystem      Size  Used Avail Use% Mounted on
devtmpfs         16G     0   16G   0% /dev
tmpfs            16G     0   16G   0% /dev/shm
tmpfs            16G  250M   16G   2% /run
tmpfs            16G     0   16G   0% /sys/fs/cgroup
/dev/md127       50G  1.7G   45G   4% /
/dev/md125      991M  133M  792M  15% /boot
/dev/md124      201M   12M  190M   6% /boot/efi
/dev/sda5        44T   23T   22T  52% /mnt/storage1
/dev/sdb5        44T   14T   30T  32% /mnt/storage2
tmpfs           3.2G     0  3.2G   0% /run/user/0

Of course, when there are partitions above 2T the GPT is mandatory.
You can skip the software RAID1 setup if you use only one controller or you have system partitions only in one disk (virtual drive and so on). Here we have two hardware controllers, which we want to use both for the system partitions.
4 RAID1 devices:

  1. EFI partition (/boot/efi)
  2. swap partition
  3. boot parition (/boot)
  4. root partition (/)

The best practice is have total between 30G and 50G for the 4 partitions (in fact, boot partition could be skipped). Have in mind most modern Linux distributions cannot be installed on less than 10G~20G and for optimal results just separate between 30G and 50G for 4 partitions above (or 3 if you choose to skip the boot one).

Upgrade to CentOS 8 with clean install over our old CentOS 7 system partitions preserving the big data partitions.

Couple of things before start:

  • UEFI installation will be selected. So boot in UEFI mode.
  • IPMI KVM is used to install the new Linux distribution – CentOS 8
  • The installation disk is mounted in the Virtual CD/DVD IPMI KVM device – with Mount and boot ISO file from windows share in Supermicro IPMI Virtual media (CD-ROM)
  • All system parititions will be removed (grub, boot, root) and a clean minimal installation will be performed.
  • Network installation – using CentOS-8-x86_64-1905-boot.iso

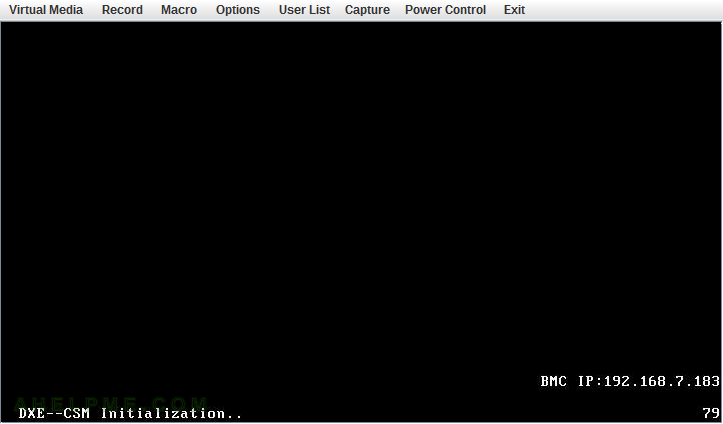
SCREENSHOT 1) The Server is starting. This is the IPMI KVM window. Press F11 to Boot in Boot Menu.

main menu
SUPERMICRO Server starting – KVM

Keep on reading!

How to do a network installation of CentOS 8 (8.0.1950) – minimal server installation

Minimal net install is useful when a dedicated server is installed from a IPMI KVM or Dell iDRAC, HP iLO, IBM IMM or where the initial client side download of files need to be minimal.
For amd64 CentOS 8 BaseOS the net install bootable media is located here (now the current latest release is 8.0.1950, but you can check the last directory with 8. for the time you follow this howto):

http://mirror.leaseweb.com/centos/8/isos/x86_64/CentOS-8-x86_64-1905-boot.iso

Note there is no minimal CD for offline installation anymore. Boot CD is to just boot and make “netinstall” installation and a big fat DVD of 6.6Gbytes to install offline.
Software details of CentOS 8 minimal install could be found here – Technical details of a default CentOS 8.0.1950 minimal installation

Download it and put it on a cd or usb, the boot from it and follow the steps bellow:

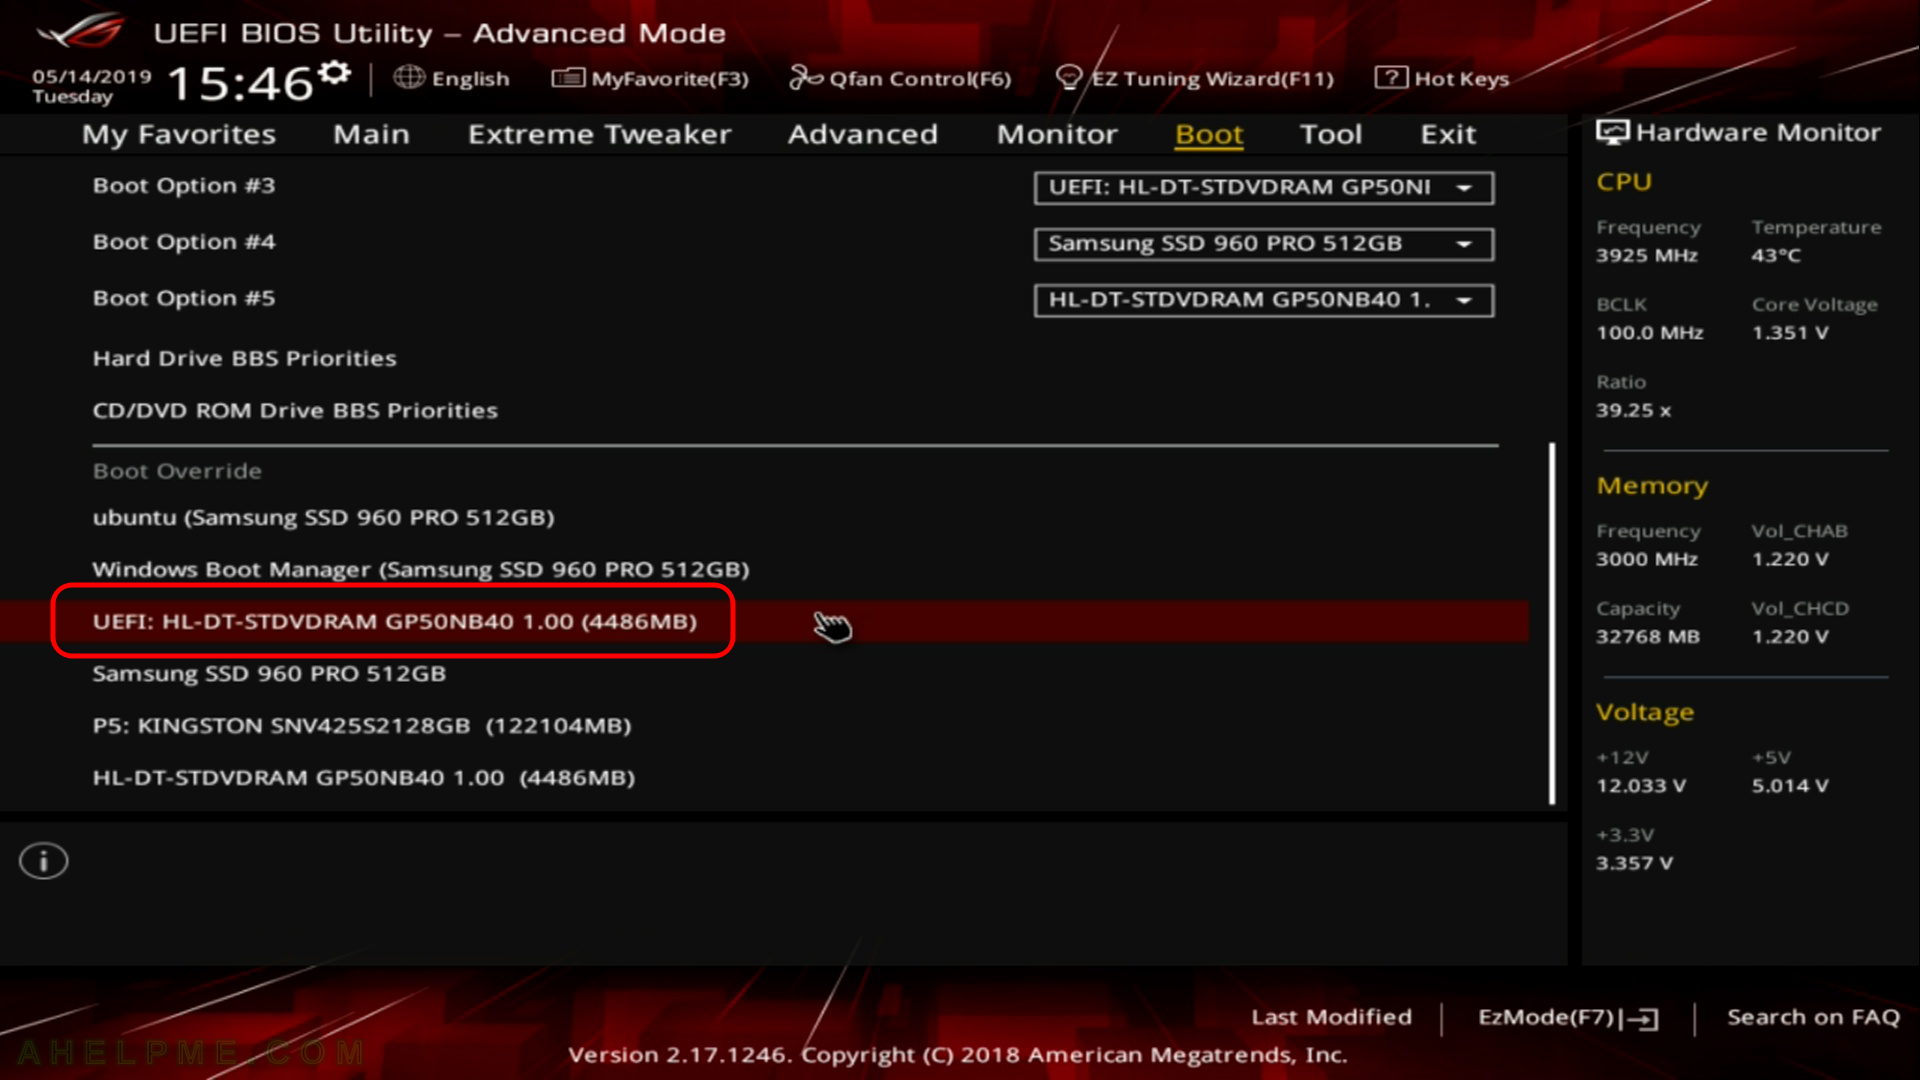
STEP 1) Enter the BIOS of your machine (desktop or server) to change the boot order.

You can try F11 on most servers to have the boot menu. Here we use DEL to enter the UEFI BIOS.

main menu
Enter BIOS – change boot order

Keep on reading!

Minimal quagga bgpd configuration to run and remote configure it

There are the three steps to configure your Quagga bgpd daemon to be able to run and configure remotely. The idea of this article is to show you how you can run the quagga bgpd with the minimal configuration and probably you might give the credential to a network administrator.
Summary – 3 files to change:

  1. /etc/quagga/daemons – enable BGPD daemon
  2. /etc/quagga/debian.conf – which IP to listen to
  3. /etc/quagga/bgpd.conf – BGP daemon configuration

Here are the steps:
Keep on reading!

Install Fedora Workstation 30 (Gnome GUI)

This tutorial will show you the simple steps of installing a modern Linux Distribution like Fedora 30 Workstation with Gnome for the user graphical interface. First, we present the basic steps for installing the Operating system in addition to your present operating systems (here we also have Windows 10) and then you can see some screenshots of the installed system and the look and feel of it. We have other tutorials showing more screenshots of the installed and working Fedora 29 (Gnome and KDE plasma) – so you can decide which of them to try first – coming soon.

The Fedora 30 Workstation comes with

  • Xorg X server – 1.20.4 XWayland is used by default
  • GNOME (the GUI) – 3.32.1
  • linux kernel – 5.0.9

Check out our article about what software is included in comming soon.

The installation process is very similar to the old Fedora Workstation 27, Fedora Workstation 28 and Fedora Workstation 29, in fact the main difference is the creation of an user, which the setup is not responsible anymore, the creation of an user is done by the first boot after installation. Our system was pretty good – Asus X399 with AMD Ryzen Threadripper 1950X and NVIDIA 1080 Ti and the setup loaded successfully and there were no problems till the end.

We used the following ISO for the installation process:

https://download.fedoraproject.org/pub/fedora/linux/releases/30/Workstation/x86_64/iso/Fedora-Workstation-Live-x86_64-30-1.2.iso

It is a LIVE image so you can try it before installing. The easiest way is just to download the image and burn it to a DVD disk and then follow the installation below:

SCREENSHOT 1) Here is our “UEFI BIOS->Boot->Boot Override” and in most modern motherboard you can choose to override the default boot devices.

Choose the “UEFI: HL-DT-STDVDRAM…” to boot and install Fedora Workstation 30 with UEFI support. You should do this, because most of the new hardware like video cards would not work properly without being in UEFI mode.

main menu
Boot from DVD/USB Installation

Keep on reading!

Access Violation error when compiling packages in Gentoo – symlink

Here is another example of an Access violation error when building packages in Gentoo. This time the build process could not make a symbolic link in “/usr/bin” and the build process of the package failed with:

 * ACCESS DENIED:  symlink:      /usr/bin/stransmit
CMake Error: failed to create symbolic link '/usr/bin/stransmit': permission denied

A detail explanation is available in our first article on the subject here – Access Violation error, when compiling packages in Gentoo.
All packages are built in a sandbox and there is a sandbox configuration in

/etc/sandbox.d/00default

, which instruct the build process where could write. If you get such an error in 99.99% there is a bug in the package and if you do not want to wait for fixing it (report it!) you can manually edit the SANDBOX_WRITE variable and add the path, which causes the build failure. Build the package and remove the added path!!! Or you risk making your system less secure!

We have problem with building the package “net-libs/srt-1.3.1”

srv1 src # emerge -v net-libs/srt

These are the packages that would be merged, in order:

[ebuild  N     ] net-libs/srt-1.3.1::gentoo  USE="-doc -gnutls -libressl" ABI_X86="32 (64) (-x32)" 0 KiB

Total: 1 package (1 new), Size of downloads: 0 KiB

>>> Verifying ebuild manifests

>>> Emerging (1 of 1) net-libs/srt-1.3.1::gentoo
 * srt-1.3.1.tar.gz BLAKE2B SHA512 size ;-) ...                                                                                                        [ ok ]
>>> Unpacking source...
.....
.....
>>> Install srt-1.3.1 into /var/tmp/portage/net-libs/srt-1.3.1/image/ category net-libs
 * abi_x86_32.x86: running multilib-minimal_abi_src_install
>>> Working in BUILD_DIR: "/var/tmp/portage/net-libs/srt-1.3.1/work/srt-1.3.1-abi_x86_32.x86"
make -j6 -l10 install 
[ 28%] Built target haicrypt_virtual
[ 40%] Built target srtsupport_virtual
[ 80%] Built target srt_virtual
[ 83%] Built target srt_static
[ 85%] Built target srt_shared
[ 90%] Built target srt-file-transmit
[ 95%] Built target srt-live-transmit
[100%] Built target srt-multiplex
Install the project...
-- Install configuration: "Gentoo"
-- Installing: /var/tmp/portage/net-libs/srt-1.3.1/image/usr/lib32/libsrt.so.1.3.1
-- Installing: /var/tmp/portage/net-libs/srt-1.3.1/image/usr/lib32/libsrt.so.1
-- Installing: /var/tmp/portage/net-libs/srt-1.3.1/image/usr/lib32/libsrt.so
-- Installing: /var/tmp/portage/net-libs/srt-1.3.1/image/usr/lib32/libsrt.a
-- Installing: /var/tmp/portage/net-libs/srt-1.3.1/image/usr/include/srt/version.h
-- Installing: /var/tmp/portage/net-libs/srt-1.3.1/image/usr/include/srt/srt.h
-- Installing: /var/tmp/portage/net-libs/srt-1.3.1/image/usr/include/srt/logging_api.h
-- Installing: /var/tmp/portage/net-libs/srt-1.3.1/image/usr/include/srt/platform_sys.h
-- Installing: /var/tmp/portage/net-libs/srt-1.3.1/image/usr/include/srt/udt.h
-- Installing: /var/tmp/portage/net-libs/srt-1.3.1/image/usr/include/srt/srt4udt.h
-- Installing: /var/tmp/portage/net-libs/srt-1.3.1/image/usr/lib32/pkgconfig/haisrt.pc
-- Installing: /var/tmp/portage/net-libs/srt-1.3.1/image/usr/lib32/pkgconfig/srt.pc
-- Installing: /var/tmp/portage/net-libs/srt-1.3.1/image/usr/bin/srt-live-transmit
-- Up-to-date: /var/tmp/portage/net-libs/srt-1.3.1/image/usr/bin/srt-live-transmit
 * ACCESS DENIED:  symlink:      /usr/bin/stransmit
CMake Error: failed to create symbolic link '/usr/bin/stransmit': permission denied
-- Created symlink: /usr/bin/stransmit -> srt-live-transmit
-- Installing: /var/tmp/portage/net-libs/srt-1.3.1/image/usr/bin/srt-file-transmit
-- Up-to-date: /var/tmp/portage/net-libs/srt-1.3.1/image/usr/bin/srt-file-transmit
-- Installing: /var/tmp/portage/net-libs/srt-1.3.1/image/usr/bin/srt-multiplex
-- Up-to-date: /var/tmp/portage/net-libs/srt-1.3.1/image/usr/bin/srt-multiplex
-- Installing: /var/tmp/portage/net-libs/srt-1.3.1/image/usr/bin/srt-ffplay
 * abi_x86_64.amd64: running multilib-minimal_abi_src_install
>>> Working in BUILD_DIR: "/var/tmp/portage/net-libs/srt-1.3.1/work/srt-1.3.1-abi_x86_64.amd64"
make -j6 -l10 install 
[ 11%] Built target srtsupport_virtual
[ 52%] Built target srt_virtual
[ 80%] Built target haicrypt_virtual
[ 83%] Built target srt_static
[ 85%] Built target srt_shared
[ 90%] Built target srt-multiplex
[ 95%] Built target srt-file-transmit
[100%] Built target srt-live-transmit
Install the project...
-- Install configuration: "Gentoo"
-- Installing: /var/tmp/portage/net-libs/srt-1.3.1/image/usr/lib64/libsrt.so.1.3.1
-- Installing: /var/tmp/portage/net-libs/srt-1.3.1/image/usr/lib64/libsrt.so.1
-- Installing: /var/tmp/portage/net-libs/srt-1.3.1/image/usr/lib64/libsrt.so
-- Installing: /var/tmp/portage/net-libs/srt-1.3.1/image/usr/lib64/libsrt.a
-- Installing: /var/tmp/portage/net-libs/srt-1.3.1/image/usr/include/srt/version.h
-- Up-to-date: /var/tmp/portage/net-libs/srt-1.3.1/image/usr/include/srt/srt.h
-- Up-to-date: /var/tmp/portage/net-libs/srt-1.3.1/image/usr/include/srt/logging_api.h
-- Up-to-date: /var/tmp/portage/net-libs/srt-1.3.1/image/usr/include/srt/platform_sys.h
-- Up-to-date: /var/tmp/portage/net-libs/srt-1.3.1/image/usr/include/srt/udt.h
-- Up-to-date: /var/tmp/portage/net-libs/srt-1.3.1/image/usr/include/srt/srt4udt.h
-- Installing: /var/tmp/portage/net-libs/srt-1.3.1/image/usr/lib64/pkgconfig/haisrt.pc
-- Installing: /var/tmp/portage/net-libs/srt-1.3.1/image/usr/lib64/pkgconfig/srt.pc
-- Installing: /var/tmp/portage/net-libs/srt-1.3.1/image/usr/bin/srt-live-transmit
-- Up-to-date: /var/tmp/portage/net-libs/srt-1.3.1/image/usr/bin/srt-live-transmit
 * ACCESS DENIED:  symlink:      /usr/bin/stransmit
CMake Error: failed to create symbolic link '/usr/bin/stransmit': permission denied
-- Created symlink: /usr/bin/stransmit -> srt-live-transmit
-- Installing: /var/tmp/portage/net-libs/srt-1.3.1/image/usr/bin/srt-file-transmit
-- Up-to-date: /var/tmp/portage/net-libs/srt-1.3.1/image/usr/bin/srt-file-transmit
-- Installing: /var/tmp/portage/net-libs/srt-1.3.1/image/usr/bin/srt-multiplex
-- Up-to-date: /var/tmp/portage/net-libs/srt-1.3.1/image/usr/bin/srt-multiplex
-- Up-to-date: /var/tmp/portage/net-libs/srt-1.3.1/image/usr/bin/srt-ffplay
>>> Completed installing srt-1.3.1 into /var/tmp/portage/net-libs/srt-1.3.1/image/

 * Final size of build directory: 14632 KiB (14.2 MiB)
 * Final size of installed tree:   5324 KiB ( 5.1 MiB)

 * --------------------------- ACCESS VIOLATION SUMMARY ---------------------------
 * LOG FILE: "/var/log/sandbox/sandbox-25570.log"
 * 
VERSION 1.0
FORMAT: F - Function called
FORMAT: S - Access Status
FORMAT: P - Path as passed to function
FORMAT: A - Absolute Path (not canonical)
FORMAT: R - Canonical Path
FORMAT: C - Command Line

F: symlink
S: deny
P: /usr/bin/stransmit
A: /usr/bin/stransmit
R: /usr/bin/stransmit
C: /usr/bin/cmake -E create_symlink srt-live-transmit /usr/bin/stransmit 

F: symlink
S: deny
P: /usr/bin/stransmit
A: /usr/bin/stransmit
R: /usr/bin/stransmit
C: /usr/bin/cmake -E create_symlink srt-live-transmit /usr/bin/stransmit 
 * --------------------------------------------------------------------------------

>>> Failed to emerge net-libs/srt-1.3.1, Log file:

>>>  '/var/tmp/portage/net-libs/srt-1.3.1/temp/build.log'

In the installation phase occurred the package failure leaving half installed package. So we edited the “/etc/sandbox.d/00default” and added “:/usr/bin” at the end of SANDBOX_WRITE:

SANDBOX_WRITE="/usr/tmp/conftest:/usr/lib/conftest:/usr/lib32/conftest:/usr/lib64/conftest:/usr/tmp/cf:/usr/lib/cf:/usr/lib32/cf:/usr/lib64/cf:/usr/bin"

Then rebuild the package with emerge and remove the added path “:/usr/bin”. This is a dirty workaround, but it will allow you to use srt (and as a dependency to another packages’ installation).

Install Fedora 29 KDE Plasma Desktop (KDE GUI)

This tutorial will show you the simple steps of installing a modern Linux Distribution Fedora 29 KDE Plasma Desktop with KDE for the user graphical interface. First we present the basic steps for installing the Operating system in addition to your present operating systems (here we have two: Windows 10 and Ubuntu 16) and then you can see some screenshots of the installed system and the look and feel of it. We have another tutorials showing more screenshots of the installed and working Fedora 29 (Gnome and KDE plasma) – so you can decide which of them to try first – coming soon.

The Fedora 29 KDE Plasma Desktop comes with

  • Xorg X server – 1.20.1
  • linux kernel – 4.18.16
  • KDE Plasma version: 5.13.5
  • KDE Frameworks version: 5.50.0
  • QT version: 5.11.1

The installation process is very similar to the old Install Fedora 27 KDE Plasma Desktop. Our system was pretty new – Asus X399 with AMD Ryzen Threadripper 1950X and NVIDIA 1080 TI and the setup loaded successfully and there were no problems till the end.

We used the following ISO for the installation process:

https://download.fedoraproject.org/pub/fedora/linux/releases/29/Spins/x86_64/iso/Fedora-KDE-Live-x86_64-29-1.2.iso

It is a LIVE image so you can try it before installing. The easiest way is just to download the image and burn it to a DVD disk and then follow the installation below:

SCREENSHOT 1) Here is our “UEFI BIOS->Boot->Boot Override” and in most modern motherboard you can choose to override the default boot devices.

Choose the “UEFI: HL-DT-STDVDRAM…” to boot and install Fedora KDE 29 with UEFI support. You should do this, because most of the new hardware like video cards would not work properly without beeing in UEFI mode.

main menu
Boot from DVD/USB Installation

Keep on reading!

Install Fedora Workstation 29 (Gnome GUI)

This tutorial will show you the simple steps of installing a modern Linux Distribution like Fedora 29 Workstation with Gnome for the user graphical interface. First we present the basic steps for installing the Operating system in addition to your present operating systems (here we have two: Windows 10 and Ubuntu 16) and then you can see some screenshots of the installed system and the look and feel of it. We have another tutorials showing more screenshots of the installed and working Fedora 29 (Gnome and KDE plasma) – so you can decide which of them to try first – coming soon.

The Fedora 29 Workstation comes with

  • Xorg X server – 1.20.1
  • GNOME (the GUI) – 3.30.1
  • linux kernel – 4.18.16

Check out our article about what software is included in Fedora 29 Workstation

The installation process is very similar to the old Fedora Workstation 27 and Fedora Workstation 28, in fact the main difference is the creation of an user, which the setup is not responsible anymore, the creation of an user is done by the first boot after installation. Our system was pretty new – Asus X399 with AMD Ryzen Threadripper 1950X and NVIDIA 1080 Ti and the setup loaded successfully and there were no problems till the end.

We used the following ISO for the installation process:

https://download.fedoraproject.org/pub/fedora/linux/releases/29/Workstation/x86_64/iso/Fedora-Workstation-Live-x86_64-29-1.2.iso

It is a LIVE image so you can try it before installing. The easiest way is just to download the image and burn it to a DVD disk and then follow the installation below:

STEP 1) Here is our “UEFI BIOS->Boot->Boot Override” and in most modern motherboard you can choose to override the default boot devices.

Choose the “UEFI: HL-DT-STDVDRAM…” to boot and install Fedora Workstation 29 with UEFI support. You should do this, because most of the new hardware like video cards would not work properly without beeing in UEFI mode.

main menu
Boot from DVD/USB Installation

Keep on reading!