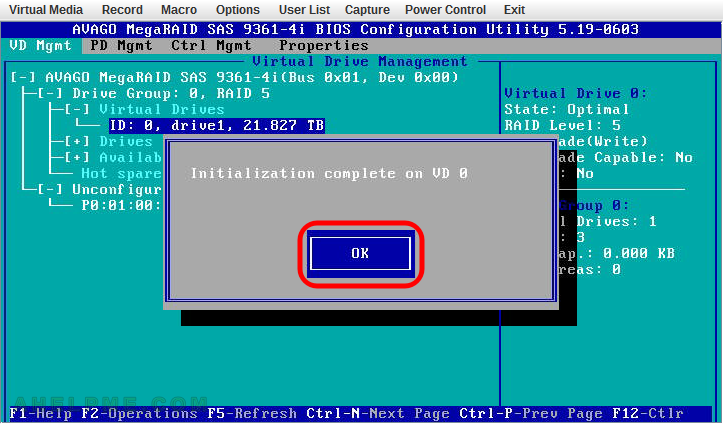
STEP 21) The initialization completed on Virtual Drive 0.
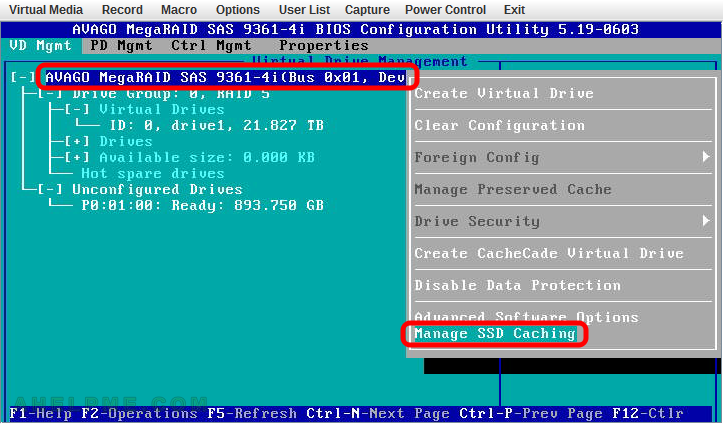
STEP 22) Select “AVAGO MegaRAID SAS 9361-4i(Bus 0x01, Dev 0x00)” and press “F2” to show the operation context menu and the press “Manage SSD Caching”
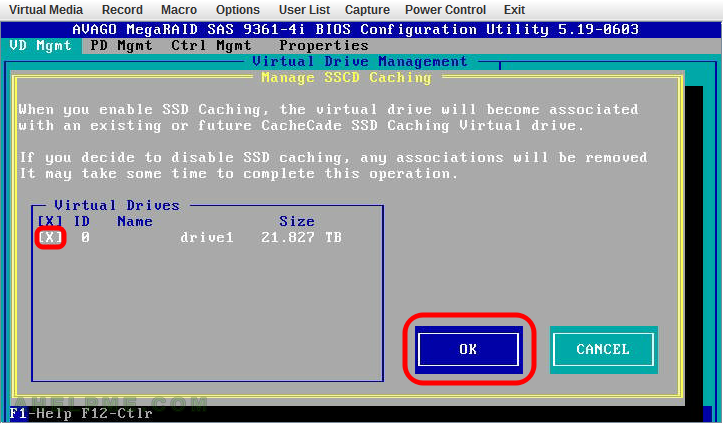
STEP 23) You can see our new virtual device with name “drive1” is cheched and is using SSD caching.
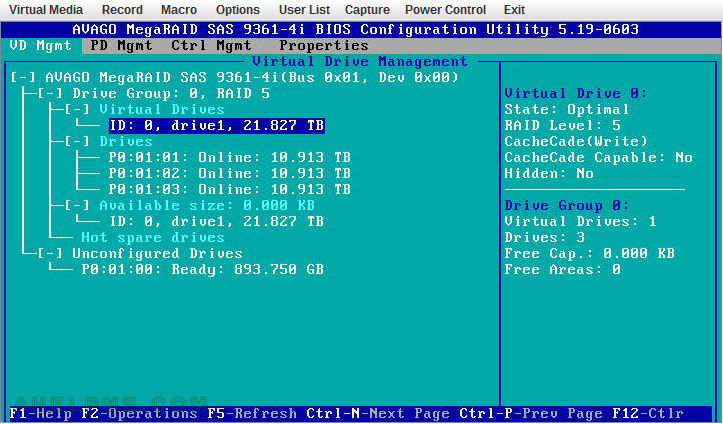
STEP 24) Virtual drive with ID 0 and all disks are online.
No failed devices.
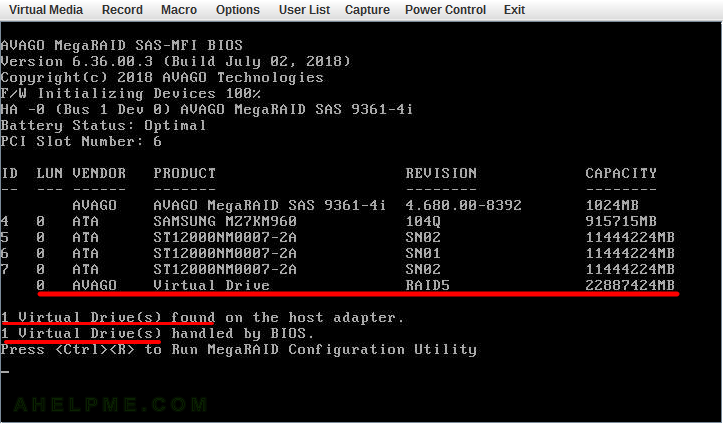
STEP 25) We rebooted the server and here you can see the controller initialized all drives – the physical ones and the logical – RAID5 virtual drive ID 0.
The controller’s BIOS tells you everyhting is ready for use when you see the last line “Press
One thought on “AVAGO MegaRAID SAS-9361-4i with CacheCade – create a new virtual drive RAID5 with SSD caching”