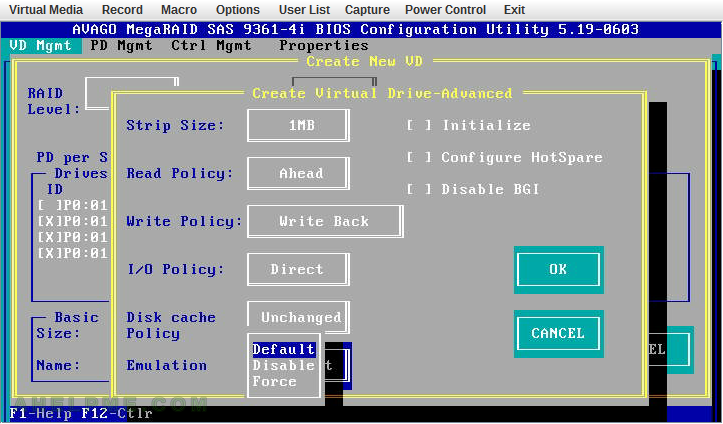
STEP 11) The options are Read a head or normal. In our case for media streaming the read a head is better here.
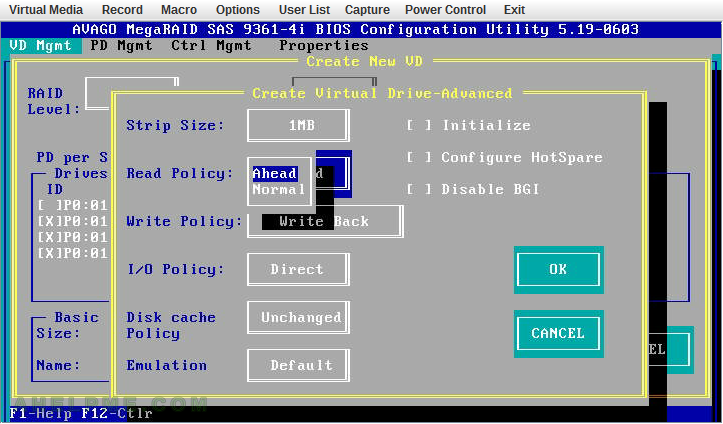
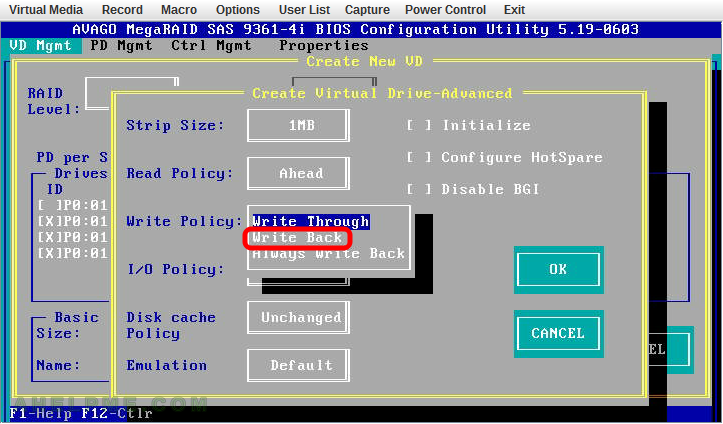
STEP 12) The options are “Write Through”, “Write Back” and “Always Write Back”. The “Write Through” could load your hard disk drives very much and you might have hard disk failure more often. The performance is also less than “Write Back” and “Always Write Back”. “Always Write Back” means the controller will not switch to “Write Through” when there are issues with the battery or when testing the battery’s health.
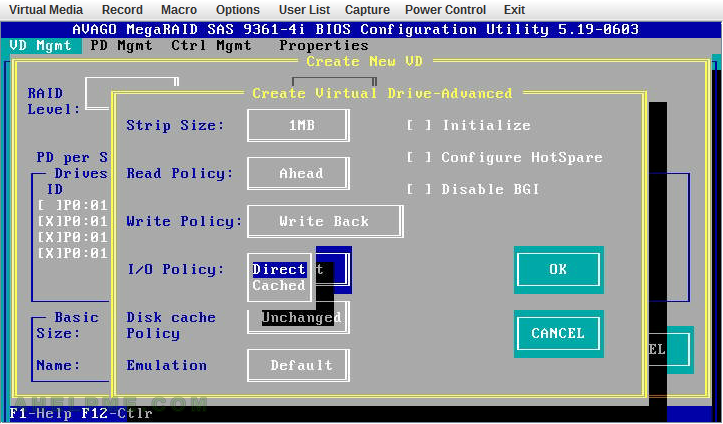
STEP 13) The options are “Direct” or “Cached”, we use “Direct” here.
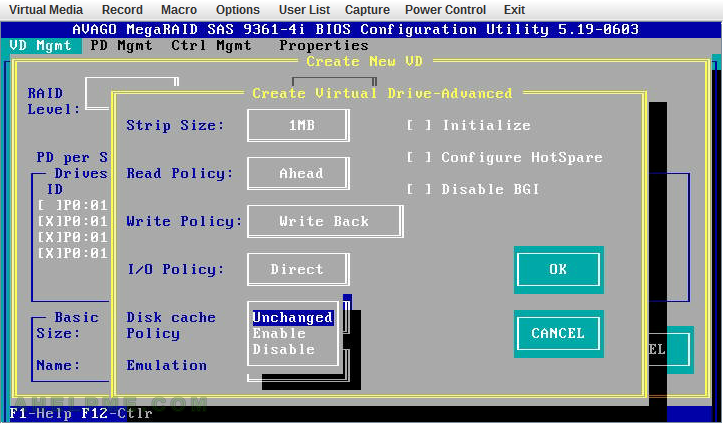
STEP 14) The options are “Unchanged”, “Enable”, “Disable”. The default is “Unchanged”. If you have UPS it is safe to set “Enable”.
STEP 15) The options are “Default”, “Disable”, “Force”. The default is “Default”. You could enable or disable the emulation of 512 byte sector size. We use “Default” and parted shows “Sector size (logical/physical): 512B/4096B”.
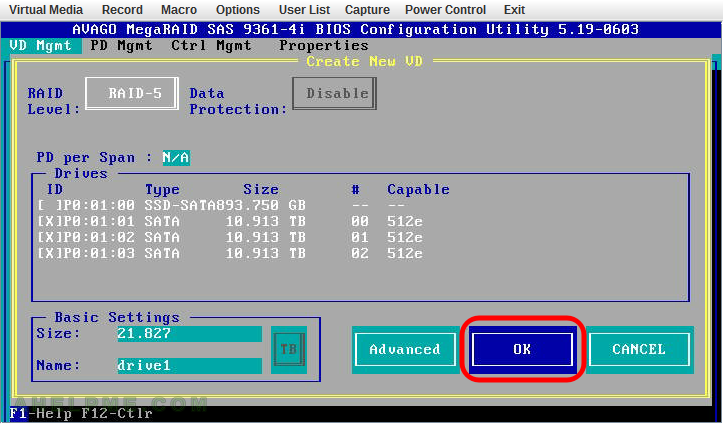
STEP 16) Press “OK” to accept the settings and to create the virtual drive.
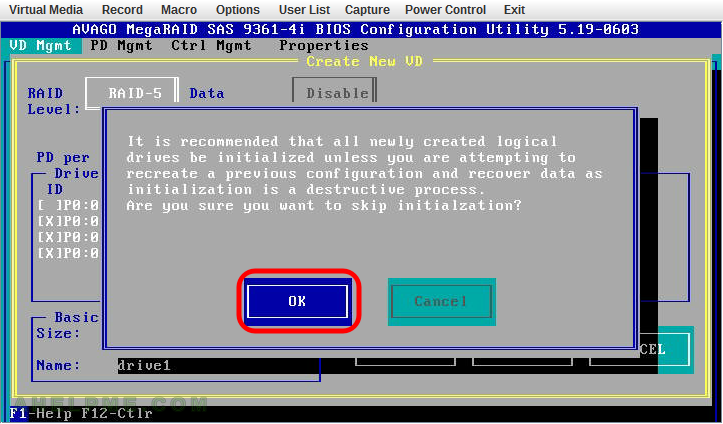
STEP 17) It is recommended to initialize the new virtual drive.
BE CAREFUL this will destroy all old data and you will not be able to recover anything if you try to. Press “OK” to initialize.
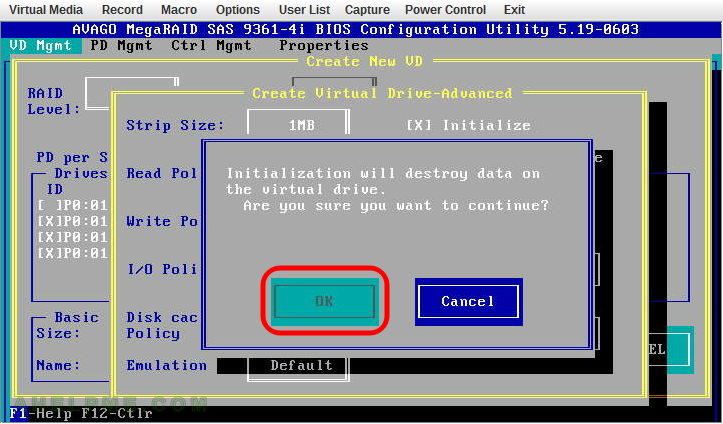
STEP 18) Press “OK” to confirm the start of the initialization process.
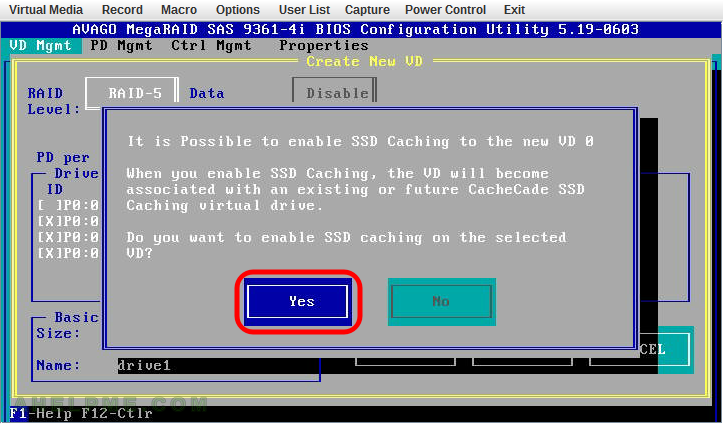
STEP 19) The setup auto-detect we have unused SSD and offers us to enable the SSD caching. Press “Yes” to enable SSD caching of your newly created virtual drive.
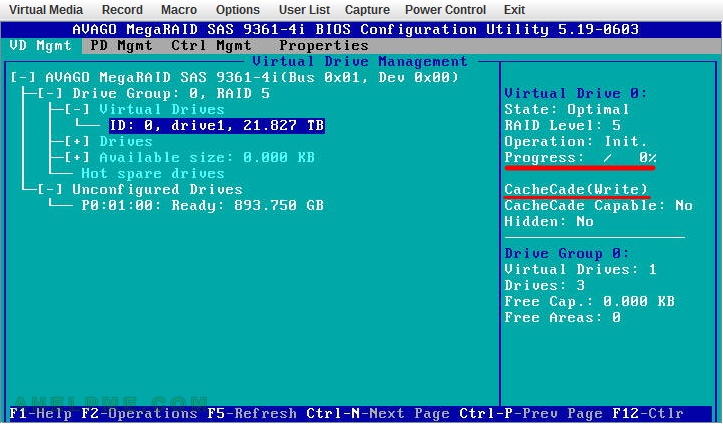
STEP 20) You can see the progress of the initialization.
One thought on “AVAGO MegaRAID SAS-9361-4i with CacheCade – create a new virtual drive RAID5 with SSD caching”