There is a project for extended PXE Boot features https://ipxe.org/. This article is not for describing what this project may offer, but to show how to boot any Linux distribution (in fact, Windows 10, too) network installation wizard using the virtual CD/DVD of an IPMI KVM, DELL’s DRAC, HP iLO, IBM RSA/IMM and in general, KVM over IP.
Using the iPXE CD bootable disk mounted in the virtual CD/DVD of the server’s remote console (IPMI KVM and so on) will allow:
- Booting from a CD/DVD with only a 1M size.
- Extends the PXE features of the server’s network card.
- Manual set IP address, i.e. not relying on DHCP server. In addition of the DHCP feature, but DHCP feature requires DHCP server, which is not always the case.
- Load a Linux kernel and initramfs from a URL.
- Boot a Linux live or installation CD/DVD from an URL. The server could load the instllation wizard from an official mirror in the Internet.
- Manual install – boot from 1M CD and continue with multi gigabyte installation from an URL. For comparision the CentOS 8 network installation disk is more than 600M versus 1M iPXE CD disk. Booting directly from a 600M CentOS 8 network installation disk is unstable and really slow when the disk is mounted in user’s KVM. And not alwyas is possible to mount a disk next to the server location (or in the same co-location).
- Automated install – simple unattended installation with kickstart files without the need of speacial features of the dedicated service provider.
- No software installation or code writting needed.
This article uses the iPXE CD to boot and manually set an IP and then load the Linux kernel and initramfs of the CentOS 8 installation disk using an official URL mirror on the Internet. All types of server’s KVM, which supports CD/DVD virtual device, can be used.
Just 1 Mbytes of CD/DVD is required to boot an installation of a (connected to the Internet) server/machine.
Here are the steps and correct (all lines are tested) command lines to boot an installation wizard. The server is a SUPERMICRO server with IPMI KVM for remote management.
The iPXE ISO file is located here http://boot.ipxe.org/ipxe.iso
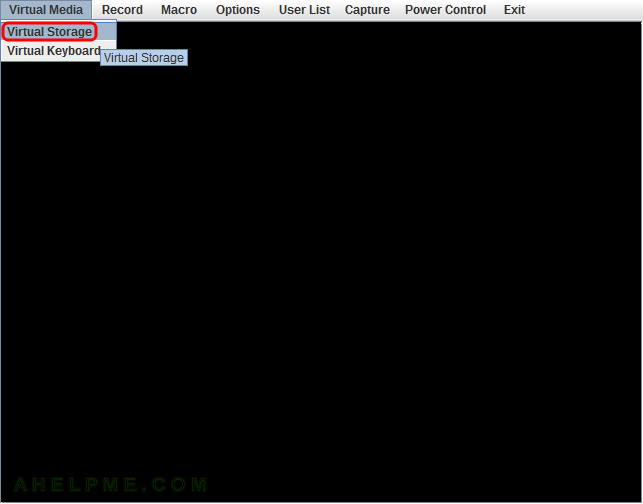
SCREENSHOT 1) Open the IPMI KVM and click on “Virtual Storage” menu to open the image mount dialog.
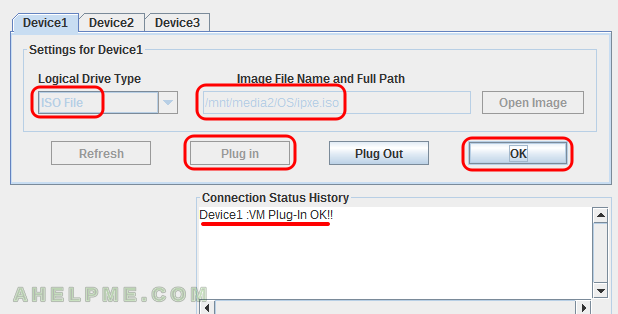
SCREENSHOT 2) First select the ISO File (the dropdown box will be editable), select the image by clicking on “Open Image” button and browse the downloaded iPXE cd image from your local drive.
When the image is selected click on “Plug in” to mount it in the virtual CD/DVD IPMI KVM drive and last, click on OK to close the dialog. On a successful mount there will be “Device :VM Plug-In OK!!” status in the “Connection Status History” text area.
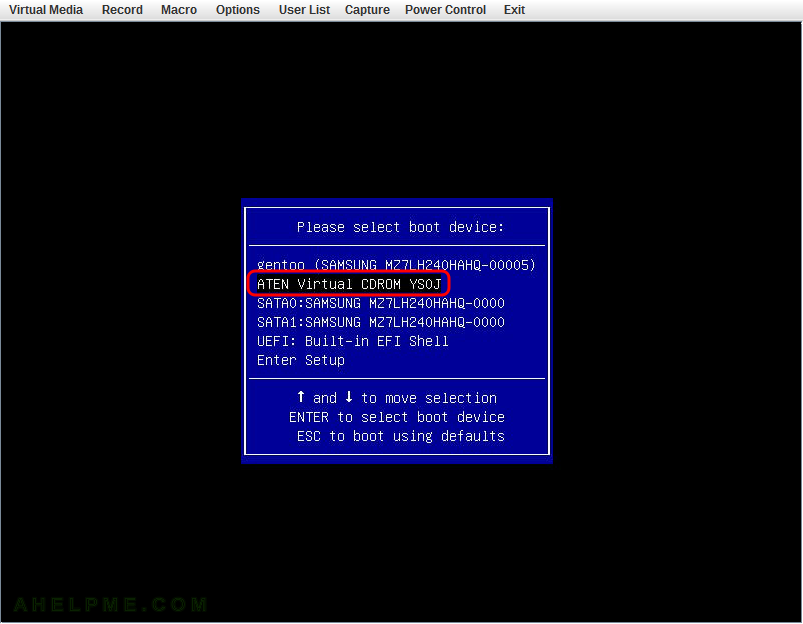
SCREENSHOT 3) Restart the server and choose to boot from a booting menu or just enable your BIOS as first boot device the “ATEN Virtual CDROM”.
Select and hit Enter to boot from the “ATEN Virtual CDROM”.
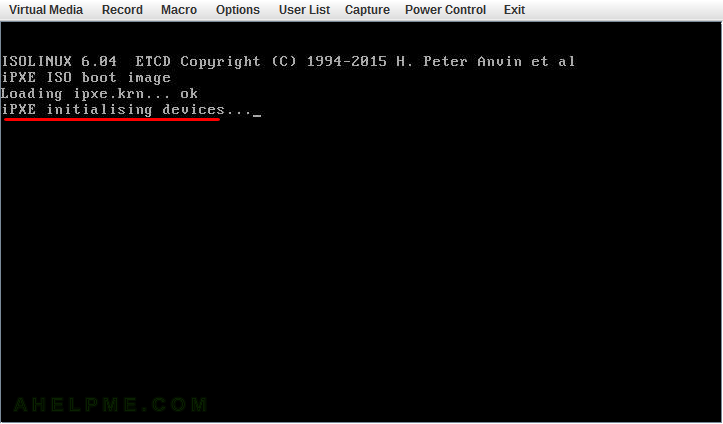
SCREENSHOT 4) The iPXE boot image is loading and initialising the devices…
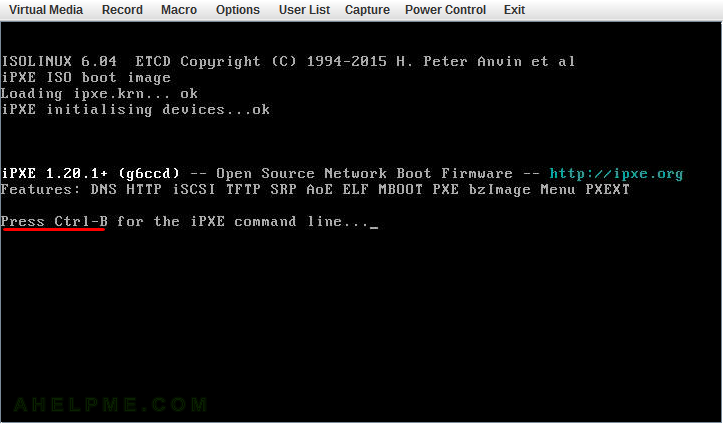
SCREENSHOT 5) To get into the iPXE command line there are a few seconds to press “CTRL” and “B”.
If missed a server restart is required! The default behaviour is to look for a DHCP server to set the network and boot parameters for kernel and initramfs.
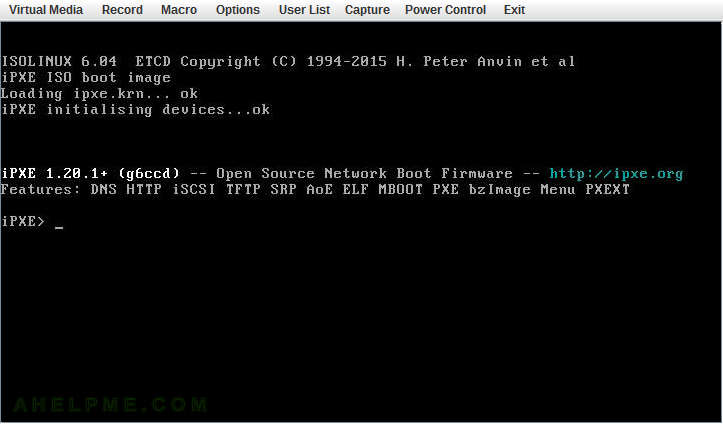
SCREENSHOT 6) iPXE command line.
On pressing Ctrl-B in the last step the default behaviour is interrupted and the user could execute commands in the iPXE command line.
SCREENSHOT 7) As mentioned, this is a no DHCP server example, so manual setting the network.
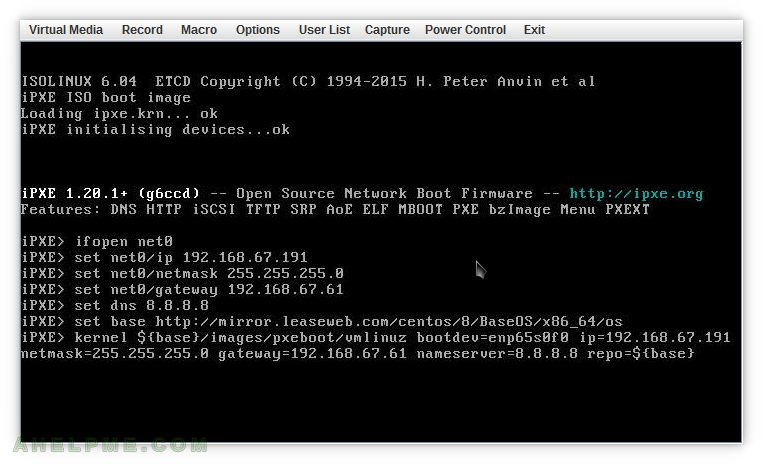
The network configuration is:
ifopen net0
set net0/ip 192.168.67.191
set net0/netmask 255.255.255.0
set net0/gateway 192.168.67.61
set dns 8.8.8.8
The ifopen is needed when there are more ethernet devices. In fact, a system with 4 LAN the network could not start without the ifopen command at start.
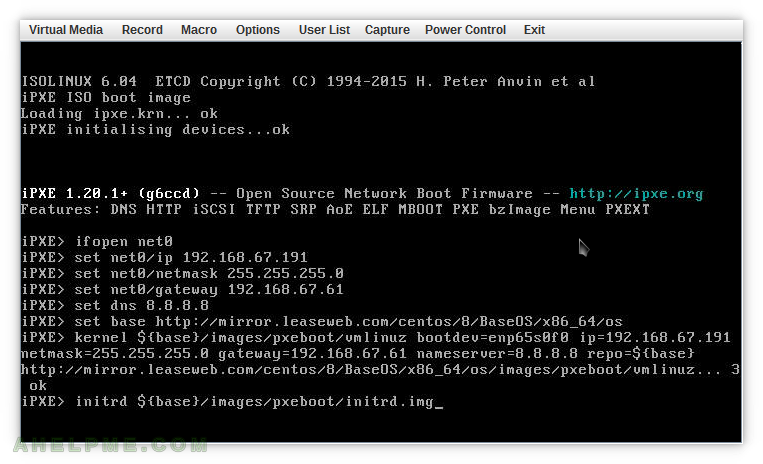
SCREENSHOT 8) All kernel settings should be included with parameter “kernel”!
After hitting Enter the kernel is downloaded (HTTPS is not supported!!! The boot disk is just a 1Mbyte!).
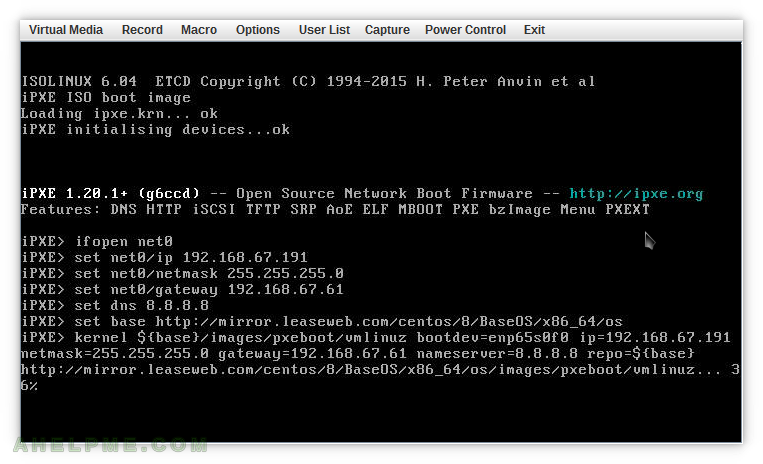
The iPXE’s set command is used to set a variable, which can replace a big URL, for example:
set base http://mirror.leaseweb.com/centos/8/BaseOS/x86_64/os
To use the variable value just write “${base}”.
The iPXE’s kernel command takes all the kernel parameters:
kernel ${base}/images/pxeboot/vmlinuz bootdev=enp65s0f0 ip=192.168.67.191 netmask=255.255.255.0 gateway=192.168.67.61 nameserver=8.8.8.8 repo=${base}
The parameters are meant to be used in dracut to configure the initial network settings. This is the only format, which works and sets the network properly!
SCREENSHOT 9) The kernel from the URL provided has been downloaded successfully.
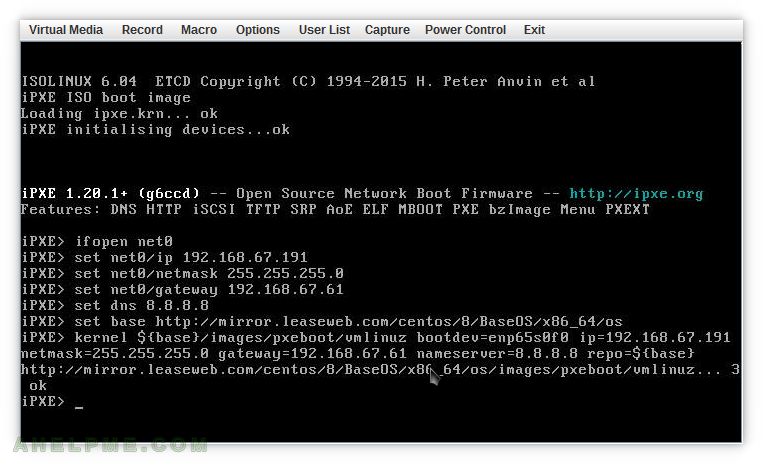
SCREENSHOT 10) No parameters are accepted in the option “initrd”.
Just use the URL for the iniramfs image and hit Enter.
initrd ${base}/images/pxeboot/initrd.img