Let’s say you update your software raid layout – create, delete or modify your software raid and reboot the system and your server does not start normally. After loading your remote video console (KVM) you see the boot process reports for a missing device and you are under console (dracut console). Your system is in “Emergency mode”.
The warning:
dracut-initqueue[504]: Warning: dracut-initqueue timeout - starting timeout scripts
dracut-initqueue[504]: Warning: dracut-initqueue timeout - starting timeout scripts
dracut-initqueue[504]: Warning: dracut-initqueue timeout - starting timeout scripts
....
....
dracut-initqueue[504]: Warning: could not boot.
dracut-initqueue[504]: Warning: /dev/disk/by-id/md-uuid-2fdc509e:8dd05ed3:c2350cb4:ea5a620d does not exist
      Starting Dracut Emergency Shell...
Warning: /dev/disk/by-id/md-uuid-2fdc509e:8dd05ed3:c2350cb4:ea5a620d does not exist

Generating "/run/initramfs/rdsosreport.txt"


Entering emergency mode. Exit the shell to continue.
Type "journalctl" to view system logs.
You might want to save "/run/initramfs/rdsosreport.txt" to a USB stick or /boot
after mounting them and attach it to a bug report.


dracut:/#
This article is for problems, which occur after manipulating a storage RAID devices, not the system (root) or boot devices!!! If the missing device the RAID “md-uuid-2fdc509e:8dd05ed3:c2350cb4:ea5a620d does not exist” is either the root or the boot device, the propose solution here would not help with just exiting the Emergency Shell! In those cases, when the missing device is the root or boot before exiting the Emergency Shell the problem must be resolved, so the devices and their file system should be available. There is another article on the subject, which may help the reader in such cases – CentOS 8 dracut-initqueue timeout and could not boot – warning /dev/disk/by-id/md-uuid- does not exist – inactive raids.
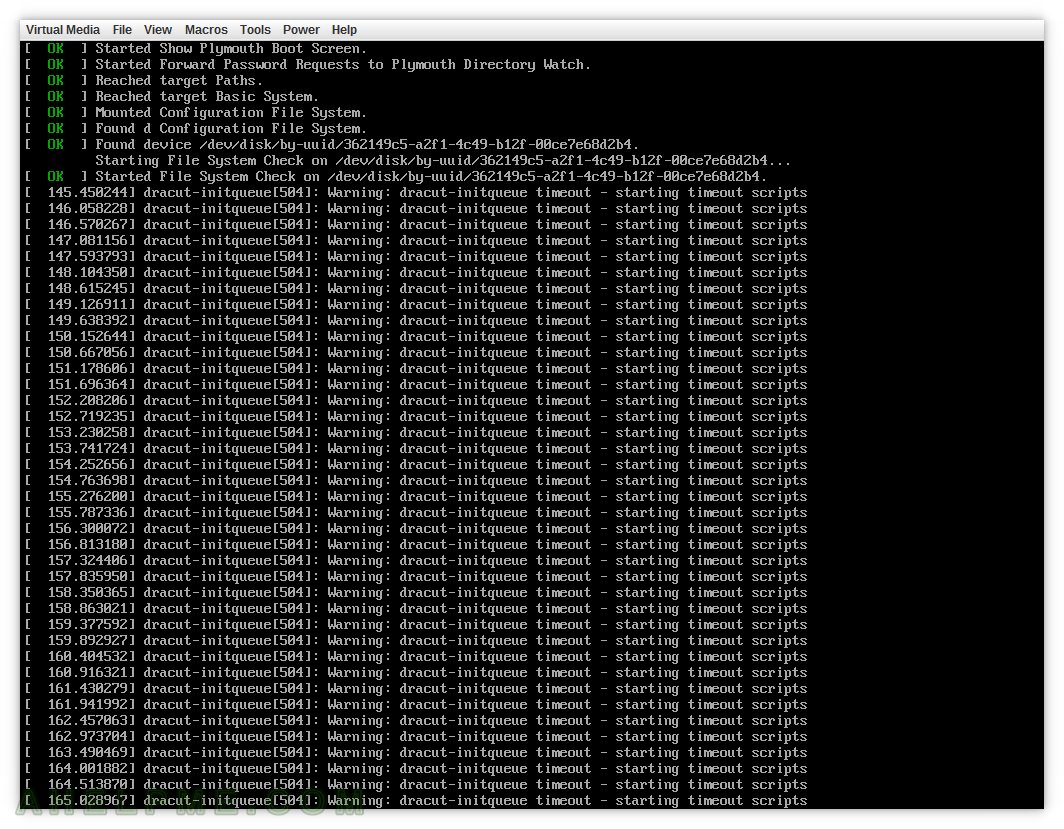
SCREENSHOT 1) The boot process reports mutiple warning messages of dracut-initqueue timeout, because a drive cannot be found.
This article is similar to Centos 7 Server hangs up on boot after deleting a software raid (mdadm device).
Check if all of your software raid devices are included in:
- /etc/default/grub, which file is used when your boot configuration is made.
- /boot/grub/grub.cfg – grub configuration file.
What happened in our case
we included the configuration in /etc/default/grub, but never generated the new grub2 configuration before a reboot, so our server got into the Emergency mode, which you can exit, by just type “exit” and to continue loading the system as usual.
So to be clear, if you remove a RAID or replace it with a new one with a new ID you must update the /etc/default/grub and then generate the grub configuration /boot/grub/grub.cfg.
Here is a log of how we got in the problem and how we fixed it.
The problem
[root@srv ~]# grep rd.md.uuid /etc/default/grub
GRUB_CMDLINE_LINUX="crashkernel=auto rd.md.uuid=3b9feb09:75da7a5e:72932e0a:b847f393 rd.md.uuid=b6e9ca56:66468d69:3c89646a:2154d33f rd.md.uuid=b1427aed:cdd0e6d0:81f80c97:ca76233d rd.md.uuid=d950abd0:22d3443d:07148bae:344b362a rhgb quiet"
[root@srv ~]# grep rd.md.uuid /boot/grub2/grub.cfg
        linux16 /vmlinuz-3.10.0-957.21.2.el7.x86_64 root=UUID=362149c5-a2f1-4c49-b12f-00ce7e68d2b4 ro crashkernel=auto rd.md.uuid=3b9feb09:75da7a5e:72932e0a:b847f393 rd.md.uuid=b6e9ca56:66468d69:3c89646a:2154d33f rd.md.uuid=b1427aed:cdd0e6d0:81f80c97:ca76233d rd.md.uuid=2fdc509e:8dd05ed3:c2350cb4:ea5a620d rhgb quiet LANG=en_US.UTF-8
        linux16 /vmlinuz-3.10.0-957.10.1.el7.x86_64 root=UUID=362149c5-a2f1-4c49-b12f-00ce7e68d2b4 ro crashkernel=auto rd.md.uuid=3b9feb09:75da7a5e:72932e0a:b847f393 rd.md.uuid=b6e9ca56:66468d69:3c89646a:2154d33f rd.md.uuid=b1427aed:cdd0e6d0:81f80c97:ca76233d rd.md.uuid=2fdc509e:8dd05ed3:c2350cb4:ea5a620d rhgb quiet LANG=en_US.UTF-8
        linux16 /vmlinuz-3.10.0-957.5.1.el7.x86_64 root=UUID=362149c5-a2f1-4c49-b12f-00ce7e68d2b4 ro crashkernel=auto rd.md.uuid=3b9feb09:75da7a5e:72932e0a:b847f393 rd.md.uuid=b6e9ca56:66468d69:3c89646a:2154d33f rd.md.uuid=b1427aed:cdd0e6d0:81f80c97:ca76233d rd.md.uuid=2fdc509e:8dd05ed3:c2350cb4:ea5a620d rhgb quiet
        linux16 /vmlinuz-3.10.0-957.el7.x86_64 root=UUID=362149c5-a2f1-4c49-b12f-00ce7e68d2b4 ro crashkernel=auto rd.md.uuid=3b9feb09:75da7a5e:72932e0a:b847f393 rd.md.uuid=b6e9ca56:66468d69:3c89646a:2154d33f rd.md.uuid=b1427aed:cdd0e6d0:81f80c97:ca76233d rd.md.uuid=2fdc509e:8dd05ed3:c2350cb4:ea5a620d rhgb quiet
        linux16 /vmlinuz-0-rescue-bc0e9d9e9dcd4e48b3b6d0b7a8327917 root=UUID=362149c5-a2f1-4c49-b12f-00ce7e68d2b4 ro crashkernel=auto rd.md.uuid=3b9feb09:75da7a5e:72932e0a:b847f393 rd.md.uuid=b6e9ca56:66468d69:3c89646a:2154d33f rd.md.uuid=b1427aed:cdd0e6d0:81f80c97:ca76233d rd.md.uuid=2fdc509e:8dd05ed3:c2350cb4:ea5a620d rhgb quiet
[root@srv ~]#
As you can see in our default configuration the last software raid device is with ID d950abd0:22d3443d:07148bae:344b362a, but in the active grub2 configuration is the old ID 2fdc509e:8dd05ed3:c2350cb4:ea5a620d and this is why we got into Emergency mode, the grub2 cannot find this disk, because it was removed.
To fix the problem
Generate the grub2 configuration and verify the two default and active configuration are the same.
[root@srv ~]# grub2-mkconfig -o /boot/grub2/grub.cfg
Generating grub configuration file ...
Found linux image: /boot/vmlinuz-3.10.0-957.21.2.el7.x86_64
Found initrd image: /boot/initramfs-3.10.0-957.21.2.el7.x86_64.img
Found linux image: /boot/vmlinuz-3.10.0-957.10.1.el7.x86_64
Found initrd image: /boot/initramfs-3.10.0-957.10.1.el7.x86_64.img
Found linux image: /boot/vmlinuz-3.10.0-957.5.1.el7.x86_64
Found initrd image: /boot/initramfs-3.10.0-957.5.1.el7.x86_64.img
Found linux image: /boot/vmlinuz-3.10.0-957.el7.x86_64
Found initrd image: /boot/initramfs-3.10.0-957.el7.x86_64.img
Found linux image: /boot/vmlinuz-0-rescue-bc0e9d9e9dcd4e48b3b6d0b7a8327917
Found initrd image: /boot/initramfs-0-rescue-bc0e9d9e9dcd4e48b3b6d0b7a8327917.img
done
[root@srv ~]# grep rd.md.uuid /etc/default/grub
GRUB_CMDLINE_LINUX="crashkernel=auto rd.md.uuid=3b9feb09:75da7a5e:72932e0a:b847f393 rd.md.uuid=b6e9ca56:66468d69:3c89646a:2154d33f rd.md.uuid=b1427aed:cdd0e6d0:81f80c97:ca76233d rd.md.uuid=d950abd0:22d3443d:07148bae:344b362a rhgb quiet"
[root@srv ~]# grep rd.md.uuid /boot/grub2/grub.cfg
        linux16 /vmlinuz-3.10.0-957.21.2.el7.x86_64 root=UUID=362149c5-a2f1-4c49-b12f-00ce7e68d2b4 ro crashkernel=auto rd.md.uuid=3b9feb09:75da7a5e:72932e0a:b847f393 rd.md.uuid=b6e9ca56:66468d69:3c89646a:2154d33f rd.md.uuid=b1427aed:cdd0e6d0:81f80c97:ca76233d rd.md.uuid=d950abd0:22d3443d:07148bae:344b362a rhgb quiet
        linux16 /vmlinuz-3.10.0-957.10.1.el7.x86_64 root=UUID=362149c5-a2f1-4c49-b12f-00ce7e68d2b4 ro crashkernel=auto rd.md.uuid=3b9feb09:75da7a5e:72932e0a:b847f393 rd.md.uuid=b6e9ca56:66468d69:3c89646a:2154d33f rd.md.uuid=b1427aed:cdd0e6d0:81f80c97:ca76233d rd.md.uuid=d950abd0:22d3443d:07148bae:344b362a rhgb quiet
        linux16 /vmlinuz-3.10.0-957.5.1.el7.x86_64 root=UUID=362149c5-a2f1-4c49-b12f-00ce7e68d2b4 ro crashkernel=auto rd.md.uuid=3b9feb09:75da7a5e:72932e0a:b847f393 rd.md.uuid=b6e9ca56:66468d69:3c89646a:2154d33f rd.md.uuid=b1427aed:cdd0e6d0:81f80c97:ca76233d rd.md.uuid=d950abd0:22d3443d:07148bae:344b362a rhgb quiet
        linux16 /vmlinuz-3.10.0-957.el7.x86_64 root=UUID=362149c5-a2f1-4c49-b12f-00ce7e68d2b4 ro crashkernel=auto rd.md.uuid=3b9feb09:75da7a5e:72932e0a:b847f393 rd.md.uuid=b6e9ca56:66468d69:3c89646a:2154d33f rd.md.uuid=b1427aed:cdd0e6d0:81f80c97:ca76233d rd.md.uuid=d950abd0:22d3443d:07148bae:344b362a rhgb quiet
        linux16 /vmlinuz-0-rescue-bc0e9d9e9dcd4e48b3b6d0b7a8327917 root=UUID=362149c5-a2f1-4c49-b12f-00ce7e68d2b4 ro crashkernel=auto rd.md.uuid=3b9feb09:75da7a5e:72932e0a:b847f393 rd.md.uuid=b6e9ca56:66468d69:3c89646a:2154d33f rd.md.uuid=b1427aed:cdd0e6d0:81f80c97:ca76233d rd.md.uuid=d950abd0:22d3443d:07148bae:344b362a rhgb quiet
[root@srv ~]#
As mentioned above, we had already updated the “/etc/default/grub” and included the new RAID UUID in the rd.md.uuid kernel parameter, but we missed to generate the /boot/grub2/grub.cfg with the new configuration. So if you have not done it yet, you must do it before using grub2-mkconfig. It is pretty easy to see the RAID UUID with mdadm tool. First, list the mdstat devices to find their names. Let’s say “md0” i the new one (the old one has already been deleted, which is still in the confiuration) and use mdadm with one of the disks part of the “md0” RAID to see the UUID. Replace the old rd.md.uuid=[UUID_OLD] in “/etc/default/grub” with rd.md.uuid=43ceac15:c4a1be05:690eef43:2d364140. And now you may use grub2-mkconfig as described above to generate the new grub2 configuration.
[root@srv ~]# cat /proc/mdstat
Personalities : [raid1]
md126 : active raid1 sdb1[1] sda1[0]
      52427776 blocks super 1.2 [2/2] [UU]
      bitmap: 1/1 pages [4KB], 65536KB chunk

md0 : active raid1 sdb3[1] sda3[0]
      3906560 blocks super 1.2 [2/2] [UU]

md127 : active raid1 sdb2[1] sda2[0]
      1047552 blocks super 1.2 [2/2] [UU]
      bitmap: 0/1 pages [0KB], 65536KB chunk

unused devices: <none>
[root@srv ~]# mdadm -E /dev/sdb3
/dev/sdb3:
          Magic : a92b4efc
        Version : 1.2
    Feature Map : 0x0
     Array UUID : 43ceac15:c4a1be05:690eef43:2d364140
           Name : srv.example.com:0  (local to host srv.example.com)
  Creation Time : Fri Mar 27 10:47:56 2020
     Raid Level : raid1
   Raid Devices : 2

 Avail Dev Size : 7813120 sectors (3.73 GiB 4.00 GB)
     Array Size : 3906560 KiB (3.73 GiB 4.00 GB)
    Data Offset : 6144 sectors
   Super Offset : 8 sectors
   Unused Space : before=6064 sectors, after=0 sectors
          State : clean
    Device UUID : 24984e9e:4976b5cf:212e2359:56fe29ad

    Update Time : Sun Apr  5 01:33:20 2020
  Bad Block Log : 512 entries available at offset 16 sectors
       Checksum : 89592802 - correct
         Events : 38


   Device Role : Active device 1
   Array State : AA ('A' == active, '.' == missing, 'R' == replacing)
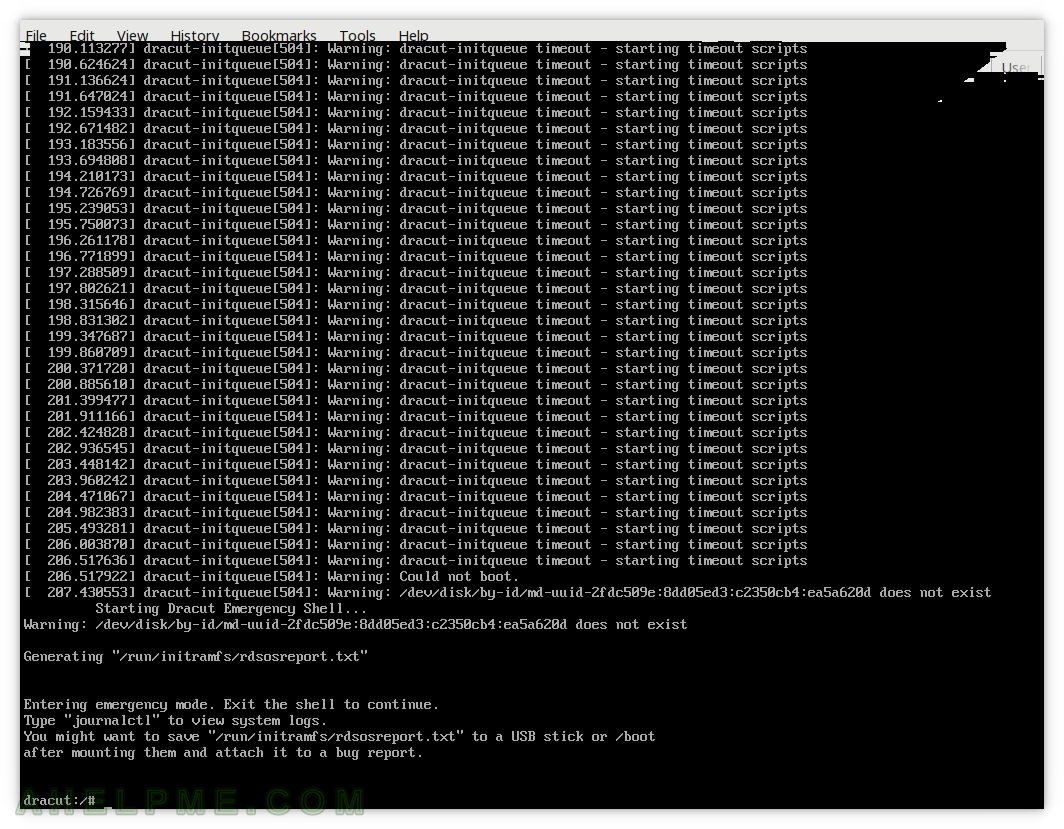
SCREENSHOT 2) When the boot fails the boot process leave you in the Emergency shell.
It is simple to exit and continue booting – just type “exit” and hit Enter. You can see the systemd logs with journalctl – these logs are from the current boot process and resides in memory.
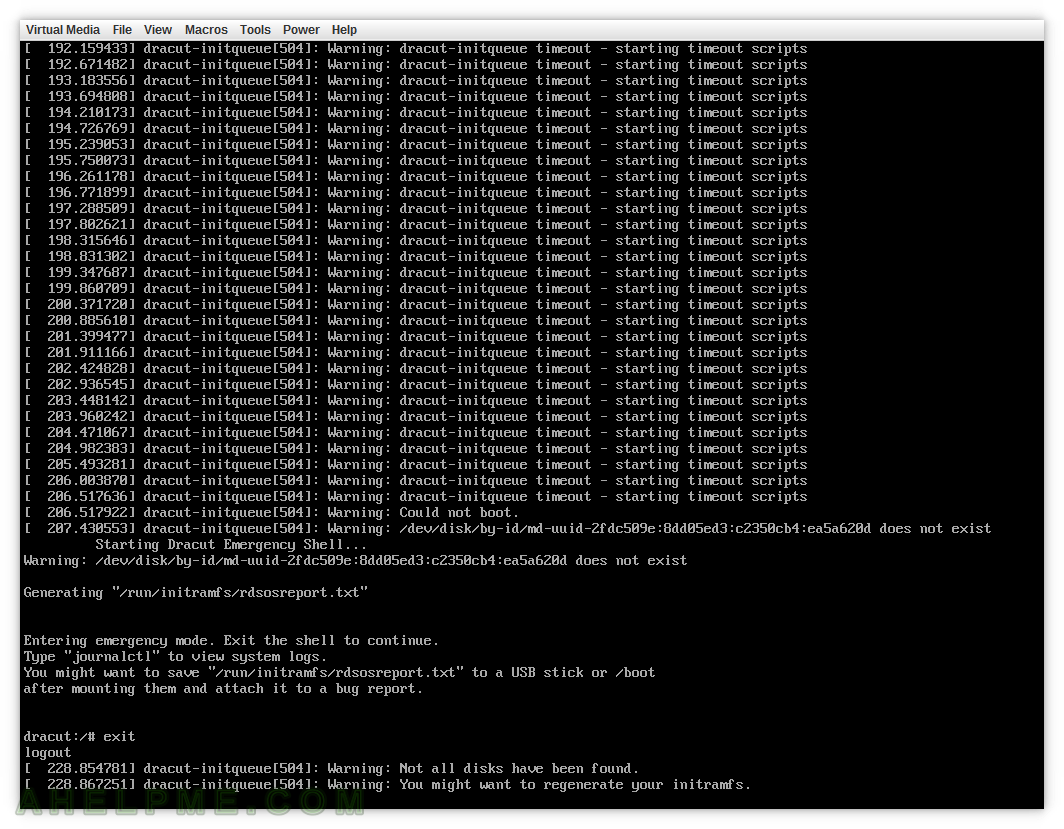
SCREENSHOT 3) Exit Emergency Shell with the command “Exit” and the booting process continues if possible.
In our case, the unrecognized drive was our new storage and it was not important for the boot process. If the miss-configured ID were for the root partition the boot process would be able to continue. The boot process is smart enough and you can see the two lines after the “exit” command: “Not all disks have been found.” and “You might want to regenerate your initramfs.” – in our case not initramfs, but the grub2 configuration!
SCREENSHOT 4) The normal boot continues after Emergency Shell if the unrecognized disk is not so important (such as the root partition, for example).

Here you can check another issue with the same error – CentOS 8 dracut-initqueue timeout and could not boot – warning /dev/disk/by-id/md-uuid- does not exist – inactive raids
simple solution is that when you disconnect from internet .actually grub file update from Linux repository if you working on vm machine.after that if this problem happens go to above mentioned solution,
wow you are the saver bro. Thanks
Thank you. Your explanation is very clear. But maybe I use EFI as my boot partition, I use this way to solve my problem.
grub2-mkconfig -o /boot/efi/EFI/centos/grub.cfg
Hey ! what should I do with situations on 3rd Screenshoot?
Type “exit” to exit the Emergency Shell.
I cant type anything after “Not all disks have been found”
Me neither. Anyone know what we can do?
It should boot normally, in fact this tutorial is only for non-root missing/wrong raid devices. If your root/boot raid device is missing, the server will not boot normally till you resolve the missing file system on the devices. If the missing/wrong devices are not boot or the root, but the storage, it is not critical for the system to boot, even it generally stopped here at first.
Hi, I came across your well written article from the search
“dracut initqueue”
possibly, this search string is too general. However, I wanted to leave a reply with what happened to me…
VMWARE ESXi 6.7!!!
When I copied a VM from one vmware installation to another, then recreated the VM as a 6.7? “dracut initqueue”
In my case, it turned out I needed to recreate the VM as a 6.0…matching the source…simple enough but it took me awhile to figure this out. I hope this reply helps someone else save some time.
Hello this is my problem. See the log:
It is a image from VMWare to KVM ..
What can i Do ?
Mounted Conf iguration File System.
1.4867911 usb 1-1: new high-speed USB device number Z using xhci_hcd
Started udev Coldplug all Devices.
Start ing dracut initqueue hook…
Start ing Show Plymouth Boot Screen…
Reached target System Initial ization.
Started Show Plymouth Boot Screen.
Reached target Paths .
Started Forward Password Requests to Plymouth Directory Watch .
Reached target Basic System.
1.5326161 usb 1-1: New USB device found, idVendor=06Z7, idProduct=08B1, bcd
Device=
8.88
1.5356881 usb 1-1: New USB device strings: Mfr=l, Product=3, SerialNumber=1
1.5382481 usb 1-1: Product•. QEMU USB Tablet
1.5335281 usb 1-1: Manufacturer•. QEMU
1.5487741 usb 1-1: SerialNumber•.
1.5433871 input: QEMU QEMU USB Tablet as
: 82 : 88 . B/usbl/l-l/l-l : 1 . B/ inputZ
1.5466381 hid-generic input,hidrawa: USB HID VB .81 Mou
se [QEMU QEMU USB Tablet] on
1.9469151 input: ImExPS/Z Generic Explorer Mouse as
/seri01/input/input3
1.9758681 tsc: Ref ined TSC clocksource cal ibration:
/devices/p latform/ i 8842
2932.935 MHz
ng
ng
ng
151.8344581 dracut-initqueue[Z381:Warn ing :dracut-initqueue timeout – starti
188 .3836111 dracut-initqueue[Z381: Warning: Could not boot.
188 .4626941 dracut-initqueue[2981:Warning: /dev/centos/root does not exist
Reg.
MyMeyer
You should boot from some Linux LiveCD and then regenerate the initramfs file to include the new drivers for your new environment, i.e. (qemu-?) KVM. Your problem is that the modules for the virtualized disks in your new environment are not included.
Hey!!
I am stuck at boot process after typing ‘exit’ from dracut. currently stuck at ‘a start job is running for /dev/mapper/vg_root-lv_root’Please help what can be the issue.