Here are the steps to enable your internal graphics – the CPU internal video chip in your Intel processor. Multiple Intel processors have video unit in it, which could be used for hardware decoding and encoding of video streams. We have two kind of processors:
Intel(R) Xeon(R) CPU E3-1585 v5 @ 3.50GHz
and
Intel(R) Xeon(R) CPU E3-1285 v4 @ 3.50GHz
the two processors packed with the right motherboard will give you a big advance in hardware decoding and encoding with your server! Intel calls it “Intel Quick Sync Video” and to use it your chipset should support it, so when using SUPERMICRO your motherboard must be equipped with C226 (for v4 CPU) and C236 (for v5 CPU)! Your CPU could have video unit in it, but if your chipset does not support internal graphics you won’t be able to use it, so be careful to have C226 or C236 Chipsets!
So if you have another setup (not Supermicro) you should check the chipset of your motherboard if it support internal graphics this is very important, because there are numerous motherboard, which have BIOS options for Enable/Disable of the internal graphics, but you cannot use it!
Here are the compliant platforms to use the video unit properly:
Intel Xeon E3-1200 v4 Family with C226 chipset
Intel Xeon E3-1200 and E3-1500 v5 Family with C236 chipset
If you enabled the internal graphics properly you’ll see it in hardware devices Device manager in MS Windows and in linux with “lspci”:
[root@srv ~]# lspci |grep -i display
00:02.0 Display controller: Intel Corporation Device 193a (rev 09)
Your BIOS menus could vary, but for SUPERMICRO there are vary similar:
STEP 1) The SUPERMICRO server is intializing you. Hit “DEL” button on your keyboard to enter BIOS Setup.
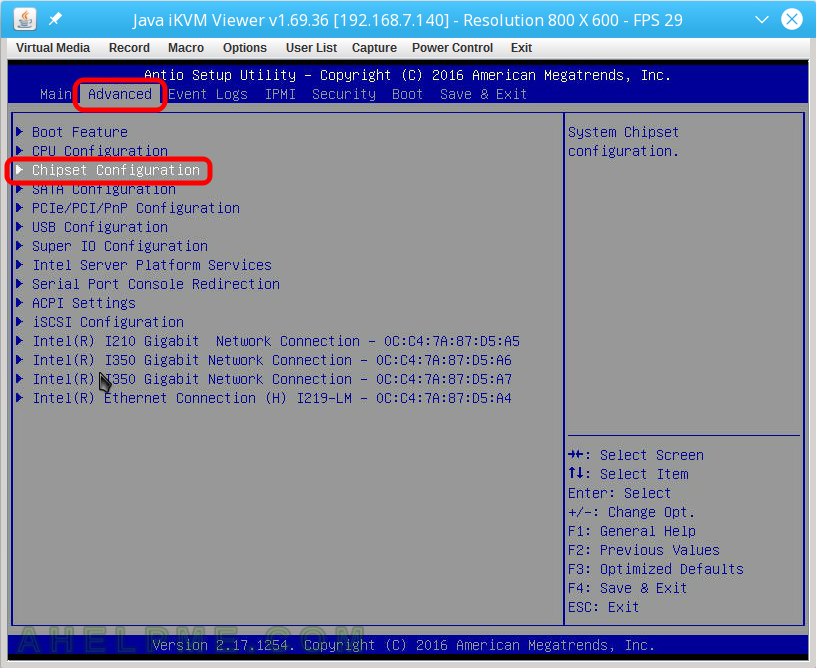
STEP 2) Go to “Advanced” tab with the arrows and then hit “enter” on “Chipset Configuration” to enter the sub-menu.
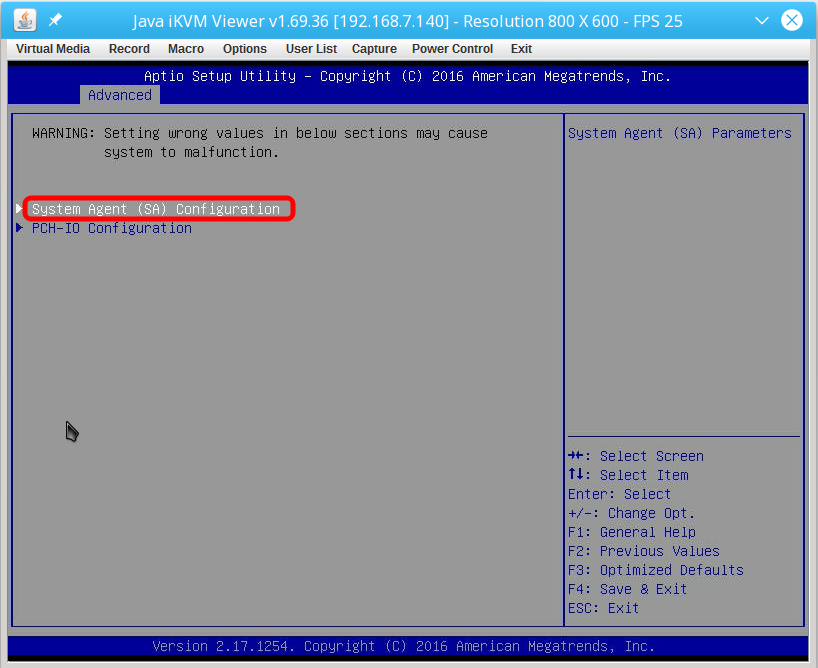
STEP 3) Hit “enter” on System Agent (SA) Configuration to enter the sub-menu
STEP 4) Hit “enter” on “Graphics Configuration” to enter the specific video sub-menu

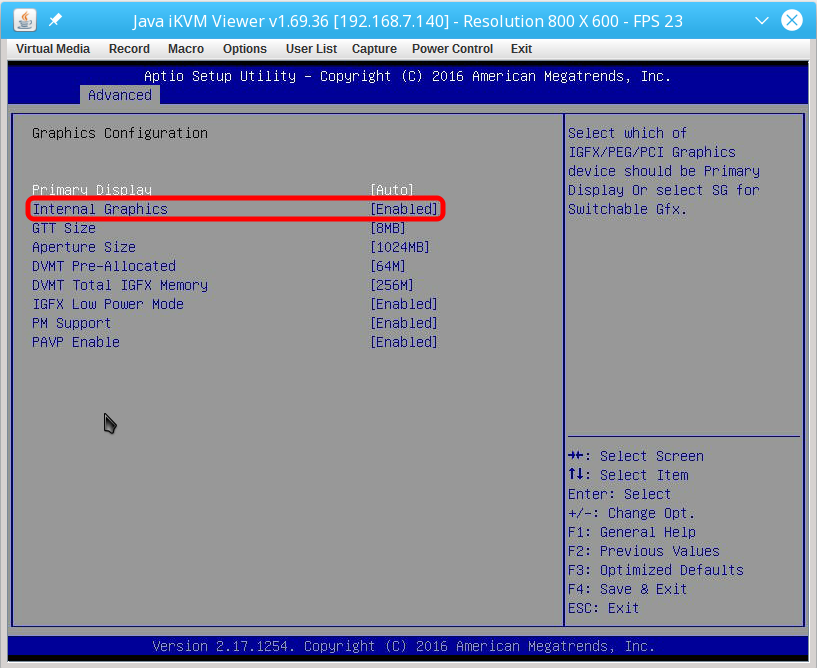
STEP 5) Enable “Internal Graphics”. Press Enter and select “Enable”!
And tune the configuration as in the picture or you can do test to see what is the best for your purposes – GTT Size, Apperture Size, DVMT Pre-Allocated, DVM Total IGFX Memory, IGFX Low Power Mode, PM Support, PAVP Enable. This image is a screenshot from the IPMI KVM of the SUPERMICRO motherboard – X10SLH-F/X10SLM+-F You can also enable Primary display to be IGFX if you use only KVM IPMI on your server, it is safe. Some version of the intel driver need this to be enabled so you could try “Auto” at first and then if you still have problems just set “Primary Display” to IGFX. We’ve tested it and you will still have video output in the IPMI KVM.
Note that the additional options above will be available after you reboot and enter in the BIOS again if your “Internal Graphics” was “Disabled”.
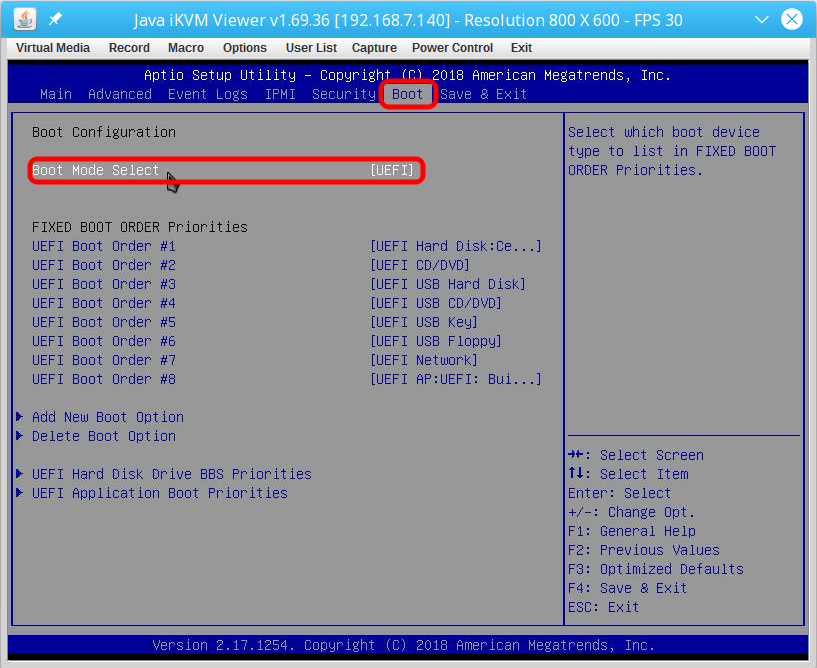
STEP 6) Enable UEFI mode of the BIOS. Go to the main menu “Boot” and set “UEFI” on “Boot Mode Select”
It is almost certain you won’t be able to use the internal display properly if you boot into Legacy mode. So your Operating system installation must be done in UEFI mode to be sure the Operating system will boot with UEFI mode not BIOS Legacy!
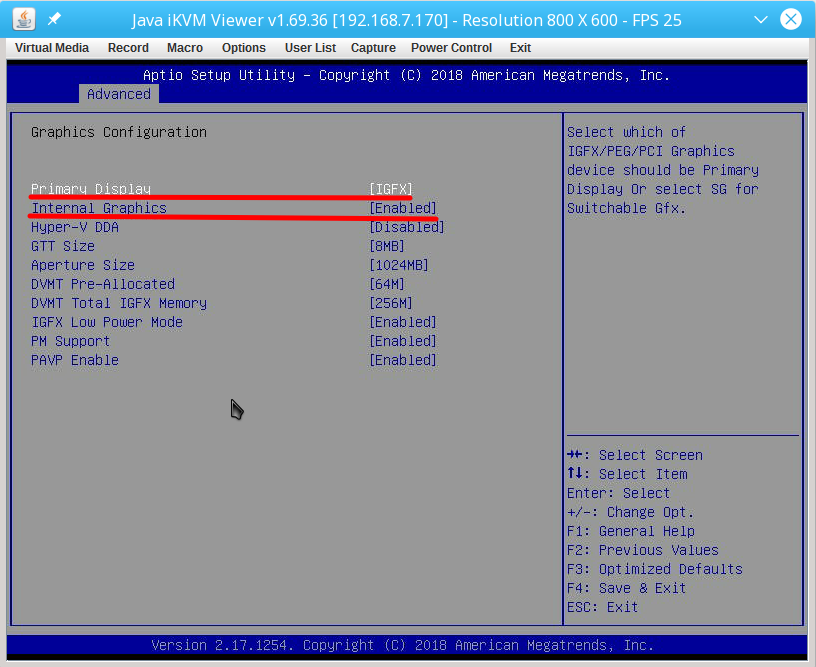
STEP 7) Enable “Internal Graphics”. Press Enter and select “Enable”!
This is the menu for the newer SUPERMICRO setup with C236 and E3-1585 v5. It is slightly different, but esensially the same. And tune the configuration as in the picture or you can do test to see what is the best for your purposes – Primary Display, Hyper-V DDA, GTT Size, Apperture Size, DVMT Pre-Allocated, DVM Total IGFX Memory, IGFX Low Power Mode, PM Support, PAVP Enable. This image is a screenshot from the IPMI KVM of the SUPERMICRO motherboard – X11SSV-M4F You can also enable Primary display to be IGFX if you use only KVM IPMI on your server, it is safe. Some version of the intel driver need this to be enabled so you could try “Auto” at first and then if you still have problems just set “Primary Display” to IGFX. We’ve tested it and you will still have video output in the IPMI KVM.
Note that the additional options above will be available after you reboot and enter in the BIOS again if your “Internal Graphics” was “Disabled”.
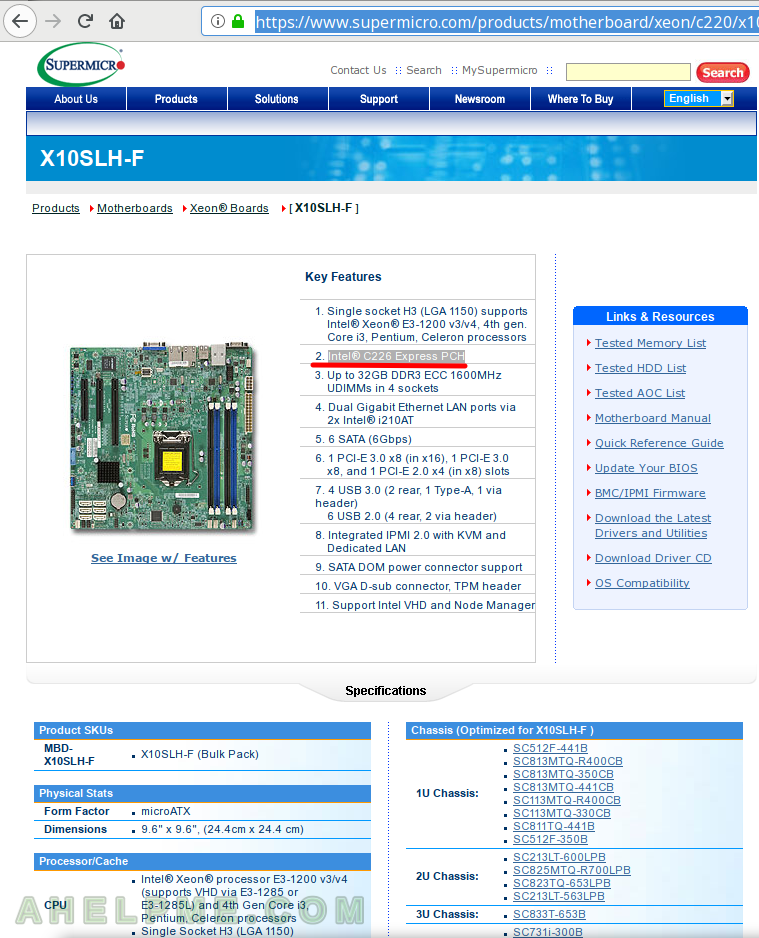
Extra 1 – The infromation from SUPERMICRO site for X10SLH-F/X10SLM+-F.
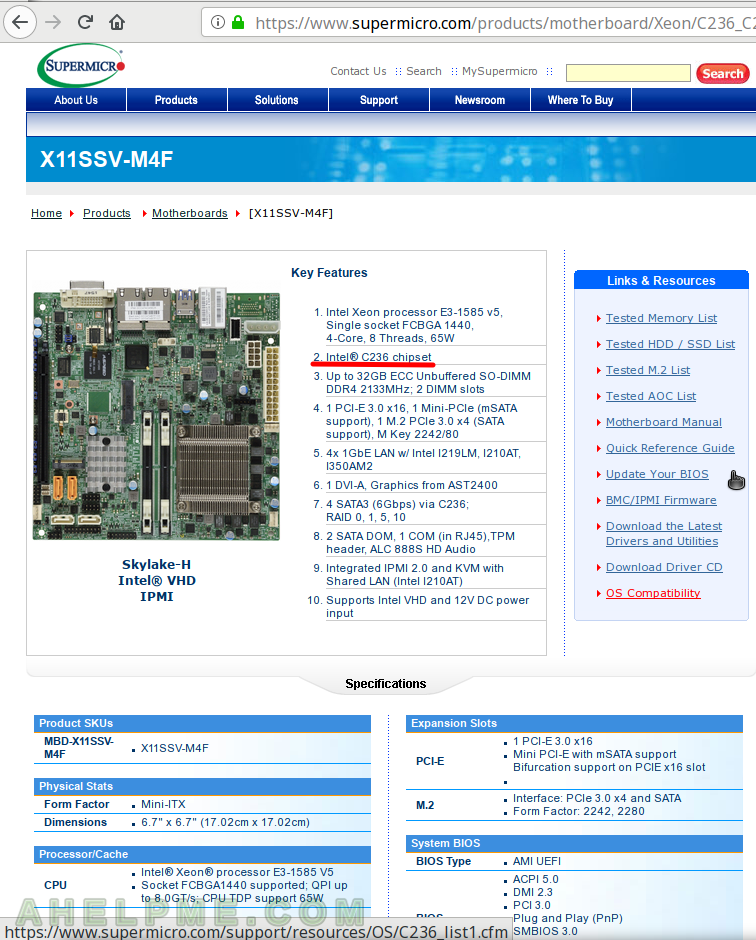
Extra 2 – The infromation from SUPERMICRO site for X11SSV-M4F.
Done.
2 thoughts on “Enable internal graphics in SUPERMICRO servers”