This is a basic review of the Eclipse new Angular IDE. What is the basic functionality of the IDE and how we can work with it. The main purpose is to show what it looks like creating an angular project.
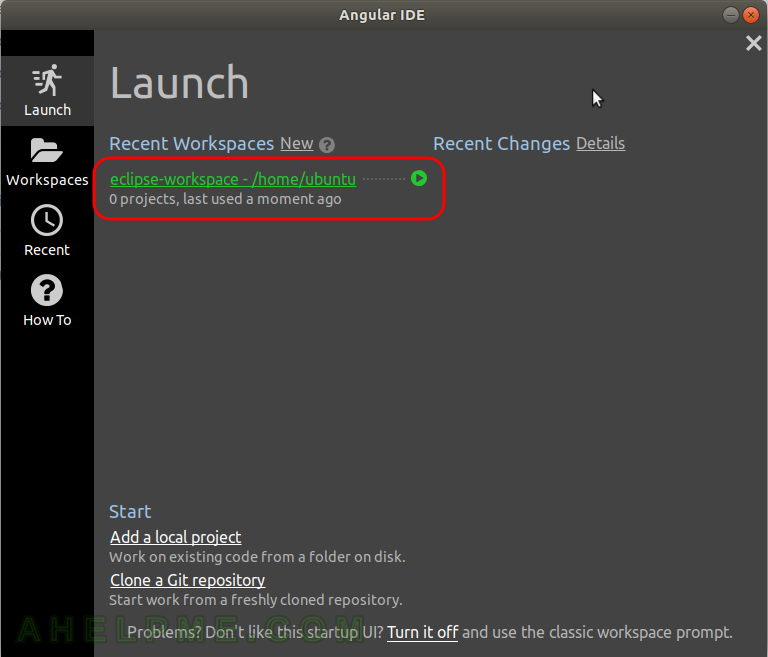
STEP 1) Launch the Angular IDE and select the Workspace you used for your projects.
Angular IDE
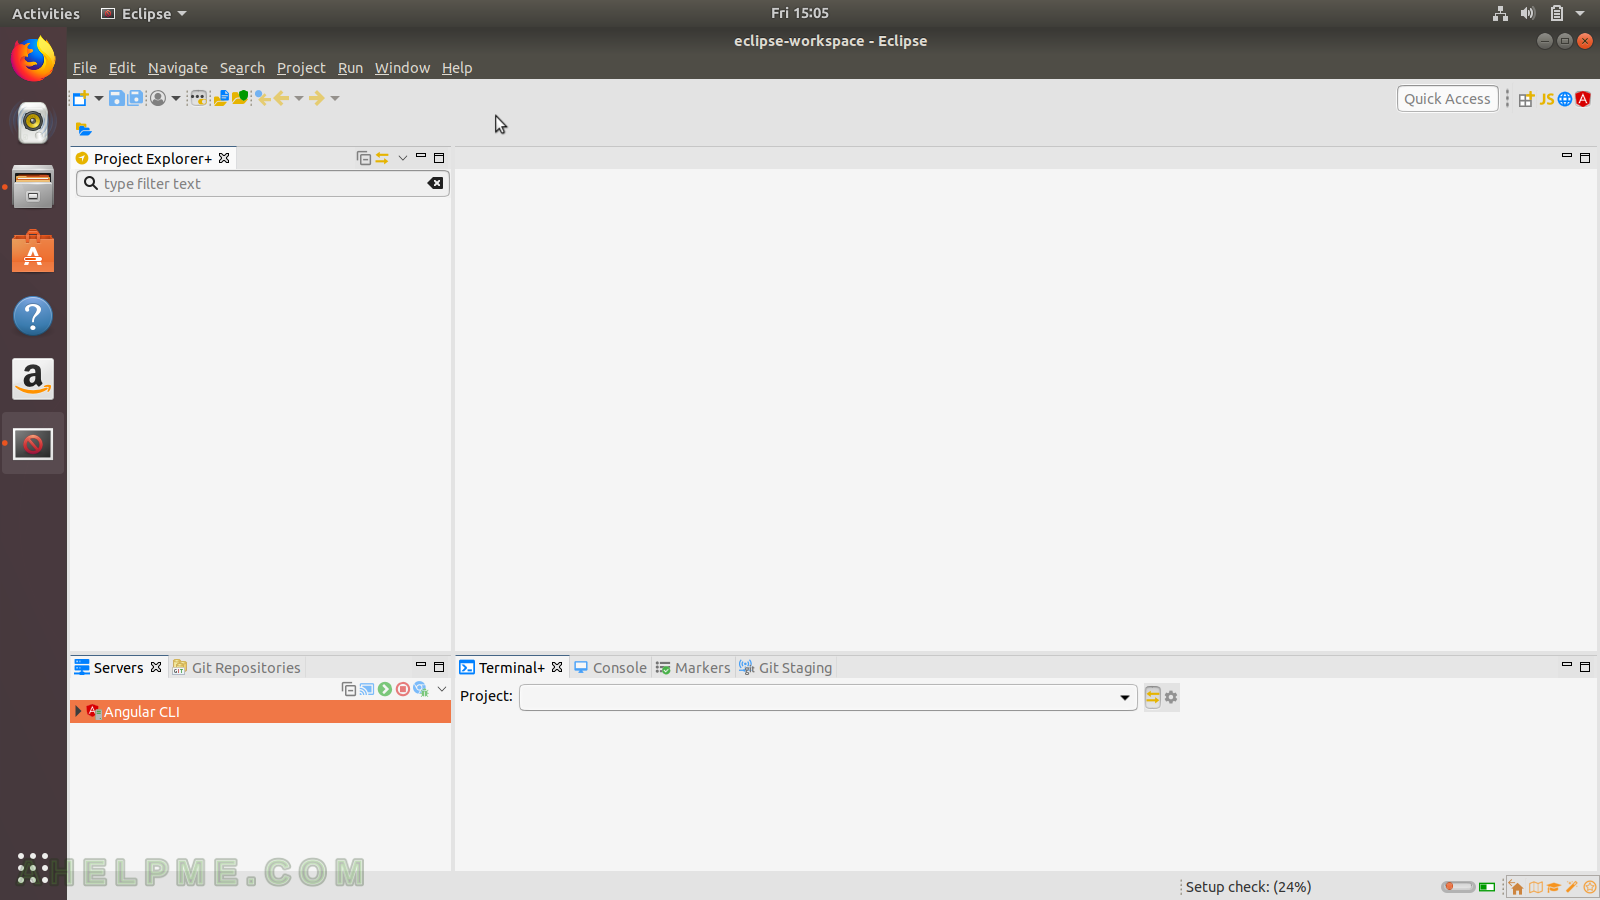
STEP 2) Eclipse IDE started for the first time – no projects opened and no history projects.
eclipse-workspace
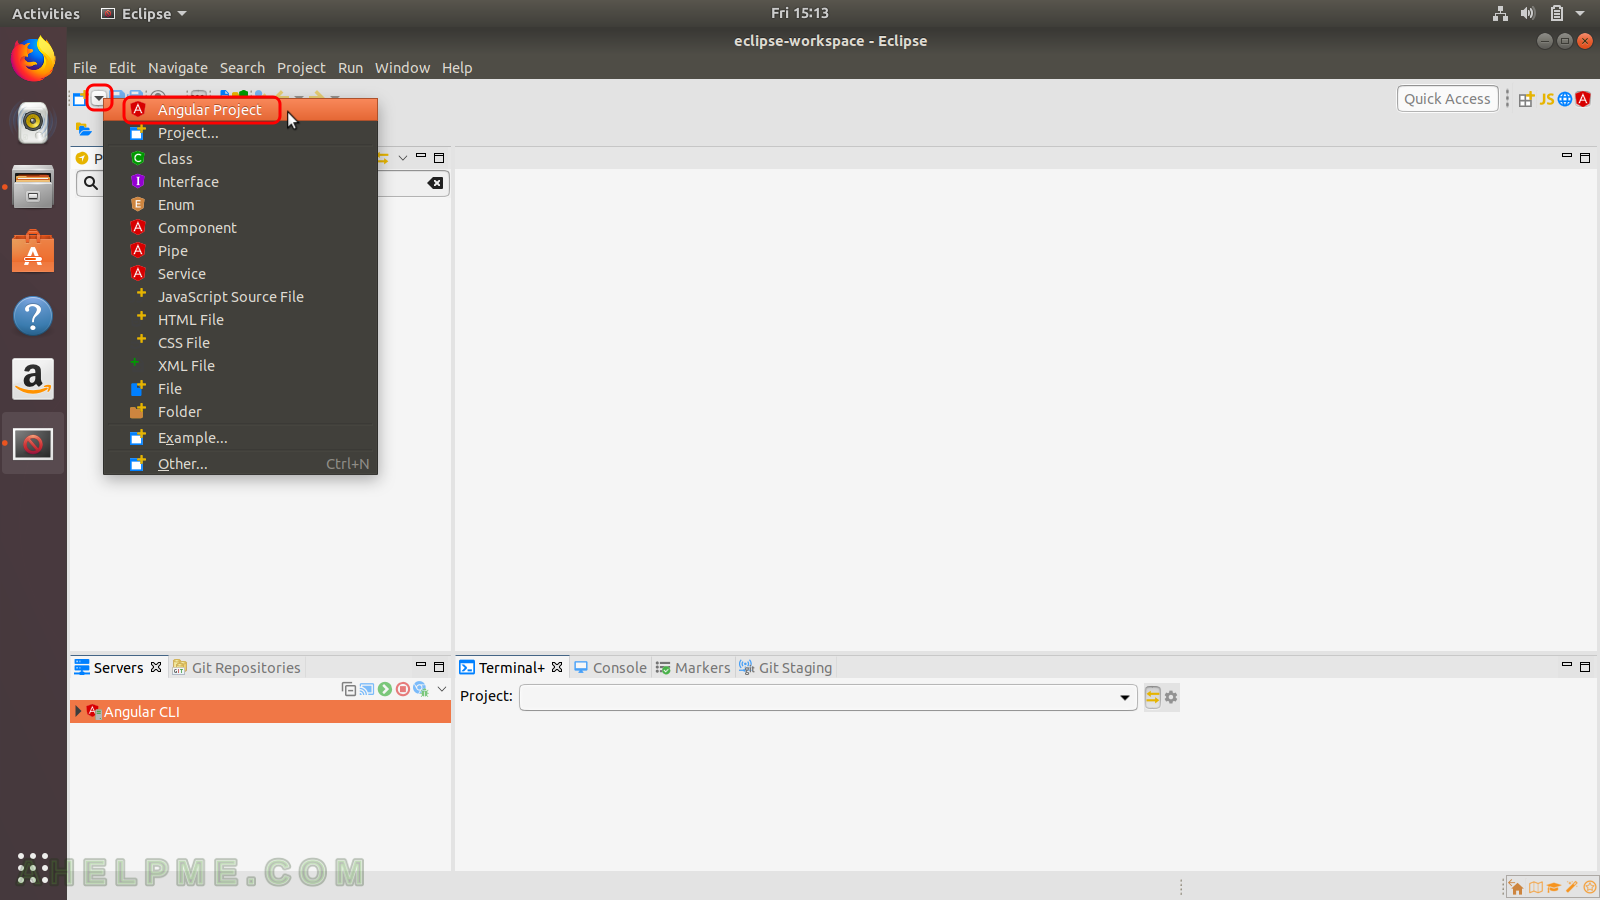
STEP 3) Create project by clicking the down array (the second icon from the left) and then Angular Project
Angular Project
STEP 4) A new window will pop up asking for the name of the project and as you can see you can tune the specific versions of Angular CLI, Node.js and NPM. Click “Next”.
New Angular Project
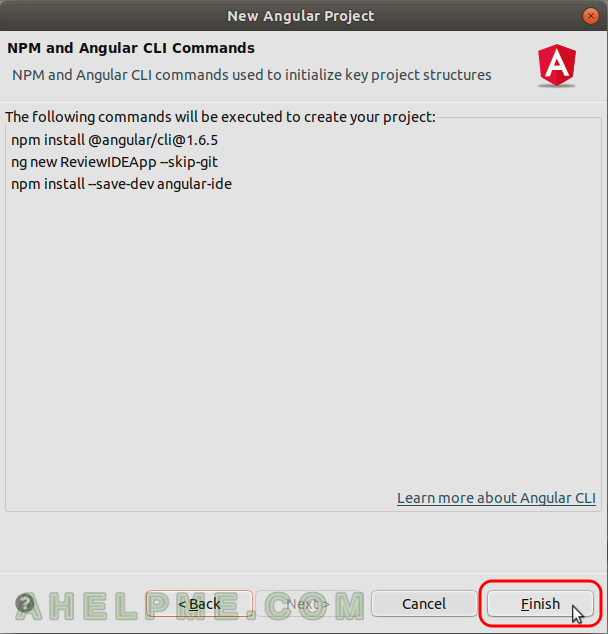
STEP 5) Here you see the commands that will be executed by the eclipse IDE to create a new Angular Project. Click “Finish”.
New Angular Project Finish
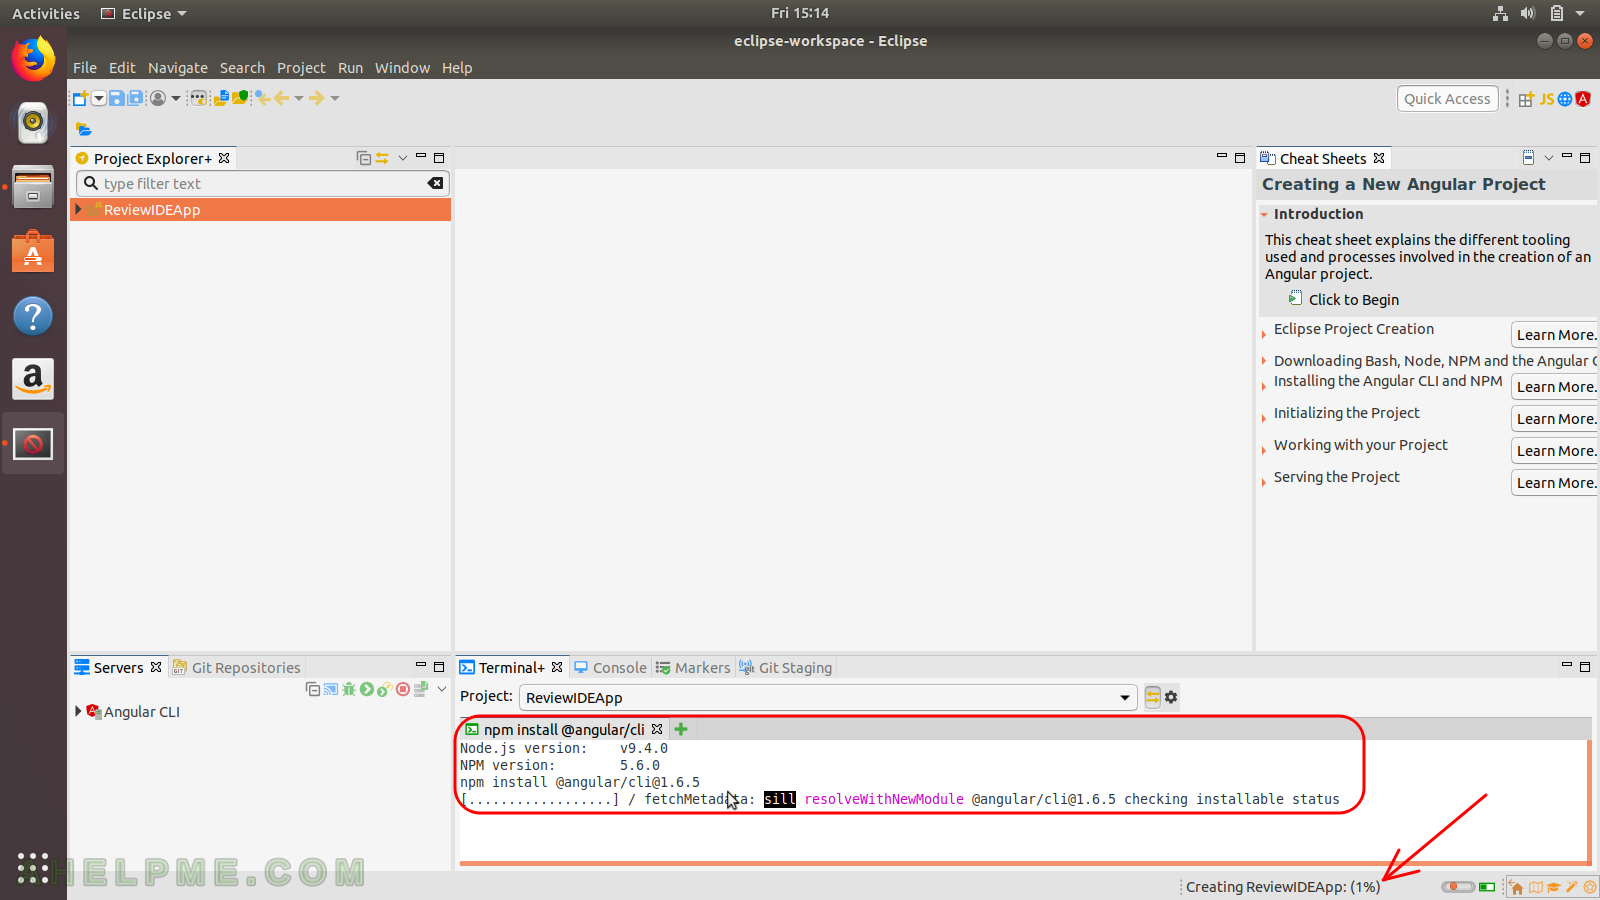
STEP 6) The commands of the previous step are executed and the needed packages and their dependecies will be installed. There a progress status with percetages right bottom of the IDE. When the percetages reach 100% the view for the angular project will be opened.
Creating the Angular Project
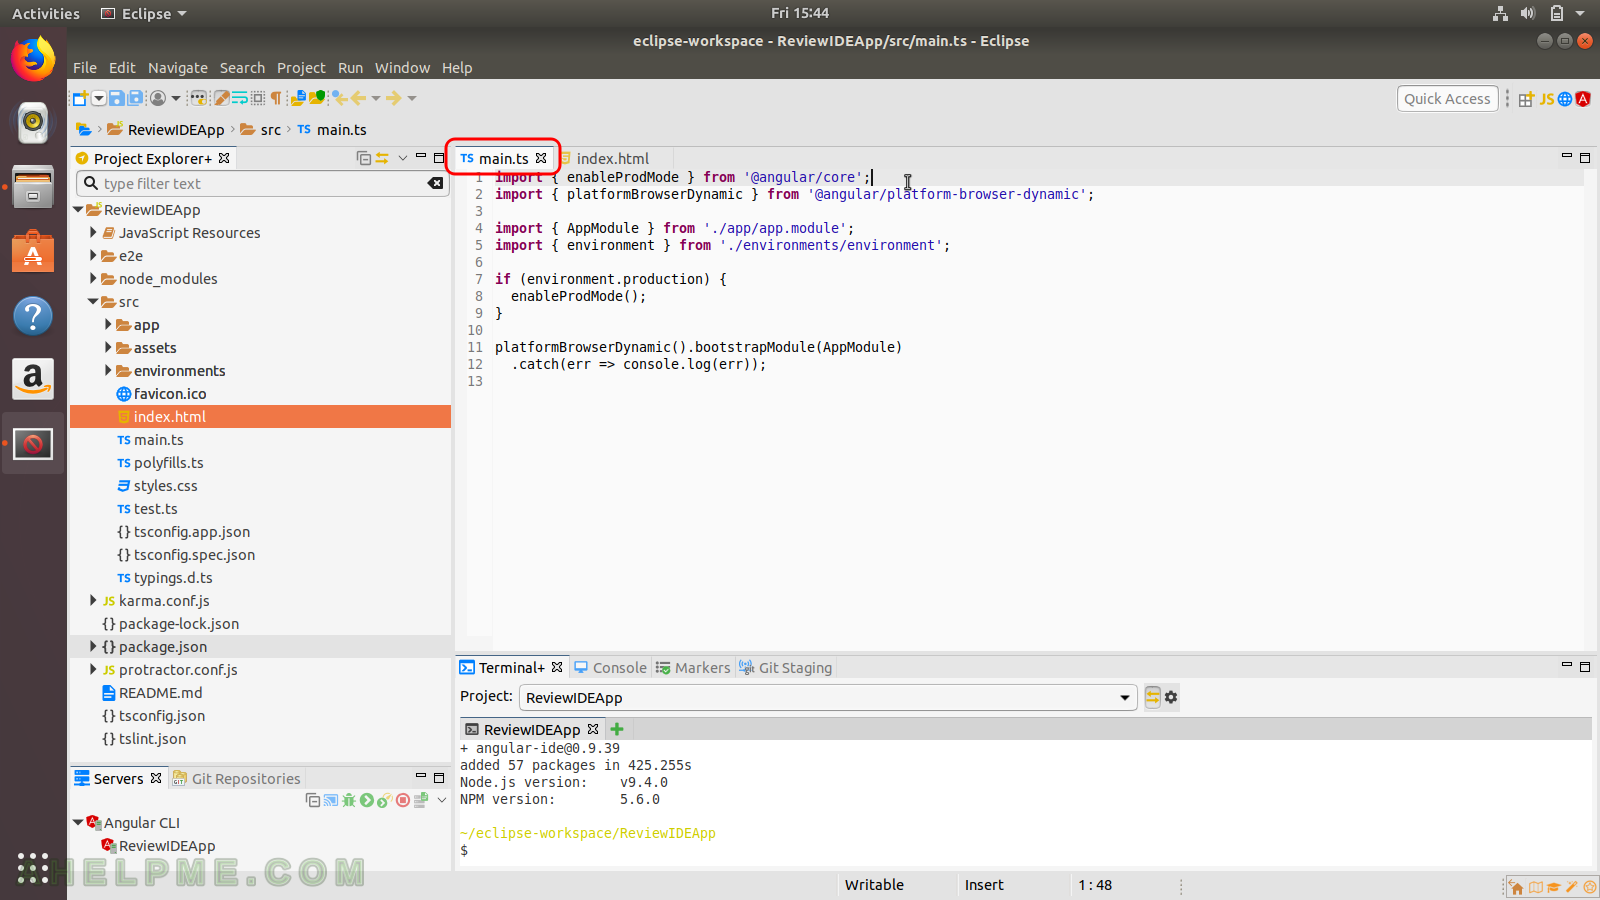
STEP 7) Angular project opened, the “main.ts” file is showed in the typescript editor. A proper hilighting of typescript language.
ReviewIDEApp
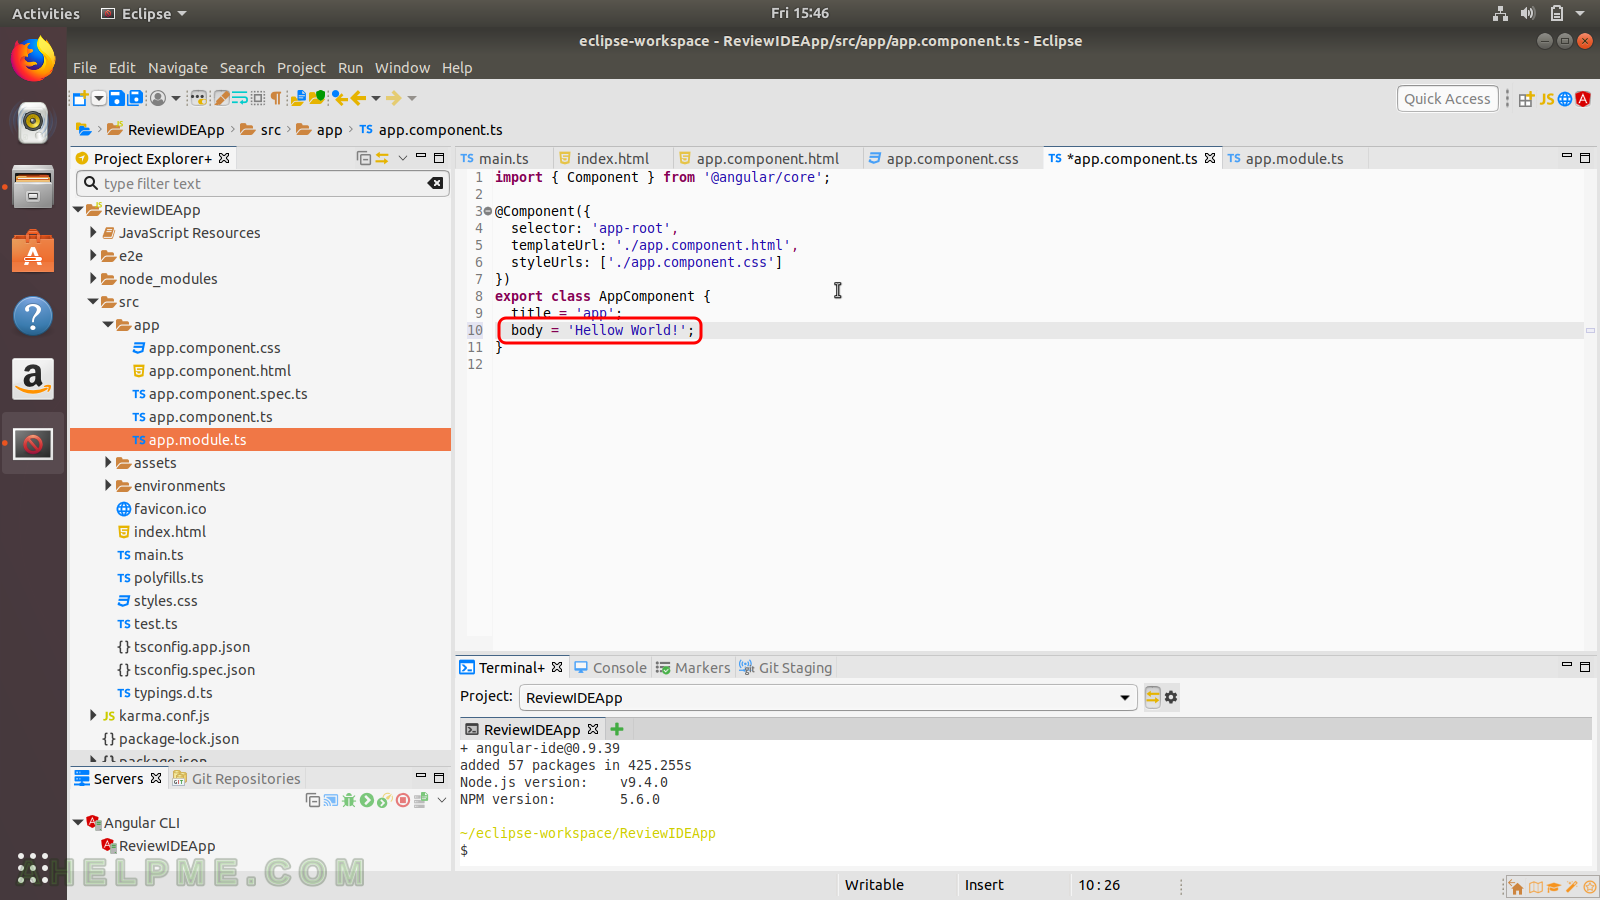
STEP 8) We open the “app.component.ts” file in the typescript editor and we add “body” variable for testing the IDE.
ReviewIDEApp – app.component.ts
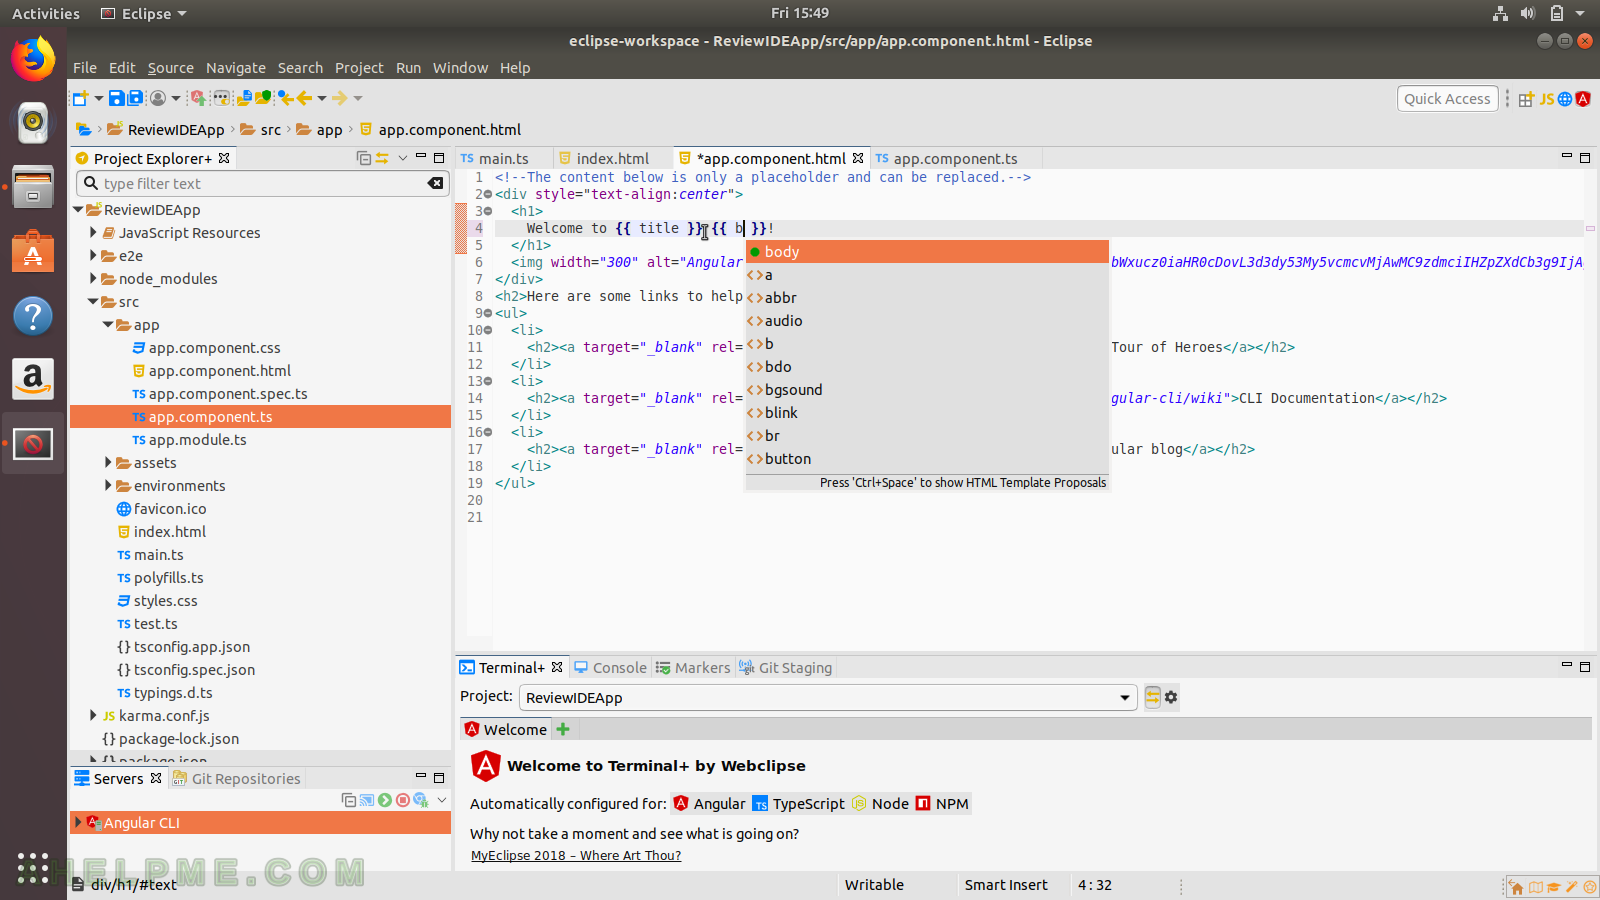
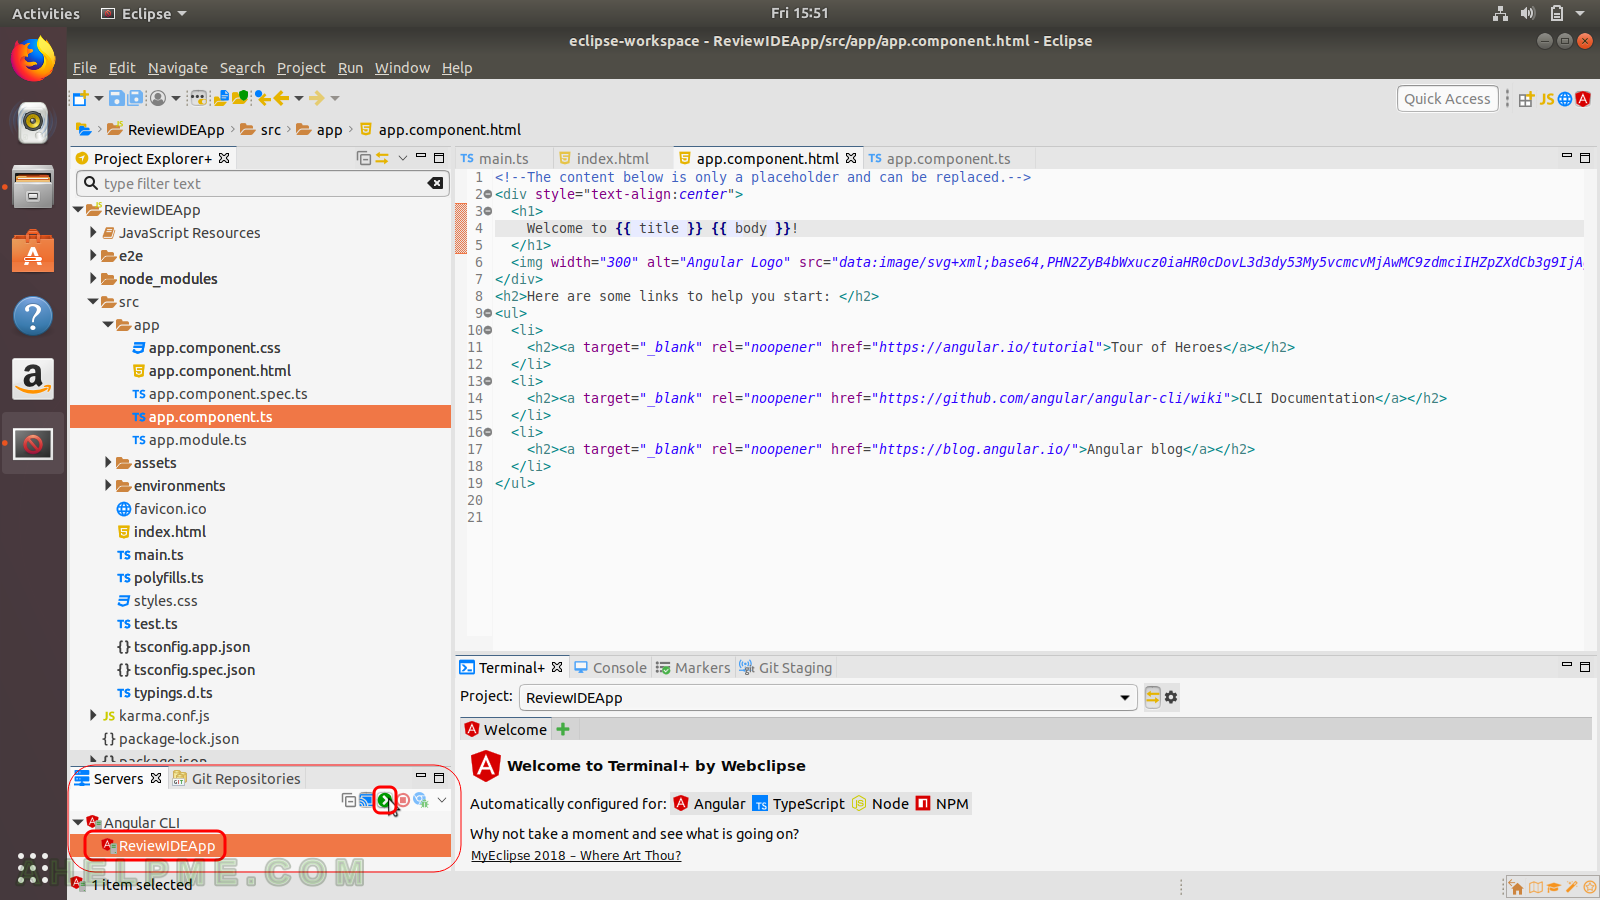
STEP 9) The html file of the AppComponent – it has a proposals (autocomplete) even in the angular string interpolation {{}}. So we use the proposal of our AppComponent variable “body”.
ReviewIDEApp – app.component.html
STEP 10) There is a tab “Servers” left bottom with all the Angular CLI applications. We have only one ReviewIDEApp, mark it and then click on the “play” button and the project will be built and started on the local ip port 4200.
ReviewIDEApp – Servers
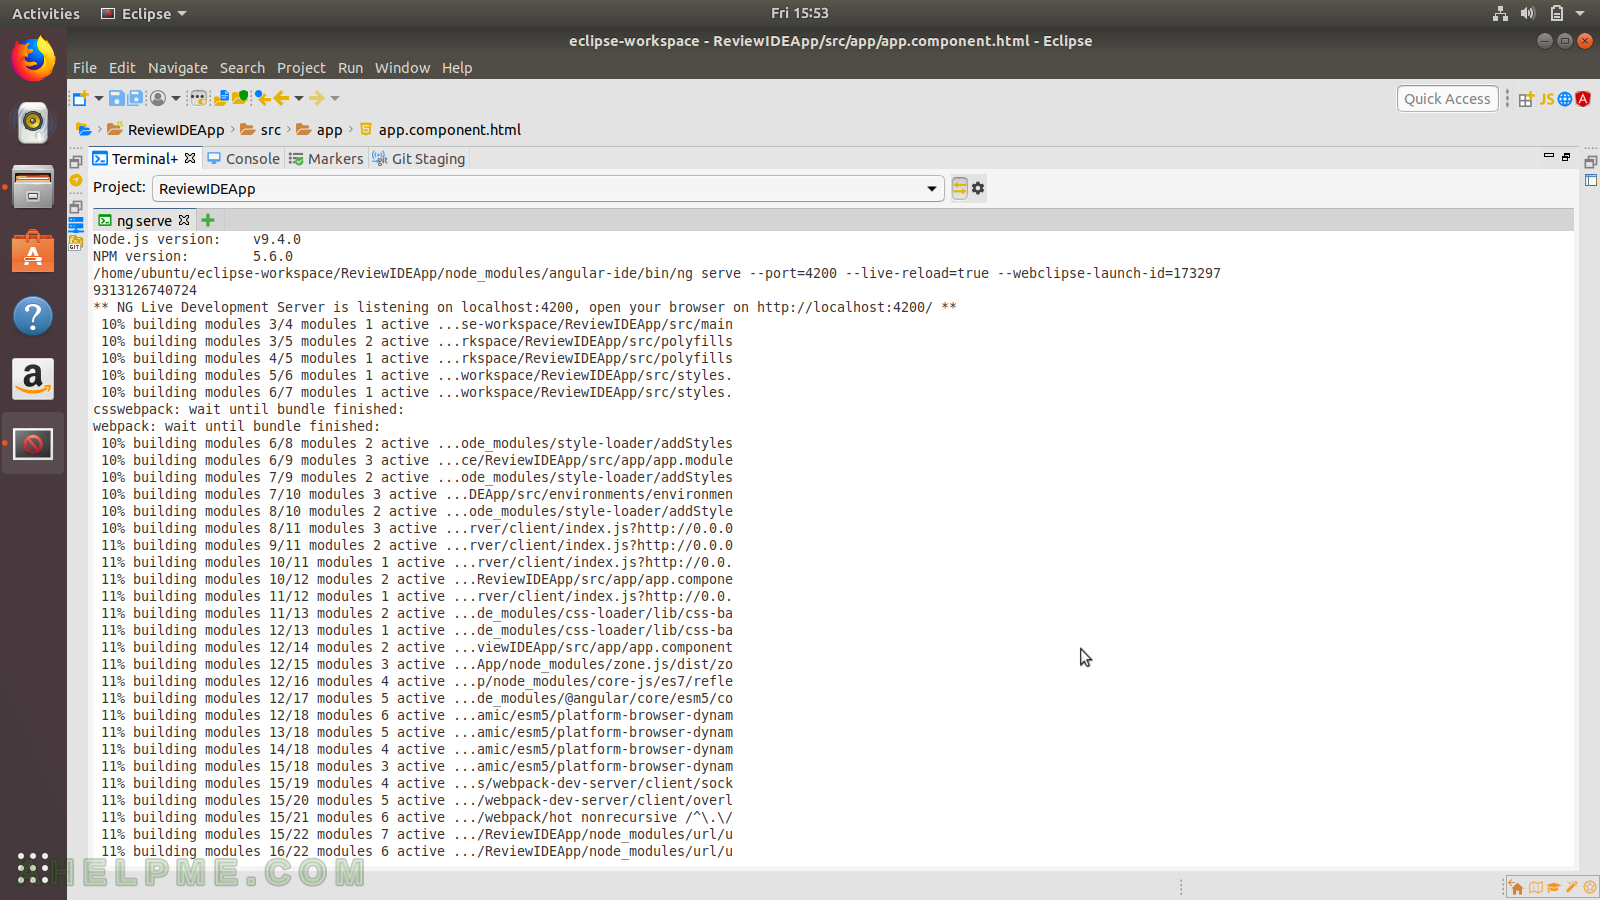
STEP 11) in the terminal you can see all the commands and their output. Our angular application is being built.
ReviewIDEApp – Terminal
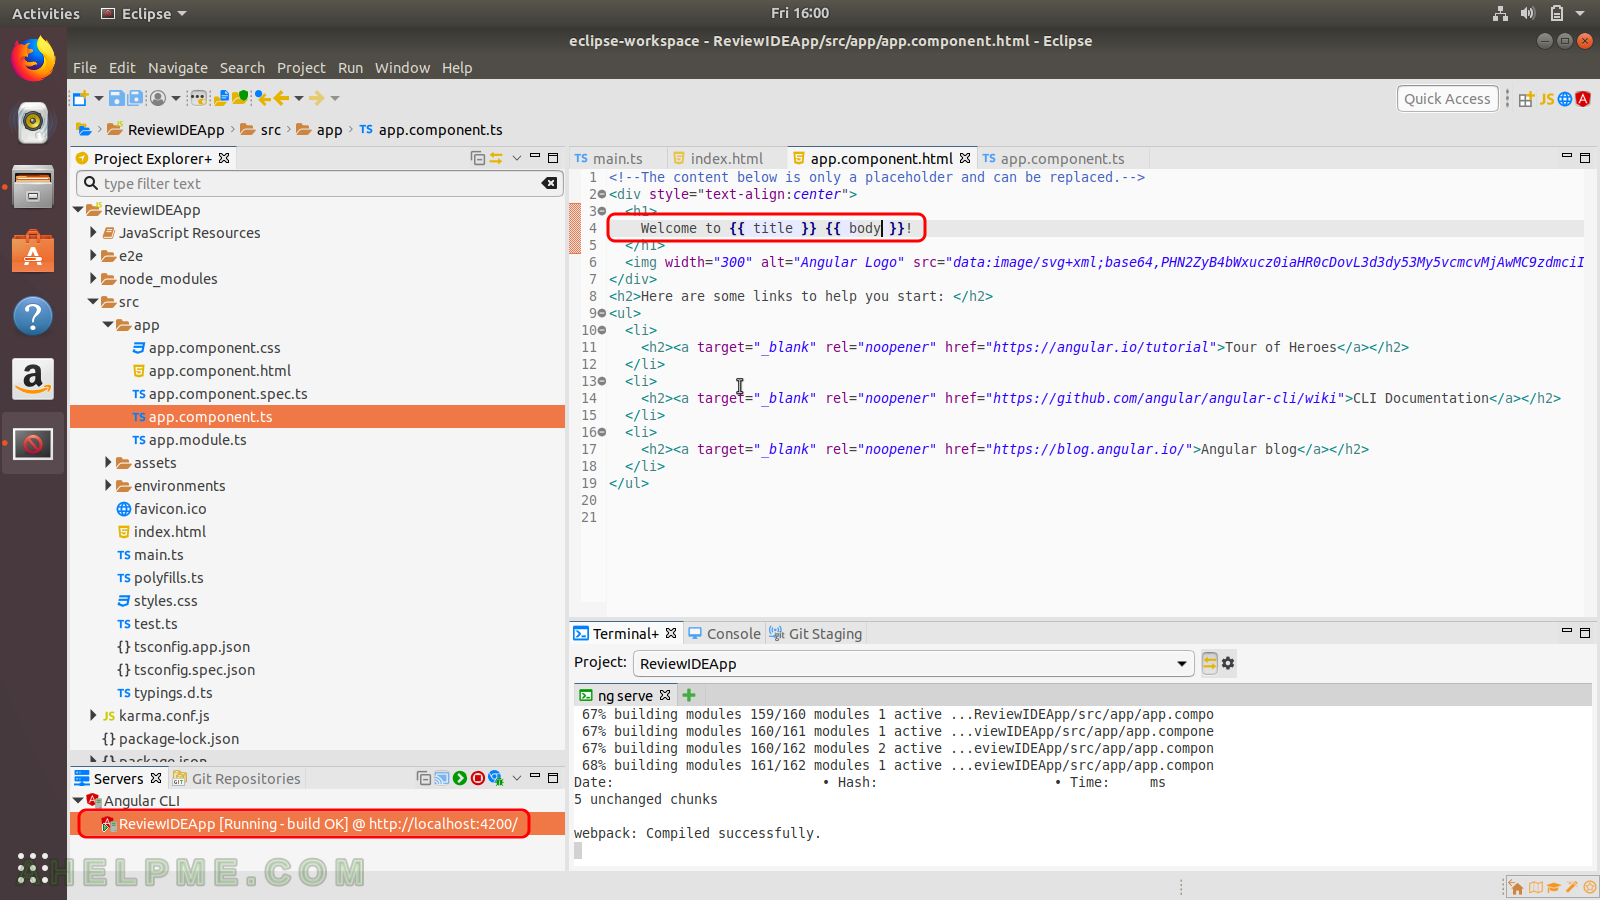
STEP 12) Again in the “Servers” tab we see our application is running on http://localhost:4200/ Also you see our modification of the default code.
ReviewIDEApp – running – build OK
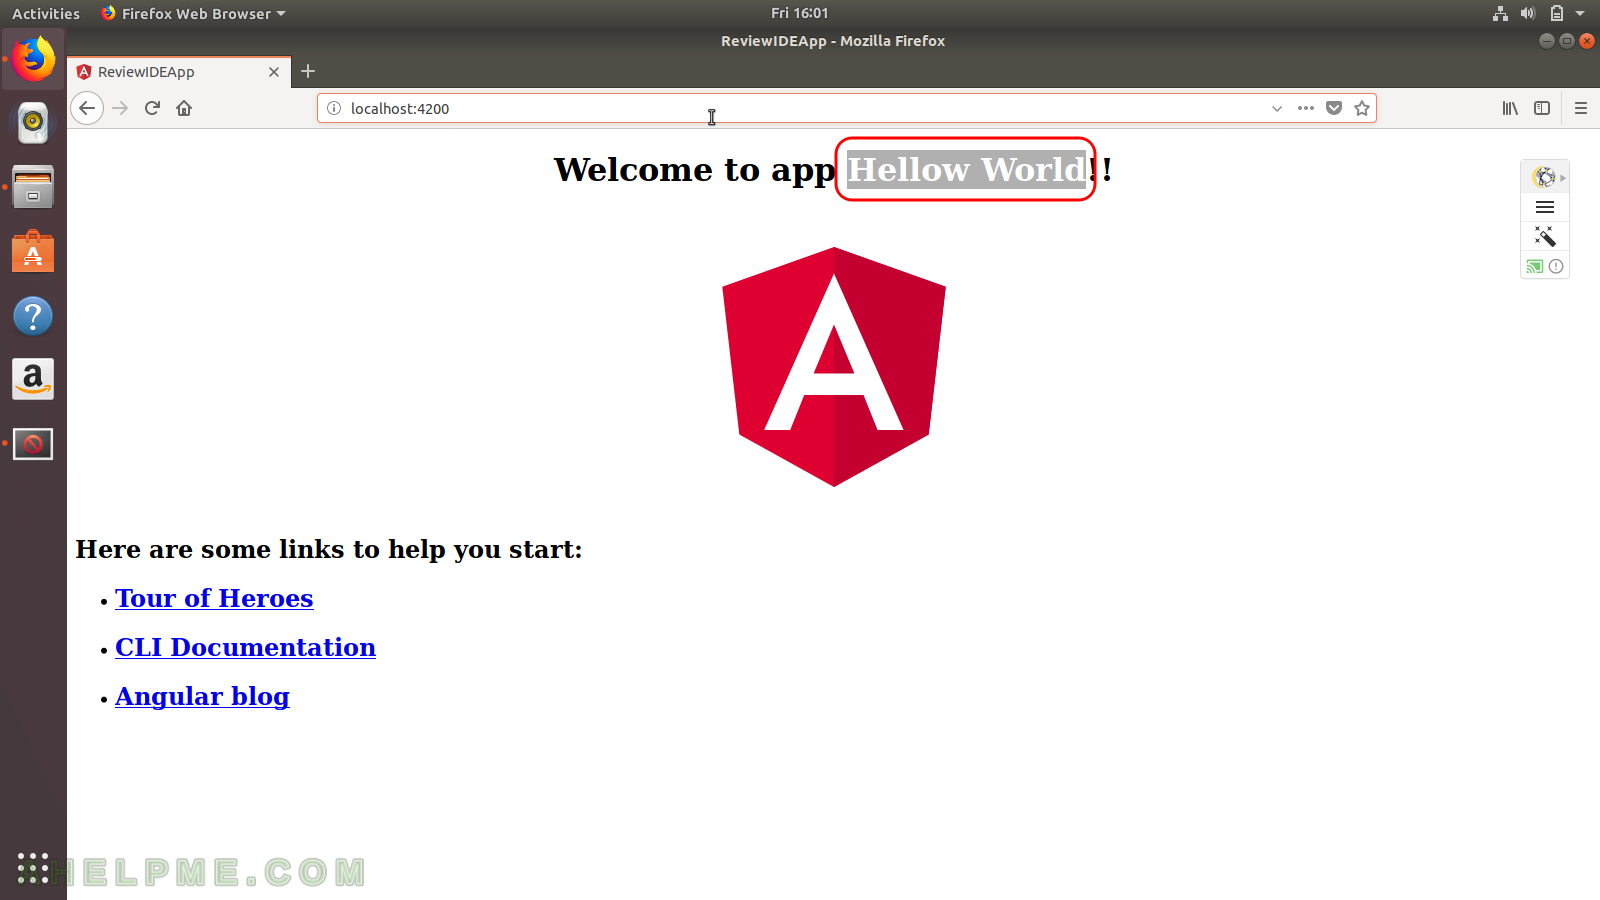
STEP 13) Open your browser and load http://localhost:4200/ you’ll see something similar and our variable “body” (“Hello World”) showed in the header.
ReviewIDEApp – browser http://localhost:4200/
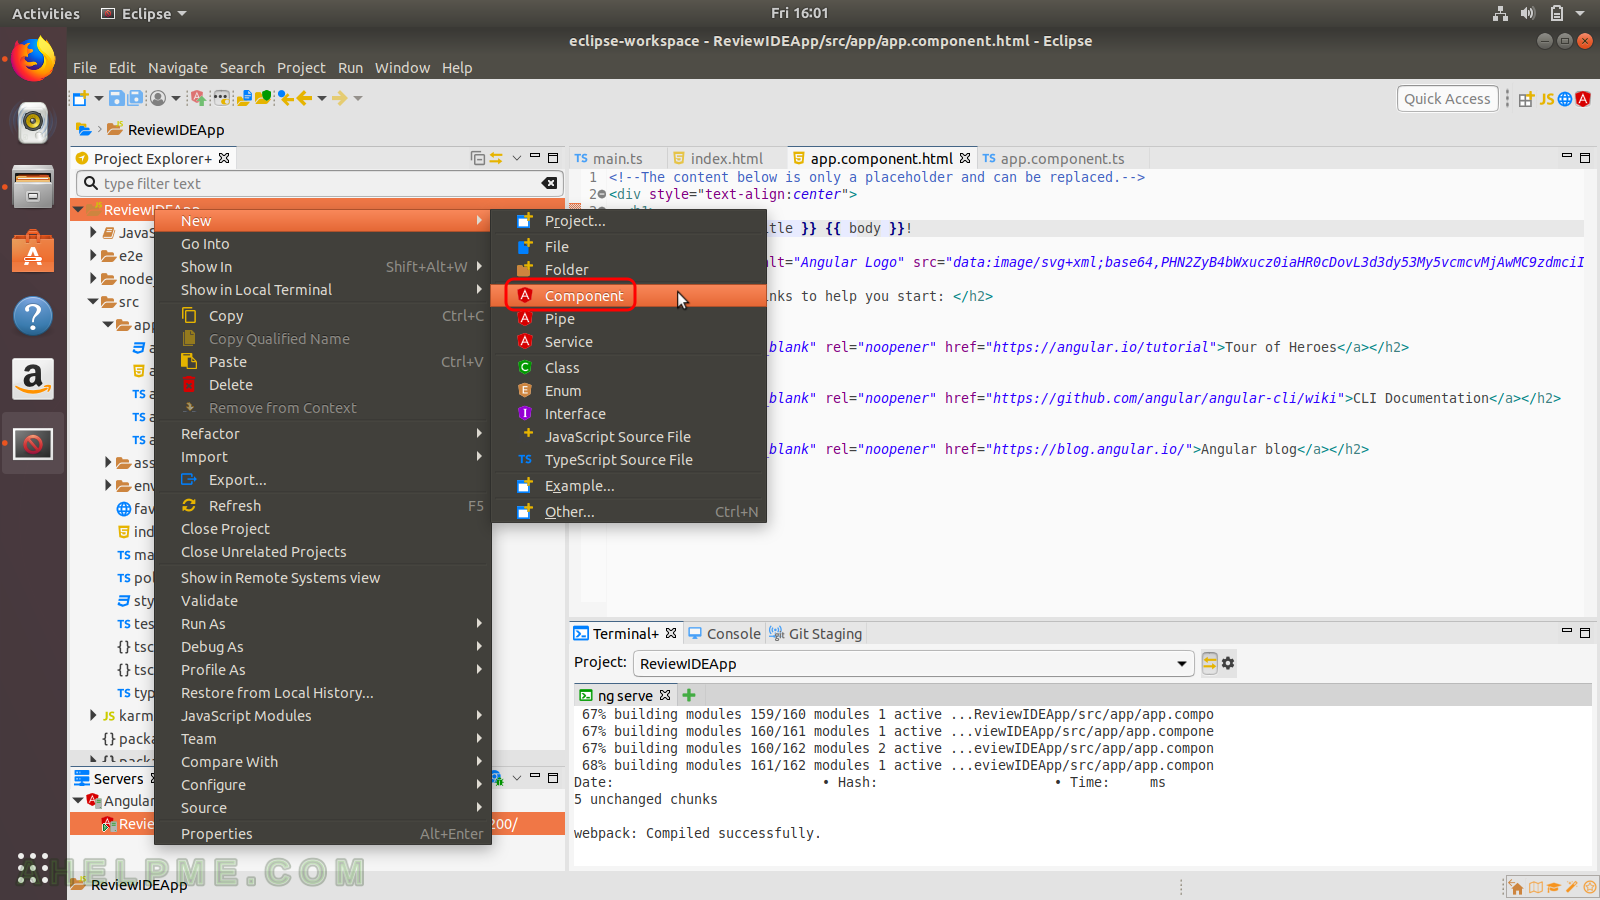
STEP 14) Create a new angular component with the IDE is simple, just mark your application in the “Project Explorer” -> right mouse click -> “New” -> “Component”.
New Component
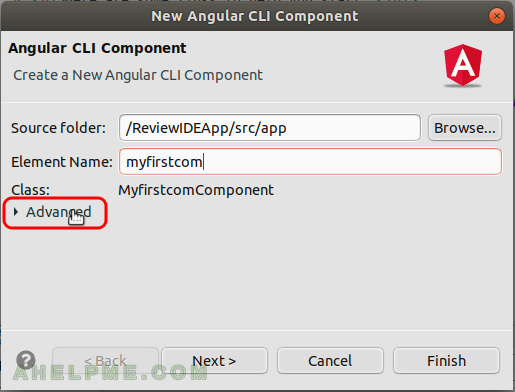
STEP 15) Set the “Element Name” and you also could click on “Advanced” to see more options for the component creation.
New Angular CLI Component
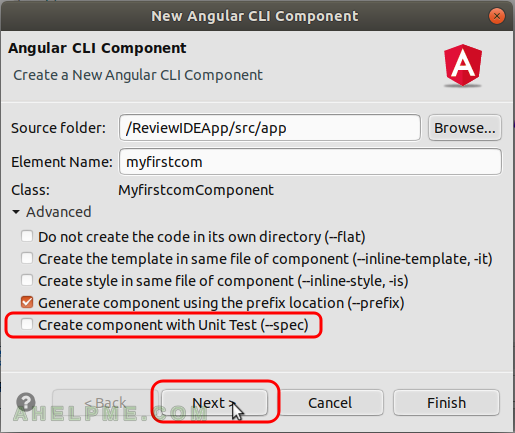
STEP 16) For example you can uncheck “Create component with Unit Test (–spec)” and then Next. It will not generate the spec file.
New Angular CLI Component – Advanced
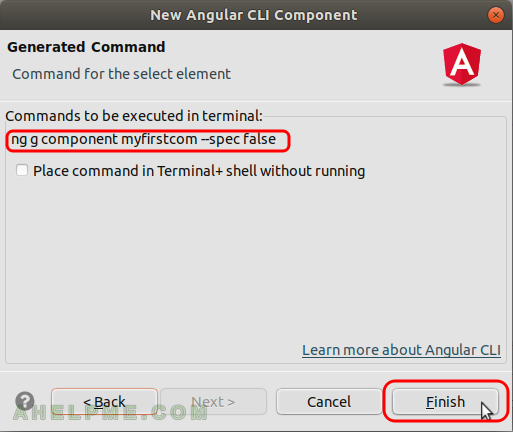
STEP 17) You see the commands to be executed in the terminal and then click “Finish” to execute the commands.
New Angular CLI Component – Generated Command
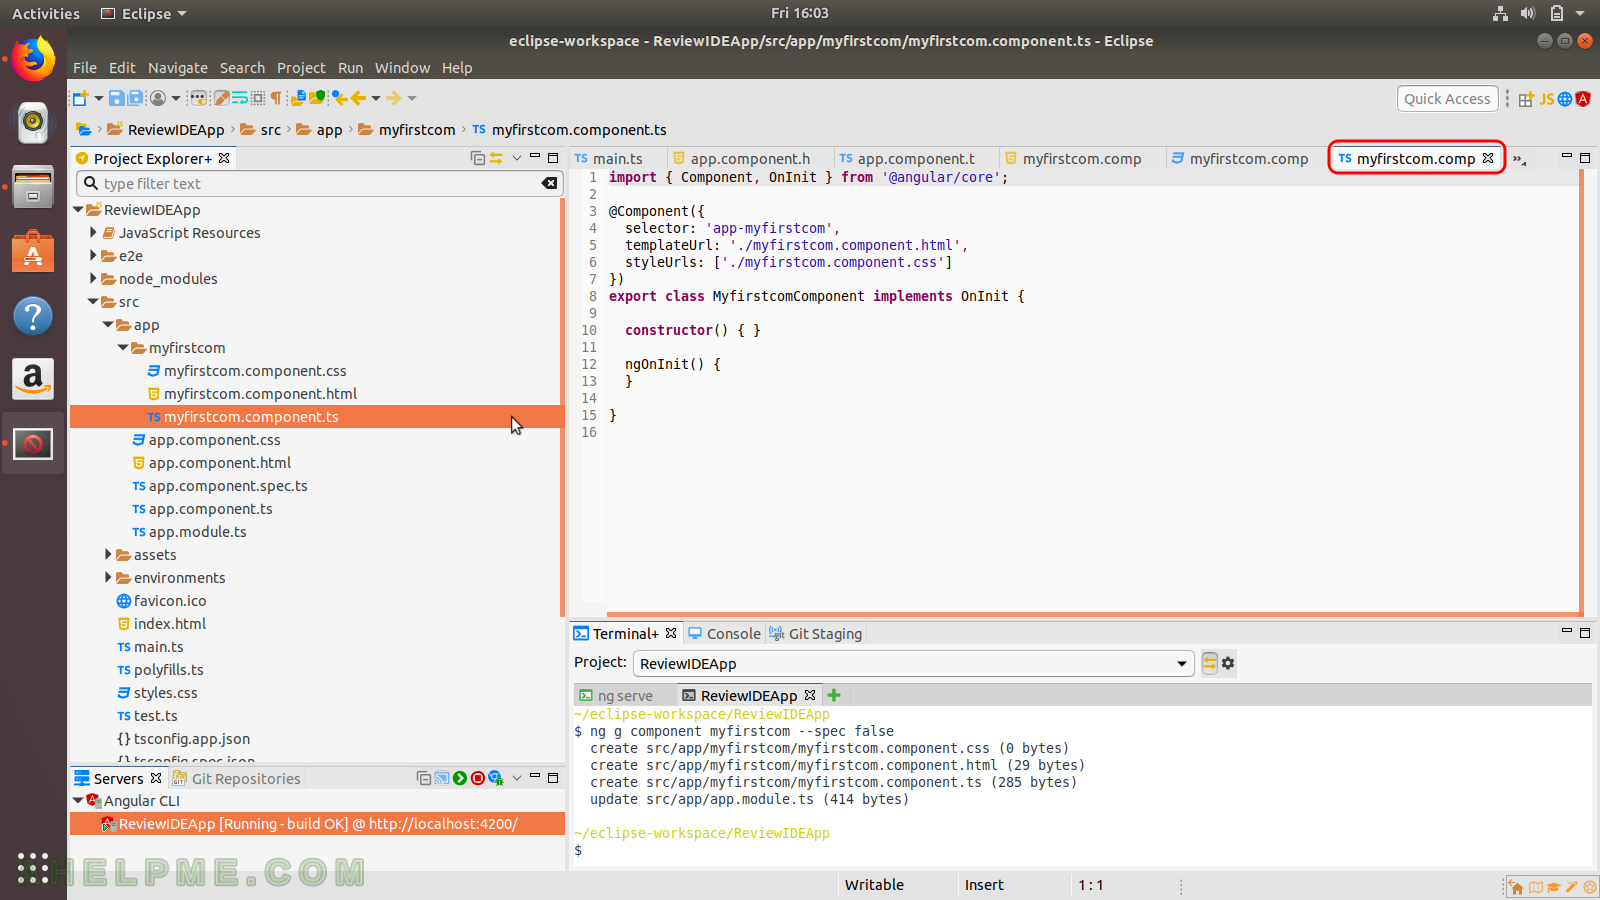
STEP 18) The files for the component are generated – ts (typescript file), html (the template file) and css (the style file). The three file are placed in a separate directory with the name of the component. The typescript file has the skeleton of your angular component.
myfirstcom.component.ts
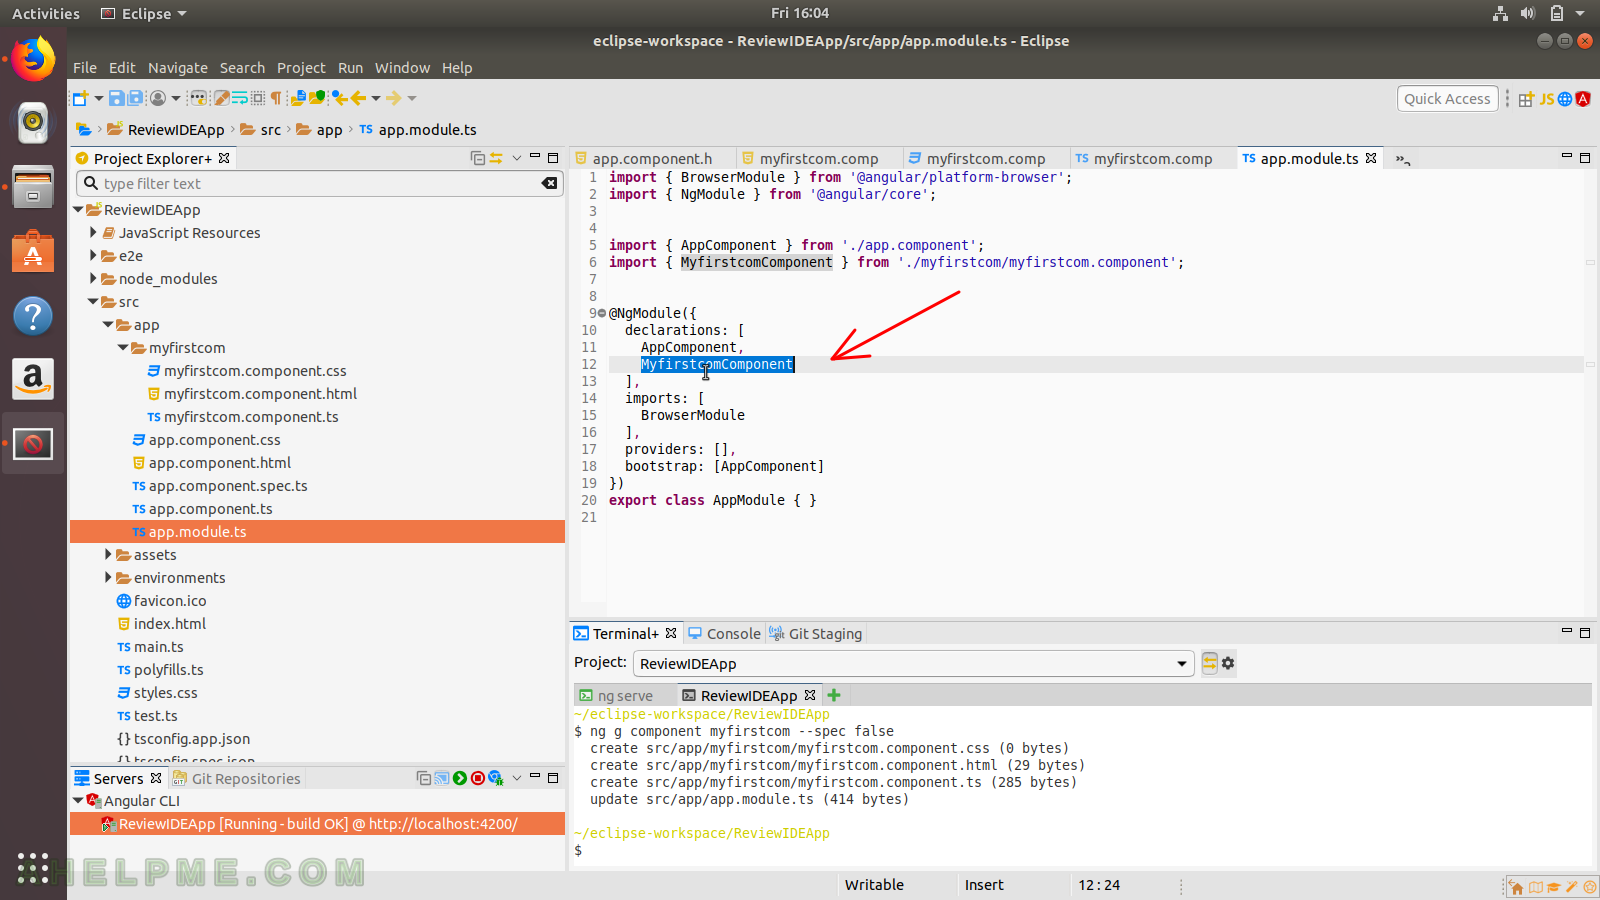
STEP 19) As you can see the CLI inlcuded the component we created from the previous step in our global app.module file.
app.modules.ts
STEP 20) Create a new angular pipe with the IDE is simple, just mark your application in the “Project Explorer” -> right mouse click -> “New” -> “Pipe”.
New Pipe
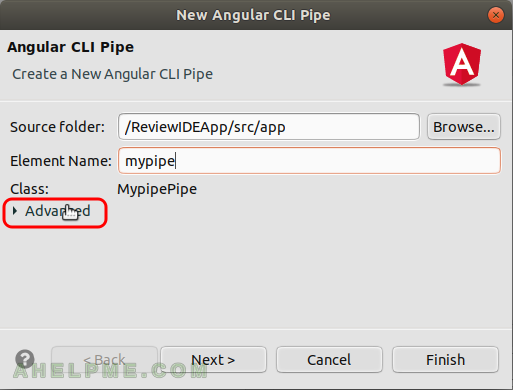
STEP 21) Set the “Element Name” and you also could click on “Advanced” to see more options for the pipe creation.
New Angular CLI Pipe
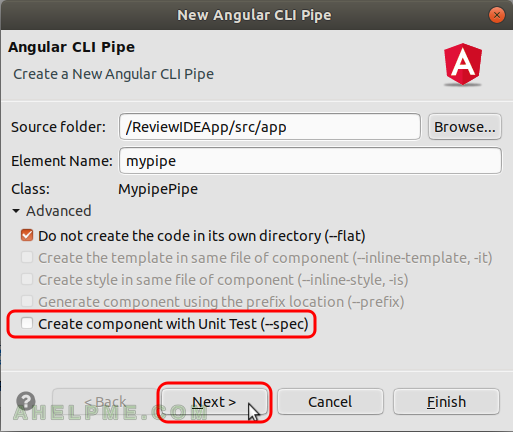
STEP 22) For example you can uncheck “Create component with Unit Test (–spec)” and then Next. It will not generate the spec file.
New Angular CLI Pipe – Advanced
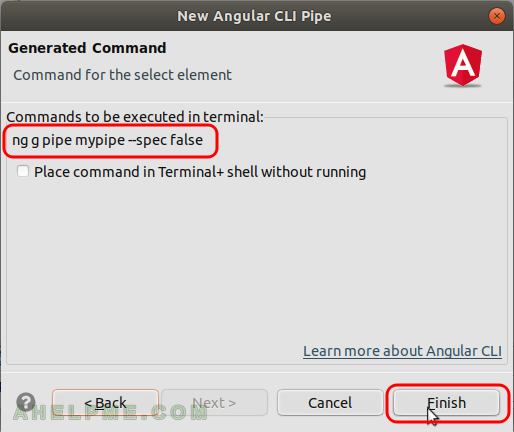
STEP 23) You see the commands to be executed in the terminal and then click “Finish” to execute the commands.
New Angular CLI Pipe – Generated Command
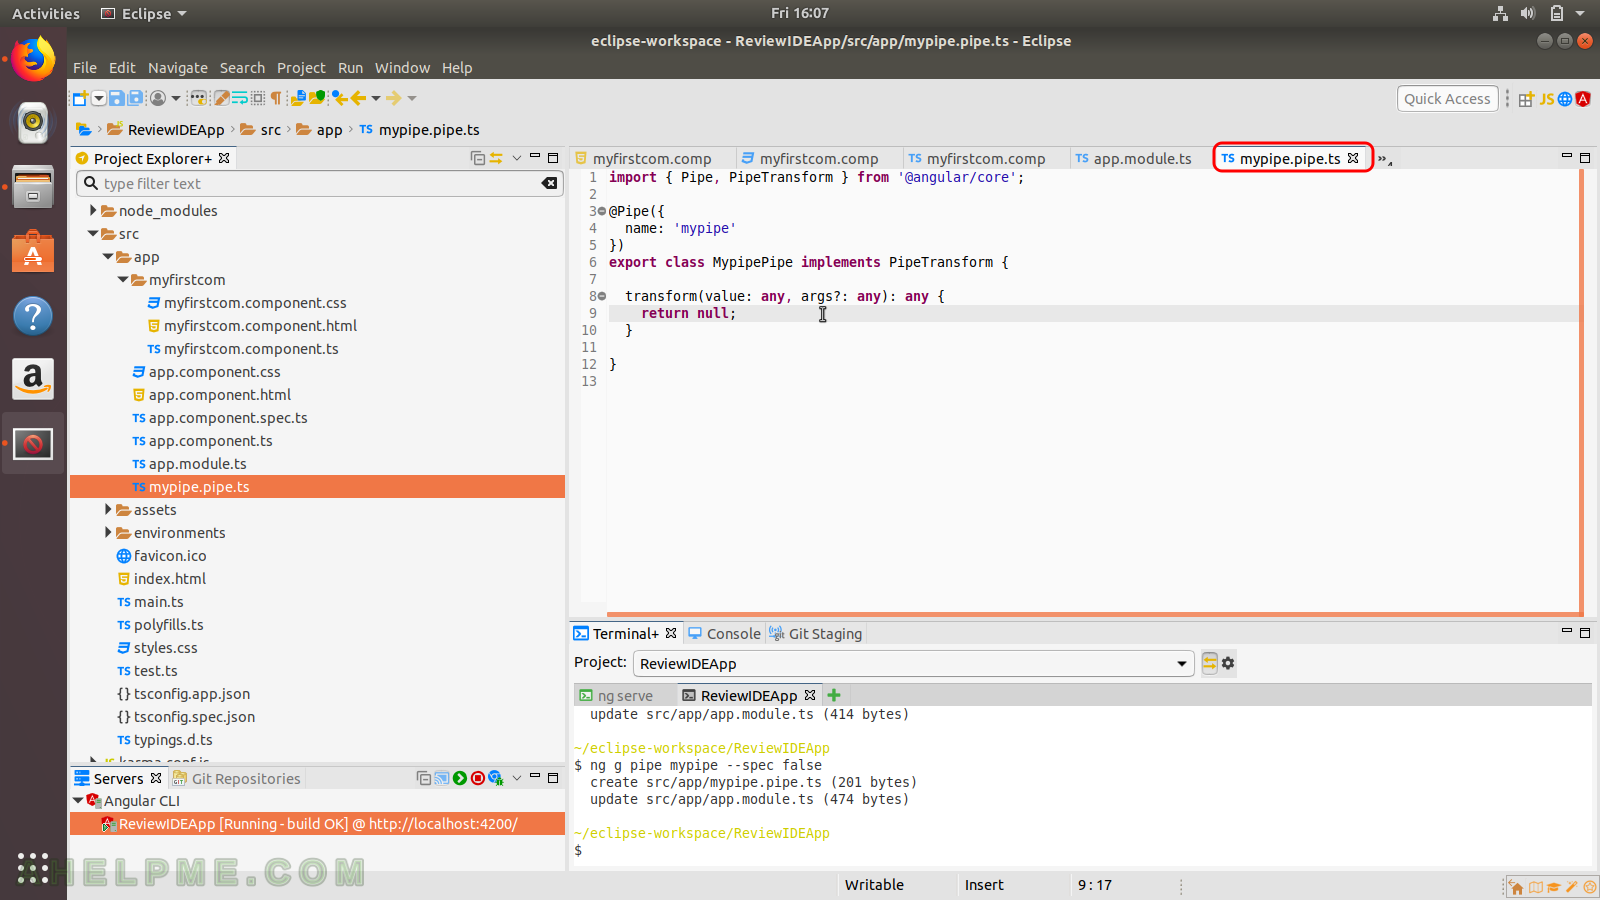
STEP 24) One typescript file is generated. The typescript mypipe.pipe.ts file has the skeleton of a pipe component. There is the definition of the pipe class implementing the the mandatory class “PipeTransform” and the method transform to override.
mypipe.pipe.ts
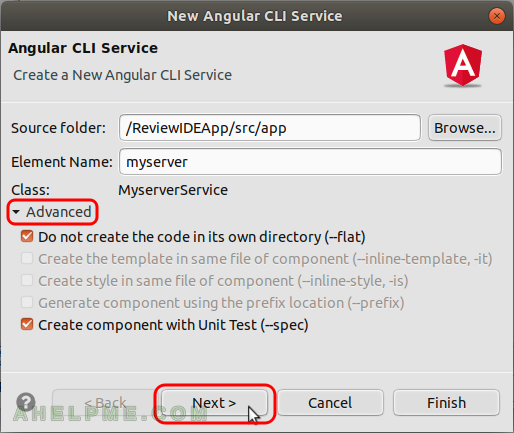
STEP 25) Create a new angular service with the IDE is simple, just mark your application in the “Project Explorer” -> right mouse click -> “New” -> “Service” and you’ll see the window for creating a service. Enter “Element Name”, click “Advanced” to see more options for the angular services.
New Angular CLI Service
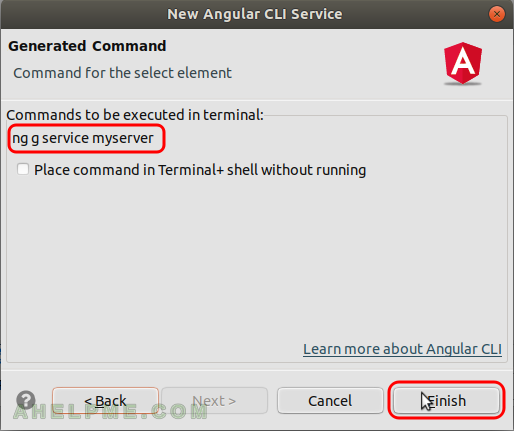
STEP 26) You see the commands to be executed in the terminal and then click “Finish” to execute the commands.
New Angular CLI Service – Generated Command
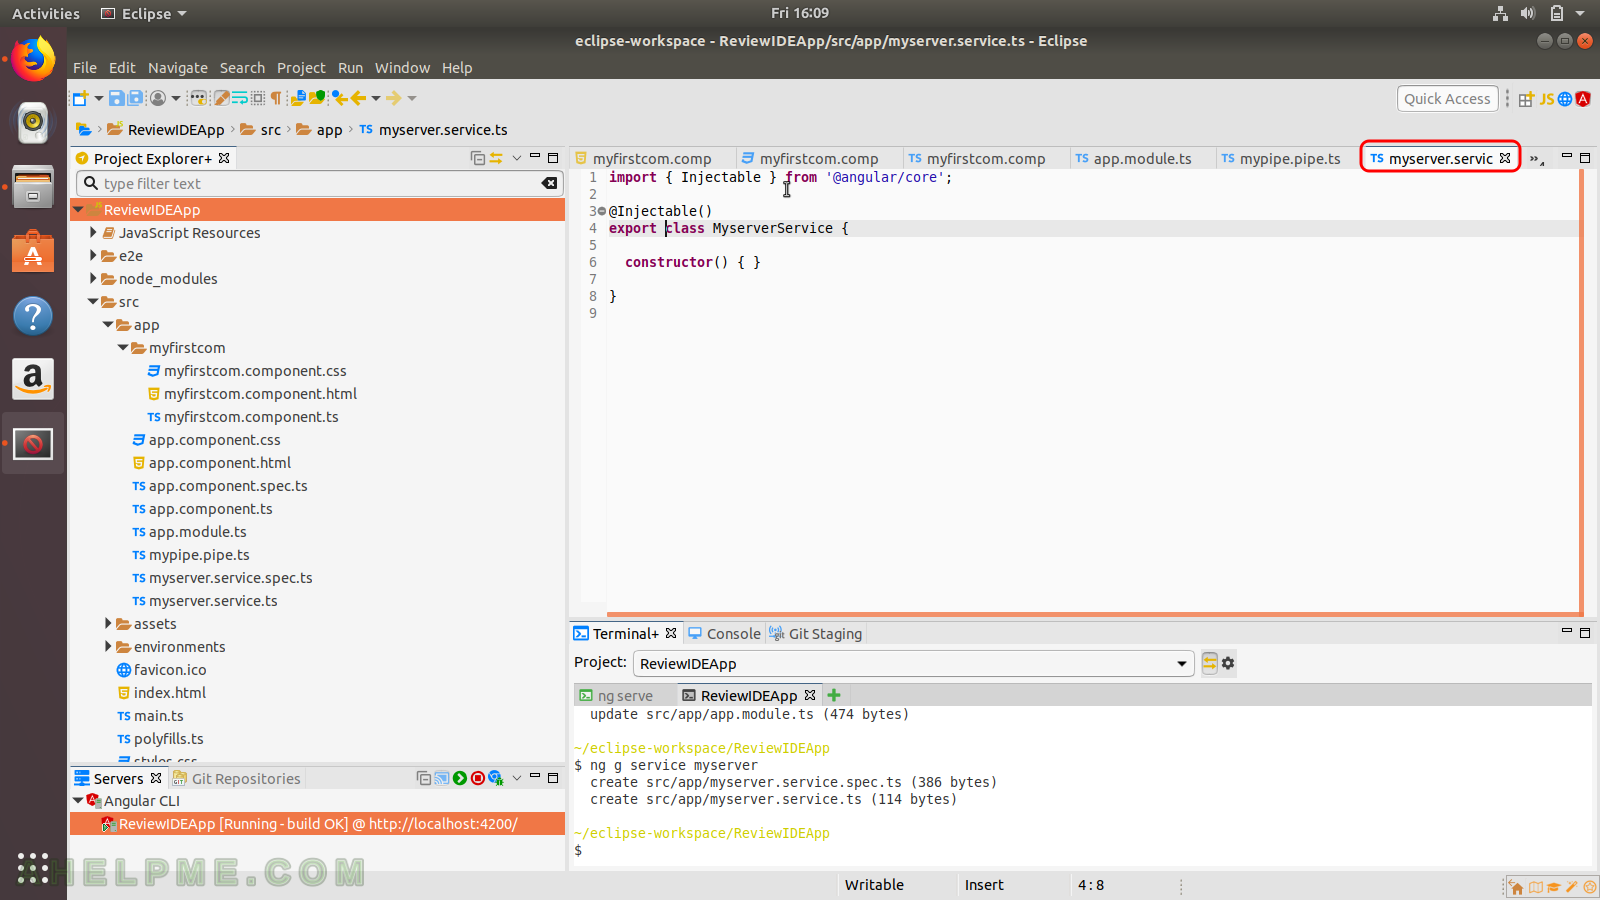
STEP 27) The typescript file for our service is generated: a an exported class with blank constuctor.
myserver.service.ts
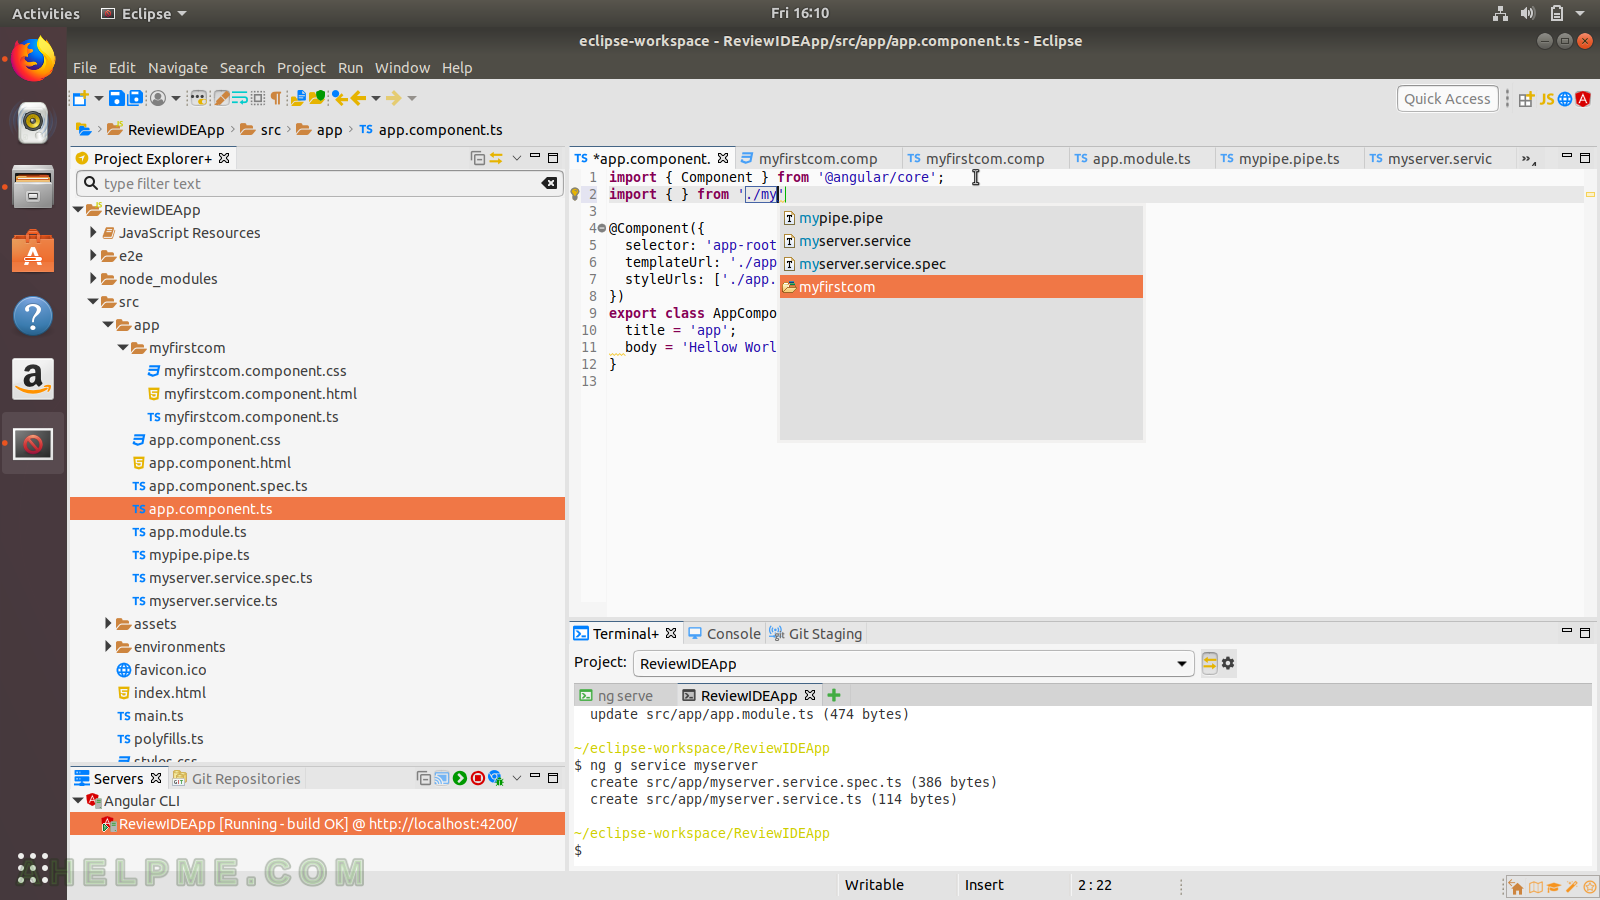
STEP 28) There is autocomplete for the import directive.
import – autocomplete
STEP 29) There is autocomplete for the exported class of the imported file/library.
import class – autocomplete
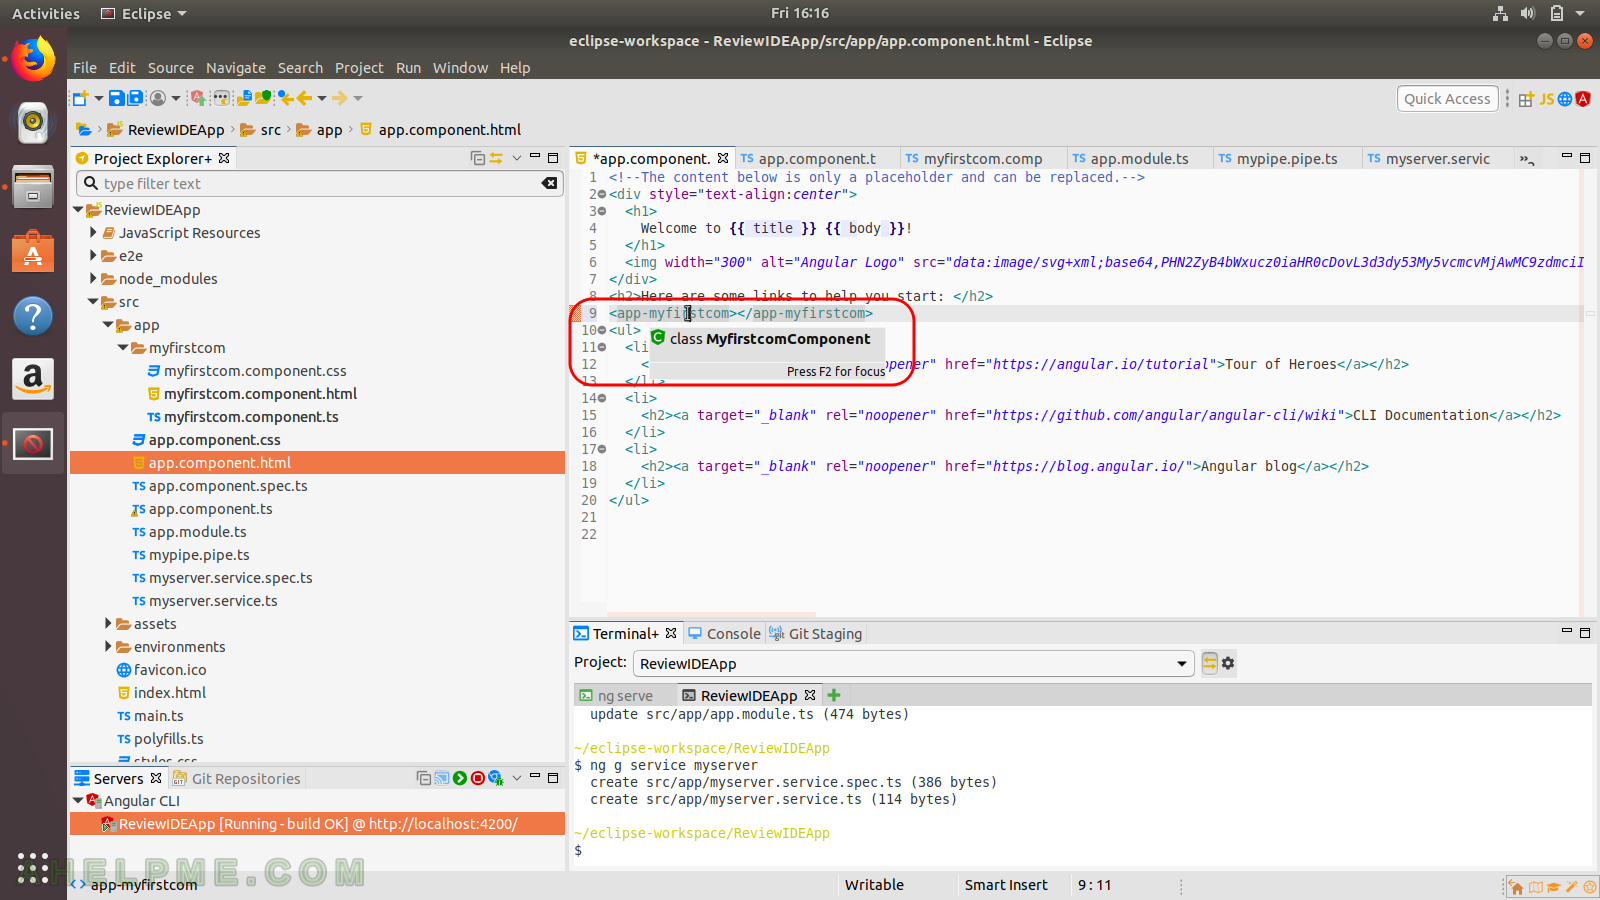
STEP 30) There is autocomplete for the component names in the html. If you write “html component autocomplete
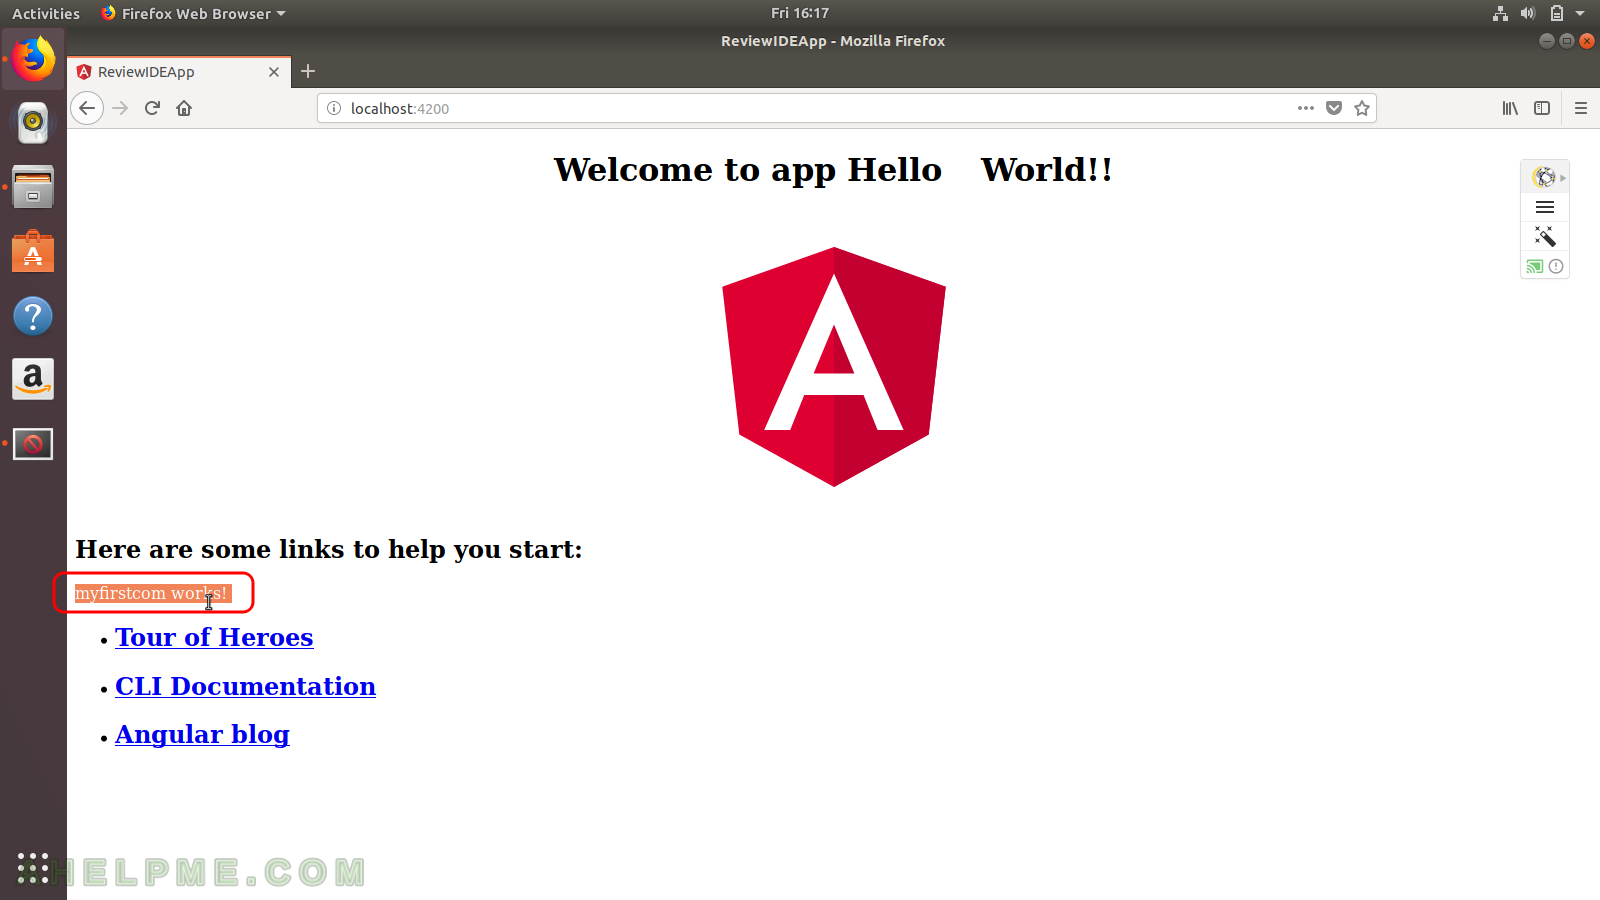
STEP 31) Our component works!
Our app in the Browser
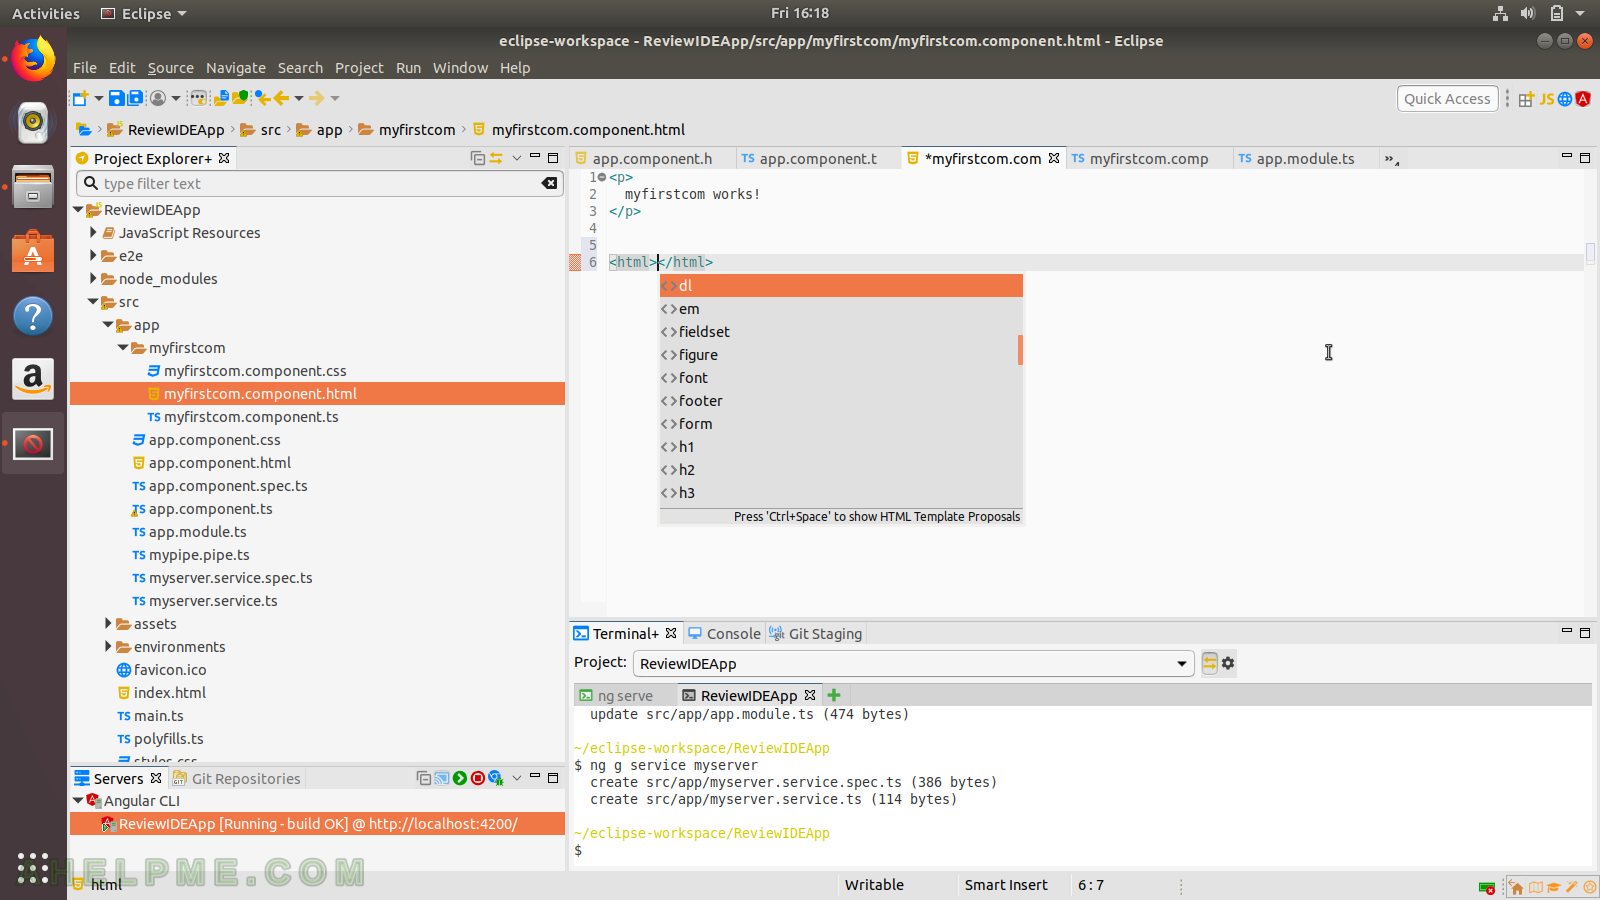
STEP 32) There is an autocomplete of the all html tags.
Html template file
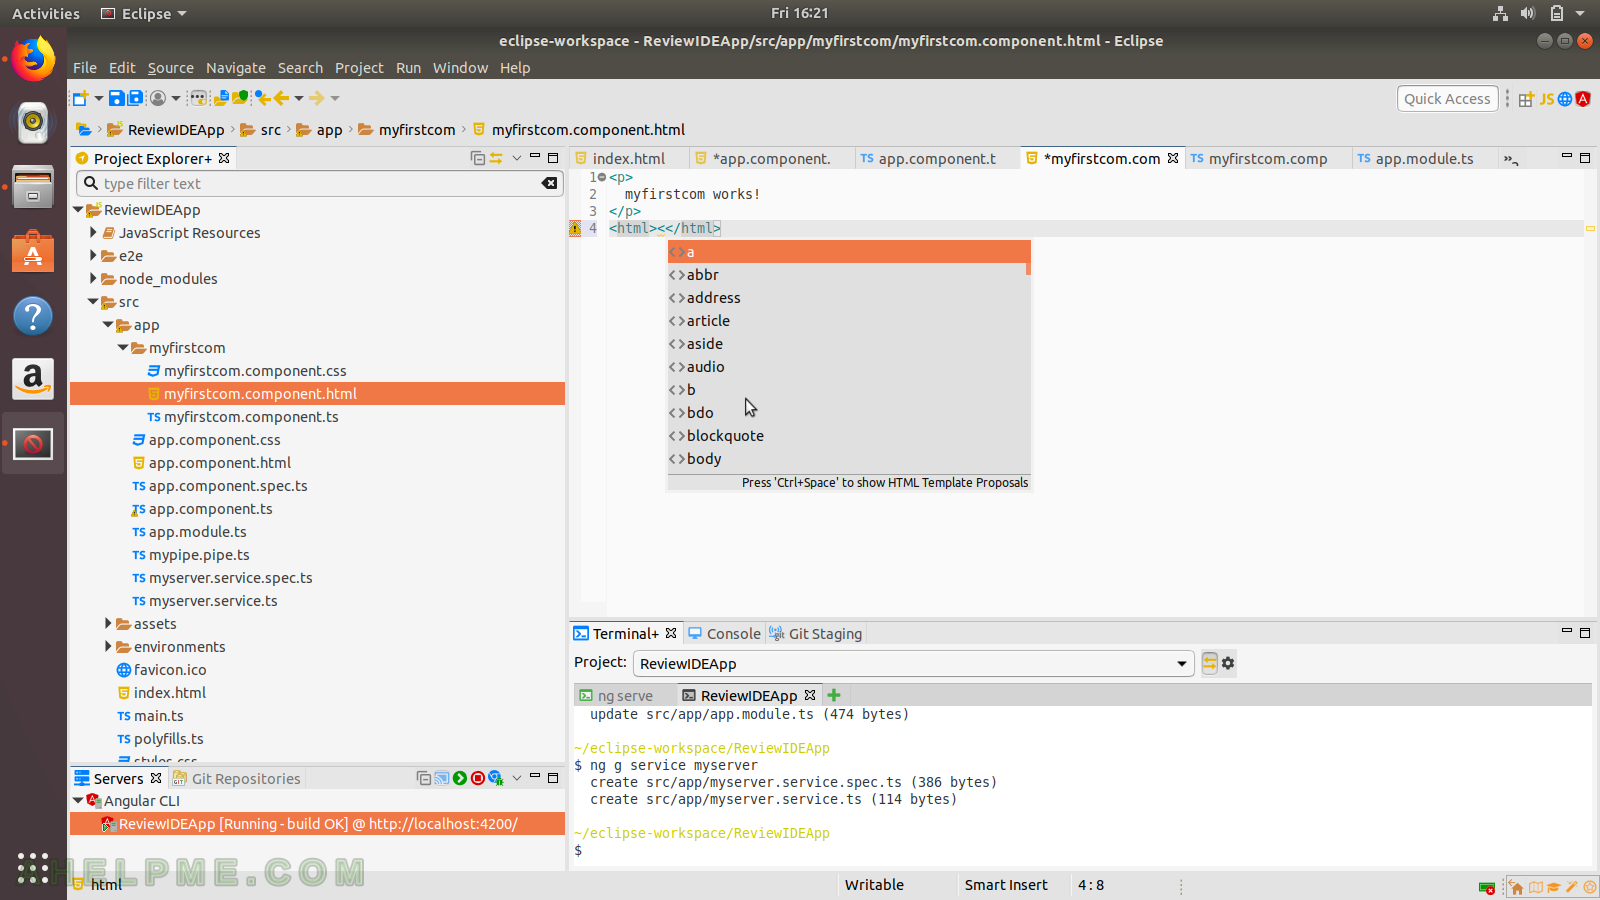
STEP 33) There is an autocomplete of the all html tags.
Html template file
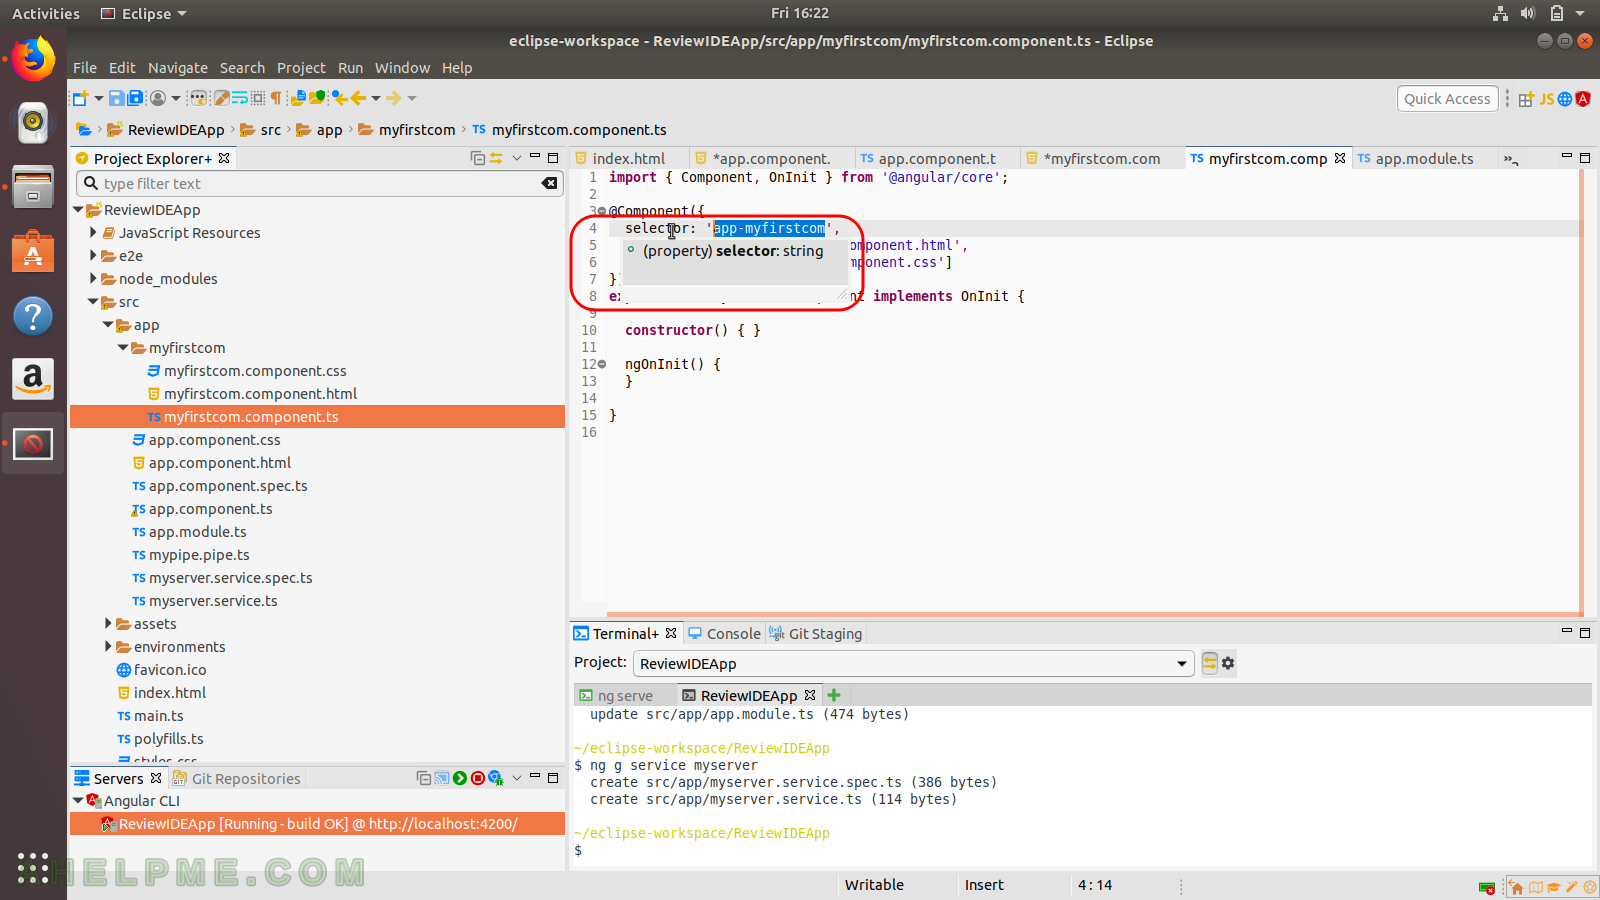
STEP 34) Information is available for all properties.
Property information
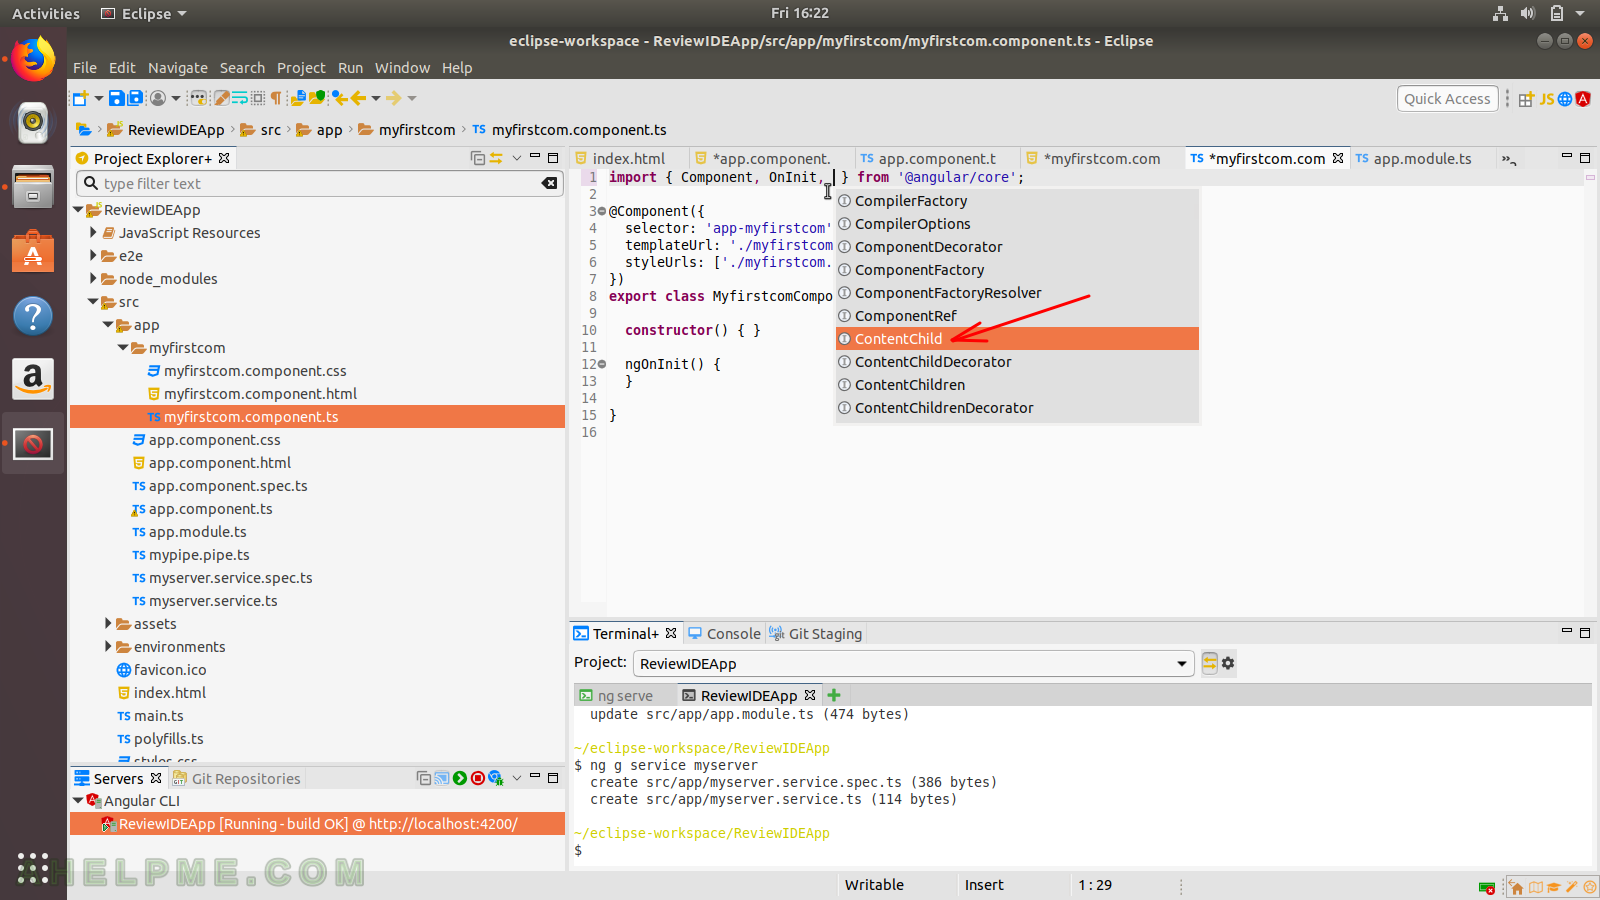
STEP 35) Autocomplete proposal for all the available classes of an import.
Autocomplete proposal for classes
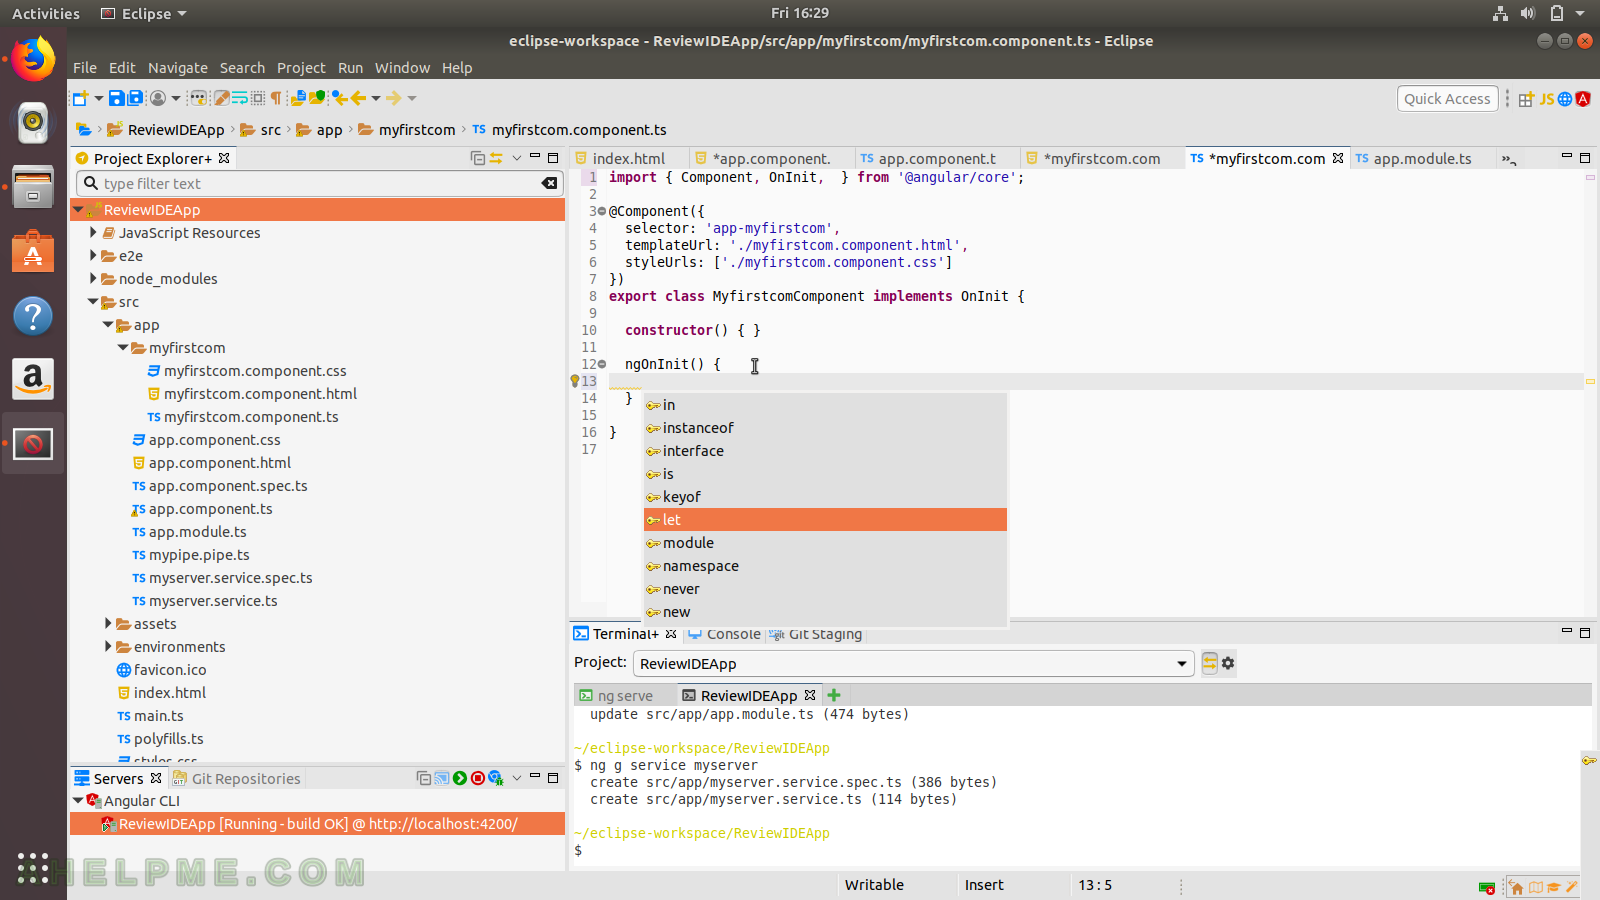
STEP 36) Autocomplete proposal fired in a funtion body.
We use technologies like cookies to store and/or access device information. We do this to improve browsing experience and to show (non-) personalized ads. Consenting to these technologies will allow us to process data such as browsing behavior or unique IDs on this site. Not consenting or withdrawing consent, may adversely affect certain features and functions.
Functional
Always active
The technical storage or access is strictly necessary for the legitimate purpose of enabling the use of a specific service explicitly requested by the subscriber or user, or for the sole purpose of carrying out the transmission of a communication over an electronic communications network.
Preferences
The technical storage or access is necessary for the legitimate purpose of storing preferences that are not requested by the subscriber or user.
Statistics
The technical storage or access that is used exclusively for statistical purposes.The technical storage or access that is used exclusively for anonymous statistical purposes. Without a subpoena, voluntary compliance on the part of your Internet Service Provider, or additional records from a third party, information stored or retrieved for this purpose alone cannot usually be used to identify you.
Marketing
The technical storage or access is required to create user profiles to send advertising, or to track the user on a website or across several websites for similar marketing purposes.


My preferred Angular IDE is Codelobster – http://www.codelobster.com/angular.html